
1.3
<
Введение>
Вид сзади
Внешний вид панели управления
1
сетевой порт
а
а. Только для моделей Phaser 3250DN.
4
блок для
двусторонней печати
2
Порт USB
5
разъем для шнура
питания
3
кабельный разъем для
дополнительного
лотка 2
6
выключатель
питания
1
Индикатор ошибки. Указывает на состояние принтера.
См. стр. 9.5.
2
Индикатор подключения. Указывает на состояние
принтера. См. стр. 9.5.
3
Кнопка «Старт/Стоп». Печать тестовой страницы или
страницы конфигурации.
Отмена задания печати.
Возобновление задания печати.
1
3
2
4
5
6
3250-038
*
На рисунке представлена модель Phaser 3250DN.
1
2
3
3250-031
Индикаторы
Индикатор
Состояние
Описание
Ошибка
Красный
Горит
•
Открыта крышка. Закройте
крышку.
•
В лотке отсутствует бумага.
Загрузите бумагу в лоток.
•
Принтер прекратил печать
из-за серьезной ошибки.
•
Не установлен картридж.
Установите картридж.
•
Возникла системная ошибка.
Если устранить проблему не
удается, обратитесь в службу
технической поддержки.
•
Тонер в картридже полностью
закончился. Извлеките
картридж и установите новый.
См. стр. 8.3.
Мигает • Произошла незначительная
ошибка, и принтер ожидает
ее устранения. После
устранения ошибки принтер
продолжит печать.
•
Тонер в картридже
заканчивается. Закажите
новый картридж. Качество
печати можно временно
улучшить, встряхнув
картридж. См. стр. 8.2.
Оранжевый Горит
•
Произошло замятие бумаги.
Для решения проблемы
см. стр. 9.1.
Индикатор
подклю-
чения
Зеленый
Горит
•
Принтер находится в режиме
энергосбережения.
•
Принтер включен и может
получать данные
с компьютера.
Мигает • Медленное мигание означает,
что принтер получает данные
с компьютера.
•
Частое мигание означает, что
выполняется печать.
 22:46
22:46
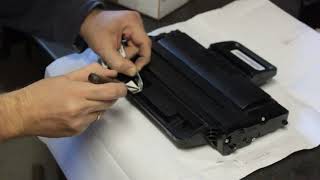
Инструкция как разобрать Xerox Phaser 3250 (Чистка печки)
 11:55
11:55
Вечная прошивка принтера Xerox Phaser 3250 без программатора и чипа
 01:38
01:38
xerox phaser 3250 printer
 04:34
04:34
Как подключить принтер к wifi сети
 01:54
01:54
Замена чипа в картридже xerox phaser 3250.
 36:36
36:36
Чистка принтера Xerox 3250
 06:53
06:53
Заправка картриджа xerox phaser 3250.
 07:08
07:08
Xerox Phaser 3140 — замятие бумаги на выходе из принтера, чистка лазера
9.8
<
Устранение неисправностей>
Решение проблем качества печати
Загрязнение внутренних частей принтера и загрузка бумаги
неподходящего типа могут привести к снижению качества печати.
Для устранения проблем, связанных с низким качеством печати,
воспользуйтесь приведенной ниже таблицей.
Условие
Рекомендуемые действия
Слишком
светлое
или бледное
изображение
Вертикальные белые полосы или бледные
области могут появляться на странице
по указанным ниже причинам.
•
В картридже заканчивается тонер. Срок
службы картриджа можно немного продлить.
См. стр. 8.2. Если после этого качество печати
не улучшится, установите новый картридж.
•
Бумага не отвечает установленным
требованиям (например, слишком влажная
или грубая). См. стр. 5.3.
•
Если вся страница печатается слишком
светлой, значит, установлено низкое
разрешение печати или включен режим
экономии тонера. Установите нужное
разрешение и отключите режим экономии
тонера в окне свойств принтера. См. раздел
«
Программное обеспечение».
•
Если изображение бледное и грязное,
возможно, принтер нуждается в чистке.
См. стр. 8.1.
•
Поверхность блока лазерного сканирования
может быть загрязнена. Очистите блок
лазерного сканирования. См. стр. 8.2.
Появление
пятен тонера на
изображении
•
Бумага не отвечает установленным
требованиям (например, слишком влажная
или грубая). См. стр. 5.3.
•
Загрязнен ролик переноса или путь
прохождения бумаги. См. стр. 8.1.
Непропечатан-
ные участки
На бумаге возникают беспорядочно
разбросанные бледные области круглой
формы.
•
Отдельный лист бумаги непригоден для
печати. Повторите печать задания.
•
Неравномерная влажность бумаги или
наличие на ее поверхности влажных пятен.
Используйте бумагу другой марки.
См. стр. 5.3.
•
Некачественная партия бумаги. Иногда при
производстве бумаги образуются области,
отталкивающие тонер. Используйте бумагу
другой марки или сорта.
•
Картридж неисправен. См. раздел
«
Равномерно повторяющиеся вертикальные
дефекты» в следующем столбце.
•
Если эти действия не помогают решить
проблему, обратитесь к представителю
службы технического обеспечения.
Вертикальные
линии
Черные вертикальные полосы могут появиться
на странице по следующей причине:
•
барабан внутри картриджа поцарапан.
Установите новый картридж. См. стр. 8.3.
Белые вертикальные полосы могут появиться
на странице по следующей причине:
•
поверхность блока лазерного сканирования
внутри принтера загрязнена. Очистите блок
лазерного сканирования. См. стр. 8.2.
Серый фон
Если затенение фона становится слишком
сильным, выполните указанные ниже действия.
•
Используйте менее плотную бумагу.
См. стр. 5.3.
•
Проверьте условия работы принтера.
Слишком низкая (менее 20 %) или высокая
(
более 80 %) влажность может привести
к значительному затенению фона.
•
Извлеките картридж и установите новый.
См. стр. 8.3.
Разводы тонера • Очистите внутренние части принтера.
См. стр. 8.1.
•
Проверьте тип и качество бумаги.
См. стр. 5.2.
•
Извлеките картридж и установите новый.
См. стр. 8.3.
Условие
Рекомендуемые действия

9.9
<
Устранение неисправностей>
Равномерно
повторяющиеся
вертикальные
дефекты
На стороне листа, где выполнялась печать,
появляются пятна, расположенные через
равные промежутки.
•
Картридж неисправен. Если на странице
появляются повторяющиеся отметки,
установите новый картридж. См. стр. 8.3.
•
На некоторые части принтера мог попасть
тонер. Если дефект появляется на обратной
стороне листа бумаги, вероятно, он исчезнет
после печати нескольких страниц.
•
Поврежден блок термофиксатора. Обратитесь
в службу технической поддержки.
Рассеивание
тонера
Разбросанные по фону пятна могут являться
следствием рассеивания частиц тонера по
странице.
•
Возможно, бумага слишком влажная.
Используйте для печати бумагу из другой
пачки. Не вскрывайте пачки до начала
использования, иначе бумага может впитать
слишком много влаги.
•
Если рассеивание тонера по странице
происходит на конверте, измените макет
печати, чтобы избежать печати на участке
пересечения клееных швов с оборотной
стороны. Печать на клееных швах может
привести к появлению дефектов.
•
Если рассеивание тонера происходит на
всей поверхности напечатанной страницы,
измените разрешение из приложения или
окна свойств принтера.
Деформирован-
ные символы
•
Если символы имеют неправильную форму
и изображение кажется чересчур плоским,
бумага может быть слишком гладкой.
Используйте другую бумагу. См. стр. 5.3.
Перекос
страницы
•
Проверьте, правильно ли загружена бумага.
•
Проверьте тип и качество бумаги. См. стр. 5.2.
•
Убедитесь в том, что бумага загружена
правильно и ограничители не слишком
свободно и не слишком туго прилегают
к пачке.
Условие
Рекомендуемые действия
Сворачивание
и искривление
•
Проверьте, правильно ли загружена бумага.
•
Проверьте тип и качество бумаги. Высокая
температура и влажность могут привести
к скручиванию бумаги. См. стр. 5.2.
•
Переверните стопку бумаги в лотке.
Попробуйте также повернуть бумагу в лотке
на 180°.
Морщины
и складки
•
Проверьте, правильно ли загружена бумага.
•
Проверьте тип и качество бумаги. См. стр. 5.2.
•
Переверните стопку бумаги в лотке.
Попробуйте также повернуть бумагу в лотке
на 180°.
Оборотная
сторона
документов
загрязнена
•
Загрязнен ролик переноса. См. стр. 8.1.
•
Проверьте, не просыпался ли тонер.
Очистите внутренние части принтера.
Страница
полностью
черная
•
Возможно, картридж установлен
неправильно. Переустановите картридж.
•
Возможно, картридж неисправен и требует
замены. Установите новый картридж.
•
Возможно, принтер нуждается в ремонте.
Обратитесь в службу технической поддержки.
Условие
Рекомендуемые действия

Часто встречающиеся проблемы, При печати в ос windows
Страница 43
- Изображение
- Текст
9.10
<
Устранение неисправностей>
Незакрепленный
тонер
•
Очистите внутренние части принтера.
•
Проверьте тип и качество бумаги. См. стр. 5.2.
•
Установите новый картридж. См. стр. 8.3.
•
Если проблема не устранится, возможно,
принтер нуждается в ремонте. Обратитесь
в службу технической поддержки.
Непропечатка
символов
Под непропечаткой символов подразумевается
появление белых областей в черных символах.
•
Если печать выполняется на прозрачных
пленках, попробуйте использовать пленки
другого типа. Появление непропечатанных
символов может быть обусловлено
структурой пленки.
•
Возможно, печать выполняется на стороне,
не предназначенной для печати. Переверните
бумагу в лотке.
•
Возможно, бумага не соответствует
установленным требованиям. См. стр. 5.3.
Горизонтальные
полосы
Горизонтальные черные полосы и разводы
могут появляться по указанным ниже причинам.
•
Картридж установлен неправильно.
Переустановите картридж.
•
Картридж неисправен. Установите новый
картридж. См. стр. 8.3.
•
Если проблема не устранится, возможно,
принтер нуждается в ремонте. Обратитесь
в службу технической поддержки.
Сворачивае-
мость
Если отпечатанные листы скручиваются или
бумага не подается в принтер, выполните
указанные ниже действия.
•
Переверните стопку бумаги в лотке.
Попробуйте также повернуть бумагу в лотке
на 180°.
Условие
Рекомендуемые действия
Часто встречающиеся проблемы
при печати в ОС Windows
На нескольких
страницах подряд
воспроизводится
непонятное
изображение
либо печатаются
загрязненные,
содержащие
незакрепленный
тонер или
блеклые
страницы.
Это может произойти, если принтер
используется на высоте более 1 000 м над
уровнем моря.
На большой высоте могут появляться такие
дефекты, как плохое закрепление тонера или
снижение яркости печати. Этот параметр
можно настроить с помощью утилиты
настройки принтера или на вкладке
«
Принтер» окна свойств драйвера принтера.
См. стр. 1.5.
Условие
Рекомендуемые действия
На экран
выводятся
сообщения
«
Общая ошибка
защиты»,
«
Исключение OE»,
«Spool32»
или
«
Недопустимая
операция».
Закройте все приложения, перезагрузите
Windows
и попытайтесь вновь напечатать
документ.
На экран
выводятся
сообщения
«
Ошибка печати»
или «Ошибка.
Превышено время
ожидания».
Эти сообщения могут появляться во время
печати. Дождитесь завершения печати.
Если сообщение появляется в режиме
ожидания или после завершения процесса
печати, проверьте соединение и/или
наличие ошибок.
Примечание
Дополнительные сведения о сообщениях об ошибках
в Windows см. в руководстве пользователя операционных
систем Microsoft Windows 2000/XP/2003/Vista.
Условие
Рекомендуемые действия

Часто встречающиеся проблемы при печати в ос linux, Часто встречающиеся проблемы, При использовании postscript
При печати в ос linux
- Изображение
- Текст
9.11
<
Устранение неисправностей>
Часто встречающиеся проблемы
при использовании PostScript
Ошибки, описанные ниже, связаны с языком PostScript и могут
появляться при использовании нескольких языков принтера.
Примечание
Для того чтобы при возникновении ошибок PostScript
выводилось сообщение или печатался отчет об ошибке,
откройте окно параметров печати и выберите
соответствующий параметр в группе ошибок PostScript.
Условие
Возможная
причина
Рекомендуемые действия
Не удается
распечатать
файл
PostScript.
Драйвер
PostScript
установлен
неправильно.
•
Напечатайте страницу
конфигурации и проверьте,
доступен ли язык PostScript
для печати.
•
Установите драйвер
PostScript.
Сведения об
установке драйвера см.
в разделе «Программное
обеспечение».
•
Если проблема сохраняется,
обратитесь в службу
технической поддержки.
На экран
выводится
сообщение
об ошибке
проверки
лимита.
Задание
печати
слишком
сложное.
Возможно, необходимо
понизить уровень сложности
документа.
Распечаты-
вается
страница
ошибок
PostScript.
Возможно,
формат
задания
печати не
соответствует
формату
PostScript.
Убедитесь в том, что задание
печати имеет формат
PostScript.
Проверьте,
не ожидает ли приложение
отправки на принтер файла
параметров или заголовка
PostScript.
Неправильная
передача
цветов при
печати
документа из
приложения
Acrobat Reader
(
версия 6.0 или
более поздняя)
на компьютерах
Macintosh.
Возможно,
разрешение,
установленное
в драйвере
принтера,
не совпадет
с разрешением,
установленным
в программе
Acrobat Reader.
Убедитесь в том, что значения
разрешения в драйвере
принтера и в программе
Acrobat Reader
совпадают.
Часто встречающиеся проблемы
при печати в ОС Linux
Условие
Рекомендуемые действия
Принтер не
печатает.
•
Проверьте, установлен ли в системе драйвер
принтера. Запустите программу Unified Driver
Configurator
и в окне Printers Configuration на
вкладке Printers проверьте список доступных
принтеров. Данное устройство должно быть
в этом списке. Если это не так, запустите
мастер Add new printer для настройки
устройства.
•
Проверьте, запущен ли принтер. В окне
Printers configuration
выберите устройство
из списка принтеров. Просмотрите описание
устройства в области данных Selected printer.
Если строка состояния содержит строку
(stopped),
нажмите кнопку Start. После этого
устройство должно возобновить нормальную
работу. Состояние остановки (stopped) может
возникнуть снова в случае некоторых
неполадок при печати,
•
Проверьте, задан ли в приложении
специальный параметр печати «-oraw».
Если параметр командной строки содержит
«-oraw»,
удалите его, чтобы печать
осуществлялась правильно. В программе
Gimp Front-end
выберите print -> Setup printer
и отредактируйте параметр командной
строки.
При печати
документа
появляется
сообщение об
ошибке: Unable
to open mfp port
device file!
Во время печати не следует изменять
параметры выполняемого задания печати
(
например, с помощью графического
интерфейса LPR). Известные версии сервера
CUPS
прерывают задание печати при
изменении его параметров и пытаются
повторно запустить прерванное задание
сначала. Поскольку пакет драйверов Unified
Linux Driver
блокирует порт mfp во время
печати, при внезапном окончании работы
драйвера порт остается заблокированным и,
следовательно, недоступным для передачи
последующих заданий на печать. В данной
ситуации попробуйте разблокировать порт mfp.
При печати
документа по
сети в ОС SuSE
9.2
принтер
не печатает.
В версии CUPS (Common Unix Printing System),
включаемой в поставку ОС SuSE Linux 9.2
(cups-1.1.21),
зафиксированы неполадки
при печати под управлением протокола ipp
(
протокола печати через Интернет). Вместо
печати по протоколу IPP выберите печать с
использованием сокетов или установите более
позднюю версию CUPS (cups-1.1.22 либо выше).

Часто встречающиеся проблемы при, Работе с компьютерами macintosh
Страница 45
- Изображение
- Текст
9.12
<
Устранение неисправностей>
Часто встречающиеся проблемы при работе
с компьютерами Macintosh
Условие
Рекомендуемые действия
Файлы PDF печатаются
некорректно.
Некоторые фрагменты
графики, текста или
иллюстраций
отсутствуют.
Несовместимость между файлом PDF
и программой Acrobat.
Для решения проблемы
можно напечатать файл PDF
как изображение. Для этого в окне
параметров печати программы
Acroba
включите параметр
«
Печатать как изображение».
Примечание
.
Печать файла PDF
в виде изображения занимает
больше времени, чем обычно.
После завершения
печати документа
задание печати не
исчезает из очереди
печати (в операционной
системе Mac OS 10.3.2).
Обновите операционную систему
Mac OS
до версии 10.3.3 или
более поздней.
В режиме печати
обложек некоторые
символы печатаются
неправильно.
Неисправность возникает вследствие
того, что в этом режиме печати
операционная система Macintosh
не может найти нужный шрифт.
В этом режиме печатаются только
алфавитно-цифровые символы из поля
Billing Info.
Остальные символы могут
отображаться неправильно.

Установка дополнительной памяти, Меры предосторожности при установке модулей памяти, Установка модуля памяти
Страница 46
- Изображение
- Текст
10.1
<
Установка дополнительной памяти>
10
Установка дополнительной
памяти
Данное устройство представляет собой многофункциональный
принтер, оптимизированный для выполнения большинства функций
печати. Однако, принимая во внимание, что у пользователей могут
быть особые требования, корпорация Xerox производит
дополнительные модули памяти, которые позволяют расширить
возможности устройства.
В главу входят указанные ниже разделы.
•
Меры предосторожности при установке модулей памяти
•
Установка модуля памяти
Меры предосторожности при установке
модулей памяти
Отключите шнур питания
Запрещается открывать крышку отсека дополнительной памяти при
включенном питании.
Во избежание поражения электрическим током всегда отключайте
шнур питания при установке или снятии ЛЮБОГО внутреннего или
внешнего компонента.
Снимите заряд статического электричества
Плата управления и внутренние дополнительные компоненты
(
плата сетевого интерфейса, модули памяти) подвержены
воздействию статического электричества. Перед установкой или
извлечением внутренних компонентов снимите заряд статического
электричества с тела, прикоснувшись к металлическому предмету
(
например, к задней металлической пластине любого устройства,
подключенного к розетке с заземлением). Если вы отходили от места
проведения работ до завершения установки, повторно снимите
статический заряд.
Установка модуля памяти
Устройство имеет разъем для модуля памяти DIMM, в который
можно установить дополнительный модуль памяти.
Чтобы увеличить объем памяти, можно установить модуль памяти
в свободный разъем. Объем памяти устройства (32 Мб) можно
увеличить, установив модуль памяти объемом 128 Мб.
Информация по заказу дополнительного модуля памяти.
(C
м. раздел «Дополнительные компоненты» на стр. 7.1.)
1
Выключите устройство и отключите все шнуры.
2
Откройте крышку отсека дополнительной памяти.
3
Достаньте новый модуль памяти из пластиковой упаковки.
4
Удерживая модуль памяти за края, установите его в разъем
с наклоном около 30 градусов. Убедитесь в том, что пазы на
модуле памяти совпадают с пазами разъема.
5
Установите модуль памяти в разъем, нажимая на него до щелчка.
6
Закройте крышку отсека дополнительной памяти.
7
Подключите шнур питания и кабель принтера и включите
устройство.
Примечание
Выемки и вырезы, показанные выше, необязательно
совпадают с теми, которые присутствуют на реальных
модулях памяти и в разъеме.
Предупреждение
Не прилагайте слишком больших усилий — это может привести
к повреждению модуля. Если модуль не устанавливается
в разъем, аккуратно повторите описанные действия.
Примечание
Чтобы снять блок памяти, нажмите две пластинки снаружи
на слоте, при этом модуль памяти выйдет из слота.
3250-008
3250-006
3250-007

10.2
<
Установка дополнительной памяти>
Активация добавленной памяти в свойствах
принтера PS
Чтобы использовать дополнительный модуль памяти, его нужно
выбрать в окне свойств драйвера принтера PostScript.
1
Убедитесь в том, что драйвер принтера PostScript установлен
на компьютере. Сведения об установке драйвера PS см.
в разделе «Программное обеспечение».
2
Откройте меню «Пуск» системы Windows.
3
В Windows 2000 выберите пункт «Параметры», затем —
«
Принтеры».
В Windows XP/2003 выберите пункт «Принтеры и факсы».
В ОС Windows Vista последовательно выберите «Панель
управления» > «Оборудование и звук» >
«
Принтеры».
4
Выберите принтер Xerox Phaser 3250 PS.
5
Щелкните по значку принтера правой кнопкой мыши и выберите
пункт «Свойства».
6
В Windows 2000/XP/2003/Vista выберите пункт «Параметры
устройства».
7
Укажите объем установленной памяти в поле «Память принтера»
раздела «Доп. оборудование».
8
Нажмите кнопку OK.

11.1
<
Характеристики>
11
Характеристики
Технические характеристики принтера
Элемент
Характеристики и описание
Скорость
печати
a
До 28 стр./мин. формата A4
(30
стр./мин. формата Letter)
Двусторонняя печать: приблизительно
14
изобр./мин. для формата A4
и 14,5 изобр./мин. для формата Letter
Разрешение
Фактическое разрешение —
до 1 200 x 1 200 тчк./дюйм
Время разогрева
Менее 15 секунд
Время печати
первой страницы
8,5
секунды (из режима готовности)
В спящем режиме: 23,5 секунды
Диапазон
напряжения
Переменный ток 110—127 В или 220—240 В
Точные спецификации напряжения, частоты
(
Гц) и типа тока см. на этикетке «Диапазон
напряжения» на корпусе устройства.
Потребляемая
мощность
Средняя: 400 Вт
В режиме энергосбережения: менее 8 Вт
Уровень шума
b
В режиме ожидания: менее 26 дБА
Режим печати: менее 50 дБА
Срок службы
картриджа
c
Стандартные картриджи: средний ресурс
картриджа — 3 500
d
стандартных страниц.
Картриджи повышенной емкости: средний
ресурс картриджа — 5 000 стандартных
страниц.
Срок службы картриджа, поставляемого
с принтером, ниже стандартного.
Рабочая
нагрузка
Ежемесячно: до 30 000 страниц
Масса
11,9
кг (включая расходные материалы)
Вес упаковки
Бумажная: 2,4 кг; пластиковая: 0,3 кг
Память
32
Мб
Габариты
(
Ш х Г х В)
364 x 395 x 200
мм
Условия
эксплуатации
Температура: 10—32 °C
Относительная влажность: от 20 до 80 %
Язык принтера
PCL 6
e
, IBM ProPrinter, EPSON,
PostScript 3, SPL
Шрифты
1
растровый шрифт, 45 масштабируемых
шрифтов, 136 шрифтов PostScript 3
Интерфейс
•
Стандарт интерфейса USB
— USB 2.0:
высокоскоростной
интерфейс USB 2.0
•
Сетевой интерфейс
—
Проводной сетевой интерфейс
Ethernet 10/100 Base TX (
только
для модели Phaser 3250DN)
Совместимость
с операционными
системами
• Windows 2000/2003 Server/
XP (32-
и 64-разрядная)/Vista
•
Различные версии ОС Linux
• Mac OS 10.3—10.5
Драйверы
принтера
f
•
Драйвер PCL 6: Windows 2000/2003 Server/
XP (32-
и 64-разрядная)/Vista
•
Драйвер PostScript: Windows 2000/
2003 Server/XP (32-
и 64-разрядная)/Vista
Дополнительные
функции
Лоток на 250 листов
Температура
закрепления
тонера
180 °C
a.
Скорость печати зависит от операционной системы, быстродействия
компьютера, используемых приложений, способа подключения,
типа и размеров материала для печати и сложности задания печати.
b.
Уровень звукового давления, ISO 7779.
c.
Количество страниц зависит от условий эксплуатации, интервала печати,
а также типа и размера материала для печати.
d.
Заявленный ресурс в соответствии со стандартом ISO/IEC 19752.
e.
Совместим с PCL 6 версии 2.1
f.
Последние версии программного обеспечения см. на веб-сайте
www.xerox.com
.
Элемент
Характеристики и описание

12.1
<
Глоссарий>
глоссарий
BMP
Растровый графический формат внутреннего использования
графической подсистемы Microsoft Windows (GDI), который
обычно используется как простой формат графических файлов
на этой платформе.
BOOTP
Bootstrap Protocol (
протокол начальной загрузки). Сетевой
протокол, используемый для автоматического получения клиентом
своего IP-адреса. Получение IP-адреса происходит во время
загрузки компьютеров или операционных систем, работающих на
этих компьютерах. Серверы BOOTP назначают IP-адрес каждому
сетевому клиенту из адресного пула. BOOTP дает возможность
компьютерам «бездисковой рабочей станции» получать IP-адрес
перед загрузкой какой-либо расширенной операционной системы.
CCD
Прибор с зарядовой связью (CCD) — это аппаратное
обеспечение, дающее возможность выполнять задания
сканирования. Механизм блокировки CCD также используется
для удержания модуля CCD с целью предотвращения
повреждений при передвижении аппарата.
CSV
Значение, отделенное запятой (CSV), тип формата файлов,
CSV
используется для обмена данными между неродственными
приложениями. Этот формат файлов, как таковой используемый
в Microsoft Excel, стал псевдостандартом в промышленности,
даже среди платформ не на основе Microsoft.
DHCP
DHCP (Dynamic Host Configuration Protocol —
протокол
динамического выбора конфигурации хост-машины) является
сетевым протоколом «клиент-сервер». Сервер DHCP
предоставляет параметры конфигурации на конкретный запрос от
клиента DHCP, обычно компьютеру клиента параметры требуются
для подключения к сети. DHCP предоставляет также механизм
назначения IP-адреса компьютеру клиента.
DIMM
Модуль памяти с двухрядным расположением выводов (DIMM),
небольшая печатная плата, предназначенная для хранения
данных. DIMM хранит все данные принтера, такие как данные
для печати и полученные факсы.
DNS
DNS (Domain Name Server —
служба доменных имен) — это
система, которая хранит информацию, связанную с доменными
именами в распределенной по сети базе данных, такой как
Интернет.
DRPD
Режим распознавания условного звонка. Функция условного
звонка — это услуга телефонной компании, позволяющая
использовать одну телефонную линию для работы с несколькими
телефонными номерами.
ECM
Режим исправления ошибок (ECM) — это необязательный режим
передачи данных, имеющийся в факсимильных аппаратах или
в факс-модемах класса 1. Он автоматически регистрирует
и исправляет ошибки в процессе передачи факса, которые иногда
возникают из-за помех в телефонной линии.
Ethernet
Ethernet —
это технология организации компьютерных сетей
на базе передачи кадров, используемая при создании
локальных сетей. Она определяет запись и блокировку на
физическом уровне, форматы кадров и протоколы на уровне
MAC (
управление доступом к среде)/канальном уровне модели
OSI.
Для сетей Ethernet чаще всего используется стандарт
IEEE 802.3.
Он является наиболее распространенной
технологией LAN, используемой с 1990-х годов до настоящего
времени.
EtherTalk
Набор протоколов, разработанный компанией Apple Computer для
компьютерных сетей. Он был включен в оригинальный Macintosh
(1984),
а сейчас его использование ограничивается компанией Apple
в пользу сетей TCP/IP.
FDI
Внешний интерфейс устройства (FDI) — это плата,
устанавливаемая в устройство для подключения внешнего
устройства, такого как монетоприемник или устройства для
чтения карт памяти. В результате появляется возможность
наладить эксплуатацию устройства на платной основе.
FTP
Протокол передачи файлов (FTP) — это общеиспользуемый
протокол для обмена файлами в любой сети, поддерживающей
протокол TCP/IP (такой как Интернет или Интранет).
IEEE
Институт инженеров по электротехнике и радиоэлектронике (IEEE)
—
это международная некоммерческая организация,
занимающаяся продвижением технологий, связанных с
электричеством.
IEEE 1284
Стандарт параллельного порта 1284, который был разработан
Институтом инженеров по электротехнике и радиоэлектронике
(IEEE).
Термин «1284-B» описывает особый тип разъема на
конце параллельного кабеля, который подключается к
периферийному устройству (например, к принтеру).
IPM
Изображений в минуту (IPM) — это показатель скорости
принтера. Значение IPM показывает количество односторонних
листов, которое принтер может напечатать за одну минуту.
Представленный глоссарий поможет ознакомиться с продуктом.
Здесь разъясняется терминология, которая обычно
используется при описании процесса печати, в том числе и в
данном руководстве пользователя.

12.2
<
Глоссарий>
IPX/SPX
IPX/SPX
означает обмен пакетами в Интернете/последовательный
обмен пакетами. Это — сетевой протокол, используемый
операционной системой Novell NetWare. Как IPX, так и SPX
обеспечивают службу подключения подобно TCP/IP, при этом
протокол IPX имеет сходство с IP, а SPX имеет сходство с TCP. IPX/
SPX
первоначально был разработан для локальных сетей (LAN),
для которых он является очень эффективным протоколом (обычно
его производительность превышает производительность протокола
TCP/IP
в LAN).
IP-
адрес
Адрес, используемый в протоколе IP, является уникальным
числом, которое используется сетевыми устройствами для
идентификации и взаимодействия друг с другом по сети с
использованием стандарта IP (Internet Protocol — протокол
Интернета).
ISO
Международная организация по стандартизации (ISO) — это
международный орган стандартизации, членами которого
являются представители национальных органов
стандартизации. ISO публикует промышленные и коммерческие
стандарты, использующиеся во всем мире.
ITU-T
Международный союз электросвязи — это международная
организация, созданная с целью стандартизации и
регулирования международных радио- и телекоммуникаций. В
его основные задачи входит стандартизация, распределение
радиочастот и организация мероприятий по связи между
разными странами, чтобы обеспечить возможность
международной телефонной связи. T в аббревиатуре ITU-T
означает телекоммуникации.
JBIG
Объединенная экспертная группа по изображениям уровня «би»
(JBIG) —
это стандарт сжатия изображений без потерь качества
и четкости, который был разработан для сжатия бинарных
изображений, в частности факсов, но может применяться также
для других изображений.
JPEG
Объединенная экспертная группа по фотографии (JPEG) —
это наиболее распространенный стандартный метод сжатия
фотографических изображений с частичной потерей качества.
Этот формат используется для хранения и передачи
фотографий во всемирной глобальной сети.
LDAP
Облегченный протокол доступа к каталогам (LDAP) — это
сетевой протокол для запросов и изменений служб каталогов,
работающих по протоколу TCP/IP.
MAC-
адрес
Адрес контроля доступа к среде (MAC) — это уникальный
идентификатор устройства, присоединенного к сетевой среде.
MAC-
адрес — это уникальное 48-битовое число, обычно
записываемое в виде 12 шестнадцатеричных символов,
сгруппированных попарно (например, 00-00-0c-34-11-4e). Этот
адрес обычно является жестко запрограммированным в плате
сетевого интерфейса (NIC) ее производителем и используется
для помощи маршрутизаторам, пытающимся найти устройство
в больших сетях.
MH
Модифицированный метод Хаффмана (MH) — это метод
сжатия для сокращения количества передаваемых данных
между факсимильными аппаратами, необходимого для
передачи изображения, рекомендованный ITU-T T.4. MH
является схемой шифрования по длинам серий на основе
словаря кодов, оптимизированной под эффективное сжатие
свободного пространства. Так как большинство факсов состоит,
в основном, из свободного пространства, это позволяет свести к
минимуму время передачи большинства факсов.
MMR
Модифицированный метод модификации READ (MMR) —
это метод сжатия данных, рекомендованных ITU-T T.6.
MR
Модифицированное считывание (MR) — это метод сжатия данных,
рекомендованный ITU-T T.4. MR кодирует первую
просканированную линию при помощи метода MH. Следующая
строка сравнивается с предыдущей, определяются различия
между ними, и эти различия кодируются и передаются.
OPC
Органический фотопроводник (OPC) — это механизм, который
формирует виртуальное изображение для печати с помощью
лазерного луча. Обычно представляет собой цилиндр серого
или зеленого цвета.
Барабан постепенно изнашивается при использовании. Его
следует своевременно заменять, поскольку он покрывается
царапинами от твердых частиц, имеющихся в бумаге.
OSI
Взаимодействие открытых систем (OSI) — это модель,
разработанная для связи Международной Организацией
Стандартизации (ISO). OSI представляет стандартный модульный
принцип архитектуры сети, который делит требуемый набор
комплексных функций на управляемый, автономный и
функциональный слои. Этими слоями являются (сверху вниз):
приложение, презентация, сессия, передача, сеть, канал передачи
данных и физическая связь.
PABX
Офисная автоматическая телефонная станция (PABX) —
это автоматическая телефонная система коммутации,
действующая в пределах учреждения.
PCL
Язык управления печатью (PCL) — это язык описания страниц
(PDL),
разработанный компанией HP в качестве протокола
принтера, который стал промышленным стандартом. Изначально
разработанный для первых струйных принтеров, PCL был выпущен
для разных уровней: для термографических печатающих устройств,
матричных принтеров и страничных принтеров.
Portable Document Format (PDF) —
это защищенный патентом
формат файла, разработанный компанией Adobe Systems для
представления двухмерных документов в виде, не зависящем
от отображающего устройства и его разрешения.
PostScript
PostScript (PS) —
язык описания страниц и язык
программирования, первоначально используемый в
электронных и настольных издательских системах, применяется
в качестве интерпретатора для формирования изображений.

Комментарии
-
Contents
-
Table of Contents
-
Troubleshooting
-
Bookmarks
Quick Links
Related Manuals for Xerox Phaser 3250
Summary of Contents for Xerox Phaser 3250
-
Page 1
User Guide… -
Page 2
This manual is provided for information purposes only. All information included herein is subject to change without notice. Xerox Corporation is not responsible for any direct or indirect damages, arising from or related to the use of this manual. © 2008 Xerox Corporation. All rights reserved. -
Page 3: Table Of Contents
Contents Safety Safety Introduction …………………………1.i Marks and Labels …………………………1.i Radio Frequency Emissions ………………………. 1.i Laser Safety Introduction ……………………….1.i Operational Safety Information ……………………..1.i Maintenance Information ……………………….1.iii Product Safety Certification ………………………. 1.iii Regulatory Information ……………………….1.iii Product Recycling & Disposal ……………………..1.iv Energy program compliance ………………………
-
Page 4
6. Basic printing Printing a document …………………………6.1 Canceling a print job …………………………. 6.1 7. Ordering supplies and accessories Print cartridge …………………………… 7.1 Accessories …………………………..7.1 How to purchase …………………………7.1 8. Maintenance Cleaning the printer …………………………8.1 Cleaning the outside of the printer ……………………8.1 Cleaning the inside of the printer …………………… -
Page 5: Safety
— Increase the separation between the equipment and receiver. Your Xerox product and supplies have been designed and tested to meet strict safety requirements. These include safety agency evaluation and — Connect the equipment into an outlet on a circuit different from that to certification, and compliance with electromagnetic regulations and which the receiver is connected.
-
Page 6: Electrical Supply
• Do not use aerosol cleaners, they may be explosive and flammable under certain conditions. Do not use an adapter to connect any Xerox equipment to an electrical outlet that lacks a ground connection terminal. • Always exercise care when moving or relocating equipment. Please…
-
Page 7: Maintenance Information
CE The CE mark applied to this product, symbolizes XEROX’s declaration of conformity with the following applicable European Union If you need additional information about ozone, please request the Xerox Directives, as of the dates indicated: publication Facts About Ozone (part number 610P64653) by calling 1-800-828-6571 in the United States and Canada.
-
Page 8: Product Recycling & Disposal
The ENERGY STAR and ENERGY STAR MARK are If your product is not part of the Xerox program and you are managing its registered United States trademarks. The ENERGY disposal, please note that the product may contain lead and other…
-
Page 9: Introduction
Save time and money Introduction • Your printer allows you to use toner save mode to save toner. See the Software Section. Congratulations on the purchase of your printer! • You can print on both sides of the paper to save This chapter includes: paper.
-
Page 10: Printer Overview
Machine features Printer overview The table below lists a general overview of features supported by your printer. Front view (I: Installed, O: Option, NA: Not Available) Features Phaser 3250D Phaser 3250DN USB 2.0 (USB 2.0: Hi-Speed USB 2.0) Network Interface (Ethernet 10/100 Base TX) PCL Emulation PostScript Emulation…
-
Page 11: Rear View
Rear view Understanding the LEDs Status Description Error • The cover is open. Close the cover. • There is no paper in the tray. Load paper in the tray. • The printer has stopped printing due to a major error. •…
-
Page 12: Finding More Information
If you have Internet access, you can get help, support, printer drivers, manuals, and order Printing is suitable for altitudes under 1,000 m (3,281 ft). Refer to information from the Xerox website, the altitude setting to optimize your printing. See page 1.5 for more www.xerox.com.
-
Page 13: Altitude Adjustment
Unpack the machine and check all the enclosed items. Altitude adjustment Remove the tape holding the machine tightly. The print quality is affected by atmospheric pressure, which is Install the print cartridge. determined by the height of the machine above sea level. The following information will guide you on how to set your machine to the best print Load paper.
-
Page 14: Changing The Font Setting
Changing the font setting Your machine has preset the font for your region or country. If you want to change the font or set the font for special conditions such as DOS environment, you can change the font setting as follows: Ensure that you have installed the printer driver from the provided software CD.
-
Page 15: Basic Setup
Basic setup This chapter includes: • Printing a demo page • Using toner save mode Printing a demo page After setting up your printer, print a demo page to make sure that the printer is operating correctly. Press and hold the Start/Stop button for about 2 seconds. A demo page prints out.
-
Page 16: Software Overview
Contents Software overview Macintosh • Printer driver: Use this driver to run This chapter gives you an overview of the software that comes with your your printer from a Macintosh printer. Further details about installing and using the software are computer and print documents.
-
Page 17: System Requirements
Linux System requirements Item Requirements Before you begin, ensure that your system meets the following requirements: Operating system Various Linux OS including • Red Hat 8~9 Windows • Fedora Core 1~4 • Mandrake 9.2~10.1 Item Requirements Recommended • SuSE 8.2~9.2 Operating Windows 2000/XP/2003/Vista Processor…
-
Page 18: Network Setup (Phaser 3250Dn Only)
Open the language folder you want to use. Double click Setup.exe to install this program. Supported operating systems From the Windows Start menu, select Programs > Xerox Phaser 3250 > SetIP > SetIP. The following table shows the network environments supported by the printer: Select the name of your printer and click “…
-
Page 19
Enter the network card’s MAC address, IP address, subnet mask, default gateway, and then click Apply. Note If you do not know the network card’s MAC address, print the machine’s network information report. Click OK to confirm the settings. 10 Click Exit to close the SetIP program. <Network setup (Phaser 3250DN only)>… -
Page 20: Loading Print Media
• Some print media may meet all of the guidelines in this section and still not produce satisfactory results. This may be the result of improper handling, unacceptable temperature and humidity levels, or other variables over which Xerox has no control. • Before purchasing large quantities of print media, ensure that it meets the requirements specified in this user guide.
-
Page 21: Supported Sizes Of Paper
Supported sizes of paper Type Size Dimensions Weight Capacity Letter 216 x 279 mm (8.5 x 11 inches) • 60 to 105 g/m (16 to 28 lb • 250 sheets of 75 g/m bond) for the tray (20 lb bond) paper for the Legal 216 x 356 mm (8.5 x 14 inches) •…
-
Page 22: Media Sizes Supported In Each Mode
Media sizes supported in each mode Guidelines for special print media Type Guidelines Mode Size Source Envelopes • Successful printing on envelopes depends Single side All sizes supported by • tray 1 upon the quality of the envelopes. When printing the machine •…
-
Page 23: Loading Paper
Type Guidelines Type Guidelines Transparencies • To avoid damaging the printer, use only Preprinted • Letterhead must be printed with heat-resistant paper transparencies designed for use in laser ink that will not melt, vaporize, or release printers. hazardous emissions when subjected to the •…
-
Page 24: Using Tray 1 Or The Optional Tray 2
Using tray 1 or the optional tray 2 Press and hold the guide lock, and slide the paper length guide to locate it in the correct paper size slot. Use the print material you use for the majority of your print jobs in tray 1. Tray 1 can hold a maximum of 250 sheets of 75 g/m paper.
-
Page 25: Using The Manual Feeder
Note Adjust the manual tray paper width guides to the width of the paper. Do not force too much, or the paper will bend, which could result in • Do not push the paper width guide far enough to cause the a paper jam or skew.
-
Page 26: Output Tray Information
Output tray information output tray 3250-043 The output tray collects paper face down, in the order in which the sheets were printed. Notes • If you continuously print many pages, the surface of the output tray may become hot. Be careful not to touch the surface, and especially keep children away from the surface.
-
Page 27: Basic Printing
For Windows 2000, select Settings and then Printers. For Windows XP (32/64 bit)/2003, select Printers and Faxes. For Windows Vista, select Control Panel > Hardware and Sound > Printers. Double-click the Xerox Phaser 3250 icon. From the Document menu, select Cancel Note •…
-
Page 28: Ordering Supplies And Accessories
106R01374 To order Xerox-authorized supplies or accessories, contact your local a. Declared yield value in accordance with ISO/IEC 19752. Xerox dealer or the retailer where you purchased your printer, or visit www.xerox.com and select your country/region for information on calling Caution for technical support.
-
Page 29: Maintenance
Cleaning the inside of the printer Maintenance Turn the printer off and unplug the power cord. Wait for the printer to cool down. This chapter provides information for maintaining your printer and the print cartridge. Open the front cover and pull the print cartridge out. Set it on a This chapter includes: clean flat surface.
-
Page 30: Maintaining The Print Cartridge
Gently swab the long strip of glass (LSU) inside the top of the Maintaining the print cartridge cartridge and check for dirt or dust. Print cartridge storage To get the most from the print cartridge, keep the following guidelines in mind: •…
-
Page 31: Replacing The Print Cartridge
Replacing the print cartridge Caution • Avoid reaching too far into the printer. The fuser area may be When the toner is completely empty or the print cartridge reached the hot. end of its life span: • To prevent damage to the print cartridge, do not expose it to •…
-
Page 32: Printing A Configuration Page
Approx. 50,000 pages Pick-up roller Approx. 50,000 pages Xerox highly recommends that an authorized service provider, dealer or the retailer where you bought printer performs this maintenance activity. The warranty does not cover the replacement of the maintenance parts after their lifespan.
-
Page 33: Troubleshooting
Remove the jammed paper by gently pulling it straight out. Make Troubleshooting sure that all of the paper is properly aligned in the tray 1. This chapter provides helpful information for what to do if you encounter an error while using your printer. This chapter includes: •…
-
Page 34: Areas Near The Print Cartridge
Pull the paper straight up and out. Areas near the print cartridge Caution The fuser area is hot. Take care when removing paper from the printer. Open the front cover and pull the print cartridge out. 3250-022 Insert the trays back into the printer. Printing automatically resumes.
-
Page 35: In The Paper Exit Area
In the paper exit area In the duplex unit area If the duplex unit is not inserted correctly, paper jam may occur. Make Open and close the front cover. The jammed paper is automatically sure that the duplex unit is inserted correctly. ejected from the printer.
-
Page 36: Tips For Avoiding Paper Jams
Duplex jam 1 Load the paper into the tray with the long edge facing the front of the tray. Open the rear cover. Lower the rear guide and remove the paper. Return the rear guide to its original position. 3250-023 In the printer properties window, set the page orientation to be rotated 90 degrees.
-
Page 37: Troubleshooting Checklist
Check the power source by plugging the The printer is not Select Xerox Phaser 3250 or green. power cord into another outlet. selected as the Xerox Phaser 3250 PS as default printer.
-
Page 38: Printer Specifications
Condition Possible cause Suggested solutions Condition Possible cause Suggested solutions The printer The printer may Check the printer properties to Half the page The page layout Simplify the page layout and does not be configured ensure that all of the print is blank.
-
Page 39: Solving Print Quality Problems
Condition Possible cause Suggested solutions Solving print quality problems Pages print, The print Redistribute the print cartridge. Dirt inside of the printer or improper paper loading may reduce print but are cartridge is See page 8.2. quality. See the table below to troubleshoot problems. blank.
-
Page 40
Condition Suggested solutions Condition Suggested solutions Vertical lines If black vertical streaks appear on the page: Background Background scatter results from bits of toner scatter distributed on the printed page. • The drum inside the print cartridge has • The paper may be too damp. Try printing with probably been scratched. -
Page 41: Common Windows Problems
Condition Suggested solutions Condition Suggested solutions Wrinkles or • Ensure that the paper is loaded properly. Horizontal If horizontally aligned black streaks or smears creases stripes appear: • Check the paper type and quality. See page 5.2. • The print cartridge may be installed •…
-
Page 42: Common Postscript Problems
Common PostScript problems Common Linux problems The following situations are PostScript language specific and may occur Condition Suggested solutions when several printer languages are being used. • Check if the printer driver is installed in your Note system. Open Unified Driver Configurator •…
-
Page 43: Common Macintosh Problems
Common Macintosh problems Condition Suggested solutions The printer does not Incompatibility between the PDF file and print PDF file correctly. the Acrobat products: Some parts of graphics, Printing the PDF file as an image may text, or illustrations are solve this problem. Turn on Print As missing.
-
Page 44: Installing Additional Memory
Installing additional memory Your machine is a full-featured model that has been optimized to meet most of your printing needs. Recognizing that each user may have different requirements, however, Xerox makes additional memory available to enhance your machine’s capabilities. This chapter includes: •…
-
Page 45: Activating The Added Memory In The Ps Printer Properties
For Windows XP/2003, select Printers and Faxes. For Windows Vista, select Control Panel > Hardware and Sound > Printers. Select the Xerox Phaser 3250 PS printer. Click the right mouse button on the printer icon and select Properties. For Windows 2000/XP/2003/Vista, select Device Settings.
-
Page 46: Specifications
Declared yield value in accordance with ISO/IEC 19752. e. Compatible with PCL6 version 2.1. Print cartridge Standard Yield: Average cartridge yield 3,500 f. Please visit www.xerox.com to download the latest software version. life standard pages. High Yield: Average cartridge yield 5,000 standard pages.
-
Page 47: Glossary
Glossary Comma Separated Values (CSV). A type of file format, CSV is used to exchange data between disparate applications. The file format, as it is used in Microsoft Excel, has become a pseudo standard The following glossary helps you get familiar with the product by throughout the industry, even among non-Microsoft platforms.
-
Page 48
and corrects errors in the fax transmission process that are IEEE sometimes caused by telephone line noise. The Institute of Electrical and Electronics Engineers (IEEE) is an international non-profit, professional organization for the Emulation advancement of technology related to electricity. Emulation is a technique of one machine obtaining the same results as another. -
Page 49
PC, and An interface for a device driver, this allows software to interact with the network protocols were based on the archetypal Xerox XNS the device driver using standard input/output system calls, which stack. -
Page 50
Protocol TWAIN A convention or standard that controls or enables the connection, An industry standard for scanners and software. By using a TWAIN- communication, and data transfer between two computing compliant scanner with a TWAIN-compliant program, a scan can be endpoints. -
Page 51
Index accessories, order information 7.1 output location 5.7 quality problems 9.7 cleaning paper guidelines 5.3 redistributing, print cartridge 8.2 inside 8.1 paper jam, clear replacing, print cartridge 8.3 outside 8.1 around the print cartridge 9.2 component location 1.2 duplex area 9.3 configuration page, print 8.4 multi-purpose tray 9.2 control panel… -
Page 52
Software Section… -
Page 53
Software section Contents 1. Installing Printer Software in Windows Installing Printer Software ……………………….4 Installing Software for Local Printing ………………….4 Installing Software for Network Printing …………………. 6 Reinstalling Printer Software ……………………..9 Removing Printer Software ……………………..10 2. Using SetIP (Phaser 3250DN only) Installing SetIP ………………………… -
Page 54
4. Advanced Printing Printing Multiple Pages on One Sheet of Paper (N-Up Printing) …………….19 Printing Posters …………………………20 Printing Booklets …………………………20 Printing on Both Sides of Paper ……………………… 21 Printing a Reduced or Enlarged Document ………………….21 Fitting Your Document to a Selected Paper Size ………………..21 Using Watermarks ………………………… -
Page 55
6. Using Your Printer in Linux Getting Started …………………………27 Installing the MFP Driver ……………………….27 Installing the MFP Driver ……………………… 27 Uninstalling the MFP Driver ……………………28 Using the MFP Configurator ……………………..29 Opening the MFP Configurator ……………………. 29 Printers Configuration …………………….. -
Page 56: Installing Printer Software In Windows
Typical Installation Installing Printer Software in This is recommended for most users. All components necessary for printer operations will be installed. Windows Make sure that the printer is connected to your computer and powered on. This chapter includes: Insert the supplied CD-ROM into your CD-ROM drive. •…
-
Page 57
Custom Installation : If your printer is not already connected to the computer, the You can choose individual components to install. following window will appear. Make sure that the printer is connected to your computer and powered on. Insert the supplied CD-ROM into your CD-ROM drive. The CD-ROM should automatically run, and an installation window appears. -
Page 58: Installing Software For Network Printing
Select your printer and click Next. : You can change the desired installation folder by clicking [Browse]. After the installation is finished, a window asking you to print a test page appears. If you choose to print a test page, select the checkbox and click Next Next…
-
Page 59
Click Install Software. • If you do not see your printer on the list, click Update to refresh the list, or select Add TCP/IP Port to add your printer to the network. To add the printer to the network, enter the port name and the IP address for the printer. -
Page 60
Click Install Software. • To find a shared network printer (UNC Path), select Shared Printer [UNC] and enter the shared name manually or find a shared printer by clicking the Browse button. : To search the network printer, the firewall should be disabled. : If you want to set a specific IP address on a specific network printer, click the Set IP Address button. -
Page 61: Reinstalling Printer Software
You can also change the printer name, set the printer to be The list of printers available on the network appears. Select the shared on the network, set the printer as the default printer, and printer you want to install from the list and then click Next. change the port name of each printer.
-
Page 62: Removing Printer Software
Select the components you want to reinstall and click Next. If you installed the printer software for local printing and select your printer driver name, the window asking you to print a test page appears. Do as follows: a. To print a test page, select the check box and click Next.
-
Page 63: Using Setip (Phaser 3250Dn Only)
Click Install SetIP Utility(Optional). Click Finish. Using SetIP From the Windows Start menu, select Programs or All Programs Xerox Phaser 3250 SetIP SetIP. The program automatically detects and displays new and configured print servers on your network. Using SetIP (Phaser 3250DN only)
-
Page 64
Select the name of your printer and click . If you cannot find your printer name, click to refresh the list. OTES • To confirm the MAC address, see the NETWORK PRINTER CARD TEST PAGE. The NETWORK PRINTER CARD TEST PAGE will be printed after the Configuration Page. -
Page 65: Basic Printing
Open the document you want to print. Basic Printing Select Print from the File menu. The Print window is displayed. It may look slightly different depending on your application. The basic print settings are selected within the Print window. This chapter explains the printing options and common printing tasks These settings include the number of copies and print range.
-
Page 66: Printing To A File (Prn)
Printing to a file (PRN) Printer Settings You will sometimes need to save the print data as a file for your purpose. You can use the printer properties window, which allows you to access all of the printer options you need when using your printer. When the To create a file: printer properties are displayed, you can review and change the settings needed for your print job.
-
Page 67: Layout Tab
Layout Tab Paper Tab The Layout tab provides options to adjust how the document appears Use the following options to set the basic paper handling specifications on the printed page. The Layout Options includes Multiple Pages when you access the printer properties. See “Printing a Document” on per Side, Poster Printing and Booklet Printing.
-
Page 68: Graphics Tab
Use the following Graphic options to adjust the print quality for your specific printing needs. See “Printing a Document” on page 13 for more : For optimal performance and reliability consider using xerox information on accessing printer properties. paper.
-
Page 69: Extras Tab
Advanced Options Extras Tab You can set advanced settings by clicking the Advanced Options You can select output options for your document. See “Printing a button. Document” on page 13 for more information about accessing the printer • Print All Text To Black: When the Print All Text To Black option properties.
-
Page 70: Troubleshooting Tab
Troubleshooting Tab Using a Favorite Setting Use the Troubleshooting tab for printer information page. See The Favorites option, which is visible on each properties tab, allows you “Printing a Document” on page 13 for more information about accessing to save the current properties settings for future use. printer properties.
-
Page 71: Advanced Printing
Advanced Printing Printing Multiple Pages on One Sheet of Paper (N-Up Printing) This chapter explains printing options and advanced printing tasks. You can select the number of pages to print on a single sheet of paper. To print more than one page per sheet, the pages will be reduced in size •…
-
Page 72: Printing Posters
Printing Posters Printing Booklets This feature allows you to print a single-page document onto 4, 9, or 16 sheets of paper, for the purpose of pasting the sheets together to form one poster-size document. : The poster printing option is available when 600 dpi is selected in the resolution option on the Graphic tab.
-
Page 73: Printing On Both Sides Of Paper
Printing on Both Sides of Paper Printing a Reduced or Enlarged Document You can print on both sides of a sheet of paper. Before printing, decide how you want your document oriented. You can change the size of a page’s content to appear larger or smaller The options are: on the printed page.
-
Page 74: Using Watermarks
Editing a Watermark Using Watermarks To change the print settings from your software application, access printer properties. See “Printing a Document” on The Watermark option allows you to print text over an existing document. page 13. For example, you may want to have large gray letters reading “DRAFT” Click the Extras tab and click the Edit button in the Watermark or “CONFIDENTIAL”…
-
Page 75: Using Overlays
Using a Page Overlay Using Overlays After an overlay has been created, it is ready to be printed with your document. To print an overlay with a document: Create or open the document you want to print. What is an Overlay? To change the print settings from your software application, An overlay is text and/or images stored in the computer hard disk drive access printer properties.
-
Page 76: Using Windows Postscript Driver
Advanced Using Windows PostScript You can use advanced settings by clicking the button. Advanced Driver If you want to use the PostScript driver provided with your system CD-ROM to print a document. PPDs, in combination with the PostScript driver, access printer features and allow the computer to communicate with the printer.
-
Page 77: Sharing The Printer Locally
Sharing the Printer Locally Setting Up a Host Computer Start Windows. You can connect the printer directly to a selected computer, which is called “host computer,” on the network. From the Start menu select Printers and Faxes. The following procedure is for Windows XP. For other Windows OS, refer Double-click your printer driver icon.
-
Page 78: Using Utility Applications
• To use the this program, you need: — To check for Operating System(s) that are compatible with your Or, from the Start menu, select Programs or All Programs → Xerox printer, refer to Printer Specifications in your Printer User Guide.
-
Page 79: Using Your Printer In Linux
Using Your Printer in Linux Installing the MFP Driver You can use your machine in a Linux environment. Installing the MFP Driver This chapter includes: Make sure that you connect your machine to your computer. • Getting Started Turn both the computer and the machine on. root •…
-
Page 80: Uninstalling The Mfp Driver
The installation program has added the MFP Configurator desktop icon and Xerox MFP group to the system menu for your If the CD-ROM is secondary master and the location to mount is convenience. If you have any difficulties, consult the onscreen…
-
Page 81: Using The Mfp Configurator
Opening the MFP Configurator Switches to Printer configuration. Double-click MFP Configurator on the desktop. You can also click the Startup Menu icon and select Xerox MFP Shows all of the and then MFP Configurator. installed printer. Press each button on the Modules pane to switch to the corresponding configuration window.
-
Page 82: Ports Configuration
Classes Tab Configuring Printer Properties The Classes tab shows a list of available printer classes. Using the properties window provided by the Printers configuration, you can change the various properties for your machine as a printer. Open the MFP Configurator. If necessary, switch to Printers configuration.
-
Page 83: Printing A Document
In the Xerox LPR window, select the model name of your Printing Files machine from the Printer list and click Properties. You can print many different types of files on the Xerox machine device using the standard CUPS way — directly from the command line interface. Click.
-
Page 84: Using Your Printer With A Macintosh
Double-click the MAC_Installer folder. driver by installing the PPD file. Double-click the MAC_Printer folder. Double-click the Xerox Phaser 3250D or Xerox Phaser Some printers do not support a network interface. Make 3250DN icon. sure that your printer supports a network interface by referring to Printer Specifications in your Printer User Guide.
-
Page 85: For A Usb-Connected
Follow the instructions on “Installing Software” on page 32 to install the PPD file on your computer. For MAC OS 10.3, if Auto Select does not work properly, select Xerox in Printer Model and your printer name in Model Open the Applications folder → Utilities, and Print Setup Name.
-
Page 86: Printing
Changing Printer Settings Printing You can use advanced printing features when using your printer. From your Macintosh application, select Print from the File menu. The printer name which appears in the printer properties window may differ OTES depending on the printer in use. Except for the name, the composition of •…
-
Page 87: Printing Multiple Pages On One Sheet Of Paper
The higher setting also may increase the time it takes to print a document. : For optimal performance and reliability consider using xerox paper. Using Your Printer with a Macintosh…
-
Page 88: Duplex Printing
Duplex Printing You can print on both sides of the paper. Before printing in the duplex mode, decide on which edge you will be binding your finished document. The binding options are: Long-edged binding: Which is the conventional layout used in book binding.
-
Page 89
Software section Index Windows 15 document 13 Linux fit to page 21 advanced printing 19 driver, install 27 from Macintosh 34 printer properties 30 from Windows 13 printing 31 N-up Macintosh 35 booklet printing 20 Windows 19 overlay 23 poster 22 Macintosh PRN 14 driver… -
Page 90
image mode 16 resolution Windows 16 toner save 16 true-type option 16 software install Macintosh 32 Windows 4 reinstall Windows 9 system requirements Macintosh 32 uninstall Windows 10 status monitor 26 toner save 16 toner save, set 16 uninstall, software Windows 10 uninstalling driver…
-
Contents
-
Table of Contents
-
Troubleshooting
-
Bookmarks
Quick Links
Related Manuals for Xerox Phaser 3250
Summary of Contents for Xerox Phaser 3250
-
Page 1
User Guide… -
Page 2
This manual is provided for information purposes only. All information included herein is subject to change without notice. Xerox Corporation is not responsible for any direct or indirect damages, arising from or related to the use of this manual. © 2008 Xerox Corporation. All rights reserved. -
Page 3: Table Of Contents
Contents Safety Safety Introduction …………………………1.i Marks and Labels …………………………1.i Radio Frequency Emissions ………………………. 1.i Laser Safety Introduction ……………………….1.i Operational Safety Information ……………………..1.i Maintenance Information ……………………….1.iii Product Safety Certification ………………………. 1.iii Regulatory Information ……………………….1.iii Product Recycling & Disposal ……………………..1.iv Energy program compliance ………………………
-
Page 4
6. Basic printing Printing a document …………………………6.1 Canceling a print job …………………………. 6.1 7. Ordering supplies and accessories Print cartridge …………………………… 7.1 Accessories …………………………..7.1 How to purchase …………………………7.1 8. Maintenance Cleaning the printer …………………………8.1 Cleaning the outside of the printer ……………………8.1 Cleaning the inside of the printer …………………… -
Page 5: Safety
— Increase the separation between the equipment and receiver. Your Xerox product and supplies have been designed and tested to meet strict safety requirements. These include safety agency evaluation and — Connect the equipment into an outlet on a circuit different from that to certification, and compliance with electromagnetic regulations and which the receiver is connected.
-
Page 6: Electrical Supply
• Do not use aerosol cleaners, they may be explosive and flammable under certain conditions. Do not use an adapter to connect any Xerox equipment to an electrical outlet that lacks a ground connection terminal. • Always exercise care when moving or relocating equipment. Please…
-
Page 7: Maintenance Information
CE The CE mark applied to this product, symbolizes XEROX’s declaration of conformity with the following applicable European Union If you need additional information about ozone, please request the Xerox Directives, as of the dates indicated: publication Facts About Ozone (part number 610P64653) by calling 1-800-828-6571 in the United States and Canada.
-
Page 8: Product Recycling & Disposal
The ENERGY STAR and ENERGY STAR MARK are If your product is not part of the Xerox program and you are managing its registered United States trademarks. The ENERGY disposal, please note that the product may contain lead and other…
-
Page 9: Introduction
Save time and money Introduction • Your printer allows you to use toner save mode to save toner. See the Software Section. Congratulations on the purchase of your printer! • You can print on both sides of the paper to save This chapter includes: paper.
-
Page 10: Printer Overview
Machine features Printer overview The table below lists a general overview of features supported by your printer. Front view (I: Installed, O: Option, NA: Not Available) Features Phaser 3250D Phaser 3250DN USB 2.0 (USB 2.0: Hi-Speed USB 2.0) Network Interface (Ethernet 10/100 Base TX) PCL Emulation PostScript Emulation…
-
Page 11: Rear View
Rear view Understanding the LEDs Status Description Error • The cover is open. Close the cover. • There is no paper in the tray. Load paper in the tray. • The printer has stopped printing due to a major error. •…
-
Page 12: Finding More Information
If you have Internet access, you can get help, support, printer drivers, manuals, and order Printing is suitable for altitudes under 1,000 m (3,281 ft). Refer to information from the Xerox website, the altitude setting to optimize your printing. See page 1.5 for more www.xerox.com.
-
Page 13: Altitude Adjustment
Unpack the machine and check all the enclosed items. Altitude adjustment Remove the tape holding the machine tightly. The print quality is affected by atmospheric pressure, which is Install the print cartridge. determined by the height of the machine above sea level. The following information will guide you on how to set your machine to the best print Load paper.
-
Page 14: Changing The Font Setting
Changing the font setting Your machine has preset the font for your region or country. If you want to change the font or set the font for special conditions such as DOS environment, you can change the font setting as follows: Ensure that you have installed the printer driver from the provided software CD.
-
Page 15: Basic Setup
Basic setup This chapter includes: • Printing a demo page • Using toner save mode Printing a demo page After setting up your printer, print a demo page to make sure that the printer is operating correctly. Press and hold the Start/Stop button for about 2 seconds. A demo page prints out.
-
Page 16: Software Overview
Contents Software overview Macintosh • Printer driver: Use this driver to run This chapter gives you an overview of the software that comes with your your printer from a Macintosh printer. Further details about installing and using the software are computer and print documents.
-
Page 17: System Requirements
Linux System requirements Item Requirements Before you begin, ensure that your system meets the following requirements: Operating system Various Linux OS including • Red Hat 8~9 Windows • Fedora Core 1~4 • Mandrake 9.2~10.1 Item Requirements Recommended • SuSE 8.2~9.2 Operating Windows 2000/XP/2003/Vista Processor…
-
Page 18: Network Setup (Phaser 3250Dn Only)
Open the language folder you want to use. Double click Setup.exe to install this program. Supported operating systems From the Windows Start menu, select Programs > Xerox Phaser 3250 > SetIP > SetIP. The following table shows the network environments supported by the printer: Select the name of your printer and click “…
-
Page 19
Enter the network card’s MAC address, IP address, subnet mask, default gateway, and then click Apply. Note If you do not know the network card’s MAC address, print the machine’s network information report. Click OK to confirm the settings. 10 Click Exit to close the SetIP program. <Network setup (Phaser 3250DN only)>… -
Page 20: Loading Print Media
• Some print media may meet all of the guidelines in this section and still not produce satisfactory results. This may be the result of improper handling, unacceptable temperature and humidity levels, or other variables over which Xerox has no control. • Before purchasing large quantities of print media, ensure that it meets the requirements specified in this user guide.
-
Page 21: Supported Sizes Of Paper
Supported sizes of paper Type Size Dimensions Weight Capacity Letter 216 x 279 mm (8.5 x 11 inches) • 60 to 105 g/m (16 to 28 lb • 250 sheets of 75 g/m bond) for the tray (20 lb bond) paper for the Legal 216 x 356 mm (8.5 x 14 inches) •…
-
Page 22: Media Sizes Supported In Each Mode
Media sizes supported in each mode Guidelines for special print media Type Guidelines Mode Size Source Envelopes • Successful printing on envelopes depends Single side All sizes supported by • tray 1 upon the quality of the envelopes. When printing the machine •…
-
Page 23: Loading Paper
Type Guidelines Type Guidelines Transparencies • To avoid damaging the printer, use only Preprinted • Letterhead must be printed with heat-resistant paper transparencies designed for use in laser ink that will not melt, vaporize, or release printers. hazardous emissions when subjected to the •…
-
Page 24: Using Tray 1 Or The Optional Tray 2
Using tray 1 or the optional tray 2 Press and hold the guide lock, and slide the paper length guide to locate it in the correct paper size slot. Use the print material you use for the majority of your print jobs in tray 1. Tray 1 can hold a maximum of 250 sheets of 75 g/m paper.
-
Page 25: Using The Manual Feeder
Note Adjust the manual tray paper width guides to the width of the paper. Do not force too much, or the paper will bend, which could result in • Do not push the paper width guide far enough to cause the a paper jam or skew.
-
Page 26: Output Tray Information
Output tray information output tray 3250-043 The output tray collects paper face down, in the order in which the sheets were printed. Notes • If you continuously print many pages, the surface of the output tray may become hot. Be careful not to touch the surface, and especially keep children away from the surface.
-
Page 27: Basic Printing
For Windows 2000, select Settings and then Printers. For Windows XP (32/64 bit)/2003, select Printers and Faxes. For Windows Vista, select Control Panel > Hardware and Sound > Printers. Double-click the Xerox Phaser 3250 icon. From the Document menu, select Cancel Note •…
-
Page 28: Ordering Supplies And Accessories
106R01374 To order Xerox-authorized supplies or accessories, contact your local a. Declared yield value in accordance with ISO/IEC 19752. Xerox dealer or the retailer where you purchased your printer, or visit www.xerox.com and select your country/region for information on calling Caution for technical support.
-
Page 29: Maintenance
Cleaning the inside of the printer Maintenance Turn the printer off and unplug the power cord. Wait for the printer to cool down. This chapter provides information for maintaining your printer and the print cartridge. Open the front cover and pull the print cartridge out. Set it on a This chapter includes: clean flat surface.
-
Page 30: Maintaining The Print Cartridge
Gently swab the long strip of glass (LSU) inside the top of the Maintaining the print cartridge cartridge and check for dirt or dust. Print cartridge storage To get the most from the print cartridge, keep the following guidelines in mind: •…
-
Page 31: Replacing The Print Cartridge
Replacing the print cartridge Caution • Avoid reaching too far into the printer. The fuser area may be When the toner is completely empty or the print cartridge reached the hot. end of its life span: • To prevent damage to the print cartridge, do not expose it to •…
-
Page 32: Printing A Configuration Page
Approx. 50,000 pages Pick-up roller Approx. 50,000 pages Xerox highly recommends that an authorized service provider, dealer or the retailer where you bought printer performs this maintenance activity. The warranty does not cover the replacement of the maintenance parts after their lifespan.
-
Page 33: Troubleshooting
Remove the jammed paper by gently pulling it straight out. Make Troubleshooting sure that all of the paper is properly aligned in the tray 1. This chapter provides helpful information for what to do if you encounter an error while using your printer. This chapter includes: •…
-
Page 34: Areas Near The Print Cartridge
Pull the paper straight up and out. Areas near the print cartridge Caution The fuser area is hot. Take care when removing paper from the printer. Open the front cover and pull the print cartridge out. 3250-022 Insert the trays back into the printer. Printing automatically resumes.
-
Page 35: In The Paper Exit Area
In the paper exit area In the duplex unit area If the duplex unit is not inserted correctly, paper jam may occur. Make Open and close the front cover. The jammed paper is automatically sure that the duplex unit is inserted correctly. ejected from the printer.
-
Page 36: Tips For Avoiding Paper Jams
Duplex jam 1 Load the paper into the tray with the long edge facing the front of the tray. Open the rear cover. Lower the rear guide and remove the paper. Return the rear guide to its original position. 3250-023 In the printer properties window, set the page orientation to be rotated 90 degrees.
-
Page 37: Troubleshooting Checklist
Check the power source by plugging the The printer is not Select Xerox Phaser 3250 or green. power cord into another outlet. selected as the Xerox Phaser 3250 PS as default printer.
-
Page 38: Printer Specifications
Condition Possible cause Suggested solutions Condition Possible cause Suggested solutions The printer The printer may Check the printer properties to Half the page The page layout Simplify the page layout and does not be configured ensure that all of the print is blank.
-
Page 39: Solving Print Quality Problems
Condition Possible cause Suggested solutions Solving print quality problems Pages print, The print Redistribute the print cartridge. Dirt inside of the printer or improper paper loading may reduce print but are cartridge is See page 8.2. quality. See the table below to troubleshoot problems. blank.
-
Page 40
Condition Suggested solutions Condition Suggested solutions Vertical lines If black vertical streaks appear on the page: Background Background scatter results from bits of toner scatter distributed on the printed page. • The drum inside the print cartridge has • The paper may be too damp. Try printing with probably been scratched. -
Page 41: Common Windows Problems
Condition Suggested solutions Condition Suggested solutions Wrinkles or • Ensure that the paper is loaded properly. Horizontal If horizontally aligned black streaks or smears creases stripes appear: • Check the paper type and quality. See page 5.2. • The print cartridge may be installed •…
-
Page 42: Common Postscript Problems
Common PostScript problems Common Linux problems The following situations are PostScript language specific and may occur Condition Suggested solutions when several printer languages are being used. • Check if the printer driver is installed in your Note system. Open Unified Driver Configurator •…
-
Page 43: Common Macintosh Problems
Common Macintosh problems Condition Suggested solutions The printer does not Incompatibility between the PDF file and print PDF file correctly. the Acrobat products: Some parts of graphics, Printing the PDF file as an image may text, or illustrations are solve this problem. Turn on Print As missing.
-
Page 44: Installing Additional Memory
Installing additional memory Your machine is a full-featured model that has been optimized to meet most of your printing needs. Recognizing that each user may have different requirements, however, Xerox makes additional memory available to enhance your machine’s capabilities. This chapter includes: •…
-
Page 45: Activating The Added Memory In The Ps Printer Properties
For Windows XP/2003, select Printers and Faxes. For Windows Vista, select Control Panel > Hardware and Sound > Printers. Select the Xerox Phaser 3250 PS printer. Click the right mouse button on the printer icon and select Properties. For Windows 2000/XP/2003/Vista, select Device Settings.
-
Page 46: Specifications
Declared yield value in accordance with ISO/IEC 19752. e. Compatible with PCL6 version 2.1. Print cartridge Standard Yield: Average cartridge yield 3,500 f. Please visit www.xerox.com to download the latest software version. life standard pages. High Yield: Average cartridge yield 5,000 standard pages.
-
Page 47: Glossary
Glossary Comma Separated Values (CSV). A type of file format, CSV is used to exchange data between disparate applications. The file format, as it is used in Microsoft Excel, has become a pseudo standard The following glossary helps you get familiar with the product by throughout the industry, even among non-Microsoft platforms.
-
Page 48
and corrects errors in the fax transmission process that are IEEE sometimes caused by telephone line noise. The Institute of Electrical and Electronics Engineers (IEEE) is an international non-profit, professional organization for the Emulation advancement of technology related to electricity. Emulation is a technique of one machine obtaining the same results as another. -
Page 49
PC, and An interface for a device driver, this allows software to interact with the network protocols were based on the archetypal Xerox XNS the device driver using standard input/output system calls, which stack. -
Page 50
Protocol TWAIN A convention or standard that controls or enables the connection, An industry standard for scanners and software. By using a TWAIN- communication, and data transfer between two computing compliant scanner with a TWAIN-compliant program, a scan can be endpoints. -
Page 51
Index accessories, order information 7.1 output location 5.7 quality problems 9.7 cleaning paper guidelines 5.3 redistributing, print cartridge 8.2 inside 8.1 paper jam, clear replacing, print cartridge 8.3 outside 8.1 around the print cartridge 9.2 component location 1.2 duplex area 9.3 configuration page, print 8.4 multi-purpose tray 9.2 control panel… -
Page 52
Software Section… -
Page 53
Software section Contents 1. Installing Printer Software in Windows Installing Printer Software ……………………….4 Installing Software for Local Printing ………………….4 Installing Software for Network Printing …………………. 6 Reinstalling Printer Software ……………………..9 Removing Printer Software ……………………..10 2. Using SetIP (Phaser 3250DN only) Installing SetIP ………………………… -
Page 54
4. Advanced Printing Printing Multiple Pages on One Sheet of Paper (N-Up Printing) …………….19 Printing Posters …………………………20 Printing Booklets …………………………20 Printing on Both Sides of Paper ……………………… 21 Printing a Reduced or Enlarged Document ………………….21 Fitting Your Document to a Selected Paper Size ………………..21 Using Watermarks ………………………… -
Page 55
6. Using Your Printer in Linux Getting Started …………………………27 Installing the MFP Driver ……………………….27 Installing the MFP Driver ……………………… 27 Uninstalling the MFP Driver ……………………28 Using the MFP Configurator ……………………..29 Opening the MFP Configurator ……………………. 29 Printers Configuration …………………….. -
Page 56: Installing Printer Software In Windows
Typical Installation Installing Printer Software in This is recommended for most users. All components necessary for printer operations will be installed. Windows Make sure that the printer is connected to your computer and powered on. This chapter includes: Insert the supplied CD-ROM into your CD-ROM drive. •…
-
Page 57
Custom Installation : If your printer is not already connected to the computer, the You can choose individual components to install. following window will appear. Make sure that the printer is connected to your computer and powered on. Insert the supplied CD-ROM into your CD-ROM drive. The CD-ROM should automatically run, and an installation window appears. -
Page 58: Installing Software For Network Printing
Select your printer and click Next. : You can change the desired installation folder by clicking [Browse]. After the installation is finished, a window asking you to print a test page appears. If you choose to print a test page, select the checkbox and click Next Next…
-
Page 59
Click Install Software. • If you do not see your printer on the list, click Update to refresh the list, or select Add TCP/IP Port to add your printer to the network. To add the printer to the network, enter the port name and the IP address for the printer. -
Page 60
Click Install Software. • To find a shared network printer (UNC Path), select Shared Printer [UNC] and enter the shared name manually or find a shared printer by clicking the Browse button. : To search the network printer, the firewall should be disabled. : If you want to set a specific IP address on a specific network printer, click the Set IP Address button. -
Page 61: Reinstalling Printer Software
You can also change the printer name, set the printer to be The list of printers available on the network appears. Select the shared on the network, set the printer as the default printer, and printer you want to install from the list and then click Next. change the port name of each printer.
-
Page 62: Removing Printer Software
Select the components you want to reinstall and click Next. If you installed the printer software for local printing and select your printer driver name, the window asking you to print a test page appears. Do as follows: a. To print a test page, select the check box and click Next.
-
Page 63: Using Setip (Phaser 3250Dn Only)
Click Install SetIP Utility(Optional). Click Finish. Using SetIP From the Windows Start menu, select Programs or All Programs Xerox Phaser 3250 SetIP SetIP. The program automatically detects and displays new and configured print servers on your network. Using SetIP (Phaser 3250DN only)
-
Page 64
Select the name of your printer and click . If you cannot find your printer name, click to refresh the list. OTES • To confirm the MAC address, see the NETWORK PRINTER CARD TEST PAGE. The NETWORK PRINTER CARD TEST PAGE will be printed after the Configuration Page. -
Page 65: Basic Printing
Open the document you want to print. Basic Printing Select Print from the File menu. The Print window is displayed. It may look slightly different depending on your application. The basic print settings are selected within the Print window. This chapter explains the printing options and common printing tasks These settings include the number of copies and print range.
-
Page 66: Printing To A File (Prn)
Printing to a file (PRN) Printer Settings You will sometimes need to save the print data as a file for your purpose. You can use the printer properties window, which allows you to access all of the printer options you need when using your printer. When the To create a file: printer properties are displayed, you can review and change the settings needed for your print job.
-
Page 67: Layout Tab
Layout Tab Paper Tab The Layout tab provides options to adjust how the document appears Use the following options to set the basic paper handling specifications on the printed page. The Layout Options includes Multiple Pages when you access the printer properties. See “Printing a Document” on per Side, Poster Printing and Booklet Printing.
-
Page 68: Graphics Tab
Use the following Graphic options to adjust the print quality for your specific printing needs. See “Printing a Document” on page 13 for more : For optimal performance and reliability consider using xerox information on accessing printer properties. paper.
-
Page 69: Extras Tab
Advanced Options Extras Tab You can set advanced settings by clicking the Advanced Options You can select output options for your document. See “Printing a button. Document” on page 13 for more information about accessing the printer • Print All Text To Black: When the Print All Text To Black option properties.
-
Page 70: Troubleshooting Tab
Troubleshooting Tab Using a Favorite Setting Use the Troubleshooting tab for printer information page. See The Favorites option, which is visible on each properties tab, allows you “Printing a Document” on page 13 for more information about accessing to save the current properties settings for future use. printer properties.
-
Page 71: Advanced Printing
Advanced Printing Printing Multiple Pages on One Sheet of Paper (N-Up Printing) This chapter explains printing options and advanced printing tasks. You can select the number of pages to print on a single sheet of paper. To print more than one page per sheet, the pages will be reduced in size •…
-
Page 72: Printing Posters
Printing Posters Printing Booklets This feature allows you to print a single-page document onto 4, 9, or 16 sheets of paper, for the purpose of pasting the sheets together to form one poster-size document. : The poster printing option is available when 600 dpi is selected in the resolution option on the Graphic tab.
-
Page 73: Printing On Both Sides Of Paper
Printing on Both Sides of Paper Printing a Reduced or Enlarged Document You can print on both sides of a sheet of paper. Before printing, decide how you want your document oriented. You can change the size of a page’s content to appear larger or smaller The options are: on the printed page.
-
Page 74: Using Watermarks
Editing a Watermark Using Watermarks To change the print settings from your software application, access printer properties. See “Printing a Document” on The Watermark option allows you to print text over an existing document. page 13. For example, you may want to have large gray letters reading “DRAFT” Click the Extras tab and click the Edit button in the Watermark or “CONFIDENTIAL”…
-
Page 75: Using Overlays
Using a Page Overlay Using Overlays After an overlay has been created, it is ready to be printed with your document. To print an overlay with a document: Create or open the document you want to print. What is an Overlay? To change the print settings from your software application, An overlay is text and/or images stored in the computer hard disk drive access printer properties.
-
Page 76: Using Windows Postscript Driver
Advanced Using Windows PostScript You can use advanced settings by clicking the button. Advanced Driver If you want to use the PostScript driver provided with your system CD-ROM to print a document. PPDs, in combination with the PostScript driver, access printer features and allow the computer to communicate with the printer.
-
Page 77: Sharing The Printer Locally
Sharing the Printer Locally Setting Up a Host Computer Start Windows. You can connect the printer directly to a selected computer, which is called “host computer,” on the network. From the Start menu select Printers and Faxes. The following procedure is for Windows XP. For other Windows OS, refer Double-click your printer driver icon.
-
Page 78: Using Utility Applications
• To use the this program, you need: — To check for Operating System(s) that are compatible with your Or, from the Start menu, select Programs or All Programs → Xerox printer, refer to Printer Specifications in your Printer User Guide.
-
Page 79: Using Your Printer In Linux
Using Your Printer in Linux Installing the MFP Driver You can use your machine in a Linux environment. Installing the MFP Driver This chapter includes: Make sure that you connect your machine to your computer. • Getting Started Turn both the computer and the machine on. root •…
-
Page 80: Uninstalling The Mfp Driver
The installation program has added the MFP Configurator desktop icon and Xerox MFP group to the system menu for your If the CD-ROM is secondary master and the location to mount is convenience. If you have any difficulties, consult the onscreen…
-
Page 81: Using The Mfp Configurator
Opening the MFP Configurator Switches to Printer configuration. Double-click MFP Configurator on the desktop. You can also click the Startup Menu icon and select Xerox MFP Shows all of the and then MFP Configurator. installed printer. Press each button on the Modules pane to switch to the corresponding configuration window.
-
Page 82: Ports Configuration
Classes Tab Configuring Printer Properties The Classes tab shows a list of available printer classes. Using the properties window provided by the Printers configuration, you can change the various properties for your machine as a printer. Open the MFP Configurator. If necessary, switch to Printers configuration.
-
Page 83: Printing A Document
In the Xerox LPR window, select the model name of your Printing Files machine from the Printer list and click Properties. You can print many different types of files on the Xerox machine device using the standard CUPS way — directly from the command line interface. Click.
-
Page 84: Using Your Printer With A Macintosh
Double-click the MAC_Installer folder. driver by installing the PPD file. Double-click the MAC_Printer folder. Double-click the Xerox Phaser 3250D or Xerox Phaser Some printers do not support a network interface. Make 3250DN icon. sure that your printer supports a network interface by referring to Printer Specifications in your Printer User Guide.
-
Page 85: For A Usb-Connected
Follow the instructions on “Installing Software” on page 32 to install the PPD file on your computer. For MAC OS 10.3, if Auto Select does not work properly, select Xerox in Printer Model and your printer name in Model Open the Applications folder → Utilities, and Print Setup Name.
-
Page 86: Printing
Changing Printer Settings Printing You can use advanced printing features when using your printer. From your Macintosh application, select Print from the File menu. The printer name which appears in the printer properties window may differ OTES depending on the printer in use. Except for the name, the composition of •…
-
Page 87: Printing Multiple Pages On One Sheet Of Paper
The higher setting also may increase the time it takes to print a document. : For optimal performance and reliability consider using xerox paper. Using Your Printer with a Macintosh…
-
Page 88: Duplex Printing
Duplex Printing You can print on both sides of the paper. Before printing in the duplex mode, decide on which edge you will be binding your finished document. The binding options are: Long-edged binding: Which is the conventional layout used in book binding.
-
Page 89
Software section Index Windows 15 document 13 Linux fit to page 21 advanced printing 19 driver, install 27 from Macintosh 34 printer properties 30 from Windows 13 printing 31 N-up Macintosh 35 booklet printing 20 Windows 19 overlay 23 poster 22 Macintosh PRN 14 driver… -
Page 90
image mode 16 resolution Windows 16 toner save 16 true-type option 16 software install Macintosh 32 Windows 4 reinstall Windows 9 system requirements Macintosh 32 uninstall Windows 10 status monitor 26 toner save 16 toner save, set 16 uninstall, software Windows 10 uninstalling driver…
General Troubleshooting
Service Diagnostics
LED Status and Errors
4-2
This chapter covers Service Diagnostics, LED Status and Errors, and
troubleshooting problems that are not associated with an error message or
Control Panel error.
For troubleshooting problems associated with an error message or Control
Panel error, refer to «Error Messages and Codes» on page 3-1. Print-quality
problems are covered in «Print-Quality Troubleshooting» on page 5-1.
Using various tests, service technicians should be able to diagnose the
problems quickly and isolate which component or sub-assembly part needs
replacement.
If confronted with an error that requires more than a cursory investigation to
clear or when directed by a troubleshooting procedure, use Service
Diagnostics to exercise selected sub-assemblies or parts in the vicinity of the
reported error. Detailed diagnostic procedures are available in Chapter 3,
«Error Messages and Codes» on page 3-1.
Status
Error
Red
On
Blinking A minor error is occurring
Amber
On
Online
Green
On
Description
The Front Cover is open.
There is no paper in the
tray.
The printer has stopped
printing due to a major
error.
The Print Cartridge is not
installed.
The Print Cartridge is
empty.
and the printer is waiting
for the error to be cleared.
The Print Cartridge is low
on toner.
A paper jam has occurred.
The printer is in Power
Save mode.
The printer is on-line and
can receive data from the
computer.
Phaser 3250 Laser Printer Service Manual
Solution
Close the Front Cover.
Load paper in the tray.
Install the Print
Cartridge.
Replace the Print
Cartridge.
When the problem is
cleared, the print job
resumes.
Replace the Print
Cartridge.
Remove paper.
Ремонт мфу принтера XEROX PHASER 3250DN
Принтер XEROX PHASER 3250DN обслуживание и ремонт в Москве и области.

Ремонт принтера XEROX PHASER 3250DN
Сломался принтер XEROX PHASER 3250DN?
Решение есть!
| Услуги | Гарантия на работу | Стоимость (руб.) | Выполнение дней |
| Диагностика | — | бесплатно | 1 |
| Выезд мастера | — | бесплатно | 1 |
| Ремонт принтера | 6 месяца | от 2000 | 1-5 |
| Профилактика принтера | 2 месяца | от 2000 | 1 |
| Замена ремня каретки | 2 месяца | от 2000 | 1-7 |
| Замена ролика подачи бумаги | 2 месяца | от 2000 | 1-7 |
| Замена каретки | 2 месяца | от 2000 | 1-7 |
| Замена платы высоковольтной | 2 месяца | от 2000 | 1-7 |
| Замена или восстановление главной платы | 2 месяца | от 2000 | 1-7 |
| Замена низковольтной платы | 2 месяца | от 2000 | 1-7 |
| Замена печатающей головки | 2 месяца | от 2000 | 1-7 |
| Замена шлейфа печатающей головки | 2 месяца | от 2000 | 1-7 |
| Настройка принтера | 2 месяца | от 2000 | 1-2 |
| Калибровка печатающей головки | 2 месяца | от 2000 | 1-2 |
| Прошивка принтера | 2 месяца | от 2000 | 1-2 |
| Устранение программных сбоев | 2 месяца | от 2000 | 1-7 |
| Чистка печатающей головки картриджа | 2 месяца | от 2000 | 1-7 |
| Заправка картриджа | 2 месяца | от 2000 | 1-2 |
| Установка СНПЧ | 2 месяца | от 2000 | 1-7 |
Часто случается, что принтер перестает работать должным образом и начинает плохо печатать, или вообще не печатать. Что же делать в данном случае?
Вам нужна помощь профессионального мастера, со знанием своего дела, который проведет диагностику и ремонт принтера XEROX PHASER 3250DN.
Наш технический центр занимается как раз такими поломками. Мы сделаем ваш принтер XEROX PHASER 3250DN рабочим в максимально короткие сроки. Просто наберите и свяжитесь с нами!
Обслуживание принтера XEROX PHASER 3250DN
Порядок диагностики и ремонта принтера XEROX PHASER 3250DN
Обслуживание принтера Xerox включает замену только качественных запчастей от производителя.
Частые неисправности и ошибки принтеров XEROX PHASER 3250DN:
принтер не печатает
что делать если принтер не отвечает
принтер печатает с полосами
документ в очереди, а принтер не печатает
принтер заминает бумагу
что делать если принтер не захватывает бумагу
принтер печатает пустые листы
после заправки картриджа принтер не печатает
компьютер не видит принтер
почему не печатает принтер хотя краска есть
принтер печатает пустые листы
почему принтер печатает белые листы
что делать если бумага застряла в принтере
принтер не берет бумагу из лотка
почему принтер печатает чёрные листы
при печати принтер пачкает бумагу
или другие ошибки принтера xerox
Диагностика мфу XEROX PHASER 3250DN бесплатно
Мы проводим работу по выявлению поломок вашего принтера, внимательно рассматривая все блоки, детали, узлы аппаратов на наличие дефектов, а также определяем объемы работ, необходимые для ремонта принтера, в процессе которой может потребоваться и повторная диагностика.
Важно! Мы можем предоставить Вам бесплатную удаленную диагностику по телефону. Все необходимые действия вы выполняете по рекомендациям нашего мастера.
Или после звонка, к вам выезжает наш специалист и проводит диагностику принтера. Он выявляет причину, по которой принтер неисправен. Он определяет запчасти, которые требуют замены, выставляет счет на нужные детали и после оплаты выставленного счета, выполняет ремонт и замену нужных запчастей принтера.
Можно ли обойтись без диагностики?
Конечно же, нет. Без диагностики невозможен любой ремонт любой техники. А наши мастера, знающие свое дело, могут установить причину поломки в максимально короткие сроки как у нас, так и по месту эксплуатации, что позволяет сэкономить ваше и наше время.
Что если поломка появится снова?
Наши специалисты являются профессионалами, и после их работы у Вас навряд ли что-либо опять сломается. Но все же, если так получилось, то мы готовы предоставить Вам гарантию от нашего сервисного центра, а также на замененные запчасти от производителя.
Принтер может сломаться по многим причинам, вот одни из них: загрязненные узлы аппаратов принтера, неработоспособность картриджей, неработоспособности печатающих головок, неправильная работа тракта прохождения бумаги, неправильная работа узла очистки головок, поломка в результате установки СНПЧ, неправильная парковка каретки.
Мы ремонтируем XEROX PHASER 3250DN и другие принтеры.