замена 1-го транспортного модуля bna nautilus 7600T
Ребята, сегодня столкнулась с проблемкой — купюры выплевывает при тестировании в сепаратор пачки, там они и лежат с ошибкой b9015 или b9016. После 8 часов вылизывания датчиков, разборки-сборки сепаратора, допетрила потянуть за длинный ремень и посмотреть на ролики первого транспорта — а они проскальзывают! Я так понимаю, нужно залезть внутрь этого модуля, но при попытке снять его я зашла в тупик, да и время было позднее уже, устала… Может, есть инструкция по его демонтажу, пошагово, типа, открутите там-то, снимите то-то 
- bavlynka
- Новичок
- Сообщения: 39
- Зарегистрирован: 05 май 2015, 23:39
-

Dragon - Специалист
- Сообщения: 212
- Зарегистрирован: 29 апр 2011, 15:56
- Откуда: Москва
-
- Профиль
- ICQ
Re: замена 1-го транспортного модуля bna nautilus 7600T
 anton-4444 » 06 окт 2015, 01:46
bavlynka писал(а): Я так понимаю, нужно залезть внутрь этого модуля, но при попытке снять его я зашла в тупик, да и время было позднее уже, устала… Может, есть инструкция по его демонтажу, пошагово, типа, открутите там-то, снимите то-то
Снимите верхнюю крышку со сдвигом, дальше просто четыре винта и отсоедините проводку !Сомневаюсь что разборка Вам что-то даст! Меняйте бэндле бна целиком 
- anton-4444
- Специалист
- Сообщения: 230
- Зарегистрирован: 29 июн 2013, 02:28
- asniv
- Новичок
- Сообщения: 23
- Зарегистрирован: 03 мар 2014, 17:17
Re: замена 1-го транспортного модуля bna nautilus 7600T
bavlynka » 07 окт 2015, 03:48
В общем, сняла я его. Правда, он остался болтаться на жгуте из проводов, мне лень было выкусывать стяжки и искать разъемы. Сняла двигатель какой-то. Странная конструкция движка озадачила меня. Разобрала его до винтика. Внутри абразивная поверхность а ля сцепление. Мне казалось, что проскальзывание — дефект. Но теперь кажется, что так и должно быть — хитрая приспособа для определенных задач, наверное. Собрала движок, воткнула, где был. Потом обратила внимание на то, что купюра как-то странно болтается при заходе из сепаратора в первый транспорт. Увидела двойной ролик, который должен прижимать купюру сверху. И тут я поняла — он как-то странно болтается. Сняла верхнюю крышку с первого транспорта. Так и есть — выломано крепление пружины, пружина задевала за датчик при закрытии крышки транспорта, приколхозила пружину на апгрейд кит, так что банкомат уже в обслуживании
Хитрость снятия первого транспорта, когда бна висит перед тобой на направляющих на уровне груди, сверху мешают для откручивания четвертого болта железяки, которые крепятся к направляющим. Надо открутить с угла 4 болта и слегка вытащить на 1-2 см наружу эту железку, тогда отверткой можно дотянуться и открутить первый транспорт.
- bavlynka
- Новичок
- Сообщения: 39
- Зарегистрирован: 05 май 2015, 23:39
Re: замена 1-го транспортного модуля bna nautilus 7600T
zlodei » 01 дек 2015, 22:41
Вдогонку. Первый транспортный вообще модуль забавный. Его половинки приводят в движение два РАЗНЫХ ремня. Сколько уже у меня инженеров попалось на том что купюры застревают как раз на входе в него, а модуль чистый и визуально с ним всё хорошо. Лечится путём подтяжки (с помощью натяжителей) или ослабления этих ремней, делается это всё методом тыка т.к. у ремней может быть разный износ.
Может кому поможет.
ЧИ
Добавлено спустя 5 минут 5 секунд:
bavlynka писал(а):Сняла двигатель какой-то. Странная конструкция движка озадачила меня. Разобрала его до винтика. Внутри абразивная поверхность а ля сцепление. Мне казалось, что проскальзывание — дефект. Но теперь кажется, что так и должно быть — хитрая приспособа для определенных задач, наверное.
Это электромуфта такие же стоят в пикерах.
- zlodei
- Новичок
- Сообщения: 7
- Зарегистрирован: 17 июл 2014, 21:30
- Авто: самокат
Re: замена 1-го транспортного модуля bna nautilus 7600T
Tivman » 03 фев 2019, 20:15
zlodei писал(а):Лечится путём подтяжки (с помощью натяжителей) или ослабления этих ремней, делается это всё методом тыка т.к. у ремней может быть разный износ
Можете показать где натяжители?
- Tivman
- Новичок
- Сообщения: 28
- Зарегистрирован: 12 окт 2018, 16:23
Вернуться в Nautilus Hyosung
Кто сейчас на конференции
Сейчас этот форум просматривают: нет зарегистрированных пользователей и гости: 2
| Error Code | Description | Resolution |
| 1106910 | LOST SLIP, DEV_SPR | |
| 2001000 | Receipt paper jam | Remove any jammed paper from the printer. |
| 2001200 | Receipt printer feed plate open | Close the feed plate. |
| 2001300 | Out of receipt (Receipt paper empty) | Replenish the receipt paper. |
| 2010100 | Receipt printer lever opened | Close the lever of print head completely. |
| 2010200 | Receipt printer head overheated | Wait the time until the temperature of head adequately slow down and try to initialize. |
| 2010300 | Receipt paper jam | Remove jammed paper between printer head and rollers. |
| 2010400 | Receipt paper empty | 1. Replenish receipt paper.2. Check the status of sensor and its connector. |
| 2010500 | Receipt paper is empty | 1. Check the status of setting paper.2. Check the status of sensor and its connector. |
| 2010600 | Thermal printer is overheated | After terminating self-test and initialize receipt printer. |
| 2010600 | Command is received while doing self-test | After terminating self-test and initialize receipt printer. |
| 2010700 | No receipt paper | 1. Replenish receipt paper in paper charger. 2. Check the status of Near End sensor and its connector. |
| 2010800 | Receipt paper cutting error | 1. Check the Cutter module. 2. Check if printer head lever is properly close. |
| 2010900 | No sensing black mark (dark sensor) | 1. Check the status of Black mark sensor.2. Check if Dip switch #6 is correctly set (Dip switch #6 is set by On in case of not using Black mark). |
| 2010A00 | The size of image print data is abnormal | Check the AP version and initialize. |
| 2080100 | Receipt printer lever opened | Close the lever of print head completely. |
| 2080200 | Receipt printer head overheated | Wait the time until the temperature of head adequately slow down and try to initialize. |
| 2080300 | Receipt paper jam | Remove jammed paper between printer head and rollers. |
| 2080400 | Receipt Paper Jam | 1. Replenish receipt paper. 2. Check the status of sensor and its connector. |
| 2080500 | Receipt paper setting error | 1. Check the status of setting paper. 2. Check the status of sensor and its connector. |
| 2080600 | Command is received while doing self-test | After terminating self-test and initialize receipt printer. |
| 2080700 | No receipt paper | 1. Replenish receipt paper in paper charger. 2. Check the status of Near End sensor and its connector. |
| 2080800 | Receipt paper cutting error | 1. Check the Cutter module. 2. Check if printer head lever is properly close. |
| 2080900 | No sensing black mark (dark sensor) | 1. Check the status of Black mark sensor. 2. Check if Dip switch #6 is correctly set (Dip switch #6 is set by On in case of not using Black mark). |
| 2080A00 | The size of image print data is abnormal | Check the AP version and initialize. |
| 9720000 | Receipt printer communication error during SP opening | Check if communication cable or COM port is not connected. |
| 9722010 | Receipt Printer communication failure during COM port open | 1. Do RESET at Operator Function. 2. Reboot ATM. |
| 9722DN0 | Receipt Printer communication failure during sending command to Receipt Printer | 1. Do RESET at Operator Function. 2. Reboot ATM. |
| 97912XX | DEV_SPR Time Over Error | 1. Reboot ATM. 2. Call your attendant. |
| 97922XX | DEV_SPR FATAL ERROR (WARNING) | 1. Reboot ATM. 2. Call your attendant. |
| A010100 | Detecting the lever opened before executing command | Close the feed lever. |
| A010200 | Printer thermal head overheated while executing command | Check the thermal printer head and change if necessary |
| A010300 | Paper jam detected before executing command | Remove any jammed paper from the printer. |
| A010400 | Paper setting error detected before executing command | Remove and re-install the receipt paper. |
| A010500 | Paper check error detected before executing command | Remove and re-install the receipt paper. |
| A010800 | Paper cutter software check error detected before executing command | Check for and remove any jammed paper. |
| A080100 | Open lever detected while executing command | Remove any jammed paper. |
| A080200 | Receipt printer head overheated while printing | Check the thermal printer head and change if necessary. |
| A080300 | Paper jam detected while executing command | Remove and re-install the receipt paper. |
| A080400 | Paper setting error detected before executing command | Remove and re-install the receipt paper. |
| A080500 | Paper check error in doing command | Remove any jammed paper. |
| A080800 | Paper cutter software check error detected while executing command | Check for and remove any jammed paper. |
| ADN0100 | No response detected for 30 seconds after sending command | Check cable and connection between the CE and printer. |
| ADN0F00 | No response detected for 30 seconds after sending command | Check cable and connection between the CE and printer. |
| ADN1100 | No response detected after 3 retries | Check for notes in the Cash Dispenser. If no bills are present try using compressed air to clean the dispenser (a sensor may be blocked by dust). Otherwise the dispenser may require service. |
| ADN1200 | No response detected between ENQ-ACK after 5 retries of ENQ | Check cable and connection between the CE and printer. |
| ADN1300 | No response detected after 5 retries because of timeout between STX-BCC interval | Check cable and connection between the CE and printer. |
| HYOSUNG CE – E.2 CARD READER ERROR CODES | ||
| 8217091 | Card in card reader | Remove Card. |
| 1101910 | LOST CARD”, DEV_MCU | |
| 9723010 | Failed to open device | Failed to open device |
| 9723016 | Time out to receive data | Check the serial port or cable. |
| 9723019 | Polling down | Check the serial port or cable. |
| 9730100 | IC CARD DENIAL | |
| 9730200 | IC CARD ONLINE DATA ERROR | |
| 9730300 | IC CARD ERROR | |
| 97913XX | DEV_MCU Time-over Error Code | 1. Reboot ATM. 2. Call your attendant. |
| 97923XX | DEV_MCU FATAL ERROR (WARNING) | 1. Reboot ATM. 2. Call your attendant. |
| HYOSUNG CE – E.3 JOURNAL PRINTER ERROR CODES | ||
| 9721111 | Off line status | 1. Check communication cable connected properly. 2. Check power cable connected properly. |
| 9721112 | On busy | Check printer’s working status. |
| 9721121 | Mechanics Error | 1. Recover printer’s mechanical Error. 2. Reboot ATM. |
| 9721122 | Recoverable Error | 1. Recover printer’s Error. 2. Reboot ATM. |
| 9721123 | Unrecoverable Error | Reboot ATM. |
| 9721124 | Paper jammed | Remove jammed paper. |
| 97911XX | DEV_JPR Time-over Error Code | 1. Reboot ATM. 2. Call your attendant. |
| 97921XX | DEV_JPR FATAL ERROR (WARNING) | 1. Reboot ATM. 2. Call your attendant. |
| HYOSUNG CE – E.4 CASH DISPENSER ERROR CODES | ||
| 1102910 | LOST WITHDRAW CASH”, DEV_CSH | |
| 1102920 | LOST DEPOSIT CASH”, DEV_CSH | |
| 1103910 | LOST CARD & SLIP”, DEV_MCU | DEV_SPR | |
| 2000100 | No cassette | Insert or re-insert the cassette(s). Check cassette sensor. |
| 2000200 | Note shortage | Replenish the cassette. |
| 2000300 | Reject bin full | Remove notes from the reject bin and try the Cassette Total function again. |
| 2000500 | Cash Dispenser Unit data setting error | Check Cash Dispenser Unit information. (Currency, Denomination, etc.) |
| 2001600 | Note detected in stacker (shutter or presenter type) | Clear any notes from the stacker. |
| 2021500 | Sensor detects note in delivery path before CDU dispenses | Remove note from the CDU delivery path. |
| 2131500 | CS4 sensor detects note in delivery path before CDU dispenses. Sensor is located along the delivery path right before the reject bin. | Remove note from the CDU delivery path. |
| 21A1500 | CS1A sensor detects note in delivery path before CDU dispenses. Sensor is located along the delivery path right after where the note exits the 1st cassette. | Remove note from the CDU delivery path. |
| 21B1500 | CS1A sensor detects note in delivery path before CDU dispenses. Sensor is located along the delivery path right after where the note exits the 1st cassette. | Remove note from the CDU delivery path. |
| 21B1500 | CSB sensor detects note in delivery path before CDU dispenses. Sensor is located along the delivery path right after where the note exits the 1st cassette. |
Remove note from the CDU delivery path. |
| 24A1500 | CS3A sensor detects note in delivery path before CDU dispenses. Sensor is located along the delivery path right after where the note exits the 3rd cassette. |
Remove note from the CDU delivery path. |
| 24B1500 | CS3B sensor detects note in delivery path before CDU dispenses. Sensor is located along the delivery path right after where the note exits the 3rd cassette. |
Remove note from the CDU delivery path. |
| 4000000 | Cash Dispenser(CDU) received the undefined command from AP software | 1. Get the trace file and log files in D:trace 2. Call your attendant |
| HYOSUNG CE ERROR CODES | ||
| 4001100 | Detecting CS2 Dark (Front Access Type: Reject box is opened.) | 1. Remove notes on CS2 sensor. 2. Clean CS2. |
| 4001400 | CS4A sensor detects note in delivery path before/after CDU dispenses | 1. Remove note from the CDU delivery path. 2. Clean CS4A. |
| 4001500 | CS2 or CS4A sensor detects note in delivery path before/after CDU dispenses | 1. Remove note from the CDU delivery path. 2. Clean CS2 and CS4A. |
| 4001800 | CS4B sensor detects note in delivery path before/after CDU dispenses | 1. Remove note from the CDU delivery path. 2. Clean CS4B. |
| 4001900 | CS2 or CS4B sensor detects note in delivery path before/after CDU dispenses | 1. Remove note from the CDU delivery path. 2. Clean CS2 and CS4B. |
| 4001C00 | CS4A or CS4B sensor detects note in delivery path before/after CDU dispenses | 1. Remove note from the CDU delivery path. 2. Clean CS4A and CS4B. |
| 4001D00 | CS2, CS4A or CS4B sensor detects note in delivery path before/after CDU dispenses | 1. Remove note from the CDU delivery path. 2. Clean CS2, CS4A and CS4B. |
| 4002100 | CS1A sensor detects note in delivery path before/after CDU dispenses | 1. Remove note from the CDU delivery path. 2. Clean CS1A. |
| 4002200 | CS1B sensor detects note in delivery path before/after CDU dispenses | 1. Remove note from the CDU delivery path. 2. Clean CS1B. |
| 4002300 | CS1A or CS1B sensor detects note in delivery path before/after CDU dispenses | 1. Remove note from the CDU delivery path. 2. Clean CS1A and CS1B. |
| 4002800 | CS13 sensor detects note in delivery path before/after CDU dispenses | 1. Remove note from the CDU delivery path. 2. Clean CS13. |
| 4002900 | CS1A or CS13 sensor detects note in delivery path before/after CDU dispenses | 1. Remove note from the CDU delivery path 2. Clean CS1A and CS13. |
| 4002A00 | CS1B or CS13 sensor detects note in delivery path before/after CDU dispenses | 1. Remove note from the CDU delivery path. 2. Clean CS1B and CS13. |
| 4002B00 | CS1A, CS1B or CS13 sensor detects note in delivery path before/after CDU dispenses | 1. Remove note from the CDU delivery path. 2. Clean CS1A, CS1B and CS13. |
| 4003000 | Failed in checking the main motor echo | 1. Initialize. 2. Check Main Motor Encoder Slit. 3. Initialize after Power On/Off. 4. Check Encoder Sensor CS8 BRKT. 5. Check CS8 Sensor Cable. 6. Change Main Motor Encoder Slit Sensor CS8. |
| 4003100 | Failed in checking the reject gate solenoid echo |
|
| 4003200 | Failed in checking the present gate solenoid echo | |
| 4003300 | Check sum error (No information is set) | 1. Check Cash Dispenser Information after reading Cash Dispenser version. 2. Initialize. 3. Initialize after executing Cash Dispenser Information Set(‘P’) Command. 4. Change Cash Dispenser B/D. |
| 4003400 | Error of two sheets detecting sensor(CS5_1) for initializing | 1. Check CS5_1 Sensor Cable. sensor(CS5_1) for initializing 2. Check second Dip Switch in Cash Dispenser B/D. 3. Change CS5_1 Sensor. |
| 4003600 | Error of CS 2, CS13 sensor during initialization | |
| 4003700 | Error of 2 sheets detecting sensor (CS5_1 / CS5_2) for dispensing | 1. Check Cash Dispenser Board Segment. 2. Initialize. 3. Read data of ‘Read Double Sensor’ Command. |
| 4003800 | Error in checking SRAM | |
| 4003900 | Gate operation sensor (CS3) error before initial recovery | 1. Initialize after removing notes or dust over Gate. 2. Check CS3 Sensor BKRT. 3. Check CS3 Sensor Cable. 4. Exchange Sensor after abnormal operating CS3 Gate detecting Sensor. 5. Replace Reject Solenoid 1. |
| 4003A00 | When more than 5 sheets of cash dispensing is required during a test | 1. Check command that Cash Dispenser is received. 2. Check Cash Dispenser EP ROM Version or specification. |
| 4003B00 | When CS15A or CS 15B sensor is detected as dark after initial recovery | 1. Remove notes or dust on CS15A Sensor. 2. Check CS15A Sensor Cable. 3. Exchange Sensor after abnormal operating CS15A Sensor. |
| 4004000 | Cassette is removed during dispensing | 1. Check the cassette catcher 2. Set the cassette properly |
| 4004100 | Error if re-driving is over 5 times during separated rejection | 1. Check notes in Reject Box 2. Rearrange notes in Cassette 3. Remove dust in CS15AB, CS31AB, CS41AB, CS1AB Sensor 4. Check dust existing in CS5 Sensor Guide 5. Check dust existing in Main Motor Encoder Slit 6. Check index value of notes each cassette |
| 4004200 | In case the number of notes detected outlet sensor(CS13) is less than the number of required notes | 1. Check notes dispensed and rejected. 2. Remove notes jammed in CDU.3. Remove dust in CS13 Sensor. 4. Exchange sensor after abnormal operating CS13 Sensor. |
| 4004300 | Error if total reject is more than 20 sheets | 1. Check notes in Reject Box. 2. Rearrange notes in Cassette. 3. Remove dust in CS1AB, CS15AB, CS31AB, CS41AB Sensor. 4. Check dust in existence CS5 Sensor Guide. 5. Check notes index value. |
| 4004400 | Error if continuous 5 times are rejected | 1. Check notes in Reject Box. 2. Rearrange notes in Cassette. 3. Check dust in Main Motor Encoder Slit. 4. Remove dust in CS15AB, CS31AB, CS1AB Sensor. 5. Exchange CS8 Encoder Slit Sensor. |
| 4004500 | In case the number of notes detected outlet sensor (CS13) is more than required notes | 1. Check notes dispensed and rejected. 2. Remove dust in CS13 Sensor. 3. Exchange sensor after abnormal operating CS13 Sensor. |
| 4004600 | Program error(Separated rejection) | 1. Check notes in 1 Cassette. 2. Check Sensor(CS6) Poll. 3. Check jam in 1 cassette and reload. 4. Remove dust in CS1A, CS1B Sensor. 5. Exchange 1 cassette box when there are many error. |
| 4004700 | 1 cassette mis-feed error (Separated rejection) | 1. Check notes in 1 Cassette. 2. Check Sensor(CS6) Poll. 3. Check jam in 1 cassette and reload. 4. Remove dust in CS1A, CS1B Sensor. 5. Exchange 1 cassette box when there are many error. |
| 4004800 | Error if the number of dispensed notes is not matched to the requested | 1. Check CS13 sensor (note jam and dust). 2. Replace CS13 sensor. |
| 4004900 | Error to dispense 0 sheets to be required (Separated rejection) | 1. Check received command. 2. Check communication cable. 3. Check Cash Dispenser Firmware Version. |
| 4004A00 | Error of note jam (Separated rejection) | 1. Remove jammed notes on Cash Dispenser return path. 2. Remove dust in CS1~CS4 sensor. 3. Install after rearranging notes in cassette. |
| 4004B00 | Continuous 3 times error if note is long (once tried, twice retried)>Separated rejection | 1. Check state of notes in reject box. 2. Rearrange notes in cassette. 3. Check Index of notes. 4. Check foreign objects in the main motor encoder slit. 5. Replace the CS8 encoder slit sensor. |
| 4004C00 | In case the number of notes detected outlet sensor (CS13) is more than that of notes detected on CS1A,B sensor | 1. Check CS1 sensor. 2. Reconnect CS1 sensor. |
| 4004E00 | Error of being removed 2nd cassette before separate rejection | 1. Set cassette #2 correctly. 2. Check the catcher inside cassette #2 guide. |
| 4005100 | Received a request for over 150 notes dispensing on the Cash Dispenser from the upper unit. | 1. Check the Cash Dispenser received command. 2. Check the abnormal communication cable. 3. Check the Cash Dispenser firmware version and refer to specifications. |
| 4005200 | The remaining notes at the sensor in front of the CST after dispense operation (CS1A, CS1B) | 1. Remove the remaining notes at a sensor in front of the CST. 2. Realign notes in the cassette. 3. Check abnormal clutch. 4. Check abrasion of the cassette box pick unit. |
| 4005300 | Error for the double note detection during separation. |
|
| 4005400 | Cash Dispenser EP Program Error during dispense operation (failed table search) | 1. Initialize after resetting the power. 2. Upgrade the Cash Dispenser firmware or download software again. 3. Replace the Cash Dispenser B/D. |
| 4005500 | Timeout due to note’s length error passed through the CS13 during dispense operation | 1. Remove a jammed note between the tray and Cash Dispenser. 2. Remove a jammed note at the position of the CS13 sensor. 3. Remove a dust on the CS13 sensor. |
| 4005600 | Abnormal operation of the gate solenoid during dispense operation | 1. Remove a jammed note on the gate. 2. Remove notes in the reject box and remount the reject box. 3. Check if the CS3 sensor bracket is bent. 4. Check if the CS3 sensor cable is disconnected (CN10 #9~10). 5. Exchange a sensor after abnormal operating CS3 Gate detecting sensor. 6. Replace the reject solenoid 1. |
| 4005700 | Cash dispenser configuration error | 1. Replace cash dispenser PCB. 2. Reconfigure cash dispenser setup data |
| 4005800 | Retract box position error during command reserved operation | 1. Mount the retract box or open the box cover. 2. Check if CS62 sensor poll is abnormal. 3. Check if the CS62 sensor cable is disconnected . (Cash Dispenser Board CN10 #5~2). |
| 4005900 | Initial jam time error | 1. Remove jammed notes. 2. Clean the sensors (CS1~CS15) in cash dispenser. |
| 4005B00 | 2 Cassette Miss Feed Error (Fail to reject bill separately) |
|
| 4005D00 | Continuously detected 2 notes for three times or more during dispense operation | 1. Check notes’ status in the reject box. 2. Realign notes in the cassette. 3. Check foreign objects at the position of the CS5 Sensor Guide. 4. Check if the CS5 cable is disconnected (CS5_1:Cash Dispenser B/D CN10 #11~12, 25~28/ CS5_2:CN12). |
| 4006000 | Something is detected in C31AB sensor before dispensing bills from 3rd cassette |
|
| 4006100 | Something is detected in C31AB sensor before dispensing bills. |
|
| 4006200 | Bills are remained in CS1AB sensor after dispensing bills. |
|
| 4006300 | Bills are remained in CS31AB sensor after dispensing bills |
|
| 4006A00 | CS15AB ~ CS13 Time out(Jam) during dispensing bills from second cassette |
|
| 4006B00 | Something is detected on CS31A, CS31B sensor during initialization |
|
| 4007000 | Something is detected on CS41AB sensor before dispensing bills from fourth cassette |
|
| 4007200 | Something is detected on CS41AB sensor during dispensing bills |
|
| 4007300 | Bills is remained in CS41AB sensor after dispensing bills |
|
| 4007A00 | CS31AB ~ CS13 Time out (Jam) during dispensing bills from fourth cassette |
|
| 4007B00 | Something is detected on CS41A, CS41B sensor in initialization |
|
| 4007C00 | Missfeed error in 4th cassette | |
| 4007D00 | Trying to dispense bills from 4th cassette but the 4th cassette doesn’t installed |
|
| 4008000 | Something is detected on CS15AB sensor before dispensing operation |
|
| 4008100 | Something is detected in C15AB sensor during dispensing operation |
|
| 4008200 | Bill is remained in CS15AB sensor after dispensing operation |
|
| 4008F00 | CS13 sensor detects a bill with hole during dispensing |
|
| 4009A00 | CS31AB~CS13 Time out(Jam) during dispensing from 3rd cassette. |
|
| 4009D00 | Trying to dispense bills from 3rd cassette but the 3rd cassette doesn’t installed. |
|
| 4009F00 | 3 cassette miss feed error | |
| 400AC00 | Something is detected on CS2 sensor after dispense operation |
|
| 400BC00 | Communication error – Command Length doesn’t match |
|
| 400BE00 | Bill pickup sensor(CS1, CS15) recognized has a hole and CS4 sensor detects it or CS4 sensor detects the gap too close |
|
| 400C700 | Something is detected on CS12 sensor during dispensing bills or initialization.-MB TTW |
|
| 400C800 | Something is detected on CS14 sensor during dispensing bills or initialization.-MB TTW |
|
| 400C900 | Something is detected on CS14 sensor after dispense operation |
|
| 400CC00 | Bill is remained on the sensor in front of cassette during resetting |
|
| 400D000 | Bills are passed on CS13~CS12 sensor – Timeout[Jam], MB TTW |
|
| 400D100 | Cash Dispenser communication failure during sending command to cash dispenser | 1. Do RESET at Operator Function. 2. Reboot ATM. |
| 4DN0100 | Cash Dispenser communication failure during receiving command to cash dispenser | 1. Do RESET at Operator Function. 2. Reboot ATM. |
| 4DN8100 | Communication error of Shutter | |
| 8216091 | Cash jammed on Cash Dispenser | 1. Remove jammed notes on Cash Dispenser return path. 2. Remove dust in CS1~CS4 sensor. |
| 9712000 | Failed to create file | 1. Reboot ATM. 2. Reinstall software. 3. Replace hard disk drive. |
| 9712100 | Failed to read file | 1. Reboot ATM. 2. Reinstall software. 3. Replace hard disk drive. |
| 9712200 | Failed to write file | 1. Reboot ATM. 2. Reinstall software. 3. Replace hard disk drive. |
| 9712300 | Failed to close file | 1. Reboot ATM. 2. Reinstall software. 3. Replace hard disk drive. |
| 9712400 | Failed to close file | 1. Reboot ATM. 2. Reinstall software. 3. Replace hard disk drive. |
| 9712500 | Failed to close file | 1. Reboot ATM. 2. Reinstall software. 3. Replace hard disk drive. |
| 9712600 | Failed to close file | 1. Reboot ATM. 2. Reinstall software. 3. Replace hard disk drive. |
| 9719000 | Failed to execute an extra command in the status of Cash Unit Exchange | 1. Reboot ATM. 2. Reinstall software. 3. Replace hard disk drive. |
| 9719100 | In case of not being the status of Cash Unit Exchange out of End Exchange | 1. Reboot ATM. 2. Reinstall software. 3. Replace hard disk drive. |
| 9719200 | In case of carrying out Cash In Start command at two times | 1. Reboot ATM. 2. Reinstall software. 3. Replace hard disk drive. |
| 9719300 | In case of not being the status of Cash In out of End Cash In | 1. Reboot ATM. 2. Reinstall software. 3. Replace hard disk drive. |
| 9719400 | Invalid Cash Unit ID | Reconfigure cash dispenser setup data. |
| 9719500 | Invalid Cash Unit number | Reconfigure cash dispenser setup data. |
| 9719600 | The abnormal of the number of Cash Unit | Reconfigure cash dispenser setup data. |
| 9719700 | No. of dispensed notes that software counts is not matched to it cash dispenser responded | 1. Initialize after resetting the power. 2. Upgrade the Cash Dispenser firmware or download software again. 3. Replace the Cash Dispenser B/D. |
| 971A000 | Invalid denomination | Reconfigure denomination at supervisor mode. |
| 971A100 | Invalid currency | Reconfigure currency at supervisor mode. |
| 971A200 | “CASSETTE OFF POSITION” Not dispensable | 1. Reconfigure denomination. 2. Reconfigure currency. |
| 971A300 | In case the number of bills dispensed exceeds the maximum dispensing bill | 1. Check cash dispenser driver (CDM SP) version. 2. Reconfigure the maximum dispensable count. |
| 971A400 | In case the number of coins dispensed exceeds the maximum dispensing coin | 1. Check coin dispenser driver version. 2. Reconfigure the maximum dispensable count. |
| 971A500 | Invalid mix number | Reconfigure cash dispenser at supervisor mode. |
| 971A500 | Invalid mix number | Reconfigure cash dispenser at supervisor mode. |
| 971A600 | In case automatic Retry of SP fails 3 times | |
| 971A700 | There is no setting information about automatic Retry standard | |
| 971B000 | In case of being executed Reject or Retract command without being the bills in stacker | 1. Check a dust in stacker. 2. Reconfigure the maximum dispensable count. |
| 971C000 | Not supported command Reinstall software | |
| 971D100 | Partial dispense | 1. Check the replenished amount and replenish. 2. Check the notes in cassette #1. |
| 971D200 | Partial dispense from cassette #2 | 1. Check the replenished amount and replenish. 2. Check the notes in cassette #2. |
| 971D300 | Partial dispense from cassette #3 | 1. Check the replenished amount and replenish. 2. Check the notes in cassette #3. |
| 971DX00 | In case partial bills dispensed by dispensing demand when Partial Dispense option is on. “X” means cassette number |
|
| 9740000 | Cash Dispenser communication failure during COM port open | 1. Do RESET at Operator Function. 2. Reboot ATM. |
| 9740102 | In case nonexistent Note Index is set | |
| 9741100 | When sensing CS2 Dark (Error code, 400FF00 is subdivided by location of sensor.) |
|
| 9741400 | When sensing CS4A Dark (Error code, 400FF00 is subdivided by location of sensor.) |
|
| 9741800 | When sensing CS4B Dark (Error code, 400FF00 is subdivided by location of sensor.) |
|
| 9742100 | When sensing CS21A,B Dark (Error code, 400FF00 is subdivided by location of sensor.) |
|
| 9742800 | When sensing CS13 Dark (Error code, 400FF00 is subdivided by location of sensor.) |
|
| 9743B00 | When sensing CS15A,B Dark (Error code, 400FF00 is subdivided by location of sensor.) |
|
| 9744700 | Cash picking-up fail while cash in cassette #1 is enough | 1. Check bill jam or no note in cassette #1. Check cash dispenser. |
| 9745B00 | Cash picking-up fail while cash in cassette #2 is enough | 1. Check bill jam or no note in cassette #2. 2. Check cash dispenser. |
| 9746B00 | When sensing CS31A,B Dark (Error code, 400FF00 is subdivided by location of sensor.) |
|
| 9747C00 | Cash picking-up fail while cash in cassette #4 is enough | 1. Check bill jam or no note in cassette #2. 2. Check cash dispenser. |
| 974FF00 | When sensing bills in the Stacker (Error code, 400FF00 is subdivided by location of sensor.) |
|
| 97914XX | DEV_Cash Dispenser Time-over Error Code | 1. Reboot ATM. 2. Call your attendant. |
| 97924XX | DEV_Cash Dispenser FATAL ERROR (WARNING) | 1. Reboot ATM. 2. Call your attendant. |
| 9799499 | DISPENSER COUNT ERROR | Check the sensor on cash dispenser. |
| HYOSUNG CE – E.5 MODEM ERROR CODES | ||
| D030000 | Modem is not responding | Check the modem controller. |
| D030100 | The target call address has call blocking enabled | 1. Check modem cable. 2. Contact to technician support team. |
| D030200 | The specified terminal identifier is invalid | 1. Check modem cable. 2. Contact to technician support team. |
| D030300 | All call appearances on the specified address are currently in use | 1. Check modem cable 2. Contact to technician support team. |
| D030400 | The disable address parameter contains dialing control characters that are not processed by the service provider | 1. Check modem cable. 2. Contact to technician support team. |
| D030500 | The specified country/region code is invalid | 1. Check modem cable. 2. Contact to host and phone company. |
| D030600 | The operation failed for an unspecified or unknown reason | Contact to technician support team. |
| D030700 | Insufficient resources to complete the operation | Contact to technician support team. |
| HYOSUNG CE – E.6 MISCELLANEOUS ERROR CODES | ||
| 1030100 | DEV_PIN (Key data error from host) | Contact to host. |
| 2000400 | Vault door open | Close the vault door. Check door switch. |
| 9701010 | Failed to connect communication between SP of PIN and EP of one | Check if communication cable or COM port is not connected. |
| 9701016 | Received data time out of EPP | Check if communication cable or COM port is not connected. |
| 9701017 | Delivered data time out of EPP | Check if communication cable or COM port is not connected. |
| 9701031 | Failed to produce Thread of EPP | Reboot ATM. |
| 9701040 | Failed to produce Thread of EPP | Reboot ATM. |
| 9701060 | Failed to create buffer | Reboot ATM. |
| 9701111 | BCC error of EPP | Check BCC logic of EPP. |
| 9701151 | EPP is down when it receives an ‘Get Status’ command | 1. Reboot ATM. 2. Replace pin pad. |
| 9701152 | EPP is down when it receives an ‘Clear Func Key’ command | 1. Reboot ATM. 2. Replace pin pad. |
| 9722020 | File Open Error | 1. Reboot ATM. 2. Call your attendant. |
| 9722060 | Memory Allocate Error (Print Form Allocate Index Buffer Fail) | 1. Reboot ATM. 2. Call your attendant. |
| 9722068 | Invalid Media Name | 1. Reboot ATM. 2. Call your attendant. |
| 97221A2 | Invalid Unit | 1. Reboot ATM. 2. Call your attendant. |
| 97221C1 | Form is not Found | 1. Reboot ATM. 2. Call your attendant. |
| 97221C4 | Form Name is NULL | 1. Reboot ATM. 2. Call your attendant. |
| 97221C5 | Invalid Form | 1. Reboot ATM. 2. Call your attendant. |
| 97221C6 | Print Form() offset is Invalid | 1. Reboot ATM. 2. Call your attendant. |
| 97221C7 | Invalid Form (Too many Fields in the form) | 1. Reboot ATM. 2. Call your attendant. |
| 97221D1 | Media is not Found | 1. Reboot ATM. 2. Call your attendant. |
| 97221D3 | Media Overflow when form size is larger than media size | 1. Reboot ATM. 2. Call your attendant. |
| 97221D4 | Media Name is NULL | 1. Reboot ATM. 2. Call your attendant. |
| 97221D5 | Invalid Media (Attribute for Media definition is not proper) | 1. Reboot ATM. 2. Call your attendant. |
| 97221D6 | Invalid Media (Area size is larger than media size) | 1. Reboot ATM. 2. Call your attendant. |
| 97221D7 | Invalid Media (Size of Media Name is exceeded to 2048 bytes totally) | 1. Reboot ATM. 2. Call your attendant. |
| 97221E1 | Field is not Found | 1. Reboot ATM. 2. Call your attendant. |
| 97221E2 | Field Error (This Field must have initial value) | 1. Reboot ATM. 2. Call your attendant. |
| 97221E3 | Non-Indexed value for Indexed Field | 1. Reboot ATM. 2. Call your attendant. |
| 97221E4 | Invalid Field | 1. Reboot ATM. 2. Call your attendant. |
| 97221E5 | Invalid Field (This Field’s width is 0) | 1. Reboot ATM. 2. Call your attendant. |
| 9740020 | Failed to create file | 1. Reboot ATM. 2. Call your attendant. |
| 9740025 | Failed to copy file | 1. Reboot ATM. 2. Call your attendant. |
| 9745500 | System power off while dispensing | |
| 97915XX | DEV_BRM Time-over Error Code | 1. Reboot ATM. 2. Call your attendant. |
| 97916XX | DEV_PBM Time-over Error Code | 1. Reboot ATM. 2. Call your attendant. |
| 97918XX | DEV_PIN Time-over Error Code | 1. Reboot ATM. 2. Call your attendant. |
| 9791AXX | DEV_FNG Time-over Error Code | 1. Reboot ATM. 2. Call your attendant. |
| 9791BXX | DEV_VFD Time over Error Code | 1. Reboot ATM. 2. Call your attendant. |
| 97925XX | DEV_BRM FATAL ERROR (WARNING) | 1. Reboot ATM. 2. Call your attendant. |
| 97926XX | DEV_PBM FATAL ERROR (WARNING) | 1. Reboot ATM. 2. Call your attendant. |
| 97928XX | DEV_PIN FATAL ERROR (WARNING) | 1. Reboot ATM. 2. Call your attendant. |
| 9792AXX | DEV_FNG FATAL ERROR (WARNING) | 1. Reboot ATM. 2. Call your attendant. |
| 9792BXX | DEV_VFD FATAL ERROR (WARNING) | 1. Reboot ATM. 2. Call your attendant. |
| 9799901 | DOOR CHECK | 1. Reboot ATM. 2. Call your attendant. |
| 9799902 | LIGHT ERROR | 1. Reboot ATM. 2. Call your attendant. |
| 9799903 | SPL ERROR | 1. Reboot ATM. 2. Call your attendant. |
| 9799904 | PIN ERROR | 1. Reboot ATM. 2. Call your attendant. |
| 9799905 | SENSOR CHECK | 1. Reboot ATM. 2. Call your attendant. |
| 9799907 | UPS ERROR | 1. Reboot ATM. 2. Call your attendant. |
| 9799908 | SCREEN ERROR | 1. Reboot ATM. 2. Call your attendant. |
| 991@@91 | ON TRANSACTION POWER OFF | 1. 1. Check power supply. 2. Check backup battery. |
| D000100 | Error while modem initializing | Check the modem connection and the modem test. |
| D000200 | Reversal transaction failure | Check for any CDU error codes and the number of notes dispensed to customer. |
| D000300 | PIN ERROR | Transaction was denied by host. |
| D000400 | INVALID PIN | Reboot ATM. |
| D000500 | BANK UNAVAILABLE | Transaction was denied by host. |
| D000600 | CARD NOT SUPPORTED | Transaction was denied by host. |
| D000700 | INSUFFICIENT FUNDS | Transaction was denied by host. |
| D000800 | INELIGIBLE TRANSACTION | Transaction was denied by host. |
| D000900 | INELIGIBLE ACCOUNT | Transaction was denied by host. |
| D001000 | DAILY LIMIT EXCEEDED | Transaction was denied by host. |
| D001100 | UNABLE TO PROCESS | Transaction was denied by host. |
| D001200 | Invalid transaction | Check the transaction from the host and try again. |
| D001300 | Invalid amount | Check the transaction from the host and try again. |
| D001400 | Invalid card number | Check the transaction from the host and try again. |
| D001400 | Invalid card number | Check the transaction from the host and try again. |
| D001500 | UNABLE TO PROCESS | Transaction was denied by host. |
| D001600 | WITHDRAWAL LIMIT ALREADY REACHED | Transaction was denied by host. |
| D001700 | INVALID AMOUNT | Transaction was denied by host. |
| D001800 | EXTERNAL DECLINE | Transaction was denied by host. |
| D001900 | SYSTEM ERROR | Transaction was denied by host |
| D002000 | Surcharge screen should have been displayed | Check the transaction from the host and try again. Check BIN List. |
| D002100 | ROUTING LOOKUP PROBLEM | Transaction was denied by host. |
| D002200 | UNABLE TO PROCESS | Transaction was denied by host. |
| D002300 | TRANSACTION NOT SUPPORTED | Transaction was denied by host. |
| D002400 | Exceeds Issuer Withdrawal Limit | Check the transaction from the host and try again. |
| D003900 | No Credit Account | Check the transaction from the host and try again. |
| D005100 | Insufficient Funds | Check the transaction from the host and try again. |
| D005200 | No Checking Account | Check the transaction from the host and try again. |
| D005300 | No Savings Account | Check the transaction from the host and try again. |
| D005400 | Expire Card | Check the transaction from the host and try again. |
| D005500 | Incorrect Pin | Check the transaction from the host and try again. |
| D005700 | Transaction not Permitted – Card | Check the transaction from the host and try again. |
| D005800 | Transaction not Permitted – Terminal | Check the transaction from the host and try again. |
| D006100 | Exceeds Withdrawal Limit | Check the transaction from the host and try again. |
| D007500 | PIN Tries Exceeded | Check the transaction from the host and try again. |
| D007800 | No Account | xxxx |
| D008000 | Invalid Date | xxxx |
| D008300 | Can not Verify PIN | Check the transaction from the host and try again. Try different cards. |
| D008600 | Can not Verify PIN | Check the transaction from the host and try again. Try different cards. |
| D009100 | Bank Unavailable | Check the transaction from the host and try again. |
| D009200 | System Unavailable | Check the transaction from the host and try again. |
| D009300 | Transaction Serial Number mismatch | Check the transaction from the host. |
| D009400 | Record format mismatch | Check the transaction from the host. |
| D009500 | Routing ID mismatch | Check the transaction from the host. |
| D009600 | Terminal ID mismatch | Check the transaction from the host. |
| D009700 | Response Type mismatch (Reversal) | Check the transaction from the host. |
| D009800 | Response Type mismatch (Day Close) | Check the transaction from the host. |
| D009900 | Response Type mismatch (Config.) | Check the transaction from the host. |
| D009A00 | Response Type mismatch (Withdrawal/Balance/Transfer) | Check the transaction from the host. |
| D009B00 | STX error | Check the transaction from the host. |
| D009C00 | ETX error | Check the transaction from the host. |
| D009D00 | FS out (after response code) | Check the transaction from the host. |
| D009E00 | FS out (after retrieval reference number) | Check the transaction from the host. |
| D009F00 | FS out (after system trace audit number) | Check the transaction from the host. |
| D00A000 | FS out (after account balance) | Check the transaction from the host. |
| D00A100 | FS out (after available balance) | Check the transaction from the host. |
| D00A200 | FS out (after surcharge amount) | Check the transaction from the host. |
| D00A300 | FS out (after authorization response text) | Check the transaction from the host. |
| D00A400 | ETX wrong position | Check the transaction from the host. |
| D00A500 | FS out (after total cash dispense amount) | Check the transaction from the host. |
| D00A600 | FS out (after total non-cash dispense amount) | Check the transaction from the host. |
| D00A700 | FS out (after total surcharge amount) | Check the transaction from the host. |
| D00A800 | FS out (after config surcharge amount) | Check the transaction from the host. |
| D00A900 | ETX out (config) | Check the transaction from the host. |
| D00AC00 | Invalid data received from the host (MAC data mismatch) | Check the transaction from the host. |
| D00B000 | TERMINAL ID MISMATCHED | |
| D00B100 | TRANSACTION CODE MISMATCHED | . |
| D00B200 | SECOND FIELD ID CODE MISMATCHED | |
| D00B300 | FIRST DES KEY WRONG SIZE | |
| D00B400 | SURCHARGE AMOUNT WRONG SIZE | |
| D00B500 | Sequence Number MISMATCHED | |
| D00B600 | INVALID RESPONSE CODE ERROR | |
| D00B700 | Authorization Number Error | |
| D00B800 | BUSINESS DATE Error | |
| D00B900 | Transaction time Number Error | |
| D00BA00 | BUSINESS DATE Error | |
| D00BB00 | Balance amount Error | |
| D00BC00 | Actual Surcharge Error | |
| D00BD00 | Sequence Number MISMATCHED | |
| D00BF00 | BUSINESS DATE Error | |
| D00C000 | Settlement Error | |
| D00C100 | Host Mac result error | Check the key mode and MAC value. |
| D00C200 | ATM Mac result error | Check the key mode and MAC value. |
| D011100 | REVERSAL DECLINED | |
| D022200 | PIN CHANGE DECLINED | |
| D100000 | No connection | 1. Check phone number. 2. Check modem cable. 3. Contact phone company. |
| D110000 | Cannot receive ENQ from the host | 1. Check phone number. 2. Check modem cable. 3. Contact telephone company. |
| D120000 | Transmission error : Failed to receive requesting the modem to send the data. |
1. Check modem and modem cable connection. 2. Contact telephone company. |
| D130000 | Receiving NAK more than 3 times | 1. Check modem and modem cable connection. 2. Contact telephone company. |
| D140100 | Disconnected by Unknown Reason | 1. Check modem and modem cable connection. 2. Contact telephone company. |
| D140200 | Disconnected by rejected call from remote party | Try again later. |
| D140300 | Disconnected because the local phone was picked up | Try again later. |
| D140400 | Disconnected by Forwarded | 1. Check modem and modem cable connection. 2. Contact telephone company. |
| D140500 | Disconnected by Unreachable | 1. Check modem and modem cable connection. 2. Contact telephone company. |
| D140600 | Disconnected by Congestion | 1. Check modem and modem cable connection. 2. Contact telephone company. |
| D140700 | Disconnected by Incompatible | 1. Check modem and modem cable connection. 2. Contact telephone company. |
| D140800 | Disconnected by unknown reason | 1. Check modem and modem cable connection. 2. Contact telephone company. |
| D140900 | Disconnected by Bad Address | 1. Check modem and modem cable connection. 2. Contact telephone company. |
| D141000 | Disconnected by Unavailable | 1. Check modem and modem cable connection. 2. Contact telephone company. |
| D150000 | 1. Modem dial connection time-out (while dialing the modem) 2. No response from host for 60 seconds | 1. Check modem and modem cable connection. 2. Contact telephone company. |
| D160100 | Disconnected by Bad Address | 1. Check modem and modem cable connection. 2. Contact telephone company. |
| D160200 | Disconnected by Unavailable | 1. Check modem and modem cable connection. 2. Contact telephone company. |
| D160300 | Disconnected by Out of Order | 1. Check modem and modem cable connection. 2. Contact telephone company. |
| D170000 | No carrier (while sending/receiving data after dial connection) | Check host. |
| D170100 | No Carrier during ENQ data receive from host | Check host. |
| D170200 | No Carrier before sending data send to host | Check host. |
| D170300 | No Carrier during sending data send to host | Check host. |
| D170400 | No Carrier during ACK/NAK data send to host | Check host. |
| D170500 | No Carrier during ACK/NAK data receive from host | Check host. |
| D170600 | No Carrier during receiving data | Check host. |
| D170700 | NAK retry error. | |
| D170800 | Send retry error | |
| D170900 | Modem initialize fail | |
| D171000 | Modem Comport Failed | |
| D180000 | No Dial Tone(in Modem dial connection) | |
| D190000 | No Answer | |
| D200000 | Dial(Line) busy Try again later. | |
| D210000 | Time out(30sec.) for initializing modem before Modem Dial connecting | Check telephone line connection. Test Modem. |
| D220000 | not receiving EOT from HOST | |
| D230000 | No response from Host – Dialing time out to Host | Check telephone line connection. Test Modem. Check phone number. |
| D250000 | Cannot connect to the host | Check telephone line connection. |
| D251000 | Timeout while Sending | Check telephone line connection. |
| D251100 | Communication error while Sending | Check telephone line connection. |
| D251200 | Socket error while Sending | Check telephone line connection. |
| D251300 | Timeout while Receiving | Check telephone line connection. |
| D251400 | Communication error while Receiving | Check telephone line connection. |
| D251500 | Socket Error while Receiving | Check telephone line connection. |
| D320000 | No response from Host/Dialing time out to Host | Check telephone line connection. |
| D320100 | Outbound call is aborted | Check telephone line connection. |
| D320200 | Fail to dial out | Check telephone line connection. Test Modem. |
| D320300 | No Line Reply | |
| D320400 | Get Line ID Failed | |
| D320500 | Modem Comport Failed | |
| D320600 | Call Failed | |
| D320700 | No Answer | |
| D320800 | Modem Call Other Error | |
| D410000 | CRC Mismatch | Check telephone line connection. |
| D410100 | No CRC Received | Make sure that the host is using CRC. |
| DA0xxx0 | Host Denial Error Refer to E7. | Description for error code organization. |
| F000100 | Number of Bill is not inputted | Enter number of bill. (required) |
| F000200 | Parameter is not properly set (Surcharge Owner) | Enter surcharge owner. (required) |
| F000300 | Parameter is not properly set (Surcharge Amount) | Enter surcharge owner. (required) |
| F000400 | Parameter is not properly set (Adver. Text refreshing timer) | Enter Ad text refresh timer. |
| F000500 | Parameter is not properly set (Advertisement text) | Enter Ad text. |
| F000600 | Parameter is not properly set (Dispense limit) | Enter Dispense limit. |
| F000700 | Parameter is not properly set (Denomination) | Enter Denomination. (required) |
| F000800 | Parameter is not properly set (Fast Cash) | Enter Fast Cash amount. |
| F000900 | Master Key Index invalid | Check Master key index. |
| F000A00 | Master Key empty | Enter Master key. (required) |
| F000B00 | Host Phone Number is not inputted | Enter Host phone number. (required) |
| F000C00 | Error Retry Timer is not inputted | Enter Retry timer. |
| F000D00 | RMS Password is not inputted in RMS Enable | Enter RMS password. |
| F000E00 | RMS Phone Number is not inputted in RMS Enable | Enter RMS phone number. |
| F000F00 | Terminal Number is not inputted | Enter Terminal number. (required) |
| F001000 | Routing ID is not inputted | Enter Routing ID. (required) |
| F001000 | Master Key Serial Number is not inputted | Enter Master key serial number. |
| F001100 | Master Key Serial Number is not inputted | Enter Master key serial number. |
| F001200 | Non-Cash Type text is not inputted | Enter Non-cash type text. |
| F001300 | Parameter is not properly set | Check proper parameters in setting. |
| F001400 | NVRAM Failure | Try to clear NVRAM. |
| F001500 | ATM Serial No. Empty | Enter ATM serial number. (required) |
| F001600 | Default master password was not changed | |
| F001F00 | Machine serial number is not set | 1. Check serial number. 2. Set serial number. |
| F002F00 | Host type is not set | 1. Check host type. 2. Set host type. |
| F003F00 | Communication ID invalid (only triton) | Contact to technician support team. |
| F004F00 | EPP(Pin pad) key mode is invalid | 1. Check modem cable 2. Contact to technician support team |
| F005F00 | Denomination is invalid | 1. Check modem cable 2. Contact to technician support team |
| F006F00 | Failed Host Connection! | 1. Check Host Connection. 2. Contact to technician support team. |
| FFFFFFF | NVRAM is broken 2. Clear NVRAM | 1. Reset Master Password |
| POWERAB | UPS ABNORMAL | Check UPS |
| POWERAC | POWER OUT OR AC OFF | 1. Check AC power status and environment. 2. Check AC power status and environment. |
| POWERBA | BATTERY LOW | 1. Check AC power status and environment. 2. Check UPS. |
| SDN0100 | Service Panel (SPL) communication error | Check the cables and connections. |
Предложите, как улучшить StudyLib
(Для жалоб на нарушения авторских прав, используйте
другую форму
)
Ваш е-мэйл
Заполните, если хотите получить ответ
Оцените наш проект
1
2
3
4
5
- Manuals
- Brands
- Nautilus Hyosung Manuals
- Cash Counter
- MX7600I
- Operator’s manual
-
Contents
-
Table of Contents
-
Bookmarks
Quick Links
Operator Manual
MONiMAX7600I System
V01.00.00 (2017.05.16)
© Nautilus Hyosung, Inc. All Rights Reserved.
Related Manuals for Nautilus Hyosung MX7600I
Summary of Contents for Nautilus Hyosung MX7600I
-
Page 1
Operator Manual MONiMAX7600I System V01.00.00 (2017.05.16) © Nautilus Hyosung, Inc. All Rights Reserved. -
Page 2
Operator Manual — MX7600I System Version Date Description of Change Chapter V01.00.00 2017/05/16 New Publication © Nautilus Hyosung All Rights Reserved. The content of this specification is protected by copyright laws. 2017.05. 16. 1st Release © Nautilus Hyosung, Inc. All Rights Reserved. -
Page 3: Table Of Contents
Remove jam from the B2 Upper Transport Path of BM2 ························································· 4-14 Remove jam from B2 Reject Transport Section ···································································· 4-15 Remove jam from B3 Transport Section ·············································································· 4-16 Remove jam from Reject Section ······················································································ 4-17 © Nautilus Hyosung, Inc. All Rights Reserved.
-
Page 4
Cassette Cover Guide Setting for the Vertical Size of Each Denomination ·································· 5-27 Change Note Index ········································································································· 5-29 Chapter6. Receipt Printer………………….. 6-1 Receipt Paper …………………………. 6-1 How to load the receipt paper ……………………6-2 How to clear jamming in receipt printer ………………….6-4 Memo ……………………….Memo-1 © Nautilus Hyosung, Inc. All Rights Reserved. -
Page 5: Chapter1. Preface
This manual details how the customers replenish the notes and paper and how they remove the jam at the MX7600I. Audience ▶ Customers and staffs of Nautilus Hyosung who use and operate the MX7600I in each branches of bank. Support Information ▶…
-
Page 6: Terminologies
Camera Unit CASSETTE Cash & Check Cassette CCIM Cash & Check In Module Contactless Card Reader Cash Dispenser Unit Control Electronics Earphone Jack Voice Converter for Visually Disabled Persons (ADA) Europay, Mastercard, Visa © Nautilus Hyosung, Inc. All Rights Reserved.
-
Page 7
Recognition Module REJECT Reject Module RT/A6 Retract & A6 Cassette Switch Separator Control Module Sensor and Indications Unit Service Provider Slip Printer (Receipt Printer) Text Terminal Unit (OPL or SPL) Vacuum Fluorescent Display © Nautilus Hyosung, Inc. All Rights Reserved. -
Page 8: Safety Precautions (English)
▪ Do not touch the equipment when it is running. ▪ The equipment can get extremely hot and may cause a burn. ▪ Make sure to close the cover before running the equipment. © Nautilus Hyosung, Inc. All Rights Reserved.
-
Page 9
TYPE. DISPOSED OF USED BATTERIES ACCORDING TO THE INSTRUCTIONS 3. FOR PLUGGABLE EQUIPMENT, THE SOCKET-OUTLET SHALL BE INSTALLED NEAR THE EQUIPMENT AN SHALL BE EASILY ACCESSIBLE 4. THE EQUIPMENT IS TO BE SECURED TO THE BUILDING STRUCTURE BEFORE OPERATION © Nautilus Hyosung, Inc. All Rights Reserved. -
Page 10: Précautions Pour La Sécurité (French)
• Ne pas retirer le couvercle. Seul le technicien d’entretien est autorisé à ouvrir le couvercle. • Ne pas toucher. Vous pouvez avoir un choc électrique. • Assurez-vous d’éteindre l’appareil lors de l’entretien de l’équipement. © Nautilus Hyosung, Inc. All Rights Reserved.
-
Page 11
2. RISQUE D’EXPLOSION SI LA BATTERIE EST REMPLACEE PAR UN TYPE INCORRECT. DISPOSER POUR UTILISATION DES BATTRIES SELON LES INSTRUCTIONS 3. POUR LES APPAREILS RACCORDES, LA PRISE DOIT ETRE INSTALLEE PRES D’EQUIPEMENT POUR ÊTRE FACILEMENT ACCESSIBLE © Nautilus Hyosung, Inc. All Rights Reserved. -
Page 12: Related Document
▪ Installation Manual ▪ Service Manual ▪ VDM Manual (Diagnostic) ▪ Error Code Manual For the contact of maintenance staffs of Nautilus Hyosung, see the E-mail addresses and telephone numbers provided separately. © Nautilus Hyosung, Inc. All Rights Reserved.
-
Page 13: Chapter2. Introduction
Chapter2. Introduction Chapter2. Introduction About the MX7600I ► The MX7600I is a full service ATM. Consumers deposit the cash/check, make the withdrawal and receive the transaction records through openings in the fascia with MX7600I ATM. The MX7600I is a versatile, easily maintained delivery system that can be modified to keep pace with the bank’s changing needs.
-
Page 14: The Exterior Overview
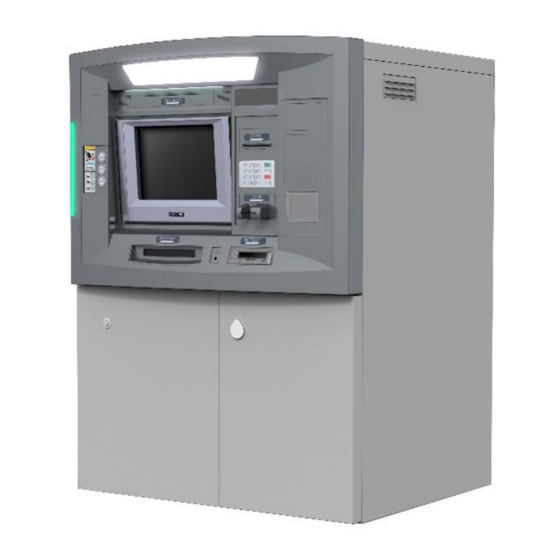
Chapter2. Introduction Operator Manual The Exterior Overview ► The following picture shows the front of MX7600I and key units. The fascia provides the interface between the customer and MX7600I. The customer selects transactions and requests information at the fascia. Statement Printer Slot (Optional)
-
Page 15: Basic Features
▶ Important features of the MX7600I is highlighted in the following list: <Note!> 1. Your MX7600I may not contain all the devices described in this section. Some devices are optional and some devices cannot be used in combination with other devices (mutually exclusive combinations).
-
Page 16
1 Check : — Seconds Deposit 5 Notes & 2 Checks Time : Less than 30 Seconds 25 Notes & 25 Checks : : Less than 30 Seconds Storage 1 Sheet : — Seconds © Nautilus Hyosung, Inc. All Rights Reserved. -
Page 17
Dimension (H X W X D) About 1,591 X 1,048 X 950 (mm) Install Method Anchor Weight About 1220Kg Dimension Battery System Battery Alarm Battery Option & Heater 3 Heater Environment (Upper/Bottom Left/Bottom Right) © Nautilus Hyosung, Inc. All Rights Reserved. -
Page 18: Devices Of Mx7600I
USB HUB used to communicate with several devices such as a cash dispenser, card reader, receipt printer and EPP. Basic Specification & Sample Picture © Nautilus Hyosung, Inc. All Rights Reserved.
-
Page 19: Customer Display & Keypad
The customer selects from the choices shown on the consumer display and presses the corresponding function key. A touch screen display eliminates the need for function keypads. Basic Specification & Sample Picture Encryption Teller Display Customer Display PIN Pad with Touch Screen © Nautilus Hyosung, Inc. All Rights Reserved.
-
Page 20: Cash Dispenser Unit
ATM, where the customer can receive it. If the media is too mutilated or wrinkled to dispense, or if a multiple pick occurs, the dispenser sends the notes to the reject/retract cassette. Basic Specification & Sample Picture © Nautilus Hyosung, Inc. All Rights Reserved.
-
Page 21: Card Reader
ATM card in the card entry slot and then removes the card to begin the transaction. The dip card reader can read magnetic stripe cards and memory chip cards. The dip card reader cannot retract, capture, or retain cards. Basic Specification & Sample Picture © Nautilus Hyosung, Inc. All Rights Reserved.
-
Page 22: Receipt Printer
ATM number and location, and other desired information. After the consumer uses the ATM, a printed record of the transaction information is presented through the appropriate printer slot. Basic Specification & Sample Picture 2-10 © Nautilus Hyosung, Inc. All Rights Reserved.
-
Page 23: Cash & Check Inert Module (Ccim)
It enables cash deposit and automated check handling. Banknotes and checks deposited by the customer are stored in cassettes. The type of document for each cassette is defined on the basis of the bank’s application. © Nautilus Hyosung, Inc. All Rights Reserved. 2-11…
-
Page 24: Power Supply
► The power supply unit converts AC power to DC power and provides that voltage to various modules within the system. The power supply unit allows the user to turn on/off the system, enter power-failure mode, and perform other sequences. 2-12 © Nautilus Hyosung, Inc. All Rights Reserved.
-
Page 25: Heater
On the contrary, if the detected temperature is higher than the setting temperature, heater drive will be blocked. There are no operator maintenance requirements for the heater. © Nautilus Hyosung, Inc. All Rights Reserved. 2-13…
-
Page 26: Safety & Security
Safety & Security Item Specification Sample Picture Safety UL 291 Level-1 Body Cover Steel Locking device Cencon Lock Dual Combo Lock, Single Combo Lock Option Key Lock Common Key (Side & Rear Door) 2-14 © Nautilus Hyosung, Inc. All Rights Reserved.
-
Page 27
Chapter2. Introduction Alarm Dual Seismic + Heat Sensor Security Terminal Block (External I/F) Camera CCD Camera Camera I/F Video Port /w Pig Tail for internal Video Power /w Pig Tail for Cam © Nautilus Hyosung, Inc. All Rights Reserved. 2-15… -
Page 28: Chapter3. For The Beginning Operator
1. Open the lower front door with key. 2. Insert the key into the lock on the upper front hatch and turn the key clockwise Then open the upper front hatch pulling it upward. © Nautilus Hyosung, Inc. All Rights Reserved.
-
Page 29: Closing Upper & Lower Front Body
3. Do not hold the following position when closing the front hatch. Check the label on the front. CAUTION Be careful not to hurt your head when opening and closing the front hatch or during maintenance. Be careful not to knock your head against a tilt!! © Nautilus Hyosung, Inc. All Rights Reserved.
-
Page 30: Opening The Security Enclosure
1. Unlock the security door, refer to the relevant instructions detailed under “Opening/ Closing The Security Enclosure (Security Door)” for the configuration of MX7800I 2. Turn and pull the Handle. Cencon Lock Handle (Dual Combo/Single Combo lock option) © Nautilus Hyosung, Inc. All Rights Reserved.
-
Page 31: Switching Power On/Off
<System Off> procedure starts and only [AC IN] LED is turned on. ▪ In case power failure occurs during normal system operation, the system will enter <Power Failure Mode> and only [DC OUT] will be turned off. © Nautilus Hyosung, Inc. All Rights Reserved.
-
Page 32: Locking Devices
CW = Clockwise; CCW = Counter Clockwise 2. Enter the factory combination of 50-25-50 by sequentially pressing those six buttons. The LCD will display the entered number. © Nautilus Hyosung, Inc. All Rights Reserved.
-
Page 33
3. When the combination has been correctly entered, the LCD will read “OPr” meaning “Open right.” 4. Turn the dial right (CW) until it stops. The lock’s bolt is now retracted and the lock is open. 5. Turn the handle and open the security door. © Nautilus Hyosung, Inc. All Rights Reserved. -
Page 34
The best thing to do in analyzing the lock level is to write down the entire string and then pick out the portions of it that are significant to you, or if you are experiencing a problem with the lock, report the entire string to the Tech Support group. © Nautilus Hyosung, Inc. All Rights Reserved. -
Page 35
Turn the Dial to the left (CCW) to extend the bolt. 7. Power Lock Turn the dial to the left (CCW) until (the Change Key symbol along with Enter Combination) is displayed. © Nautilus Hyosung, Inc. All Rights Reserved. -
Page 36
15. OPr Retract Bolt Turn the Dial to the right (CW) to retract the bolt. 16. Close Door 17. Extend Bolt Turn the Dial to the left (CCW) to extend the bolt. © Nautilus Hyosung, Inc. All Rights Reserved. -
Page 37: Electronic Lock
▪ Use one (1) 9-Volt alkaline battery in the Small Battery Box or six (6) “C” cell alkaline batteries in the Large Battery Box. It is recommended that batteries be replaced at least once a year. If the battery is depleted and will not allow the lock to open: 3-10 © Nautilus Hyosung, Inc. All Rights Reserved.
-
Page 38
3. Remove the six old “C” cell alkaline batteries. 4. Insert six new “C” cell alkaline batteries 5. Replace the cover and test the lock several times before closing the door. © Nautilus Hyosung, Inc. All Rights Reserved. 3-11… -
Page 39: Environment
2. Use the following tips to minimize device exposure. Close (but do not lock) the upper chassis when using the operator’s interface to perform routine maintenance sessions (use the keyboard outside of the terminal). 3-12 © Nautilus Hyosung, Inc. All Rights Reserved.
-
Page 40: Chapter4. Cash & Check Insert Module (Ccim)
In case of the transaction cancellation, cash and check in reject section is ejected to the customer in a lump by the command of higher rank. BC (Bill Checker) This section verifies the image data on both sides of cash for identification © Nautilus Hyosung, Inc. All Rights Reserved.
-
Page 41
Cash and check received are stored in the cassette by sheets. The cassettes can be mounted or demounted from the unit with the key. And also cassette’s door can be opened using the key. © Nautilus Hyosung, Inc. All Rights Reserved. -
Page 42: Basic Specification Of Cash & Check In Module
USB1.1 (Full-Speed) USB2.0 HUB Interface Control TM Use External Storage, Program Loading on flash Memory by SP Remote Download It is the reference value when the thickness of bill used is 0.1mm. © Nautilus Hyosung, Inc. All Rights Reserved.
-
Page 43: Specification Of External Appearance
Length: 162 ± 2 (mm) (Cash&Check) Height: 310 ± 2 (mm) Weight 4.5Kg(except Cash&Check weight) RT/A6 Dimensions Width: 274 ± 2 (mm) Cassette Length: 169 ± 2 (mm) Height: 62 ± 2 (mm) Weight 1.1Kg(except Cash&Check weight) © Nautilus Hyosung, Inc. All Rights Reserved.
-
Page 44: Cash & Check Conditions
Operator Manual Chapter4. Cash & Check Insert Module (CCIM) Cash & Check Conditions ▶ Please refer to “Bill Conditions” in the section of the Cash Dispenser. © Nautilus Hyosung, Inc. All Rights Reserved.
-
Page 45: How To Remove Jam From Each Section
BOTTOM Module includes CASH CASSETTE Module and CHECK CASSETTE Module. Zone Abbreviation Description ① BUNDLE Bulk Note Separation Module ② Separator Control Module ③ Bill Checker ④ Alignment Module ⑤ RECOG Recognition Module © Nautilus Hyosung, Inc. All Rights Reserved.
-
Page 46
⑪ B4 GUIDE B4 Guide of Body Module1 ⑫ ESCROW Escrow Module ⑬ RT/A6 Retract & A6 Cassette ⑭ CASSETTE1 Cash Cassette ⑮ CASSETTE2 Check Cassette ► Open Status of Unit Transport Path © Nautilus Hyosung, Inc. All Rights Reserved. -
Page 47: Remove Jam From Bundle Module
1. After opening the Bundle Module and SCM, remove a jammed note. If necessary, turn the green Knob 1 to move the note to easily remove the jammed note. Removing jam from Bundle Module. Removing jam from Bundle Module. © Nautilus Hyosung, Inc. All Rights Reserved.
-
Page 48: Remove Jam From The First Transport Path
3. After checking if the jammed bill is removed, completely close the First Transport Path pushing the lock lever in the yellow arrow direction as shown in the picture. Opening SCM to remove jam. Closing SCM after removing jam. © Nautilus Hyosung, Inc. All Rights Reserved.
-
Page 49: Remove Jam From Bc
3. After checking if the jammed Note is removed, completely close the BC section by pushing the lock lever in the yellow arrow direction as shown in the picture. Opening BC (Zone ③) to remove jam. Closing BC after removing jam. 4-10 © Nautilus Hyosung, Inc. All Rights Reserved.
-
Page 50: Remove Jam From Alg
Note as shown in the picture below. 3. After checking if the jammed Note is removed, completely close the ALG section. Opening Zone ④ to remove jam. Turning the green knob to remove jam. © Nautilus Hyosung, Inc. All Rights Reserved. 4-11…
-
Page 51: Remove Jam From Recog Transport Section
Note as shown in the picture below. 3. After checking if the jammed Note is removed, completely close the Recog Transport Section. Pushing the lock lever to open Zone ⑤. Opening or Closing Zone ⑤. 4-12 © Nautilus Hyosung, Inc. All Rights Reserved.
-
Page 52: Remove Jam From The B2 Upper Transport Path Of Bm2
3. After checking if the jammed Note is removed, completely close Zone ⑥ as shown in the picture. Pushing the lock lever to open Zone ⑥. Opening or Closing Zone ⑥. © Nautilus Hyosung, Inc. All Rights Reserved. 4-13…
-
Page 53
3. After checking if the jammed Note is removed, completely close Zone ⑥ as shown in the picture. Pushing the lock lever to open Zone ⑥. Opening or Closing Zone ⑥. 4-14 © Nautilus Hyosung, Inc. All Rights Reserved. -
Page 54: Remove Jam From B2 Reject Transport Section
Section as shown in the picture. 4. If it is necessary to remove the inside jam of ALG, open the ALG guide as shown in the picture. Pushing the lock lever. Opening Zone ⑦-1, ⑦-2. © Nautilus Hyosung, Inc. All Rights Reserved. 4-15…
-
Page 55: Remove Jam From B3 Transport Section
Note as shown in the picture below. 3. After checking if the jammed Note is removed, completely close Zone ⑧ as shown in the picture. Opening Zone ⑧ Closing Zone ⑧ 4-16 © Nautilus Hyosung, Inc. All Rights Reserved.
-
Page 56: Remove Jam From Reject Section
Note as shown in the picture below. 3. After checking if the jammed Note is removed, completely close the door. Removing jam from Reject Section. © Nautilus Hyosung, Inc. All Rights Reserved. 4-17…
-
Page 57: Remove Jam From B3 Escrow Transport Section
Note as shown in the picture below. 3. After checking if the jammed Note is removed, push the green button and completely close Zone ⑩ as shown in the picture. Opening Zone ⑩ Closing Zone ⑩ 4-18 © Nautilus Hyosung, Inc. All Rights Reserved.
-
Page 58: Remove Jam From B4 Transport Section
3. After checking if the jammed Note is removed, push the green button and completely close Zone ⑪ as shown in the picture. Opening Zone ⑪ Closing Zone ⑪ © Nautilus Hyosung, Inc. All Rights Reserved. 4-19…
-
Page 59: Remove Jam From Escrow
5. And then come out one note from the escrow module. And remove the note as shown in lower figure. If necessary, repeat it to end. Finally turn the Lock Lever8 to “CLOSED” position. Removing jam from Escrow Removing note from Escrow 4-20 © Nautilus Hyosung, Inc. All Rights Reserved.
-
Page 60: Remove Jam From Rt/A6 Cassette
4. After removing jam, close the door and turn the key to the left. And then it is locked. 5. To mount RT/A6 Cassette, turn the key to the left and remove it. Then mount the RT/A6 Cassette. (Auto-locking mounting) Moving BM3 Separating Retract BOX Removing jam from Retract © Nautilus Hyosung, Inc. All Rights Reserved. 4-21…
-
Page 61
Chapter4. Cash & Check Insert Module (CCIM) Operator Manual Opening or closing the door of Retract BOX Removing jam from Retract Section 4-22 © Nautilus Hyosung, Inc. All Rights Reserved. -
Page 62: Remove Jam From Cassette
3. After removing jam, close the door and turn the key to the left. And then it is locked. 4. To mount the Cassette, turn the key to the left and remove it. Then it is mounted automatically. Front View of Cassette Section. Separating the Cassette. © Nautilus Hyosung, Inc. All Rights Reserved. 4-23…
-
Page 63
Removing jam from cassette section. Turning the key to the right to open the door and turning the key to the left to close the door. Pressing the green lever to drop down the Push Plate. 4-24 © Nautilus Hyosung, Inc. All Rights Reserved. -
Page 64: How To Change Prt Maintenance Module
※ After replacing Ink Cartridge, you have to reset «PRT Cartridge Count». And you may need to replace Ink Head Cleaner Felt if necessary Installing Ink Cartridge © Nautilus Hyosung, Inc. All Rights Reserved. 4-25…
-
Page 65: How To Reset Prt Cartridge Count
3. Press the green button on PRT capping module installed BM3 for 3 seconds as shows the picture (Pressing the green button). 4. Push down DIP Switch 1 DIP Switch 1 Pressing the green button 4-26 © Nautilus Hyosung, Inc. All Rights Reserved.
-
Page 66
4.5 million, it will be displayed in red. And you have to replace the Ink Cartridge. < Note! > Ink Count Clear is Available since V01.00.54 of VDM and V02.00.35 of firmware. © Nautilus Hyosung, Inc. All Rights Reserved. 4-27… -
Page 67: How To Replace Ink Head Cleaner Felt
3. After replacing the new one by removing the tape, assemble the felt unit in the reverse process Dissembling the Felt Unit Replacing Ink Head Cleaner Felt 4-28 © Nautilus Hyosung, Inc. All Rights Reserved.
-
Page 68: Chapter5. Cash Dispenser
2. Bill has sufficient life or sizing to be handled easily 3. Bill which can be manually held straightly when one end is held by a hand and the bill is slightly curved vertically. © Nautilus Hyosung, Inc. All Rights Reserved.
-
Page 69: Unacceptable Condition
Operator Manual Unacceptable condition ▶ 1. Bill with serious wrinkles, torn or broken section wherein paper fiber is broken and separation begins. ▪ Wrinkle Wrinkle ▪ Torn Torn ▪ Broken section Broken Section © Nautilus Hyosung, Inc. All Rights Reserved.
-
Page 70
4. Bill ragged and cannot be held straightly when one end is supported by a hand 20mm (0.79inch) 35mm (1.38inch) When the bill is held by 20mm (0.79inch) and the straightness of the bill is 35mm (1.38inch) or less, it cannot be used © Nautilus Hyosung, Inc. All Rights Reserved. -
Page 71
Chapter5. Cash Dispenser Operator Manual 5. Bill with cellophane tape, scotch tape, etc Tape 6. Bill with folds Fold 7. Gradually curved bill (bills tied by hand seal, etc) Band seal © Nautilus Hyosung, Inc. All Rights Reserved. -
Page 72
Operator Manual Chapter5. Cash Dispenser 8. Bill with folded lines Case 1 Case 2 Case 3 <Note!> Bill distortion should not exceed 10 mm (0.39inch). © Nautilus Hyosung, Inc. All Rights Reserved. -
Page 73: How To Replenish The Cash Cassette
2. Place the cash cassette on a flat level platform and turn the green lever clockwise to unlock a cassette cover. Then lift up the cassette cover. <Note!> 1) Completely open the cassette cover as picture below when replenishing a cash cassette. © Nautilus Hyosung, Inc. All Rights Reserved.
-
Page 74
3. Pull black push-plate back completely until it is locked against the cash plate latch. 4. Pull the Push-Plate after pressing the Green Color Button ( 5. Set the bills and push the Push-Plate to the location where the bills are set. © Nautilus Hyosung, Inc. All Rights Reserved. -
Page 75
4) Place the bills correctly. 6. Turn the green lever clockwise and completely close the cassette cover. <Note!> 1) If you have the key type cassette, close the cassette cover using the key like the picture below. © Nautilus Hyosung, Inc. All Rights Reserved. -
Page 76
7. Holding a cassette handle with one hand and supporting the cassette from the bottom with the other hand, place the cassette carefully on the set guide of the CDU and push it completely until it is locked in place. © Nautilus Hyosung, Inc. All Rights Reserved. -
Page 77: How To Empty The Reject/Retract Box
1. Push the lever (A) and holding a Reject/Retract Box handle (B) with the other hand pull out slightly, and support the Reject/Retract Box from bottom with the hand pushed the lever (A), and pull out to the end of the cassette. 5-10 © Nautilus Hyosung, Inc. All Rights Reserved.
-
Page 78
3. Remove both rejected and retracted bills from the box. Push the edge of transparent component when remove retracted bills. PRE CAUTION: Don’t recycle rejected bills any more. Doing so will cause not only the same reject © Nautilus Hyosung, Inc. All Rights Reserved. 5-11… -
Page 79
4. Use the reverse order of 1)~3) to put Reject/Retract Box together into cash dispenser again. The Reject/Retract Box must be fully inserted. Otherwise, it will happen problems and the error code will display at monitor promptly. 5-12 © Nautilus Hyosung, Inc. All Rights Reserved. -
Page 80: How To Clear Jamming In Cash Dispenser
Any branch personnel should not attempt to remove any jams without first powering down the ATM. 2. Undock the CDU and slide out completely. Then perform the following steps for each case to clear the obstruction. © Nautilus Hyosung, Inc. All Rights Reserved. 5-13…
-
Page 81: Remove Jam From The Upper Horizontal Transport Path
1. Pull the lever with both hands while pressing it inward and then remove the bill. 2. Pull the lever with both hands while pressing it inward (see the picture of 1)) and lift up E part as the below picture. Then remove the jammed bill. 5-14 © Nautilus Hyosung, Inc. All Rights Reserved.
-
Page 82
3. Put down the E part and press the D part in the direction of arrow until it fixes. CAUTION: DO NOT put down the E part after first closing the D part. © Nautilus Hyosung, Inc. All Rights Reserved. 5-15… -
Page 83: Remove Jam From The Vertical Transport Path
1. Pull the green lever of the bottom with lifting it up and open the part. Then remove the bill. 2. Press the lever with hand as the below picture until the F part fixes. 5-16 © Nautilus Hyosung, Inc. All Rights Reserved.
-
Page 84: Remove Jam From The Carriage
1. Rotate the carriage by turning the knob (G) and remove the jammed bill. 2. After removing the jammed bill, turn the knob ( ) and return the carriage to the original position. © Nautilus Hyosung, Inc. All Rights Reserved. 5-17…
-
Page 85: Remove Jam From The Transport Path Of The Main Body
2. Lift up the carriage with hand and move it to the throat. 3. Turn the knob (G) and move the jammed bill to the location to clear it easily. Then remove the jammed bill. 5-18 © Nautilus Hyosung, Inc. All Rights Reserved.
-
Page 86: Remove Jam From The Transport Path Of Rj/Rt Box
Remove jam from the transport path of RJ/RT box ▶ Remove jam from the transport path of RJ/RT box 1. Demount the Reject/Retract Box. (Refer to “How to empty the Reject/Retract Box.”) 2. Remove the jammed bills. © Nautilus Hyosung, Inc. All Rights Reserved. 5-19…
-
Page 87: Remove Jam From The Separation Part
Remove jam from the separation part ▶ Remove jam from the separation part 1. Demount the cassette. (Refer to “How to replenish the Cash Cassette.”) 2. Remove the jammed bill as shown in below picture 5-20 © Nautilus Hyosung, Inc. All Rights Reserved.
-
Page 88: Remove Jam From The Transport Path Of Reject
2. If turning the Knob (H) counterclockwise, the jammed bill will move in the direction of the Transport Path. 3. If turning the Knob (H) clockwise, the jammed bill will move in the direction of the RJ/RT Box. © Nautilus Hyosung, Inc. All Rights Reserved. 5-21…
-
Page 89: How To Reset Main Board
Chapter5. Cash Dispenser Operator Manual How to Reset Main Board ▶ How to Reset Main Board 1. Press the hole in the red circle with a stick and reset. 5-22 © Nautilus Hyosung, Inc. All Rights Reserved.
-
Page 90: How To Set The Cassette For Each Denomination
Push Plate and take it out with the other hand. Also take out the Push Plate on the other side in the same way. 3. Completely take out the Push Plate and gently place it inside the box. © Nautilus Hyosung, Inc. All Rights Reserved. 5-23…
-
Page 91
5. After taking out the Hook Part, push the Guide in the direction of yellow arrow and take it out. 6. Remove current 6 LOWER NOTE SPACER as shown in below. Press HOOK in the green arrow and pull up the Spacer. 5-24 © Nautilus Hyosung, Inc. All Rights Reserved. -
Page 92
Recommended spacer for note size 8. For the desired denomination size, mount the Guide matching it with the white line. Press it until clicking sounds. (Mount the remaining guide in the same way.) © Nautilus Hyosung, Inc. All Rights Reserved. 5-25… -
Page 93
Operator Manual 9. Vertically insert two kinds of Shaft and turn the hand holding the Push Plate. 10. Then chck whether A Shaft matches the white arrow. (The other side is same.) 5-26 © Nautilus Hyosung, Inc. All Rights Reserved. -
Page 94: Cassette Cover Guide Setting For The Vertical Size Of Each Denomination
2. Also unfasten the Hook on the other side in the arrow direction and completely take out the Guide pulling it in the C direction. 3. Remove 6 Upper note SPACER. Then lift up HOOK and pull out Spacer from guide © Nautilus Hyosung, Inc. All Rights Reserved. 5-27…
-
Page 95
However, be sure to push it after matching the height of the other side of the Guide. 6. After also matching the other side of the Guide with the height of the desired bill size, push it with both hands until the Hook is caught. 5-28 © Nautilus Hyosung, Inc. All Rights Reserved. -
Page 96: Change Note Index
1. After change, Change the denomination label 2. After adjust cassette have to change assigned denomination value in Supervisor mode. <Note!> To assign new denomination in supervisor mode, please contact software develops part or Technical Support Center. © Nautilus Hyosung, Inc. All Rights Reserved. 5-29…
-
Page 97: Chapter6. Receipt Printer
8. Make sure the paper is rolled evenly. 9. Miscellaneous: If the paper comes in contact with carbon copy paper or if the paper surface is scratched with a metallic object, de-coloring may occur. © Nautilus Hyosung, Inc. All Rights Reserved.
-
Page 98: How To Load The Receipt Paper
2. Retract printer assembly from the rail assembly. This can be accomplished by pressing the green button and then pull out the printer towards you. 3. Insert the paper axis into the center of receipt roll and mount it onto the charger. © Nautilus Hyosung, Inc. All Rights Reserved.
-
Page 99
<Note!> Refer to diagram stickers placed on either side of the center section of the thermal printer. © Nautilus Hyosung, Inc. All Rights Reserved. -
Page 100: How To Clear Jamming In Receipt Printer
Thermal Print Head (TPH) is closed. When finished loading paper, close the Front Panel and remove the key. <Note!> After all paper jams have been cleared, reinstall the paper and test the printer using Diagnostics. © Nautilus Hyosung, Inc. All Rights Reserved.
-
Page 101: Memo
Operator Manual Memo Memo © Nautilus Hyosung, Inc. All Rights Reserved. Memo-1…
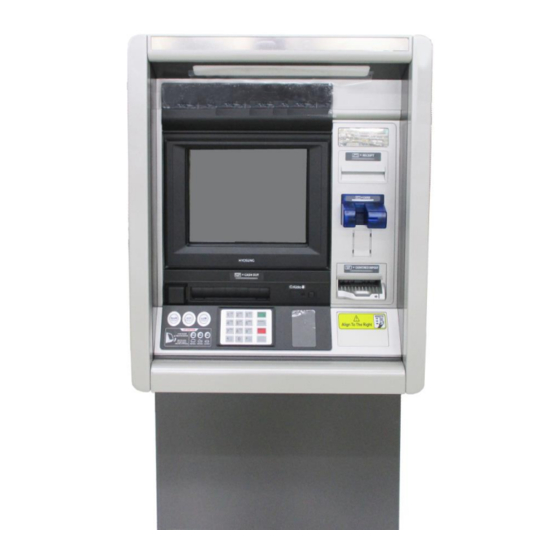
- Manuals
- Brands
- Nautilus Hyosung Manuals
- Cash Counter
- MONiMAX7600DA
- Operator’s manual
-
Contents
-
Table of Contents
-
Bookmarks
Quick Links
Operator Manual
MONiMAX7600DA System
V01.00.00 (2017.10.23)
© Nautilus Hyosung, Inc. All Rights Reserved.
Related Manuals for Nautilus Hyosung MONiMAX7600DA
Summary of Contents for Nautilus Hyosung MONiMAX7600DA
-
Page 1
Operator Manual MONiMAX7600DA System V01.00.00 (2017.10.23) © Nautilus Hyosung, Inc. All Rights Reserved. -
Page 2
Operator Manual — MX7600DA System Version Date Description of Change Chapter V01.00.00 201710/23 New Publication © Nautilus Hyosung All Rights Reserved. The content of this specification is protected by copyright laws. 2017.10. 23. 1st Release © Nautilus Hyosung, Inc. All Rights Reserved. -
Page 3: Table Of Contents
Remove jam from B2 Reject Transport Section ···································································· 4-15 Remove jam from B3 Transport Section ·············································································· 4-16 Remove jam from Reject Section ······················································································ 4-17 Remove jam from B3 Escrow Transport Section ··································································· 4-18 Remove jam from B4 Transport Section ·············································································· 4-19 © Nautilus Hyosung, Inc. All Rights Reserved.
-
Page 4
Chapter6. Receipt Printer………………….. 6-1 Overview …………………………. 6-1 Basic Specifications ……………………….6-1 Paper Handling Precautions ……………………. 6-2 How to load the receipt paper ……………………6-3 How to clear jamming in receipt printer ………………….6-5 Memo ……………………….Momo-1 © Nautilus Hyosung, Inc. All Rights Reserved. -
Page 5: Chapter1. Preface
This manual details how the customers replenish the notes and paper and how they remove the jam at the MX7600DA. Audience ▶ Customers and staffs of Nautilus Hyosung who use and operate the MX7600DA in each branches of bank. Support Information ▶…
-
Page 6: Terminologies
Camera Unit CASSETTE Cash & Check Cassette CCIM Cash & Check In Module Contactless Card Reader Cash Dispenser Unit Control Electronics Earphone Jack Voice Converter for Visually Disabled Persons (ADA) Europay, Mastercard, Visa © Nautilus Hyosung, Inc. All Rights Reserved.
-
Page 7
Recognition Module REJECT Reject Module RT/A6 Retract & A6 Cassette Switch Separator Control Module Sensor and Indications Unit Service Provider Slip Printer (Receipt Printer) Text Terminal Unit (OPL or SPL) Vacuum Fluorescent Display © Nautilus Hyosung, Inc. All Rights Reserved. -
Page 8: Safety Precautions (English)
▪ Do not touch the equipment when it is running. ▪ The equipment can get extremely hot and may cause a burn. ▪ Make sure to close the cover before running the equipment. © Nautilus Hyosung, Inc. All Rights Reserved.
-
Page 9
TYPE. DISPOSED OF USED BATTERIES ACCORDING TO THE INSTRUCTIONS 3. FOR PLUGGABLE EQUIPMENT, THE SOCKET-OUTLET SHALL BE INSTALLED NEAR THE EQUIPMENT AN SHALL BE EASILY ACCESSIBLE 4. THE EQUIPMENT IS TO BE SECURED TO THE BUILDING STRUCTURE BEFORE OPERATION © Nautilus Hyosung, Inc. All Rights Reserved. -
Page 10: Précautions Pour La Sécurité (French)
• Ne pas retirer le couvercle. Seul le technicien d’entretien est autorisé à ouvrir le couvercle. • Ne pas toucher. Vous pouvez avoir un choc électrique. • Assurez-vous d’éteindre l’appareil lors de l’entretien de l’équipement. © Nautilus Hyosung, Inc. All Rights Reserved.
-
Page 11
2. RISQUE D’EXPLOSION SI LA BATTERIE EST REMPLACEE PAR UN TYPE INCORRECT. DISPOSER POUR UTILISATION DES BATTRIES SELON LES INSTRUCTIONS 3. POUR LES APPAREILS RACCORDES, LA PRISE DOIT ETRE INSTALLEE PRES D’EQUIPEMENT POUR ÊTRE FACILEMENT ACCESSIBLE © Nautilus Hyosung, Inc. All Rights Reserved. -
Page 12: Related Document
▪ Installation Manual ▪ Service Manual ▪ VDM Manual (Diagnostic) ▪ Error Code Manual For the contact of maintenance staffs of Nautilus Hyosung, see the E-mail addresses and telephone numbers provided separately. © Nautilus Hyosung, Inc. All Rights Reserved.
-
Page 13: Chapter2. Introduction
Allows tellers to calculate and close amount on hand faster than the existing manual calculation. A bank customer and a teller can easily interact on a touch screen, just like talking, through Nautilus Hyosung’s intuitive and easy UI. Allows easy and quick installation and maintenance. © Nautilus Hyosung, Inc. All Rights Reserved.
-
Page 14: Fascia Devices And Access Points
(all features might not be included in your system): Customer Receipt Display (with (Receipt touch Printer slot) screen) Cash Out Card Entry (Cash Slot Dispenser Slot) Cash/Check (CCIM Slot) Attention Button Earphone Jack (Encryption Pin-Pad) © Nautilus Hyosung, Inc. All Rights Reserved.
-
Page 15: Basic Features
Touch Screen Sutter type Automatic Shutter Denomination US $20,20,20,20 (ID 1,2,3,4) Cash Dispenser Maximum Dispense 50 Notes/1 transaction (CDU10) Number of cassettes 4 Cassettes Cassette Capacity 3,000 notes/1 cassette Cassette Key Non Locking Key © Nautilus Hyosung, Inc. All Rights Reserved.
-
Page 16
Checks Escrow 50 Mixed Notes and Checks /1 transaction Capacity Deposit 50 Mixed Notes and Reject Checks /1 transaction Processing Deposit 1 Note : — Seconds, Time Time 1 Check : — Seconds © Nautilus Hyosung, Inc. All Rights Reserved. -
Page 17
Sound Card On-Board Additional ADA Audio guidance Available(/w Earphone jack function cover/plug) Install Method Anchor Dimension Weight About 850Kg & Battery System Battery Alarm Battery Environment Option Heater 1 Heater 2nd Heater Option © Nautilus Hyosung, Inc. All Rights Reserved. -
Page 18: Devices Of Mx7600Da
USB HUB used to communicate with several devices such as a cash dispenser, card reader, receipt printer and EPP. Basic Specification & Sample Picture © Nautilus Hyosung, Inc. All Rights Reserved.
-
Page 19: Customer Display & Keypad
The customer selects from the choices shown on the consumer display and presses the corresponding function key. A touch screen display eliminates the need for function keypads. Basic Specification & Sample Picture Customer Display with Touch Screen Encryption PIN © Nautilus Hyosung, Inc. All Rights Reserved.
-
Page 20: Supervisor Operation (Spl, Teller Display)
Chapter2. Introduction Operator Manual Supervisor Operation (SPL, Teller Display) ► Basic Specification & Sample Picture © Nautilus Hyosung, Inc. All Rights Reserved.
-
Page 21: Cash Dispenser Unit
ATM, where the customer can receive it. If the media is too mutilated or wrinkled to dispense, or if a multiple pick occurs, the dispenser sends the notes to the reject/retract cassette. Basic Specification & Sample Picture © Nautilus Hyosung, Inc. All Rights Reserved.
-
Page 22: Card Reader
ATM card in the card entry slot and then removes the card to begin the transaction. The dip card reader can read magnetic stripe cards and memory chip cards. The dip card reader cannot retract, capture, or retain cards. Basic Specification & Sample Picture 2-10 © Nautilus Hyosung, Inc. All Rights Reserved.
-
Page 23: Receipt Printer
ATM number and location, and other desired information. After the consumer uses the ATM, a printed record of the transaction information is presented through the appropriate printer slot. Basic Specification & Sample Picture © Nautilus Hyosung, Inc. All Rights Reserved. 2-11…
-
Page 24: Cash & Check Inert Module (Ccim, Optional)
Banknotes and checks deposited by the customer are stored in cassettes. The type of document for each cassette is defined on the basis of the bank’s application. Basic Specification & Sample Picture 2-12 © Nautilus Hyosung, Inc. All Rights Reserved.
-
Page 25
Operator Manual Chapter2. Introduction © Nautilus Hyosung, Inc. All Rights Reserved. 2-13… -
Page 26: Power Supply
► The power supply unit converts AC power to DC power and provides that voltage to various modules within the system. The power supply unit allows the user to turn on/off the system, enter power-failure mode, and perform other sequences. 2-14 © Nautilus Hyosung, Inc. All Rights Reserved.
-
Page 27: Heater
On the contrary, if the detected temperature is higher than the setting temperature, heater drive will be blocked. There are no operator maintenance requirements for the heater. © Nautilus Hyosung, Inc. All Rights Reserved. 2-15…
-
Page 28: Chapter3. For The Beginning Operator
Opening and Closing the Exterior Door ► Open the rear door of upper section using key. ► To close the door, push in the door bracket (1). Then close the door and lock to secure it. © Nautilus Hyosung, Inc. All Rights Reserved.
-
Page 29: Accessing The Atm Servicing Screen When The Hood Is In The Open Position
Accessing the ATM Servicing Screen when the Hood is in the open Position ► To open, press the button (1) and pull the handle of (2) toward you. ► To close, swing the panel back in the original, closed position © Nautilus Hyosung, Inc. All Rights Reserved.
-
Page 30: Opening And Closing The Vault Door
Chapter3. For the beginning operator Opening and Closing the Vault Door ► To open the vault door, enter the combination on the lock (1). Then turn the vault door handle (2) to open. © Nautilus Hyosung, Inc. All Rights Reserved.
-
Page 31: Switching Power On/Off
1. The system turning-on process is as follows 2. Open the rear door. 3. Press the standby switch to “ON” side (1) (Main power switch should be “ON” (2)) 4. The system will be turn on automatically © Nautilus Hyosung, Inc. All Rights Reserved.
-
Page 32: Switching Power Off
<System Off> procedure starts and only [AC IN] LED is turned on. ▪ In case power failure occurs during normal system operation, the system will enter <Power Failure Mode> and only [DC OUT] will be turned off. © Nautilus Hyosung, Inc. All Rights Reserved.
-
Page 33: Locking Devices
CW = Clockwise; CCW = Counter Clockwise 2. Enter the factory combination of 50-25-50 by sequentially pressing those six buttons. The LCD will display the entered number. © Nautilus Hyosung, Inc. All Rights Reserved.
-
Page 34
3. When the combination has been correctly entered, the LCD will read “OPr” meaning “Open right.” 4. Turn the dial right (CW) until it stops. The lock’s bolt is now retracted and the lock is open. 5. Turn the handle and open the security door. © Nautilus Hyosung, Inc. All Rights Reserved. -
Page 35
The best thing to do in analyzing the lock level is to write down the entire string and then pick out the portions of it that are significant to you, or if you are experiencing a problem with the lock, report the entire string to the Tech Support group. © Nautilus Hyosung, Inc. All Rights Reserved. -
Page 36
Turn the Dial to the left (CCW) to extend the bolt. 7. Power Lock Turn the dial to the left (CCW) until (the Change Key symbol along with Enter Combination) is displayed. Press #8 EcF © Nautilus Hyosung, Inc. All Rights Reserved. -
Page 37
15. OPr Retract Bolt Turn the Dial to the right (CW) to retract the bolt. 16. Close Door 17. Extend Bolt Turn the Dial to the left (CCW) to extend the bolt. 3-10 © Nautilus Hyosung, Inc. All Rights Reserved. -
Page 38: Electronic Lock
▪ Use one (1) 9-Volt alkaline battery in the Small Battery Box or six (6) “C” cell alkaline batteries in the Large Battery Box. It is recommended that batteries be replaced at least once a year. If the battery is depleted and will not allow the lock to open: © Nautilus Hyosung, Inc. All Rights Reserved. 3-11…
-
Page 39
3. Remove the six old “C” cell alkaline batteries. 4. Insert six new “C” cell alkaline batteries 5. Replace the cover and test the lock several times before closing the door. 3-12 © Nautilus Hyosung, Inc. All Rights Reserved. -
Page 40: Chapter4. Cash & Check Insert Module (Ccim, Optional)
In case of the transaction cancellation, cash and check in reject section is ejected to the customer in a lump by the command of higher rank. BC (Bill Checker) This section verifies the image data on both sides of cash for identification © Nautilus Hyosung, Inc. All Rights Reserved.
-
Page 41
Cash and check received are stored in the cassette by sheets. The cassettes can be mounted or demounted from the unit with the key. And also cassette’s door can be opened using the key. © Nautilus Hyosung, Inc. All Rights Reserved. -
Page 42: Basic Specification Of Cash & Check In Module
USB1.1 (Full-Speed) USB2.0 HUB Interface Control TM Use External Storage, Program Loading on flash Memory by SP Remote Download It is the reference value when the thickness of bill used is 0.1mm. © Nautilus Hyosung, Inc. All Rights Reserved.
-
Page 43: Specification Of External Appearance
Length: 162 ± 2 (mm) (Cash&Check) Height: 310 ± 2 (mm) Weight 4.5Kg(except Cash&Check weight) RT/A6 Dimensions Width: 274 ± 2 (mm) Cassette Length: 169 ± 2 (mm) Height: 62 ± 2 (mm) Weight 1.1Kg(except Cash&Check weight) © Nautilus Hyosung, Inc. All Rights Reserved.
-
Page 44: Cash & Check Conditions
Operator Manual Chapter4. Cash & Check Insert Module (CCIM) Cash & Check Conditions ▶ Please refer to “Bill Conditions” in the section of the Cash Dispenser. © Nautilus Hyosung, Inc. All Rights Reserved.
-
Page 45: How To Remove Jam From Each Section
BOTTOM Module includes CASH CASSETTE Module and CHECK CASSETTE Module. Zone Abbreviation Description ① BUNDLE Bulk Note Separation Module ② Separator Control Module ③ Bill Checker ④ Alignment Module ⑤ RECOG Recognition Module © Nautilus Hyosung, Inc. All Rights Reserved.
-
Page 46
⑪ B4 GUIDE B4 Guide of Body Module1 ⑫ ESCROW Escrow Module ⑬ RT/A6 Retract & A6 Cassette ⑭ CASSETTE1 Cash Cassette ⑮ CASSETTE2 Check Cassette ► Open Status of Unit Transport Path © Nautilus Hyosung, Inc. All Rights Reserved. -
Page 47: Remove Jam From Bundle Module
1. After opening the Bundle Module and SCM, remove a jammed note. If necessary, turn the green Knob 1 to move the note to easily remove the jammed note. Removing jam from Bundle Module. Removing jam from Bundle Module. © Nautilus Hyosung, Inc. All Rights Reserved.
-
Page 48: Remove Jam From The First Transport Path
3. After checking if the jammed bill is removed, completely close the First Transport Path pushing the lock lever in the yellow arrow direction as shown in the picture. Opening SCM to remove jam. Closing SCM after removing jam. © Nautilus Hyosung, Inc. All Rights Reserved.
-
Page 49: Remove Jam From Bc
3. After checking if the jammed Note is removed, completely close the BC section by pushing the lock lever in the yellow arrow direction as shown in the picture. Opening BC (Zone ③) to remove jam. Closing BC after removing jam. 4-10 © Nautilus Hyosung, Inc. All Rights Reserved.
-
Page 50: Remove Jam From Alg
Note as shown in the picture below. 3. After checking if the jammed Note is removed, completely close the ALG section. Opening Zone ④ to remove jam. Turning the green knob to remove jam. © Nautilus Hyosung, Inc. All Rights Reserved. 4-11…
-
Page 51: Remove Jam From Recog Transport Section
Note as shown in the picture below. 3. After checking if the jammed Note is removed, completely close the Recog Transport Section. Pushing the lock lever to open Zone ⑤. Opening or Closing Zone ⑤. 4-12 © Nautilus Hyosung, Inc. All Rights Reserved.
-
Page 52: Remove Jam From The B2 Upper Transport Path Of Bm2
3. After checking if the jammed Note is removed, completely close Zone ⑥ as shown in the picture. Pushing the lock lever to open Zone ⑥. Opening or Closing Zone ⑥. © Nautilus Hyosung, Inc. All Rights Reserved. 4-13…
-
Page 53
3. After checking if the jammed Note is removed, completely close Zone ⑥ as shown in the picture. Pushing the lock lever to open Zone ⑥. Opening or Closing Zone ⑥. 4-14 © Nautilus Hyosung, Inc. All Rights Reserved. -
Page 54: Remove Jam From B2 Reject Transport Section
Section as shown in the picture. 4. If it is necessary to remove the inside jam of ALG, open the ALG guide as shown in the picture. Pushing the lock lever. Opening Zone ⑦-1, ⑦-2. © Nautilus Hyosung, Inc. All Rights Reserved. 4-15…
-
Page 55: Remove Jam From B3 Transport Section
Note as shown in the picture below. 3. After checking if the jammed Note is removed, completely close Zone ⑧ as shown in the picture. Opening Zone ⑧ Closing Zone ⑧ 4-16 © Nautilus Hyosung, Inc. All Rights Reserved.
-
Page 56: Remove Jam From Reject Section
Note as shown in the picture below. 3. After checking if the jammed Note is removed, completely close the door. Removing jam from Reject Section. © Nautilus Hyosung, Inc. All Rights Reserved. 4-17…
-
Page 57: Remove Jam From B3 Escrow Transport Section
Note as shown in the picture below. 3. After checking if the jammed Note is removed, push the green button and completely close Zone ⑩ as shown in the picture. Opening Zone ⑩ Closing Zone ⑩ 4-18 © Nautilus Hyosung, Inc. All Rights Reserved.
-
Page 58: Remove Jam From B4 Transport Section
3. After checking if the jammed Note is removed, push the green button and completely close Zone ⑪ as shown in the picture. Opening Zone ⑪ Closing Zone ⑪ © Nautilus Hyosung, Inc. All Rights Reserved. 4-19…
-
Page 59: Remove Jam From Escrow
5. And then come out one note from the escrow module. And remove the note as shown in lower figure. If necessary, repeat it to end. Finally turn the Lock Lever8 to “CLOSED” position. Removing jam from Escrow Removing note from Escrow 4-20 © Nautilus Hyosung, Inc. All Rights Reserved.
-
Page 60: Remove Jam From Rt/A6 Cassette
4. After removing jam, close the door and turn the key to the left. And then it is locked. 5. To mount RT/A6 Cassette, turn the key to the left and remove it. Then mount the RT/A6 Cassette. (Auto-locking mounting) Moving BM3 Separating Retract BOX Removing jam from Retract © Nautilus Hyosung, Inc. All Rights Reserved. 4-21…
-
Page 61
Chapter4. Cash & Check Insert Module (CCIM) Operator Manual Opening or closing the door of Retract BOX Removing jam from Retract Section 4-22 © Nautilus Hyosung, Inc. All Rights Reserved. -
Page 62: Remove Jam From Cassette
3. After removing jam, close the door and turn the key to the left. And then it is locked. 4. To mount the Cassette, turn the key to the left and remove it. Then it is mounted automatically. Front View of Cassette Section. Separating the Cassette. © Nautilus Hyosung, Inc. All Rights Reserved. 4-23…
-
Page 63
Removing jam from cassette section. Turning the key to the right to open the door and turning the key to the left to close the door. Pressing the green lever to drop down the Push Plate. 4-24 © Nautilus Hyosung, Inc. All Rights Reserved. -
Page 64: How To Change Prt Maintenance Module
※ After replacing Ink Cartridge, you have to reset «PRT Cartridge Count». And you may need to replace Ink Head Cleaner Felt if necessary Installing Ink Cartridge © Nautilus Hyosung, Inc. All Rights Reserved. 4-25…
-
Page 65: How To Reset Prt Cartridge Count
3. Press the green button on PRT capping module installed BM3 for 3 seconds as shows the picture (Pressing the green button). 4. Push down DIP Switch 1 DIP Switch 1 Pressing the green button 4-26 © Nautilus Hyosung, Inc. All Rights Reserved.
-
Page 66
4.5 million, it will be displayed in red. And you have to replace the Ink Cartridge. < Note! > Ink Count Clear is Available since V01.00.54 of VDM and V02.00.35 of firmware. © Nautilus Hyosung, Inc. All Rights Reserved. 4-27… -
Page 67: How To Replace Ink Head Cleaner Felt
3. After replacing the new one by removing the tape, assemble the felt unit in the reverse process Dissembling the Felt Unit Replacing Ink Head Cleaner Felt 4-28 © Nautilus Hyosung, Inc. All Rights Reserved.
-
Page 68: Chapter5. Cash Dispenser
2. Bill has sufficient life or sizing to be handled easily 3. Bill which can be manually held straightly when one end is held by a hand and the bill is slightly curved vertically. © Nautilus Hyosung, Inc. All Rights Reserved.
-
Page 69: Unacceptable Condition
Operator Manual Unacceptable condition ▶ 1. Bill with serious wrinkles, torn or broken section wherein paper fiber is broken and separation begins. ▪ Wrinkle Wrinkle ▪ Torn Torn ▪ Broken section Broken Section © Nautilus Hyosung, Inc. All Rights Reserved.
-
Page 70
4. Bill ragged and cannot be held straightly when one end is supported by a hand 20mm (0.79inch) 35mm (1.38inch) When the bill is held by 20mm (0.79inch) and the straightness of the bill is 35mm (1.38inch) or less, it cannot be used © Nautilus Hyosung, Inc. All Rights Reserved. -
Page 71
Chapter5. Cash Dispenser Operator Manual 5. Bill with cellophane tape, scotch tape, etc Tape 6. Bill with folds Fold 7. Gradually curved bill (bills tied by hand seal, etc) Band seal © Nautilus Hyosung, Inc. All Rights Reserved. -
Page 72
Operator Manual Chapter5. Cash Dispenser 8. Bill with folded lines Case 1 Case 2 Case 3 <Note!> Bill distortion should not exceed 10 mm (0.39inch). © Nautilus Hyosung, Inc. All Rights Reserved. -
Page 73: How To Replenish The Cash Cassette
2. Place the cash cassette on a flat level platform and turn the green lever clockwise to unlock a cassette cover. Then lift up the cassette cover. <Note!> 1) Completely open the cassette cover as picture below when replenishing a cash cassette. © Nautilus Hyosung, Inc. All Rights Reserved.
-
Page 74
3. Pull black push-plate back completely until it is locked against the cash plate latch. 4. Pull the Push-Plate after pressing the Green Color Button ( 5. Set the bills and push the Push-Plate to the location where the bills are set. © Nautilus Hyosung, Inc. All Rights Reserved. -
Page 75
4) Place the bills correctly. 6. Turn the green lever clockwise and completely close the cassette cover. <Note!> 1) If you have the key type cassette, close the cassette cover using the key like the picture below. © Nautilus Hyosung, Inc. All Rights Reserved. -
Page 76
7. Holding a cassette handle with one hand and supporting the cassette from the bottom with the other hand, place the cassette carefully on the set guide of the CDU and push it completely until it is locked in place. © Nautilus Hyosung, Inc. All Rights Reserved. -
Page 77: How To Empty The Reject/Retract Box
1. Push the lever (A) and holding a Reject/Retract Box handle (B) with the other hand pull out slightly, and support the Reject/Retract Box from bottom with the hand pushed the lever (A), and pull out to the end of the cassette. 5-10 © Nautilus Hyosung, Inc. All Rights Reserved.
-
Page 78
3. Remove both rejected and retracted bills from the box. Push the edge of transparent component when remove retracted bills. PRE CAUTION: Don’t recycle rejected bills any more. Doing so will cause not only the same reject © Nautilus Hyosung, Inc. All Rights Reserved. 5-11… -
Page 79
4. Use the reverse order of 1)~3) to put Reject/Retract Box together into cash dispenser again. The Reject/Retract Box must be fully inserted. Otherwise, it will happen problems and the error code will display at monitor promptly. 5-12 © Nautilus Hyosung, Inc. All Rights Reserved. -
Page 80: How To Clear Jamming In Cash Dispenser
Any branch personnel should not attempt to remove any jams without first powering down the ATM. 2. Undock the CDU and slide out completely. Then perform the following steps for each case to clear the obstruction. © Nautilus Hyosung, Inc. All Rights Reserved. 5-13…
-
Page 81: Remove Jam From The Upper Horizontal Transport Path
1. Pull the lever with both hands while pressing it inward and then remove the bill. 2. Pull the lever with both hands while pressing it inward (see the picture of 1)) and lift up E part as the below picture. Then remove the jammed bill. 5-14 © Nautilus Hyosung, Inc. All Rights Reserved.
-
Page 82
3. Put down the E part and press the D part in the direction of arrow until it fixes. CAUTION: DO NOT put down the E part after first closing the D part. © Nautilus Hyosung, Inc. All Rights Reserved. 5-15… -
Page 83: Remove Jam From The Vertical Transport Path
1. Pull the green lever of the bottom with lifting it up and open the part. Then remove the bill. 2. Press the lever with hand as the below picture until the F part fixes. 5-16 © Nautilus Hyosung, Inc. All Rights Reserved.
-
Page 84: Remove Jam From The Carriage
1. Rotate the carriage by turning the knob (G) and remove the jammed bill. 2. After removing the jammed bill, turn the knob ( ) and return the carriage to the original position. © Nautilus Hyosung, Inc. All Rights Reserved. 5-17…
-
Page 85: Remove Jam From The Transport Path Of The Main Body
2. Lift up the carriage with hand and move it to the throat. 3. Turn the knob (G) and move the jammed bill to the location to clear it easily. Then remove the jammed bill. 5-18 © Nautilus Hyosung, Inc. All Rights Reserved.
-
Page 86: Remove Jam From The Transport Path Of Rj/Rt Box
Remove jam from the transport path of RJ/RT box ▶ Remove jam from the transport path of RJ/RT box 1. Demount the Reject/Retract Box. (Refer to “How to empty the Reject/Retract Box.”) 2. Remove the jammed bills. © Nautilus Hyosung, Inc. All Rights Reserved. 5-19…
-
Page 87: Remove Jam From The Separation Part
Remove jam from the separation part ▶ Remove jam from the separation part 1. Demount the cassette. (Refer to “How to replenish the Cash Cassette.”) 2. Remove the jammed bill as shown in below picture 5-20 © Nautilus Hyosung, Inc. All Rights Reserved.
-
Page 88: Remove Jam From The Transport Path Of Reject
2. If turning the Knob (H) counterclockwise, the jammed bill will move in the direction of the Transport Path. 3. If turning the Knob (H) clockwise, the jammed bill will move in the direction of the RJ/RT Box. © Nautilus Hyosung, Inc. All Rights Reserved. 5-21…
-
Page 89: How To Reset Main Board
Chapter5. Cash Dispenser Operator Manual How to Reset Main Board ▶ How to Reset Main Board 1. Press the hole in the red circle with a stick and reset. 5-22 © Nautilus Hyosung, Inc. All Rights Reserved.
-
Page 90: How To Set The Cassette For Each Denomination
Push Plate and take it out with the other hand. Also take out the Push Plate on the other side in the same way. 3. Completely take out the Push Plate and gently place it inside the box. © Nautilus Hyosung, Inc. All Rights Reserved. 5-23…
-
Page 91
5. After taking out the Hook Part, push the Guide in the direction of yellow arrow and take it out. 6. Remove current 6 LOWER NOTE SPACER as shown in below. Press HOOK in the green arrow and pull up the Spacer. 5-24 © Nautilus Hyosung, Inc. All Rights Reserved. -
Page 92
Recommended spacer for note size 8. For the desired denomination size, mount the Guide matching it with the white line. Press it until clicking sounds. (Mount the remaining guide in the same way.) © Nautilus Hyosung, Inc. All Rights Reserved. 5-25… -
Page 93
Operator Manual 9. Vertically insert two kinds of Shaft and turn the hand holding the Push Plate. 10. Then chck whether A Shaft matches the white arrow. (The other side is same.) 5-26 © Nautilus Hyosung, Inc. All Rights Reserved. -
Page 94: Cassette Cover Guide Setting For The Vertical Size Of Each Denomination
2. Also unfasten the Hook on the other side in the arrow direction and completely take out the Guide pulling it in the C direction. 3. Remove 6 Upper note SPACER. Then lift up HOOK and pull out Spacer from guide © Nautilus Hyosung, Inc. All Rights Reserved. 5-27…
-
Page 95
However, be sure to push it after matching the height of the other side of the Guide. 6. After also matching the other side of the Guide with the height of the desired bill size, push it with both hands until the Hook is caught. 5-28 © Nautilus Hyosung, Inc. All Rights Reserved. -
Page 96: Change Note Index
1. After change, Change the denomination label 2. After adjust cassette have to change assigned denomination value in Supervisor mode. <Note!> To assign new denomination in supervisor mode, please contact software develops part or Technical Support Center. © Nautilus Hyosung, Inc. All Rights Reserved. 5-29…
-
Page 97: Chapter6. Receipt Printer
No. of Print Lines on 1print=167mm (6.57inch) ) Valid Printing Width Max. 158mm (6.22inch) Chinese, English/Numbers (Alphanumeric), Latin, Type of Printer Letter Japanese, Korean, Arabic, Russian, Greek, Hebrew, Coptic Paper Type Inside Printing Thermal © Nautilus Hyosung, Inc. All Rights Reserved.
-
Page 98: Paper Handling Precautions
8. Make sure the paper is rolled evenly. 9. Miscellaneous: If the paper comes in contact with carbon copy paper or if the paper surface is scratched with a metallic object, de-coloring may occur. © Nautilus Hyosung, Inc. All Rights Reserved.
-
Page 99: How To Load The Receipt Paper
2. Retract printer assembly from the rail assembly, this can be accomplished by pressing the button and then pulling out the printer towards you. 3. Insert the paper axis into the center of receipt roll and mount it onto the charger. © Nautilus Hyosung, Inc. All Rights Reserved.
-
Page 100
5. Push the receipt paper inside the supporting bracket, as shown in the picture. Then it will be set automatically if turning on the power <Note!> Refer to diagram stickers placed on either side of the center section of the thermal printer. © Nautilus Hyosung, Inc. All Rights Reserved. -
Page 101: How To Clear Jamming In Receipt Printer
(C) 4. Push the lever to lock it back in place. (D) 5. Reinsert the paper back into printer until it catches (E) and prints a test receipt. Run Diagnostics if necessary. © Nautilus Hyosung, Inc. All Rights Reserved.
-
Page 102: Memo
Operator Manual Memo Memo © Nautilus Hyosung, Inc. All Rights Reserved. Memo-1…
This manual is also suitable for:
Mx7600da
- Manuals
- Brands
- Nautilus Hyosung Manuals
- Cash Counter
- MONiMAX7600DA
- Operator’s manual
-
Contents
-
Table of Contents
-
Bookmarks
Quick Links
Operator Manual
MONiMAX7600DA System
V01.00.00 (2017.10.23)
© Nautilus Hyosung, Inc. All Rights Reserved.
Related Manuals for Nautilus Hyosung MONiMAX7600DA
Summary of Contents for Nautilus Hyosung MONiMAX7600DA
-
Page 1
Operator Manual MONiMAX7600DA System V01.00.00 (2017.10.23) © Nautilus Hyosung, Inc. All Rights Reserved. -
Page 2
Operator Manual — MX7600DA System Version Date Description of Change Chapter V01.00.00 201710/23 New Publication © Nautilus Hyosung All Rights Reserved. The content of this specification is protected by copyright laws. 2017.10. 23. 1st Release © Nautilus Hyosung, Inc. All Rights Reserved. -
Page 3: Table Of Contents
Remove jam from B2 Reject Transport Section ···································································· 4-15 Remove jam from B3 Transport Section ·············································································· 4-16 Remove jam from Reject Section ······················································································ 4-17 Remove jam from B3 Escrow Transport Section ··································································· 4-18 Remove jam from B4 Transport Section ·············································································· 4-19 © Nautilus Hyosung, Inc. All Rights Reserved.
-
Page 4
Chapter6. Receipt Printer………………….. 6-1 Overview …………………………. 6-1 Basic Specifications ……………………….6-1 Paper Handling Precautions ……………………. 6-2 How to load the receipt paper ……………………6-3 How to clear jamming in receipt printer ………………….6-5 Memo ……………………….Momo-1 © Nautilus Hyosung, Inc. All Rights Reserved. -
Page 5: Chapter1. Preface
This manual details how the customers replenish the notes and paper and how they remove the jam at the MX7600DA. Audience ▶ Customers and staffs of Nautilus Hyosung who use and operate the MX7600DA in each branches of bank. Support Information ▶…
-
Page 6: Terminologies
Camera Unit CASSETTE Cash & Check Cassette CCIM Cash & Check In Module Contactless Card Reader Cash Dispenser Unit Control Electronics Earphone Jack Voice Converter for Visually Disabled Persons (ADA) Europay, Mastercard, Visa © Nautilus Hyosung, Inc. All Rights Reserved.
-
Page 7
Recognition Module REJECT Reject Module RT/A6 Retract & A6 Cassette Switch Separator Control Module Sensor and Indications Unit Service Provider Slip Printer (Receipt Printer) Text Terminal Unit (OPL or SPL) Vacuum Fluorescent Display © Nautilus Hyosung, Inc. All Rights Reserved. -
Page 8: Safety Precautions (English)
▪ Do not touch the equipment when it is running. ▪ The equipment can get extremely hot and may cause a burn. ▪ Make sure to close the cover before running the equipment. © Nautilus Hyosung, Inc. All Rights Reserved.
-
Page 9
TYPE. DISPOSED OF USED BATTERIES ACCORDING TO THE INSTRUCTIONS 3. FOR PLUGGABLE EQUIPMENT, THE SOCKET-OUTLET SHALL BE INSTALLED NEAR THE EQUIPMENT AN SHALL BE EASILY ACCESSIBLE 4. THE EQUIPMENT IS TO BE SECURED TO THE BUILDING STRUCTURE BEFORE OPERATION © Nautilus Hyosung, Inc. All Rights Reserved. -
Page 10: Précautions Pour La Sécurité (French)
• Ne pas retirer le couvercle. Seul le technicien d’entretien est autorisé à ouvrir le couvercle. • Ne pas toucher. Vous pouvez avoir un choc électrique. • Assurez-vous d’éteindre l’appareil lors de l’entretien de l’équipement. © Nautilus Hyosung, Inc. All Rights Reserved.
-
Page 11
2. RISQUE D’EXPLOSION SI LA BATTERIE EST REMPLACEE PAR UN TYPE INCORRECT. DISPOSER POUR UTILISATION DES BATTRIES SELON LES INSTRUCTIONS 3. POUR LES APPAREILS RACCORDES, LA PRISE DOIT ETRE INSTALLEE PRES D’EQUIPEMENT POUR ÊTRE FACILEMENT ACCESSIBLE © Nautilus Hyosung, Inc. All Rights Reserved. -
Page 12: Related Document
▪ Installation Manual ▪ Service Manual ▪ VDM Manual (Diagnostic) ▪ Error Code Manual For the contact of maintenance staffs of Nautilus Hyosung, see the E-mail addresses and telephone numbers provided separately. © Nautilus Hyosung, Inc. All Rights Reserved.
-
Page 13: Chapter2. Introduction
Allows tellers to calculate and close amount on hand faster than the existing manual calculation. A bank customer and a teller can easily interact on a touch screen, just like talking, through Nautilus Hyosung’s intuitive and easy UI. Allows easy and quick installation and maintenance. © Nautilus Hyosung, Inc. All Rights Reserved.
-
Page 14: Fascia Devices And Access Points
(all features might not be included in your system): Customer Receipt Display (with (Receipt touch Printer slot) screen) Cash Out Card Entry (Cash Slot Dispenser Slot) Cash/Check (CCIM Slot) Attention Button Earphone Jack (Encryption Pin-Pad) © Nautilus Hyosung, Inc. All Rights Reserved.
-
Page 15: Basic Features
Touch Screen Sutter type Automatic Shutter Denomination US $20,20,20,20 (ID 1,2,3,4) Cash Dispenser Maximum Dispense 50 Notes/1 transaction (CDU10) Number of cassettes 4 Cassettes Cassette Capacity 3,000 notes/1 cassette Cassette Key Non Locking Key © Nautilus Hyosung, Inc. All Rights Reserved.
-
Page 16
Checks Escrow 50 Mixed Notes and Checks /1 transaction Capacity Deposit 50 Mixed Notes and Reject Checks /1 transaction Processing Deposit 1 Note : — Seconds, Time Time 1 Check : — Seconds © Nautilus Hyosung, Inc. All Rights Reserved. -
Page 17
Sound Card On-Board Additional ADA Audio guidance Available(/w Earphone jack function cover/plug) Install Method Anchor Dimension Weight About 850Kg & Battery System Battery Alarm Battery Environment Option Heater 1 Heater 2nd Heater Option © Nautilus Hyosung, Inc. All Rights Reserved. -
Page 18: Devices Of Mx7600Da
USB HUB used to communicate with several devices such as a cash dispenser, card reader, receipt printer and EPP. Basic Specification & Sample Picture © Nautilus Hyosung, Inc. All Rights Reserved.
-
Page 19: Customer Display & Keypad
The customer selects from the choices shown on the consumer display and presses the corresponding function key. A touch screen display eliminates the need for function keypads. Basic Specification & Sample Picture Customer Display with Touch Screen Encryption PIN © Nautilus Hyosung, Inc. All Rights Reserved.
-
Page 20: Supervisor Operation (Spl, Teller Display)
Chapter2. Introduction Operator Manual Supervisor Operation (SPL, Teller Display) ► Basic Specification & Sample Picture © Nautilus Hyosung, Inc. All Rights Reserved.
-
Page 21: Cash Dispenser Unit
ATM, where the customer can receive it. If the media is too mutilated or wrinkled to dispense, or if a multiple pick occurs, the dispenser sends the notes to the reject/retract cassette. Basic Specification & Sample Picture © Nautilus Hyosung, Inc. All Rights Reserved.
-
Page 22: Card Reader
ATM card in the card entry slot and then removes the card to begin the transaction. The dip card reader can read magnetic stripe cards and memory chip cards. The dip card reader cannot retract, capture, or retain cards. Basic Specification & Sample Picture 2-10 © Nautilus Hyosung, Inc. All Rights Reserved.
-
Page 23: Receipt Printer
ATM number and location, and other desired information. After the consumer uses the ATM, a printed record of the transaction information is presented through the appropriate printer slot. Basic Specification & Sample Picture © Nautilus Hyosung, Inc. All Rights Reserved. 2-11…
-
Page 24: Cash & Check Inert Module (Ccim, Optional)
Banknotes and checks deposited by the customer are stored in cassettes. The type of document for each cassette is defined on the basis of the bank’s application. Basic Specification & Sample Picture 2-12 © Nautilus Hyosung, Inc. All Rights Reserved.
-
Page 25
Operator Manual Chapter2. Introduction © Nautilus Hyosung, Inc. All Rights Reserved. 2-13… -
Page 26: Power Supply
► The power supply unit converts AC power to DC power and provides that voltage to various modules within the system. The power supply unit allows the user to turn on/off the system, enter power-failure mode, and perform other sequences. 2-14 © Nautilus Hyosung, Inc. All Rights Reserved.
-
Page 27: Heater
On the contrary, if the detected temperature is higher than the setting temperature, heater drive will be blocked. There are no operator maintenance requirements for the heater. © Nautilus Hyosung, Inc. All Rights Reserved. 2-15…
-
Page 28: Chapter3. For The Beginning Operator
Opening and Closing the Exterior Door ► Open the rear door of upper section using key. ► To close the door, push in the door bracket (1). Then close the door and lock to secure it. © Nautilus Hyosung, Inc. All Rights Reserved.
-
Page 29: Accessing The Atm Servicing Screen When The Hood Is In The Open Position
Accessing the ATM Servicing Screen when the Hood is in the open Position ► To open, press the button (1) and pull the handle of (2) toward you. ► To close, swing the panel back in the original, closed position © Nautilus Hyosung, Inc. All Rights Reserved.
-
Page 30: Opening And Closing The Vault Door
Chapter3. For the beginning operator Opening and Closing the Vault Door ► To open the vault door, enter the combination on the lock (1). Then turn the vault door handle (2) to open. © Nautilus Hyosung, Inc. All Rights Reserved.
-
Page 31: Switching Power On/Off
1. The system turning-on process is as follows 2. Open the rear door. 3. Press the standby switch to “ON” side (1) (Main power switch should be “ON” (2)) 4. The system will be turn on automatically © Nautilus Hyosung, Inc. All Rights Reserved.
-
Page 32: Switching Power Off
<System Off> procedure starts and only [AC IN] LED is turned on. ▪ In case power failure occurs during normal system operation, the system will enter <Power Failure Mode> and only [DC OUT] will be turned off. © Nautilus Hyosung, Inc. All Rights Reserved.
-
Page 33: Locking Devices
CW = Clockwise; CCW = Counter Clockwise 2. Enter the factory combination of 50-25-50 by sequentially pressing those six buttons. The LCD will display the entered number. © Nautilus Hyosung, Inc. All Rights Reserved.
-
Page 34
3. When the combination has been correctly entered, the LCD will read “OPr” meaning “Open right.” 4. Turn the dial right (CW) until it stops. The lock’s bolt is now retracted and the lock is open. 5. Turn the handle and open the security door. © Nautilus Hyosung, Inc. All Rights Reserved. -
Page 35
The best thing to do in analyzing the lock level is to write down the entire string and then pick out the portions of it that are significant to you, or if you are experiencing a problem with the lock, report the entire string to the Tech Support group. © Nautilus Hyosung, Inc. All Rights Reserved. -
Page 36
Turn the Dial to the left (CCW) to extend the bolt. 7. Power Lock Turn the dial to the left (CCW) until (the Change Key symbol along with Enter Combination) is displayed. Press #8 EcF © Nautilus Hyosung, Inc. All Rights Reserved. -
Page 37
15. OPr Retract Bolt Turn the Dial to the right (CW) to retract the bolt. 16. Close Door 17. Extend Bolt Turn the Dial to the left (CCW) to extend the bolt. 3-10 © Nautilus Hyosung, Inc. All Rights Reserved. -
Page 38: Electronic Lock
▪ Use one (1) 9-Volt alkaline battery in the Small Battery Box or six (6) “C” cell alkaline batteries in the Large Battery Box. It is recommended that batteries be replaced at least once a year. If the battery is depleted and will not allow the lock to open: © Nautilus Hyosung, Inc. All Rights Reserved. 3-11…
-
Page 39
3. Remove the six old “C” cell alkaline batteries. 4. Insert six new “C” cell alkaline batteries 5. Replace the cover and test the lock several times before closing the door. 3-12 © Nautilus Hyosung, Inc. All Rights Reserved. -
Page 40: Chapter4. Cash & Check Insert Module (Ccim, Optional)
In case of the transaction cancellation, cash and check in reject section is ejected to the customer in a lump by the command of higher rank. BC (Bill Checker) This section verifies the image data on both sides of cash for identification © Nautilus Hyosung, Inc. All Rights Reserved.
-
Page 41
Cash and check received are stored in the cassette by sheets. The cassettes can be mounted or demounted from the unit with the key. And also cassette’s door can be opened using the key. © Nautilus Hyosung, Inc. All Rights Reserved. -
Page 42: Basic Specification Of Cash & Check In Module
USB1.1 (Full-Speed) USB2.0 HUB Interface Control TM Use External Storage, Program Loading on flash Memory by SP Remote Download It is the reference value when the thickness of bill used is 0.1mm. © Nautilus Hyosung, Inc. All Rights Reserved.
-
Page 43: Specification Of External Appearance
Length: 162 ± 2 (mm) (Cash&Check) Height: 310 ± 2 (mm) Weight 4.5Kg(except Cash&Check weight) RT/A6 Dimensions Width: 274 ± 2 (mm) Cassette Length: 169 ± 2 (mm) Height: 62 ± 2 (mm) Weight 1.1Kg(except Cash&Check weight) © Nautilus Hyosung, Inc. All Rights Reserved.
-
Page 44: Cash & Check Conditions
Operator Manual Chapter4. Cash & Check Insert Module (CCIM) Cash & Check Conditions ▶ Please refer to “Bill Conditions” in the section of the Cash Dispenser. © Nautilus Hyosung, Inc. All Rights Reserved.
-
Page 45: How To Remove Jam From Each Section
BOTTOM Module includes CASH CASSETTE Module and CHECK CASSETTE Module. Zone Abbreviation Description ① BUNDLE Bulk Note Separation Module ② Separator Control Module ③ Bill Checker ④ Alignment Module ⑤ RECOG Recognition Module © Nautilus Hyosung, Inc. All Rights Reserved.
-
Page 46
⑪ B4 GUIDE B4 Guide of Body Module1 ⑫ ESCROW Escrow Module ⑬ RT/A6 Retract & A6 Cassette ⑭ CASSETTE1 Cash Cassette ⑮ CASSETTE2 Check Cassette ► Open Status of Unit Transport Path © Nautilus Hyosung, Inc. All Rights Reserved. -
Page 47: Remove Jam From Bundle Module
1. After opening the Bundle Module and SCM, remove a jammed note. If necessary, turn the green Knob 1 to move the note to easily remove the jammed note. Removing jam from Bundle Module. Removing jam from Bundle Module. © Nautilus Hyosung, Inc. All Rights Reserved.
-
Page 48: Remove Jam From The First Transport Path
3. After checking if the jammed bill is removed, completely close the First Transport Path pushing the lock lever in the yellow arrow direction as shown in the picture. Opening SCM to remove jam. Closing SCM after removing jam. © Nautilus Hyosung, Inc. All Rights Reserved.
-
Page 49: Remove Jam From Bc
3. After checking if the jammed Note is removed, completely close the BC section by pushing the lock lever in the yellow arrow direction as shown in the picture. Opening BC (Zone ③) to remove jam. Closing BC after removing jam. 4-10 © Nautilus Hyosung, Inc. All Rights Reserved.
-
Page 50: Remove Jam From Alg
Note as shown in the picture below. 3. After checking if the jammed Note is removed, completely close the ALG section. Opening Zone ④ to remove jam. Turning the green knob to remove jam. © Nautilus Hyosung, Inc. All Rights Reserved. 4-11…
-
Page 51: Remove Jam From Recog Transport Section
Note as shown in the picture below. 3. After checking if the jammed Note is removed, completely close the Recog Transport Section. Pushing the lock lever to open Zone ⑤. Opening or Closing Zone ⑤. 4-12 © Nautilus Hyosung, Inc. All Rights Reserved.
-
Page 52: Remove Jam From The B2 Upper Transport Path Of Bm2
3. After checking if the jammed Note is removed, completely close Zone ⑥ as shown in the picture. Pushing the lock lever to open Zone ⑥. Opening or Closing Zone ⑥. © Nautilus Hyosung, Inc. All Rights Reserved. 4-13…
-
Page 53
3. After checking if the jammed Note is removed, completely close Zone ⑥ as shown in the picture. Pushing the lock lever to open Zone ⑥. Opening or Closing Zone ⑥. 4-14 © Nautilus Hyosung, Inc. All Rights Reserved. -
Page 54: Remove Jam From B2 Reject Transport Section
Section as shown in the picture. 4. If it is necessary to remove the inside jam of ALG, open the ALG guide as shown in the picture. Pushing the lock lever. Opening Zone ⑦-1, ⑦-2. © Nautilus Hyosung, Inc. All Rights Reserved. 4-15…
-
Page 55: Remove Jam From B3 Transport Section
Note as shown in the picture below. 3. After checking if the jammed Note is removed, completely close Zone ⑧ as shown in the picture. Opening Zone ⑧ Closing Zone ⑧ 4-16 © Nautilus Hyosung, Inc. All Rights Reserved.
-
Page 56: Remove Jam From Reject Section
Note as shown in the picture below. 3. After checking if the jammed Note is removed, completely close the door. Removing jam from Reject Section. © Nautilus Hyosung, Inc. All Rights Reserved. 4-17…
-
Page 57: Remove Jam From B3 Escrow Transport Section
Note as shown in the picture below. 3. After checking if the jammed Note is removed, push the green button and completely close Zone ⑩ as shown in the picture. Opening Zone ⑩ Closing Zone ⑩ 4-18 © Nautilus Hyosung, Inc. All Rights Reserved.
-
Page 58: Remove Jam From B4 Transport Section
3. After checking if the jammed Note is removed, push the green button and completely close Zone ⑪ as shown in the picture. Opening Zone ⑪ Closing Zone ⑪ © Nautilus Hyosung, Inc. All Rights Reserved. 4-19…
-
Page 59: Remove Jam From Escrow
5. And then come out one note from the escrow module. And remove the note as shown in lower figure. If necessary, repeat it to end. Finally turn the Lock Lever8 to “CLOSED” position. Removing jam from Escrow Removing note from Escrow 4-20 © Nautilus Hyosung, Inc. All Rights Reserved.
-
Page 60: Remove Jam From Rt/A6 Cassette
4. After removing jam, close the door and turn the key to the left. And then it is locked. 5. To mount RT/A6 Cassette, turn the key to the left and remove it. Then mount the RT/A6 Cassette. (Auto-locking mounting) Moving BM3 Separating Retract BOX Removing jam from Retract © Nautilus Hyosung, Inc. All Rights Reserved. 4-21…
-
Page 61
Chapter4. Cash & Check Insert Module (CCIM) Operator Manual Opening or closing the door of Retract BOX Removing jam from Retract Section 4-22 © Nautilus Hyosung, Inc. All Rights Reserved. -
Page 62: Remove Jam From Cassette
3. After removing jam, close the door and turn the key to the left. And then it is locked. 4. To mount the Cassette, turn the key to the left and remove it. Then it is mounted automatically. Front View of Cassette Section. Separating the Cassette. © Nautilus Hyosung, Inc. All Rights Reserved. 4-23…
-
Page 63
Removing jam from cassette section. Turning the key to the right to open the door and turning the key to the left to close the door. Pressing the green lever to drop down the Push Plate. 4-24 © Nautilus Hyosung, Inc. All Rights Reserved. -
Page 64: How To Change Prt Maintenance Module
※ After replacing Ink Cartridge, you have to reset «PRT Cartridge Count». And you may need to replace Ink Head Cleaner Felt if necessary Installing Ink Cartridge © Nautilus Hyosung, Inc. All Rights Reserved. 4-25…
-
Page 65: How To Reset Prt Cartridge Count
3. Press the green button on PRT capping module installed BM3 for 3 seconds as shows the picture (Pressing the green button). 4. Push down DIP Switch 1 DIP Switch 1 Pressing the green button 4-26 © Nautilus Hyosung, Inc. All Rights Reserved.
-
Page 66
4.5 million, it will be displayed in red. And you have to replace the Ink Cartridge. < Note! > Ink Count Clear is Available since V01.00.54 of VDM and V02.00.35 of firmware. © Nautilus Hyosung, Inc. All Rights Reserved. 4-27… -
Page 67: How To Replace Ink Head Cleaner Felt
3. After replacing the new one by removing the tape, assemble the felt unit in the reverse process Dissembling the Felt Unit Replacing Ink Head Cleaner Felt 4-28 © Nautilus Hyosung, Inc. All Rights Reserved.
-
Page 68: Chapter5. Cash Dispenser
2. Bill has sufficient life or sizing to be handled easily 3. Bill which can be manually held straightly when one end is held by a hand and the bill is slightly curved vertically. © Nautilus Hyosung, Inc. All Rights Reserved.
-
Page 69: Unacceptable Condition
Operator Manual Unacceptable condition ▶ 1. Bill with serious wrinkles, torn or broken section wherein paper fiber is broken and separation begins. ▪ Wrinkle Wrinkle ▪ Torn Torn ▪ Broken section Broken Section © Nautilus Hyosung, Inc. All Rights Reserved.
-
Page 70
4. Bill ragged and cannot be held straightly when one end is supported by a hand 20mm (0.79inch) 35mm (1.38inch) When the bill is held by 20mm (0.79inch) and the straightness of the bill is 35mm (1.38inch) or less, it cannot be used © Nautilus Hyosung, Inc. All Rights Reserved. -
Page 71
Chapter5. Cash Dispenser Operator Manual 5. Bill with cellophane tape, scotch tape, etc Tape 6. Bill with folds Fold 7. Gradually curved bill (bills tied by hand seal, etc) Band seal © Nautilus Hyosung, Inc. All Rights Reserved. -
Page 72
Operator Manual Chapter5. Cash Dispenser 8. Bill with folded lines Case 1 Case 2 Case 3 <Note!> Bill distortion should not exceed 10 mm (0.39inch). © Nautilus Hyosung, Inc. All Rights Reserved. -
Page 73: How To Replenish The Cash Cassette
2. Place the cash cassette on a flat level platform and turn the green lever clockwise to unlock a cassette cover. Then lift up the cassette cover. <Note!> 1) Completely open the cassette cover as picture below when replenishing a cash cassette. © Nautilus Hyosung, Inc. All Rights Reserved.
-
Page 74
3. Pull black push-plate back completely until it is locked against the cash plate latch. 4. Pull the Push-Plate after pressing the Green Color Button ( 5. Set the bills and push the Push-Plate to the location where the bills are set. © Nautilus Hyosung, Inc. All Rights Reserved. -
Page 75
4) Place the bills correctly. 6. Turn the green lever clockwise and completely close the cassette cover. <Note!> 1) If you have the key type cassette, close the cassette cover using the key like the picture below. © Nautilus Hyosung, Inc. All Rights Reserved. -
Page 76
7. Holding a cassette handle with one hand and supporting the cassette from the bottom with the other hand, place the cassette carefully on the set guide of the CDU and push it completely until it is locked in place. © Nautilus Hyosung, Inc. All Rights Reserved. -
Page 77: How To Empty The Reject/Retract Box
1. Push the lever (A) and holding a Reject/Retract Box handle (B) with the other hand pull out slightly, and support the Reject/Retract Box from bottom with the hand pushed the lever (A), and pull out to the end of the cassette. 5-10 © Nautilus Hyosung, Inc. All Rights Reserved.
-
Page 78
3. Remove both rejected and retracted bills from the box. Push the edge of transparent component when remove retracted bills. PRE CAUTION: Don’t recycle rejected bills any more. Doing so will cause not only the same reject © Nautilus Hyosung, Inc. All Rights Reserved. 5-11… -
Page 79
4. Use the reverse order of 1)~3) to put Reject/Retract Box together into cash dispenser again. The Reject/Retract Box must be fully inserted. Otherwise, it will happen problems and the error code will display at monitor promptly. 5-12 © Nautilus Hyosung, Inc. All Rights Reserved. -
Page 80: How To Clear Jamming In Cash Dispenser
Any branch personnel should not attempt to remove any jams without first powering down the ATM. 2. Undock the CDU and slide out completely. Then perform the following steps for each case to clear the obstruction. © Nautilus Hyosung, Inc. All Rights Reserved. 5-13…
-
Page 81: Remove Jam From The Upper Horizontal Transport Path
1. Pull the lever with both hands while pressing it inward and then remove the bill. 2. Pull the lever with both hands while pressing it inward (see the picture of 1)) and lift up E part as the below picture. Then remove the jammed bill. 5-14 © Nautilus Hyosung, Inc. All Rights Reserved.
-
Page 82
3. Put down the E part and press the D part in the direction of arrow until it fixes. CAUTION: DO NOT put down the E part after first closing the D part. © Nautilus Hyosung, Inc. All Rights Reserved. 5-15… -
Page 83: Remove Jam From The Vertical Transport Path
1. Pull the green lever of the bottom with lifting it up and open the part. Then remove the bill. 2. Press the lever with hand as the below picture until the F part fixes. 5-16 © Nautilus Hyosung, Inc. All Rights Reserved.
-
Page 84: Remove Jam From The Carriage
1. Rotate the carriage by turning the knob (G) and remove the jammed bill. 2. After removing the jammed bill, turn the knob ( ) and return the carriage to the original position. © Nautilus Hyosung, Inc. All Rights Reserved. 5-17…
-
Page 85: Remove Jam From The Transport Path Of The Main Body
2. Lift up the carriage with hand and move it to the throat. 3. Turn the knob (G) and move the jammed bill to the location to clear it easily. Then remove the jammed bill. 5-18 © Nautilus Hyosung, Inc. All Rights Reserved.
-
Page 86: Remove Jam From The Transport Path Of Rj/Rt Box
Remove jam from the transport path of RJ/RT box ▶ Remove jam from the transport path of RJ/RT box 1. Demount the Reject/Retract Box. (Refer to “How to empty the Reject/Retract Box.”) 2. Remove the jammed bills. © Nautilus Hyosung, Inc. All Rights Reserved. 5-19…
-
Page 87: Remove Jam From The Separation Part
Remove jam from the separation part ▶ Remove jam from the separation part 1. Demount the cassette. (Refer to “How to replenish the Cash Cassette.”) 2. Remove the jammed bill as shown in below picture 5-20 © Nautilus Hyosung, Inc. All Rights Reserved.
-
Page 88: Remove Jam From The Transport Path Of Reject
2. If turning the Knob (H) counterclockwise, the jammed bill will move in the direction of the Transport Path. 3. If turning the Knob (H) clockwise, the jammed bill will move in the direction of the RJ/RT Box. © Nautilus Hyosung, Inc. All Rights Reserved. 5-21…
-
Page 89: How To Reset Main Board
Chapter5. Cash Dispenser Operator Manual How to Reset Main Board ▶ How to Reset Main Board 1. Press the hole in the red circle with a stick and reset. 5-22 © Nautilus Hyosung, Inc. All Rights Reserved.
-
Page 90: How To Set The Cassette For Each Denomination
Push Plate and take it out with the other hand. Also take out the Push Plate on the other side in the same way. 3. Completely take out the Push Plate and gently place it inside the box. © Nautilus Hyosung, Inc. All Rights Reserved. 5-23…
-
Page 91
5. After taking out the Hook Part, push the Guide in the direction of yellow arrow and take it out. 6. Remove current 6 LOWER NOTE SPACER as shown in below. Press HOOK in the green arrow and pull up the Spacer. 5-24 © Nautilus Hyosung, Inc. All Rights Reserved. -
Page 92
Recommended spacer for note size 8. For the desired denomination size, mount the Guide matching it with the white line. Press it until clicking sounds. (Mount the remaining guide in the same way.) © Nautilus Hyosung, Inc. All Rights Reserved. 5-25… -
Page 93
Operator Manual 9. Vertically insert two kinds of Shaft and turn the hand holding the Push Plate. 10. Then chck whether A Shaft matches the white arrow. (The other side is same.) 5-26 © Nautilus Hyosung, Inc. All Rights Reserved. -
Page 94: Cassette Cover Guide Setting For The Vertical Size Of Each Denomination
2. Also unfasten the Hook on the other side in the arrow direction and completely take out the Guide pulling it in the C direction. 3. Remove 6 Upper note SPACER. Then lift up HOOK and pull out Spacer from guide © Nautilus Hyosung, Inc. All Rights Reserved. 5-27…
-
Page 95
However, be sure to push it after matching the height of the other side of the Guide. 6. After also matching the other side of the Guide with the height of the desired bill size, push it with both hands until the Hook is caught. 5-28 © Nautilus Hyosung, Inc. All Rights Reserved. -
Page 96: Change Note Index
1. After change, Change the denomination label 2. After adjust cassette have to change assigned denomination value in Supervisor mode. <Note!> To assign new denomination in supervisor mode, please contact software develops part or Technical Support Center. © Nautilus Hyosung, Inc. All Rights Reserved. 5-29…
-
Page 97: Chapter6. Receipt Printer
No. of Print Lines on 1print=167mm (6.57inch) ) Valid Printing Width Max. 158mm (6.22inch) Chinese, English/Numbers (Alphanumeric), Latin, Type of Printer Letter Japanese, Korean, Arabic, Russian, Greek, Hebrew, Coptic Paper Type Inside Printing Thermal © Nautilus Hyosung, Inc. All Rights Reserved.
-
Page 98: Paper Handling Precautions
8. Make sure the paper is rolled evenly. 9. Miscellaneous: If the paper comes in contact with carbon copy paper or if the paper surface is scratched with a metallic object, de-coloring may occur. © Nautilus Hyosung, Inc. All Rights Reserved.
-
Page 99: How To Load The Receipt Paper
2. Retract printer assembly from the rail assembly, this can be accomplished by pressing the button and then pulling out the printer towards you. 3. Insert the paper axis into the center of receipt roll and mount it onto the charger. © Nautilus Hyosung, Inc. All Rights Reserved.
-
Page 100
5. Push the receipt paper inside the supporting bracket, as shown in the picture. Then it will be set automatically if turning on the power <Note!> Refer to diagram stickers placed on either side of the center section of the thermal printer. © Nautilus Hyosung, Inc. All Rights Reserved. -
Page 101: How To Clear Jamming In Receipt Printer
(C) 4. Push the lever to lock it back in place. (D) 5. Reinsert the paper back into printer until it catches (E) and prints a test receipt. Run Diagnostics if necessary. © Nautilus Hyosung, Inc. All Rights Reserved.
-
Page 102: Memo
Operator Manual Memo Memo © Nautilus Hyosung, Inc. All Rights Reserved. Memo-1…
This manual is also suitable for:
Mx7600da