|
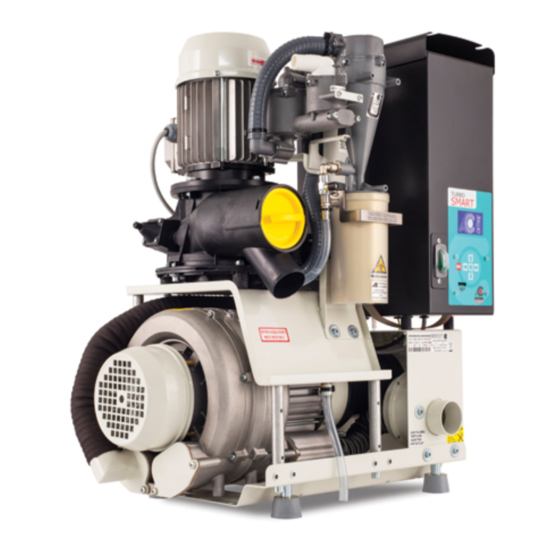
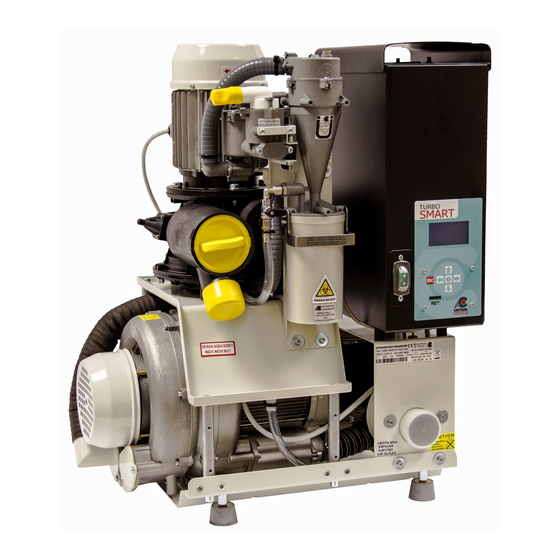
Аспиратор стоматологический Turbo-Smart ф.Cattani |
||||||
|
||||||
|
||||||
|
||||||
|
||||||
|
||||||
|
||||||
|
||||||
|
||||||
|
||||||
|
||||||
|
||||||
|
||||||
|
||||||
|
||||||
|
||||||
|
||||||
|
||||||
|
||||||
|
||||||
|
||||||
|
||||||
|
||||||
|
||||||
|
||||||
|
||||||
|
||||||
|
||||||
|
||||||
|
||||||
|
||||||
|
||||||
|
||||||
|
||||||
|
||||||
|
||||||
|
||||||
|
||||||
|
||||||
|















 например отсюда https://stomamart.ru/upload/Turbo-Smart%20(1).pdf




Alarm code
AC80 AC80-07
00
0
Microcontroller memory alarm
I14
2
Amalgam level > 95%
I15
3
Amalgam level > 100%
I00
32
Microcontroller memory alarm
I01
33
Short-circuit due to one of the two motors
I02
34
Short-circuit before the motors’ starting
I03
35
Condensers have not been charged
I04
36
Overtemperature (temperature has exceeded
the max. allowed limit)
I05
37
Blower overcurrent (the blower has
exceeded the current limit)
I07
39
Condensers overvoltage (the condensers
have exceeded the max. voltage limit)
S08
40
Centrifuge short-circuit
S09
41
PC-Board short-circuit on the centrifuge
output
S10
42
Centrifuge instant overcurrent (the centrifuge
has exceeded the current limit)
S11
43
Centrifuge time delayed overcurrent (the
centrifuge has exceeded the current limit)
I16
48
The vacuum detecting pipe is disconnected
I17
49
Centrifuge thermal switch switched-on
46
DESCRIPTION
SOLUTION
Contact the technician
Replace the amalgam container as soon as
possible
Replace the amalgam container
Contact the technician
Identify where the short-circuit is coming from
and eliminate it
Contact the technician (the PC-Board is likely to
be damaged)
Contact the technician (replace the PC-Board)
Ventilate the plant room
Check the operation of the blower (seized or
excessive friction)
Check the mains voltage (max. 260V)
Eliminate the short-circuit
Replace the PC-Board
Eliminate siphons in the piping or check the
centrifuge operation (seized or excessive friction)
Eliminate siphons in the piping or check the
centrifuge operation (seized or excessive friction)
Connect the vacuum detecting pipe to the
centrifuge
Ventilate the room
-
Contents
-
Table of Contents
-
Bookmarks
Quick Links
MANUALE ISTRUZIONI
OPERATOR’S HANDBOOK
MANUEL D’UTILISATION
GEBRAUCHSANWEISUNG
MANUAL DE ISTRUCCIONES
T U R B O
A UNIVERSAL ASPIRATOR
Related Manuals for Cattani turbo smart
Summary of Contents for Cattani turbo smart
-
Page 1
MANUALE ISTRUZIONI OPERATOR’S HANDBOOK MANUEL D’UTILISATION GEBRAUCHSANWEISUNG MANUAL DE ISTRUCCIONES T U R B O A UNIVERSAL ASPIRATOR… -
Page 3: Avvisi Importanti
T U R B O A UNIVERSAL ASPIRATOR INDICE Dati generali di funzionamento 50/60 Hz ……………..2 Introduzione ……………………3 Segnali ed avvisi …………………..3 Montaggio e messa in funzione ………………4 Manutenzione ordinaria ………………..8 Manutenzione straordinaria ………………..9 Istruzioni per muoversi e modifi care alcuni parametri nei menù di Turbo-Smart ….10 Istruzioni per settare la comunicazione Zig-bee (wireless) ……….17 Descrizione allarmi ………………….22 Avvisi importanti ………………….23…
-
Page 4: Dati Generali Di Funzionamento 50/60 Hz
• Dati generali di funzionamento 50/60 Hz Aspiratore ad uso dentistico Turbo-Smart Modello Turbo-Smart “A” Turbo-Smart “B” Tensione nominale 230 V 230 V Frequenza nominale 50/60 Hz 50/60 Hz Corrente nominale Modalità di impiego Funzionamento Funzionamento continuo continuo Protezione contro l’umidità Comune Comune Potenza massima assorbita…
-
Page 5: Table Of Contents
T U R B O A UNIVERSAL ASPIRATOR INDEX General 50/60 Hz running data………………26 Introduction ……………………27 Signals and warnings …………………27 Installation and starting ………………..28 Routine maintenance …………………32 Extraordinary maintenance ………………..33 Instructions to navigate Turbo-Smart menus and to modify some parameters ….34 Instructions for communication settings Zigbee (wireless) ……….41 Alarms description ………………….46 Important notices ………………….47…
-
Page 6: General 50/60 Hz Running Data
• General 50/60 Hz running data Turbo-Smart dental aspirator Model Turbo-Smart “A” Turbo-Smart “B” Rated voltage 230 V 230 V Rated frequency 50/60 Hz 50/60 Hz Rated current Operating conditions Continuous Continuous operation operation Protection against Ordinary Ordinary ingress of liquids Max.
-
Page 7: Introduction
This manual should be always available for consultation during unpacking, use, installation and starting of Turbo-Smart. Our updated manuals are available on the web site www.cattani.it. We recommend their consul- tation especially for updates about safety. • Signals and warnings •…
-
Page 8: Installation And Starting
• Installation and starting • Recommended precautions HANDLE WITH CARE WARNING WARNING Before unpacking the appliance, check the warning shock- SHOCKWATCH watch on the carton. In case of it being red or the carton RED INDICATES ROUGH HANDLING IF RED, NOTE ON BILL OF LADING being damaged, accept the material reserving the right to INSPECTION MAY BE WARRANTED examine the machine.
-
Page 9
• Installation Before connecting the aspirator to the piping of the cen- tralized system, ascertain that aspiration piping is clean as heavy debris could damage the appliances. Connect the PVC light grey aspiration tube (2b) (supplied with the machine) to the 50 mm Ø tube-holder (2) (“aspirated fl uid inlet”). -
Page 10
• Installation in parallel It is advisable to install in parallel only machines with the same fl ow and head values. With the instal- lation of 2 or 3 Turbo-Smart units in parallel (fi g. F) the total fl ow is doubled or tripled, provided that the diameter of the main piping is increased of 10 mm for each additional aspirator unit. -
Page 11
Starting, fi nal test and users instruction Install and connect the aspirator, select the position ON on the switch, which will light up after one of the dental units has started working. At this point aspiration will start.To check if Turbo-Smart is working correctly, it is advisable to carry out the dynamic tests (see fi g. -
Page 12: Routine Maintenance
• Routine maintenance Routine maintenance must be entrusted to specially in- structed surgery staff. • We recommend to pay special attention to all danger si- gnals and to use goggles, gloves and disposable overalls for personal protection. Daily ALLARME: • Check for any possible alarm on the display. In case of TEMPERATURA ELEVATA alarms, contact the technician.
-
Page 13: Extraordinary Maintenance
• Extraordinary maintenance Extraordinary maintenance must be entrusted to a trained technician in possession of original spare parts: • pay special attention to danger signals. Use goggles, glo- ves and disposable overalls for personal protection; • check that routine maintenance has been duly carried out and make sure that Magnolia products are used;…
-
Page 14: Instructions To Navigate Turbo-Smart Menus And To Modify Some Parameters
Main menus When Turbo-Smart is switched on, the display shows the Cattani logo for 10 seconds, after which time the main menu appears. Main Menu “A1” This menu shows some parameters such as: cycles, suc- tion activation time, temperature, presence/absence of the amalgam container and system software release.
-
Page 15
Secondary Menus Press to enter the Secondary Menus. Pressing the key takes you through the other menus. Drive Status This menu can be accessed without any access password. The display shows useful information about the Turbo- Smart functioning. User Parameters Use the password 0000123000 to enter this menu. -
Page 16
Enter Key to confi rm the password. The cur- sor will disappear. Press to return to the Cattani S.p.A. menu. It is now possible to modify the parameters of the User Parameters menu. Repeat the same process and enter the password 0000456000 to gain access to the System Parameters Se- tup menu. -
Page 17
Drive Status menu This menu can be accessed without any access password. It displays various technical parameters regarding the real- time working conditions of Turbo-Smart. Listed below is the more commonly required information. Blower Output Frequency (max. setting for version A: 85 Hz max. -
Page 18
System Temperature Maximum Detected Temperature (+58 °C: Alarm and Stop of the aspirator) Vacuum (max. setting: 200 mbar) User Parameters menu To access this menu you are required to enter the access password 0000123000 (see instructions on page 36). Vacuum Set Point This is the fi gure to which the unit will limit the vacuum. -
Page 19
Generated Code This code is generated by Cattani S.p.A. Each unit is allocated a unique code. This code needs to be supplied to Cattani to purchase the password (Activation Code) to upgrade version A (2 chair unit) to version B (4 chair unit). -
Page 20
Blower Current Limit (Max. setting for A: 5,5 A Max. setting for B: 7,5 A) Turbo-Smart Off Delay Time (Max. setting: 300 sec. Min. setting: 10 sec.) Pump (Centrifuge) Off Delay Time (Max. setting: 30 sec. Min. setting: 5 sec.) Control Panel Fan Off Delay Time (Default setting: 300 sec. -
Page 21: Instructions For Communication Settings Zigbee (Wireless)
USB port of the computer and launch the display program. Install the SMART SYSTEM MONITOR program (supplied by Cattani) in the computer. Once the program is launched, the com- pany’s logo will appear for 10 seconds followed by the main menu.
-
Page 22
Use the dropdown menu to choose which Turbo Smart you want to view. the functional parameters of the Turbo Smart will then be displayed. -
Page 23
Clicking on the SERVICE icon gives access to three different menus, an open one and 2 protected by password. To enter the USER PARAMETERS menu, enter the password 123000 and press OK. In this menu you can change the language, set the desired level of pressure and switch the machine from aspirator for 2 dental units to aspirator for 4 dental units, thanks to an… -
Page 24
In this technical menu you can view and modify all the parameters of the Turbo Smart. The INVERTER STATUS menu, which does not require an access password, displays the functional parameters of the machine while it is in operation. From the main menu, click on the email… -
Page 25
ALERTS box. The full history of all the alarms occurred in the machine during the entire period of operation can be viewed in the EVENT LOG folder. The operation cycles of the Turbo Smart are saved in the ODO COUNTERS menu. -
Page 26: Alarms Description
• Alarms description Alarm code DESCRIPTION SOLUTION AC80 AC80-07 Microcontroller memory alarm Contact the technician Amalgam level > 95% Replace the amalgam container as soon as possible Amalgam level > 100% Replace the amalgam container Microcontroller memory alarm Contact the technician Short-circuit due to one of the two motors Identify where the short-circuit is coming from and eliminate it…
-
Page 27: Important Notices
• Our updated manuals are available on the web site www.cattani.it. We recommend they are consulted especially for updates about safety.
-
Page 29
• SCHEMA DI MONTAGGIO TURBO-SMART • INSTALLATION LAYOUT MONTAGGIO AL PIANO INSTALLATION ON THE SAME FLOOR OF THE DENTAL UNITS Fig. A Draw. A all’aspiratore to the aspirator MONTAGGIO SOTTOSTANTE INSTALLATION ON A LOWER FLOOR THAN THE ONE OF THE DENTAL UNITS Fig. -
Page 30
• COLLEGAMENTI CIRCUITO INVERTER AC80-07 • INVERTER AC80-07 CONNECTIONS circuito display display circuit fusibili 16 A 16 A fuse SOFFIANTE SEPARATORE BLOWER SEPARATOR fi ltro antidisturbo main fi lter interruttore generale main switch scheda elettronica main board Fig. C Draw. C… -
Page 31
• PROVE DI DIAGNOSI SUI TURBO-SMART • DIAGNOSTIC TESTS ON TURBO-SMART Per verifi care il corretto funzionamento del Turbo-Smart, si possono effettuare alcuni test di tipo dinamico, di seguito esposti. Si dovrà eseguire il test a macchina in funzione e con l’ingresso d’aspirazione libero, non collegato alla tubazione. -
Page 32
• DIAGRAMMA DI LAVORO DI TURBO-SMART • TURBO SMART WORKING DIAGRAM ASPIRAZIONE mbar ASPIRATION mbar 2-VERSIONE «A» e «B»‘ 2-VERSION “A” and “B” 1- VERSIONE «A» e «B»‘ 1-VERSION “A” and “B” (666) (1000) (1330) (2000) PORTATA m3/h (l/min) FLOW RATE m3/h 1- CURVA ASPIRAZIONE TURBO-SMART VERSIONE «A»… -
Page 33
TURBO-SMART (versione “B”) TURBO-SMART (version “B”) Fig. F Draw.F TURBO-SMART (versione “A”) TURBO-SMART (version “A”) -
Page 34
• ESPLOSO TURBO SMART • SPLIT-UP DRAWING 023785 023785 025400 025400 015646 015646 043380 Fig. G Cod. 023785 CENTRALINO ELETTRICO ELECTRIC CONTROL PANEL Cod. 025400 SEPARATORE CENTRIFUGO Draw. G CENTRIFUGAL SEPARATOR Cod. 015646 SOFFIANTE BLOWER Cod. 043380 IDROCICLONE HYDROCYCLONE… -
Page 35
• DIMENSIONI TURBO SMART • TURBO SMART DIMENSION Fig. H Draw.H… -
Page 38
ESAM: 1225173 — 1253783 — 0791751 FOREIGN PATENTS OR PATENT APPLICATIONS: CATTANI: AU 546.143 — US 4,386,910 — US 4,787,846 — US 5,039,405 — US 5,002,486 AU 580839 — US 4,684,345 — US 5,330,641 — AT 0040181 — CH 0040181 — DE 0040181…
-
Contents
-
Table of Contents
-
Bookmarks
Quick Links
MANUALE ISTRUZIONI
OPERATOR’S HANDBOOK
MANUEL D’UTILISATION
GEBRAUCHSANWEISUNG
MANUAL DE ISTRUCCIONES
T U R B O
A UNIVERSAL ASPIRATOR
Related Manuals for Cattani turbo smart
Summary of Contents for Cattani turbo smart
-
Page 1
MANUALE ISTRUZIONI OPERATOR’S HANDBOOK MANUEL D’UTILISATION GEBRAUCHSANWEISUNG MANUAL DE ISTRUCCIONES T U R B O A UNIVERSAL ASPIRATOR… -
Page 3: Avvisi Importanti
T U R B O A UNIVERSAL ASPIRATOR INDICE Dati generali di funzionamento 50/60 Hz ……………..2 Introduzione ……………………3 Segnali ed avvisi …………………..3 Montaggio e messa in funzione ………………4 Manutenzione ordinaria ………………..8 Manutenzione straordinaria ………………..9 Istruzioni per muoversi e modifi care alcuni parametri nei menù di Turbo-Smart ….10 Istruzioni per settare la comunicazione Zig-bee (wireless) ……….17 Descrizione allarmi ………………….22 Avvisi importanti ………………….23…
-
Page 4: Dati Generali Di Funzionamento 50/60 Hz
• Dati generali di funzionamento 50/60 Hz Aspiratore ad uso dentistico Turbo-Smart Modello Turbo-Smart “A” Turbo-Smart “B” Tensione nominale 230 V 230 V Frequenza nominale 50/60 Hz 50/60 Hz Corrente nominale Modalità di impiego Funzionamento Funzionamento continuo continuo Protezione contro l’umidità Comune Comune Potenza massima assorbita…
-
Page 5: Table Of Contents
T U R B O A UNIVERSAL ASPIRATOR INDEX General 50/60 Hz running data………………26 Introduction ……………………27 Signals and warnings …………………27 Installation and starting ………………..28 Routine maintenance …………………32 Extraordinary maintenance ………………..33 Instructions to navigate Turbo-Smart menus and to modify some parameters ….34 Instructions for communication settings Zigbee (wireless) ……….41 Alarms description ………………….46 Important notices ………………….47…
-
Page 6: General 50/60 Hz Running Data
• General 50/60 Hz running data Turbo-Smart dental aspirator Model Turbo-Smart “A” Turbo-Smart “B” Rated voltage 230 V 230 V Rated frequency 50/60 Hz 50/60 Hz Rated current Operating conditions Continuous Continuous operation operation Protection against Ordinary Ordinary ingress of liquids Max.
-
Page 7: Introduction
This manual should be always available for consultation during unpacking, use, installation and starting of Turbo-Smart. Our updated manuals are available on the web site www.cattani.it. We recommend their consul- tation especially for updates about safety. • Signals and warnings •…
-
Page 8: Installation And Starting
• Installation and starting • Recommended precautions HANDLE WITH CARE WARNING WARNING Before unpacking the appliance, check the warning shock- SHOCKWATCH watch on the carton. In case of it being red or the carton RED INDICATES ROUGH HANDLING IF RED, NOTE ON BILL OF LADING being damaged, accept the material reserving the right to INSPECTION MAY BE WARRANTED examine the machine.
-
Page 9
• Installation Before connecting the aspirator to the piping of the cen- tralized system, ascertain that aspiration piping is clean as heavy debris could damage the appliances. Connect the PVC light grey aspiration tube (2b) (supplied with the machine) to the 50 mm Ø tube-holder (2) (“aspirated fl uid inlet”). -
Page 10
• Installation in parallel It is advisable to install in parallel only machines with the same fl ow and head values. With the instal- lation of 2 or 3 Turbo-Smart units in parallel (fi g. F) the total fl ow is doubled or tripled, provided that the diameter of the main piping is increased of 10 mm for each additional aspirator unit. -
Page 11
Starting, fi nal test and users instruction Install and connect the aspirator, select the position ON on the switch, which will light up after one of the dental units has started working. At this point aspiration will start.To check if Turbo-Smart is working correctly, it is advisable to carry out the dynamic tests (see fi g. -
Page 12: Routine Maintenance
• Routine maintenance Routine maintenance must be entrusted to specially in- structed surgery staff. • We recommend to pay special attention to all danger si- gnals and to use goggles, gloves and disposable overalls for personal protection. Daily ALLARME: • Check for any possible alarm on the display. In case of TEMPERATURA ELEVATA alarms, contact the technician.
-
Page 13: Extraordinary Maintenance
• Extraordinary maintenance Extraordinary maintenance must be entrusted to a trained technician in possession of original spare parts: • pay special attention to danger signals. Use goggles, glo- ves and disposable overalls for personal protection; • check that routine maintenance has been duly carried out and make sure that Magnolia products are used;…
-
Page 14: Instructions To Navigate Turbo-Smart Menus And To Modify Some Parameters
Main menus When Turbo-Smart is switched on, the display shows the Cattani logo for 10 seconds, after which time the main menu appears. Main Menu “A1” This menu shows some parameters such as: cycles, suc- tion activation time, temperature, presence/absence of the amalgam container and system software release.
-
Page 15
Secondary Menus Press to enter the Secondary Menus. Pressing the key takes you through the other menus. Drive Status This menu can be accessed without any access password. The display shows useful information about the Turbo- Smart functioning. User Parameters Use the password 0000123000 to enter this menu. -
Page 16
Enter Key to confi rm the password. The cur- sor will disappear. Press to return to the Cattani S.p.A. menu. It is now possible to modify the parameters of the User Parameters menu. Repeat the same process and enter the password 0000456000 to gain access to the System Parameters Se- tup menu. -
Page 17
Drive Status menu This menu can be accessed without any access password. It displays various technical parameters regarding the real- time working conditions of Turbo-Smart. Listed below is the more commonly required information. Blower Output Frequency (max. setting for version A: 85 Hz max. -
Page 18
System Temperature Maximum Detected Temperature (+58 °C: Alarm and Stop of the aspirator) Vacuum (max. setting: 200 mbar) User Parameters menu To access this menu you are required to enter the access password 0000123000 (see instructions on page 36). Vacuum Set Point This is the fi gure to which the unit will limit the vacuum. -
Page 19
Generated Code This code is generated by Cattani S.p.A. Each unit is allocated a unique code. This code needs to be supplied to Cattani to purchase the password (Activation Code) to upgrade version A (2 chair unit) to version B (4 chair unit). -
Page 20
Blower Current Limit (Max. setting for A: 5,5 A Max. setting for B: 7,5 A) Turbo-Smart Off Delay Time (Max. setting: 300 sec. Min. setting: 10 sec.) Pump (Centrifuge) Off Delay Time (Max. setting: 30 sec. Min. setting: 5 sec.) Control Panel Fan Off Delay Time (Default setting: 300 sec. -
Page 21: Instructions For Communication Settings Zigbee (Wireless)
USB port of the computer and launch the display program. Install the SMART SYSTEM MONITOR program (supplied by Cattani) in the computer. Once the program is launched, the com- pany’s logo will appear for 10 seconds followed by the main menu.
-
Page 22
Use the dropdown menu to choose which Turbo Smart you want to view. the functional parameters of the Turbo Smart will then be displayed. -
Page 23
Clicking on the SERVICE icon gives access to three different menus, an open one and 2 protected by password. To enter the USER PARAMETERS menu, enter the password 123000 and press OK. In this menu you can change the language, set the desired level of pressure and switch the machine from aspirator for 2 dental units to aspirator for 4 dental units, thanks to an… -
Page 24
In this technical menu you can view and modify all the parameters of the Turbo Smart. The INVERTER STATUS menu, which does not require an access password, displays the functional parameters of the machine while it is in operation. From the main menu, click on the email… -
Page 25
ALERTS box. The full history of all the alarms occurred in the machine during the entire period of operation can be viewed in the EVENT LOG folder. The operation cycles of the Turbo Smart are saved in the ODO COUNTERS menu. -
Page 26: Alarms Description
• Alarms description Alarm code DESCRIPTION SOLUTION AC80 AC80-07 Microcontroller memory alarm Contact the technician Amalgam level > 95% Replace the amalgam container as soon as possible Amalgam level > 100% Replace the amalgam container Microcontroller memory alarm Contact the technician Short-circuit due to one of the two motors Identify where the short-circuit is coming from and eliminate it…
-
Page 27: Important Notices
• Our updated manuals are available on the web site www.cattani.it. We recommend they are consulted especially for updates about safety.
-
Page 29
• SCHEMA DI MONTAGGIO TURBO-SMART • INSTALLATION LAYOUT MONTAGGIO AL PIANO INSTALLATION ON THE SAME FLOOR OF THE DENTAL UNITS Fig. A Draw. A all’aspiratore to the aspirator MONTAGGIO SOTTOSTANTE INSTALLATION ON A LOWER FLOOR THAN THE ONE OF THE DENTAL UNITS Fig. -
Page 30
• COLLEGAMENTI CIRCUITO INVERTER AC80-07 • INVERTER AC80-07 CONNECTIONS circuito display display circuit fusibili 16 A 16 A fuse SOFFIANTE SEPARATORE BLOWER SEPARATOR fi ltro antidisturbo main fi lter interruttore generale main switch scheda elettronica main board Fig. C Draw. C… -
Page 31
• PROVE DI DIAGNOSI SUI TURBO-SMART • DIAGNOSTIC TESTS ON TURBO-SMART Per verifi care il corretto funzionamento del Turbo-Smart, si possono effettuare alcuni test di tipo dinamico, di seguito esposti. Si dovrà eseguire il test a macchina in funzione e con l’ingresso d’aspirazione libero, non collegato alla tubazione. -
Page 32
• DIAGRAMMA DI LAVORO DI TURBO-SMART • TURBO SMART WORKING DIAGRAM ASPIRAZIONE mbar ASPIRATION mbar 2-VERSIONE «A» e «B»‘ 2-VERSION “A” and “B” 1- VERSIONE «A» e «B»‘ 1-VERSION “A” and “B” (666) (1000) (1330) (2000) PORTATA m3/h (l/min) FLOW RATE m3/h 1- CURVA ASPIRAZIONE TURBO-SMART VERSIONE «A»… -
Page 33
TURBO-SMART (versione “B”) TURBO-SMART (version “B”) Fig. F Draw.F TURBO-SMART (versione “A”) TURBO-SMART (version “A”) -
Page 34
• ESPLOSO TURBO SMART • SPLIT-UP DRAWING 023785 023785 025400 025400 015646 015646 043380 Fig. G Cod. 023785 CENTRALINO ELETTRICO ELECTRIC CONTROL PANEL Cod. 025400 SEPARATORE CENTRIFUGO Draw. G CENTRIFUGAL SEPARATOR Cod. 015646 SOFFIANTE BLOWER Cod. 043380 IDROCICLONE HYDROCYCLONE… -
Page 35
• DIMENSIONI TURBO SMART • TURBO SMART DIMENSION Fig. H Draw.H… -
Page 38
ESAM: 1225173 — 1253783 — 0791751 FOREIGN PATENTS OR PATENT APPLICATIONS: CATTANI: AU 546.143 — US 4,386,910 — US 4,787,846 — US 5,039,405 — US 5,002,486 AU 580839 — US 4,684,345 — US 5,330,641 — AT 0040181 — CH 0040181 — DE 0040181…
- Manuals
- Brands
- Cattani Manuals
- Dental equipment
- SMART Series
- User manual
-
Bookmarks
Quick Links
WE LOVE WHAT WE DO.
SMART
MAINTENANCE
USER GUIDE
Related Manuals for Cattani SMART Series
Summary of Contents for Cattani SMART Series
-
Page 1
WE LOVE WHAT WE DO. SMART MAINTENANCE USER GUIDE… -
Page 2
Failure to properly clean, disinfect or maintain the system as per the manufacturer’s recommendations may affect the warranty. Cattani recommend Magnolia cleaning products which are fully compatible with the system’s components and deliver ultimate care to the unit. Please follow dilution instructions in this guide. -
Page 3: Protecting Your System
MAGNOLIA CARE PRODUCTS PROTECTING YOUR SYSTEM Puli Jet Plus Disinfects, deodorises and cleans all dental aspirators (wet, semi-wet and dry line), does not contain aldehydes and phenol. 1 litre makes up to 125 litres of disinfectant or 250 litres of cleaner. (4 x 1L bottle) WHEN TO USE: Every evening.
-
Page 4: Daily Maintenance
DAILY MAINTENANCE TO BE CARRIED OUT BY INSTRUCTED SURGERY STAFF CHECK FOR ANY ALARMS ON THE DISPLAY SEE ALARMS DESCRIPTION BELOW Before carrying out any daily maintenance check the display on the keypad for your unit for any possible alarms. These alarms will indicate any issues such as the Amalgam level and any temperature faults.
-
Page 5
DAILY MAINTENANCE TO BE CARRIED OUT BY INSTRUCTED SURGERY STAFF CLEANING AND DISINFECTING YOUR SMART SUCTION UNIT User Instructions: Fill the Pulse Cleaner Bucket Each line on the inside of Place the Puli Jet on a level with 2.5 litres of warm water the Pulse Cleaner Bucket and steady surface and slightly (approx temp 50°c). -
Page 6
DAILY MAINTENANCE TO BE CARRIED OUT BY INSTRUCTED SURGERY STAFF CLEANING THE INLET DEBRIS FILTER Inlet debris filter location: MICRO SMART MICRO SMART CUBE TURBO SMART TURBO SMART CUBE MAXI SMART Instructions for cleaning: 1. Turn the power off to the suction system. 2. -
Page 7
If this is occurring, check your disinfection processes and/or contact your equipment service technician or Cattani for further advice. In this case, the rib in the back of the container (that fits into the sensor) will need to be cleaned with an appropriate brush. -
Page 8
DAILY MAINTENANCE TO BE CARRIED OUT BY INSTRUCTED SURGERY STAFF CHANGING THE AMALGAM CONTAINER MICRO SMART / MICRO SMART CUBE 1. Turn off the unit with the switch on the control panel. 2. Turn the handle underneath the amalgam container clock-wise until the container reaches the bottom of the thread. -
Page 9
DAILY MAINTENANCE TO BE CARRIED OUT BY INSTRUCTED SURGERY STAFF CHANGING THE AMALGAM CONTAINER TURBO SMART / TURBO SMART CUBE 1. Turn off the unit with the switch on the control panel 2. Turn the vent valve on the top of the amalgam separator anti clock-wise to open it so you can empty the excess liquid from the amalgam container. -
Page 10
DAILY MAINTENANCE TO BE CARRIED OUT BY INSTRUCTED SURGERY STAFF CHANGING THE AMALGAM CONTAINER MAXI SMART 1. Turn off the unit with the switch on the control panel. 2. Turn the handle underneath the amalgam container clock-wise until the container reaches the bottom of the thread. -
Page 11: Annual Maintenance
Routine servicing by a trained technician ensures the long term reliability of your equipment, trouble free operation and greatest life expectancy. Servicing of Cattani Suction equipment should be performed by a trained Authorised Service Technician using only genuine Cattani parts.
-
Page 12
We reduce costs: less maintenance and lower energy costs mean that we are always the most economical on a cost-benefit analysis. We reduce environmental impact: we save 50% on raw materials, so that you can save between 30% and 50% on electrical consumption. Cattani ESAM UK Limited, 21A Harris Business Park, Hanbury Road, Stoke Prior, Bromsgrove, Worcestershire, B60 4DJ WWW.CATTANIESAM.CO.UK…
- Manuals
- Brands
- Cattani Manuals
- Dental equipment
- SMART Series
- User manual
-
Bookmarks
Quick Links
WE LOVE WHAT WE DO.
SMART
MAINTENANCE
USER GUIDE
Related Manuals for Cattani SMART Series
Summary of Contents for Cattani SMART Series
-
Page 1
WE LOVE WHAT WE DO. SMART MAINTENANCE USER GUIDE… -
Page 2
Failure to properly clean, disinfect or maintain the system as per the manufacturer’s recommendations may affect the warranty. Cattani recommend Magnolia cleaning products which are fully compatible with the system’s components and deliver ultimate care to the unit. Please follow dilution instructions in this guide. -
Page 3: Protecting Your System
MAGNOLIA CARE PRODUCTS PROTECTING YOUR SYSTEM Puli Jet Plus Disinfects, deodorises and cleans all dental aspirators (wet, semi-wet and dry line), does not contain aldehydes and phenol. 1 litre makes up to 125 litres of disinfectant or 250 litres of cleaner. (4 x 1L bottle) WHEN TO USE: Every evening.
-
Page 4: Daily Maintenance
DAILY MAINTENANCE TO BE CARRIED OUT BY INSTRUCTED SURGERY STAFF CHECK FOR ANY ALARMS ON THE DISPLAY SEE ALARMS DESCRIPTION BELOW Before carrying out any daily maintenance check the display on the keypad for your unit for any possible alarms. These alarms will indicate any issues such as the Amalgam level and any temperature faults.
-
Page 5
DAILY MAINTENANCE TO BE CARRIED OUT BY INSTRUCTED SURGERY STAFF CLEANING AND DISINFECTING YOUR SMART SUCTION UNIT User Instructions: Fill the Pulse Cleaner Bucket Each line on the inside of Place the Puli Jet on a level with 2.5 litres of warm water the Pulse Cleaner Bucket and steady surface and slightly (approx temp 50°c). -
Page 6
DAILY MAINTENANCE TO BE CARRIED OUT BY INSTRUCTED SURGERY STAFF CLEANING THE INLET DEBRIS FILTER Inlet debris filter location: MICRO SMART MICRO SMART CUBE TURBO SMART TURBO SMART CUBE MAXI SMART Instructions for cleaning: 1. Turn the power off to the suction system. 2. -
Page 7
If this is occurring, check your disinfection processes and/or contact your equipment service technician or Cattani for further advice. In this case, the rib in the back of the container (that fits into the sensor) will need to be cleaned with an appropriate brush. -
Page 8
DAILY MAINTENANCE TO BE CARRIED OUT BY INSTRUCTED SURGERY STAFF CHANGING THE AMALGAM CONTAINER MICRO SMART / MICRO SMART CUBE 1. Turn off the unit with the switch on the control panel. 2. Turn the handle underneath the amalgam container clock-wise until the container reaches the bottom of the thread. -
Page 9
DAILY MAINTENANCE TO BE CARRIED OUT BY INSTRUCTED SURGERY STAFF CHANGING THE AMALGAM CONTAINER TURBO SMART / TURBO SMART CUBE 1. Turn off the unit with the switch on the control panel 2. Turn the vent valve on the top of the amalgam separator anti clock-wise to open it so you can empty the excess liquid from the amalgam container. -
Page 10
DAILY MAINTENANCE TO BE CARRIED OUT BY INSTRUCTED SURGERY STAFF CHANGING THE AMALGAM CONTAINER MAXI SMART 1. Turn off the unit with the switch on the control panel. 2. Turn the handle underneath the amalgam container clock-wise until the container reaches the bottom of the thread. -
Page 11: Annual Maintenance
Routine servicing by a trained technician ensures the long term reliability of your equipment, trouble free operation and greatest life expectancy. Servicing of Cattani Suction equipment should be performed by a trained Authorised Service Technician using only genuine Cattani parts.
-
Page 12
We reduce costs: less maintenance and lower energy costs mean that we are always the most economical on a cost-benefit analysis. We reduce environmental impact: we save 50% on raw materials, so that you can save between 30% and 50% on electrical consumption. Cattani ESAM UK Limited, 21A Harris Business Park, Hanbury Road, Stoke Prior, Bromsgrove, Worcestershire, B60 4DJ WWW.CATTANIESAM.CO.UK…
Specifications:
|
Accompanying Data:
Cattani turbo smart Dental equipment, Medical Equipment PDF User Maintenance Manual (Updated: Monday 3rd of October 2022 09:13:58 AM)
Rating: 4.8 (rated by 7 users)
Compatible devices: MAXI SMART, SMART Series, HYDROCLICLONE ISO, MICRO SMART, Mono-Jet Series, AVERO Premium Plus, TARGET BEAUTY 8133 — 3 MOT, 035000.
Recommended Documentation:
Transcription of Cattani turbo smart User Maintenance Manual:
SMART USER MAINTENANCE GUIDE 03 Daily Maintenance Daily maintenance is important to reduce the amount of bacterial build up within the system; preventing blockages and unpleasant odours. It is very important that whilst cleaning lters and disinfecting thesuctionsystem, atno time should any detergents or house holdproductscome into contact with anycomponents. Only use products recommended for use by the manufacturer. Useof other productsmay cause damage to the equipment or eectitsperformance. Always ensure you are familiar with safety warning labels, productinstructions andsafety data sheets before performing anyprocessesorprocedures. Before carrying out any maintenance on this system, ensure all appropriate Personal Protective Equipment (PPE) such as: gloves, mask,full sleeve gown and eye protection are worn. Peace Of Mind CARE PRODUCTS Cleaning, disinfecting and system maintenance are imperative to ensure long life of the suction system. Failure to properly clean, disinfect or maintain the system as per the manufacturer’s recommendations may aect the WARRANTY. Cattani have products available that are fully compatible with the system’s components and deliver the ultimate care. Care Product details are listed on the inside back cover of this User Maintenance Guide. PLEASE REFER TO USER MANUAL AND WARRANTY STATEMENT FOR FURTHER DETAILS. SMART User Maintenance Guide 04 Daily Maintenance 1. Fill the Pulse Cleaner with 2.5 litres ofwarm water. 2. Each line on the inside of the Pulse Cleaner represents 1 litre, so ll it up to halfway between the second and third line. 3. Place the Puli-Jet Gentle on alevelandsteady surface. 4. Slightly unscrew the red cap (i.e. 1 - 2 revolutions), but do notcompletely unscrew it. 5. Squeeze the bottle softly to force solution into the measuring dispenser. 6. Continue to squeeze until the solution reaches the 30ml mark. 7. If too much solution has entered the dispensing chamber, it can be poured back into the main bottle by tipping the bottle towards the small tube on the side. 8. Unscrew and remove the red cap. Pour the solution from the dispensing cup into the full Pulse Cleaner. Take care to not allow more solution from the main bottle ow into the dispensing cup. 9. With a disposable cloth, wipe any drips of solution from the bottle (andthen dispose of the cloth). 10. Connect suction hoses to Pulse Cleaner – adaptors may be required as hose sizes vary. Pulsed aspiration of the solution will happen automatically. Puli-Jet Gentle leaves a residue on the inside of pipes and suction tubes in order to stop growths on these surfaces. This is the reason that you may sometimes nd the surface of a tube to be ‘oily’. This is completely normal and the product is designed to do this. Puli-Jet Gentle should never be pre or semi diluted. It must be diluted (according to the instruction) and then used straight away. 11. Once pulsing has stopped please remove hoses from the Pulse Cleaner. Please note a small amount of solution will remain inthe bottom of the cleaner. This can be poured down the spittoon or aspirated manually. 12. It is highly recommended to continue aspirating air for several minutes before shutting down the suction system. This ensures that the disinfectant reaches the suction unitinthe plant room. SMART User Maintenance Guide 06 Daily Maintenance continued FILTER/SOLIDS COLLECTOR ON DENTAL CHAIR OR REAR DELIVERY SYSTEMS This process should be completed each day, after the disinfection process. In most cases, the suction hoses in the dental surgery are part of the dental chair delivery system . • Locate and remove the lter from the housing. It is recommended that you collect the waste material from the lter as it contains amalgam. This can be done by tapping the lter and allowing waste material to fall into an appropriate container and safely stored for later collection by an approved recycling company. • Brush and rinse lter with clean water to shift any stubborn matter from the lter. Ensure the brush has not been used with any other chemical or detergent. DO NOT use any detergent or disinfectant to clean the lter – simply empty it and rinse with water. • Wipe the outside of the lter basket and the inside of the lter housing with a paper towel, especially around the rubber o-ring seal, to clean away any gritty material. • Apply a few drops of Lubri-Jet lubricant to the rubber o-ring and coat o-ring evenly • Insert an Antifoaming Disinfectant Tablet (including the dissolvable clear wrapper) into the lter basket. • After the lter is reinstalled, check that the o-ring seal is seated properly and not bulging out in any place as this may cause a uid leak. If the o-ring is bulging, swollen or shows signs of wear, contact your equipment service technician for replacement. 07 Weekly Maintenance FILTER/SOLIDS COLLECTOR ONCATTANI SUCTION UNIT • This process should be completed once per week at the end of the working day, after the disinfection process. • Turn the power o to the suction system - either at the main switch orat the power point. • To remove the lter from its housing, twist anti-clockwise and pull. It is recommended that you collect the waste material from the lter as it contains amalgam. This can be done by tapping the lter and allowing waste material to fall into an appropriate container and safely stored for later collection by an approved recycling company. • Brush and rinse lter with clean water to shift any stubborn matter from the lter. Ensure the brush has not been used with any other chemical or detergent. DO NOT use any detergent or disinfectant to clean the lter – simply empty it and rinse with water. • Wipe the outside of the lter basket and the inside of the lter housing, especially around the rubber o-ring seal, to clean away any gritty material. • Apply a few drops of Lubri-Jet lubricant to the rubber o-ring, work it around the entire o-ring and then reinstall the lter into its housing. • After the lter is reinstalled, check that the o-ring seal is seated properly and not bulging out in any place as this may cause a uid leak. If the o-ring is bulging, swollen or shows signs of wear, contact your equipment service technician for replacement. • Turn the power back on to the suction system. GENERAL OBSERVATION Ensure the area around the suction system is clean and clear of debris that may aect ventilation. Check the display on the keypad for any error messages or warnings and report as necessary. Check for any signs of uid leaks or damaged hoses and if suspect, report toyour equipment service technician. SMART User Maintenance GuideSMART User Maintenance Guide 08 Maintenance to be Performed by a Technician OUR AIM IS 100% RELIABILITY Consideration should be given to the maintenance of the Cattani equipment installed in your plant room. Implementation of a routine maintenance schedule at your practice should be your highest priority. Servicing your SMART Suction Unit on time annually is important. Annual servicing will reduce the risk of unwanted breakdowns, interruptions or delays in daily practice and loss of income due to stopping for unexpected repairs. Routine servicing by a technician ensures the long term reliability of your equipment, trouble free operation and greatest life expectancy. Servicing of Cattani Suction & Compressor equipment should be performed by a trained Authorised Service Technician using only Genuine Cattani Parts. To book a service please contact your Authorised Cattani Equipment supplier or contact Cattani for further information. MINOR SERVICE EVERY 2,000 HOURS (12 MONTHS) • Complete System Check • Replace inlet lter o-ring & lubricate • Check amalgam cup level • Replace HEPA lter cartridge C-211956 Suction inlet lter o-ring (Green Viton) (Micro SMART & Micro SMART Cube) C-211974 Suction inlet lter o-ring (Green Viton) (Turbo SMART & Turbo SMART Cube) M-040727 Lubri-Jet Silicone Lubricant Drops C-160540 HEPA H14 lter cartridge (4-6 Surgeries) C-160541 HEPA H14 lter cartridge (9-12 Surgries) INTERMEDIATE SERVICE EVERY 4,000 HOURS (2 YEARS) • Complete System Check • Replace inlet lter o-ring & lubricate • Install Service kit for Amalgam RetentionUnit • Check amalgam cup level • Replace HEPA lter cartridge C-MR60SK Service Kit for Hydrocyclone ISO 6 (Micro SMART & Micro SMART Cube) 09 C-1H00SK Service Kit for Hydrocyclone ISO 18 (Turbo SMART & Turbo SMART Cube) MAJOR SERVICE EVERY 10,000 HOURS (5 YEARS) • Complete System Check • Replace inlet lter o-ring & lubricate • Install Service Kit for Centrifuge • Install Service Kit for Blower • Check amalgam cup level • Replace HEPA lter cartridge MICRO SMART 10,000 HOUR SERVICE KITS C-025401-SK Centrifuge – Micro SMART & Micro SMART Cube C-014057-SK Blower – (Uni Jet 40) Micro SMART C-017500-SK Blower – (Uni Jet 25) Micro SMART Cube TURBO SMART SERVICE KITS C-0034MS-3SK Centrifuge – Turbo SMART & Turbo SMART Cube C-1M0000-SK Blower – (Uni Jet 75) Turbo SMART C-014095-SK Blower – (Uni Jet 40) Turbo SMART Cube SMART User Maintenance Guide 10 Amalgam Container Replacement NOTIFICATION & VERIFICATION If your SMART suction system is tted with a Hydrocyclone amalgam retention unit, alarm messages will appear on the unit’s display to notify you of 95% and 100% amalgam levels. When the 95% level alarm is displayed, make arrangements to have the amalgam container replaced at an appropriate time (whilst not seeing patients) as the system will need to be turned o. Waiting until the 100% level is reached may cause interruption to your clinic. Whilst this process can be performed by clinic sta, it is highly recommended to employ your equipment service technician. The amalgam container is always full of waste uid and a varying level of amalgam waste material. 100% amalgam waste capacity of the container is approx. half the container. The amalgam waste material settles at the bottom of the container and usually appears darker than the waste uid. BEFORE replacing the container, rstly verify the 95 or 100% level alarm visually. If this cannot be determined visually from the outside, begin the container replacement process and check internally when the container is removed. False alarms can occur if the daily disinfection process in ineective. If the disinfectant is not aspirated through the entire suction system & Hydrocyclone amalgam container, it is possible for a dark bacterial build up to form on the inside of the container. This can block the level sensor and trigger a false alarm. If this is occurring, check your disinfection processes and/or contact your equipment service technician or Cattani for further advice. In this case, the rib in the back of the container (that ts into the sensor) will need to be cleaned with an appropriate brush. The container can then be reinstalled with a new o-ring seal as per the container replacement procedure. 11 Micro SMART / Cube 1. Turn the unit o unit with the switch on the control panel. 2. Turn the handle underneath the amalgam container clockwise until the container reaches the base. 3. Gently slide container out of the front of the holder. 4. Place the container on a level surface. Dispense a small amount of Puli-Jet Gentle disinfectant into the waste uid to within 5mm of the container rim. Remove lid from new cup and place the lid on the full container. Push lid down with your palm and twist to lock into position. The container is now sealed and safe tostore until pick-up. 5. Replace the o-ring on the Hydrocyclone and coat with a few drops of Lubri-Jet drops (New o-ring located in new waste container). 6. Place the new container into the guide, ensuring the guide’s plastic disc ts within the recess at the base of the container. 7. Push the container forward and turn the handle anti-clockwise until the container is fully located and sealed. SMART User Maintenance Guide 12 Turbo SMART / Cube 1. Turn the unit o with the switch onthe control panel. 2. Open the drain tap (the tap is open when the lever is in line with the tube) and loosen the breather valve (do not remove). Wait for 15 seconds. 3. Support the base of the container to keep it level and slowly lift the lever to remove. 4. Place the container on a level surface. Dispense a small amount of Puli-Jet Gentle disinfectant into the waste uid to within 5mm of the container rim. Remove lid from new cup and place the lid on the full container. Push lid down with your palm and twist to lock into position. The container is now sealed and safe tostore until pick-up. 5. Replace cone tip and o-ring seal on the Hydrocyclone. Coat the o-ring with a few drops of Lubri-Jet drops (New cone tip and o-ring located in new waste container). 6. Place the new container into position; carefully locate the tags ofthe container with the lever. Push the lever down slowly to lock the container into place. 7. Close the drain tap and tighten thebreather valve. 13 Maxi SMART 1. Turn the unit o unit with the switch on the control panel. 2. Open the drain tap (the tap is open when the lever is in line with the tube) and loosen the breather valve (do not remove). Wait for 15 seconds. 3. Turn the handle underneath the amalgam container clockwise until the container reaches the base. Gently remove the container. 4. Place the container on a level surface. Dispense a small amount of Puli-Jet Gentle disinfectant into the waste uid to within 5mm of the container rim. Remove lid from new cup and place the lid on the full container. Push lid down with your palm and twist to lock into position. The container is now sealed and safe tostore until pick-up. 5. Replace the o-ring on the Hydrocyclone and coat with a few drops of Lubri-Jet drops (New o-ring located in new waste container). 6. Place the new container into the guide, ensuring the guide’s plastic disc ts within the recess at the base of the container. 7. Push the container forward and turn the handle anti-clockwise until the container is fully located and sealed. Close the overow tap and tighten the breather valve. SMART User Maintenance Guide 14 Amalgam Recycling Amalgam container replacement should be part of the annual maintenance of the suction system performed by your service technician. CMA Ecocycle remind dental practices tokindly “do the right thing” by having your ‘waste’ amalgam recycled at all times. Your amalgam cup/container will be exchanged allowing the material to be recycled by EPA certied apparatus. Please don’t place this item in the rubbish bin and/or down the sink. Aust 1300 32 62 92 NZ 0800 732 922 CMA Ecocycle – your amalgam recyclingspecialist. Contact your equipment service technician or Cattani if you require anyfurther information. 15 M-060970 Puli-Jet GENTLE Disinfectant Solution C-040720 Pulse Cleaner Automatic Dispenser M-040825 Antifoaming Disinfectant Tablets M-040727 Lubri-Jet LubricantDrops P. +61 3 9484 1120 NZ Toll Free 0800 68 22 88 E. [email protected] www.cattani.com.au
Recommended Manuals for Cattani turbo smart Owners:


Dental equipment, Medical Equipment Devices:
-
Dear customerThank you for choosing a quality product from Dentaurum. It is essential to read these instructions carefully and adhere to them to ensure safe, efficient use and ensure that you and your patients gain full benefit. Instructions for use cannot describe every eventuality and possible application. In case of questions or ideas, please contact your local representative.As our products ar …
Variety Dental equipment 2
-
#FEJFOVOHTBOMFJUVOH*OTUSVDUJPONBOVBM߭.PEFEߤFNQMPJ*TUSV[JPOJEߤVTP߭*OTUSVDDJPOFTEFTFSWJDJPMobiloskop `S`No. 2200 040021-6806 30072015 / AMade in Germany Ideas for dental technology …
Mobiloskop S Dental equipment 4
-
S m a r t d i g i ta l c a m er a d esi g ned ex c l u si v el y f or d enti str yUser’s ManualF or th e A d v a nc ed M a nu a l of E y eS p ec i a l C — I V , v i si t ou r w eb si te a t h ttp : / / w w w . sh of u . c om .S el ec t th e r eg i on yo u p u r c h a sed th e c a m er a .Advancedm a r k i nd i c a tes th a t th e d eta i l ed ex p l a na ti on i s g i v en i n th …
EyeSpecial C-IV Digital Camera 52
-
#FEJFOVOHTBOMFJUVOH*OTUSVDUJPONBOVBM߭.PEFEtFNQMPJ*TUSV[JPOJEߤVTP߭*OTUSVDDJPOFTQBSBFMTFSWJDJP̵͚͕͍͍͕͕͗ͣͬ͛ͪ͗ͣ͘͟͜͜͟͞͝͠͞͠⠡ኰ佈⥢ᆺ߭ᜪ◅一⥢⩌߭瞦綣砞煿砖.BEFJO(FSNBOZMTplusNo.1803-x000 /-x5002011-02 21-9873 DIdeas for dental technology …
MT plus Laboratory Equipment 16
Additional Information:
Popular Right Now:
Operating Impressions, Questions and Answers about Cattani turbo smart:
РЕВОЛЮЦИЯ В АСПИРАЦИИ!!!
В 2005 году «Cattani» создала инновационный продукт TURBO-SMART!
РЕВОЛЮЦИЯ В АСПИРАЦИИ!!!
В 2005 году «Cattani» создала инновационный продукт TURBO-SMART!
 Уникальный аппарат, представляющий собой революционную конструкцию стоматологического аспиратора. Turbo-Smart разработан с целью обеспечить в одном аппарате возможности применения в большинстве систем аспирации, используемых в практике. Turbo-Smart в одном исполнении может работать по двум версиям (программам). В версии “A” он способен обеспечить аспирацию 2-3 стоматологических установок. При расширении стоматологической клиники, оснащении ее большим количеством установок, Turbo-Smart может быть легко перепрограммирован. После введения пароля, агрегат переходит в работу по версии “B” которая может обеспечить надежную аспирацию 4-5 стоматологических установок. Кроме того, данное оборудование предусматривает параллельное подключение к системе аспирации нескольких агрегатов, что реально позволяет еще больше увеличить число потребителей вакуума!
В Turbo-Smart уровень вакуума можно регулировать в диапазоне от 0 до 200 миллибар. Для его работы не требуется подключение к водопроводной сети. В Turbo-Smart автоматически регулируется уровень вакуума: при увеличении количества установок, одновременно использующих отсос, он увеличивает скорость вращения двигателя, поддерживая, таким образом, постоянный уровень вакуума. И наоборот уменьшает количество оборотов при уменьшении количества одновременно включенных установок.
Следовательно, даже потребление электроэнергии происходит пропорционально аспирационной нагрузке, оказываясь намного более низким по сравнению с традиционными системами, что позволяет еще и экономить электроэнергию.
Работа Turbo-Smart обеспечивает производительность, сопоставимую с традиционными агрегатами, в тоже время он имеет значительно меньшие габаритные размеры по отношению к традиционным аспирационным агрегатам аналогичной производительности.
Программа Turbo-Smart контролирует температуру, силу тока и уровень вакуума: при температуре, превышающей норму, аппарат автоматически уменьшает число оборотов двигателя вакуумной помпы, способствуя, таким образом, нормализации температуры и последующему автоматическому восстановлению изначального режима. Таким же образом при неожиданном образовании большего, чем предусмотрено, количества аспирационной смеси, центрифуга аппарата, выполняющая роль сепаратора, сразу же начинает более интенсивную циркуляцию излишней жидкости, увеличивая сброс в канализацию до момента возврата к нормальному режиму работы. Такой принцип автоматического контроля помогает избежать остановки аспирации и в то же время сокращает перегрузки агрегата.