Blue Screen of Death errors or Stop errors are indications that something’s wrong with your computer. So when you encounter one, you must find out what the root cause of the problem is before it gets out of hand. One of the BSOD errors you might encounter on your Windows 10 computer is the “DRIVER IRQL NOT LESS OR EQUAL or SYSTEM THREAD EXCEPTION NOT HANDLED, Netwtw04.sys failed” error.
As you know, system files or .sys files are some of the essential parts of the Windows operating system. It is a repository of system driver settings used by the Windows operating system in order to communicate with the connected hardware and devices. They are essential for the normal functioning of the operating system. A lot of Windows 10 users are facing this particular Blue Screen of Death error whenever they open an app or disconnect external devices from the system.
The Netwtw04.sys file is a part of the Intel PROSet/Wireless Wi-Fi software. And so when you might encounter two kinds of Stop errors for the Netwtw04.sys driver file such as:
- “DRIVER_IRQL_NOT_LESS_OR_EQUAL What failed: Netwtw04.sys.” – This kind of error message signifies that a kernel-mode driver tried to access pageable memory at a process IRQL that was too high.
- “SYSTEM_THREAD_EXCEPTION_NOT_HANDLED What failed: Netwtw04.sys” – This error message indicates that the root cause of the error might be incompatible drivers with the operating system. In general, the root cause of the Netwtw04.sys BSOD error might be due to several reasons such as corrupted files, incorrect device driver configuration, malicious programs, outdated drivers, bad drivers, corrupted Windows Registry as well as some damaged or corrupted system files.
Whichever of the two error messages you got, you can try the troubleshooting options given below to fix the “DRIVER IRQL NOT LESS OR EQUAL or SYSTEM THREAD EXCEPTION NOT HANDLED, Netwtw04.sys failed” BSOD error.
Option 1 – Try to rollback your Network driver
If you have updated the driver software as of late and you suddenly got this BSOD error, you might have to roll back the device driver – in other words, switch back to the previous working version. To do that, follow these steps:
- Tap the Win + R keys to launch the Run window and then type in the “devmgmt.msc” command and hit Enter to open the Device Manager window.
- Under the Device Manager, you will see a list of drivers. From there, look for the Network Adapters and expand it.
- Next, select the driver entries that are labeled appropriately other than anything in the context of the WAN Miniport.
- Then select each one of them and double-click to open a new mini window.
- After that, make sure that you’re on the Driver tab and if you are not, just navigate to it then click the Roll Back Driver button to switch back to the previous version of your Network adapters.
- Now restart your computer to successfully apply the changes made.
Option 2 – Try to update the Network drivers
If the present Network driver is giving you a headache that is the “DRIVER IRQL NOT LESS OR EQUAL or SYSTEM THREAD EXCEPTION NOT HANDLED, Netwtw04.sys failed” BSOD error, then you need to update the Network drivers. To do so, here’s what you have to do:
- Tap the Win + R keys to launch the Run window and then type in the “devmgmt.msc” command and hit Enter to open the Device Manager window.
- Under the Device Manager, you will see a list of drivers. From there, look for the Network Adapters and expand it.
- Then right-click on each one of the Network drivers and update them all.
- Restart your PC and see if it helped in fixing the BSOD error.
Note: If updating the network drivers didn’t help in fixing the problem, you can also try to uninstall the very same drivers and restart your Windows 10 PC. After that, the system itself will reinstall the drivers you just uninstalled. Alternatively, you can also download and install the drivers from the manufacturer’s website directly.
Option 3 – Try running the System File Checker Scan
The SFC or System File Checker scan could detect and automatically repair damaged system files that could be causing the Netwtw04.sys failed BSOD error. SFC is a built-in command utility that helps in restoring corrupted files as well as missing files. It replaces bad and corrupted system files to good system files. To run the SFC command, follow the steps given below.
- Tap Win + R to launch Run.
- Type in cmd in the field and tap Enter.
- After opening Command Prompt, type in sfc /scannow
The command will start a system scan which will take a few whiles before it finishes. Once it’s done, you could get the following results:
- Windows Resource Protection did not find any integrity violations.
- Windows Resource Protection found corrupt files and successfully repaired them.
- Windows Resource Protection found corrupt files but was unable to fix some of them.
Option 4 – Run the DISM Tool
The DISM tool is another command-line tool in the Windows operating system that could help users fix various corrupted system files. To use it, follow these steps:
- Open the Command Prompt as admin.
- Then type in this command: DISM /Online /Cleanup-Image /RestoreHealth
- The DISM command you entered will repair the corrupted system image. Do not close the window if the process takes a while as it will probably take a few minutes to finish.
Option 5 – Run the CHKDSK Utility
Running the CHKDSK utility might also help you resolve the Netwtw04.sys failed BSOD error. If your hard drive has issues with integrity, the update will really fail as the system will think that it’s not healthy and that’s where the CHKDSK utility comes in. The CHKDSK utility repairs hard drive errors that might be causing the problem.
- Open Command Prompt with admin privileges.
- After opening Command Prompt, execute the following command and hit Enter:
chkdsk /f /r
- Wait for the process to be completed and then restart your computer.
Advanced System Repair Pro
One-click automated PC repair solution

With Advanced System Repair Pro you can easily
DOWNLOAD
Advanced System Repair Pro is compatible with all versions of Microsoft Windows including Windows 11
Share this article:
You might also like
When you receive Error 0x800704C8 when trying to move a file inside Windows 10 operation is stopped and it can not continue leaving you with the file in its original location without a copy. Several issues can be the cause of this type of behavior and error and after some digging and analyzing we are bringing you various solutions for this error and how to fix it.
Ownership issues
It turns out that not having ownership of fie can cause this error and prevent you from copying it. For some reason, Windows can assume that file is owned or used by another application or process and thus prevents you from making a copy since you do not have ownership of it. Resolving this particular issue will require you to install a third-party application that is tailored for this kind of task.
After some talk and research, we found out that there is a freeware application that can solve this issue quite fastly. Unlocker is the name and the download link is here. Once downloaded, install it and run it. Once inside the application browse to the location where you need to change the ownership, click on it to select it, and click OK.
Use the No Action drop drown menu to select Move, then click OK
Antivirus Issue
As with other file and application issues, this error could also be a product of antivirus marking it inaccessible to Windows and thus preventing copy or move operation on it.
note: Do not turn off Windows defender since it was proven that it is not the cause of this kind of error, so if you are using only Windows defender you can skip this solution.
How temporary turning off each security suite is different and it depends on the application itself we can not cover in detail the procedure here. Go to your security suite manufacturer’s website and get information there or if you want, go directly to applications and features inside Windows and uninstall the software.
Visual Studio issue
- If the file you are trying to move is part of a Visual Studio project then the issue can be linked directly to Visual Studio itself, luckily the solution is quite easy. All you have to do it to exit Visual Studio and then run it with administrator privileges.
- In order to run Visual Studio with elevated privileges locate its executable file and right-click on it.
- Choose properties and go to the compatibility tab
- Inside compatibility tab check box that says run this program as an administrator
Corrupted system files
If the previous solutions have not provided you with results then you have system file corruption that needs to be fixed. Move from one solution to another as presented below:
-
Run SFC scan
SFC scan is a built-in Windows tool for solving corrupted system file issues, it is fully automated and does not require from the user any kind of knowledge or information. To run it and scan the system do the following:
Press ⊞ WINDOWS + X to open the secret menu
Left-click on the command prompt (admin)
In command prompt type SFC /SCANNOW and press ENTER
Wait for the process to finish, do not interrupt it and once it is done, restart your computer -
Run DISM scan
DISM scan is similar to SFC scan but it tackles different types of system file corruption and it is recommended to run it also after SFC has been completed. Please note that for DISM scan to be successful you will need a stable internet connection since DISM will replace corrupted files with new ones downloaded from Microsoft. To run it do the following:
Press ⊞ WINDOWS + X to open the secret menu
Left-click on the command prompt (admin)
inside command prompt type: exe /online /cleanup-image /scanhealth followed by ENTER, then type: Dism.exe /online /cleanup-image /restorehealth also followed with ENTER.
Leave scan to finish and reboot your PC
Read More
Windows Setup in Continuous Reboot Loop – What is it?
After upgrading to Windows 10 operating system from Windows 7 or Windows 8/8.1, a lot of Windows users are complaining about the Windows setup in a continuous reboot loop. The computer would just keep on rebooting every time the machine is booted and this incites frustration for a lot of Windows users.
Solution
 Error Causes
When Windows launched the third update for Windows 10, users trying to upgrade to Windows 10 encountered an endless reboot loop problem. The computer will crash repeatedly. The KB3081424, which is a roll-up of bug fixes of Windows 10, continuously fails once you start the update process and then triggers a message showing: “We couldn’t complete the updates, undoing the changes.” The undoing process will then cause a system reboot mandatorily.
Once you log back on your computer again, the Windows 10 update will try to reinstall KB3081424. You will not be able to stop the update which will cause your Windows setup in a continuous reboot loop.
The KB3081424 will not be successfully installed since if it fails for the first time, that initial failure can be detected to create a bad entry in your Windows 10 registry. This will then prevent your subsequent attempts to reinstall KB3081424 to make it work correctly.
Further Information and Manual Repair
In order to fix the problem of Windows 10 setup in a continuous reboot loop, there are a few methods you can try. Try following these simple steps and you’ll be able to get rid of the problem.
Note: If you’re not highly confident to solve this issue on your own, it is highly recommended to consult an authorized computer technician who would be knowledgeable enough to fix the issue for you. In addition, you can also use a system optimizer to resolve the issue.
Method One: Check For Windows Update
Microsoft Windows released an updated fix for the Windows setup in continuous reboot loop problem. You can try fixing the issue through Windows Update.
- Open Settings
- Go to Update & Security
- Select Windows Update then choose Check for updates
At this point, an additional update will be installed and downloaded to your operating system to resolve the continuous reboot loop problem.
Method Two: Eliminate Bad Registry Entry
Before KB3081424 attempts to install again, you can try doing this solution:
- Click on the Start menu then type regedit
- Once the window opens, go to HKEY_LOCAL_MACHINESOFTWAREMicrosoftWindows NTCurrentVersionProfileList
- Create a backup for your registry key (since this process is a bit risky). Select ProfileList then click on File and Export then choose your backup name.
- From the ProfileList IDs, remove anything with ProfileImagePath in it.
- Close Regedit then reboot. By this time, the KB3081424 should properly install.
Method Three: Perform A Startup Repair
Another thing you can try to solve the Windows setup in continuous reboot loop problem is to perform a startup repair from a working computer.
- Ensure that all unnecessary devices are disconnected from your computer as your computer might detect them.
- If you are connected to a network, you need to disconnect from this as well.
- On a working computer, download the Windows 10 ISO then you can perform a startup repair.
- Boot your computer from the Windows 10 DVD.
To change your BIOS option to boot from the Windows 10 DVD, follow these steps:
- Boot your computer then press the F2 function key to enter setup.
NOTE: You must do this quickly since the BIOS loads rapidly.
- Once you’re inside the BIOS, navigate to the Boot Configuration screen. On this screen, you’ll be able to change the first device to be loaded.
- Go to Removable Devices then hit Enter. Removable devices could either be a thumb drive or DVD. Select DVD to put it at the top and be the first boot device.
- Save your changes by pressing on the F10 function key. A setup confirmation box will appear with a message Save configuration changes and exit now. Select Yes.
- Exit BIOS by pressing on the ESC key. You should be prompted to boot from the Windows 10 DVD at this point.
If you’re not able to execute the aforementioned processes on your own, get help or download and install a powerful system optimizer to assist with the windows continuous reboot loop process and other Windows 10 error messages.
Read More
Error Code 0x80070017- What is it?
Error Code 0x80070017 is an error code that is most often associated with Windows 10 installations, although it has also been encountered by users on previous versions of the Windows operating systems. It is usually encountered as users attempt to install a new version of the software on their machine.
Common symptoms include:
- A vague error message regarding the inability of the system to copy over the necessary files pops up as users attempt to install a new version of the Windows operating system on their computer
While it can be hard to tell what the exact cause of Error Code 0x80070017 is on your specific device, the good news is that there are two primary methods that can be used to fix the problem and to allow you to proceed with your installation. These two methods do require some degree of technical knowledge and/or skill, so if you don’t feel like you have the ability to undertake them on your own, be sure to get in touch with a trusted computer repair professional to assist you.
Solution
Error Causes
The most basic cause of Error Code 0x80070017 is that some of the files that are needed by the system to complete the installation are either not being found by the computer or are believed to be corrupted by the system. When this happens, security features within the software prevent it from completing the installation process, so as to avoid damage to the computer.
Error Code 0x80070017 can be disruptive to your installation process, but there are two basic methods that can be employed to resolve it.
Further Information and Manual Repair
While it can be frustrating to encounter Error Code 0x80070017 on your Windows machine, there are two methods that can be used to try to resolve the problem. One of these methods is extremely simple, even for the most basic users, while the second method takes a little bit more skill and technical knowledge. If you aren’t able to complete these methods on your own, be sure to get in touch with a qualified computer repair technician that can assist you.
Here are the best ways to attempt to resolve Error Code 0x80070017 on your device:
Method One: Clean Your Physical Disk
If you purchased a physical disk version of the installation files for your Windows operating system, remove the disk from your drive and clean it using a microfiber or other lint-free cleaning cloth. As you wipe down the disk, do not use any chemicals, and be sure to wipe gently from the center towards the outside edge rather than the other direction, as failure to do so can damage the disk irreparably.
In some cases, you may need to contact Windows support if you believe that there is an error on the disk itself, such as a scratch, that would prevent the disk from being used as needed in the installation process. They may be able to offer you a replacement disk or you may be able to download a digital copy of the version that you are attempting to install on your machine.
Method Two: Use the Chkdsk Utility
To determine if there may be an error within the disk drive itself, place the installation disk into the drive and restart the system. Go through the prompts until you see the option to “repair your computer.” Choose the operating system that you are using, go into the menu for System Recovery, and type in the words “Chkdsk/r” to begin to use the tool.
Whenever you run a tool like Chkdsk on your computer, it is important to restart your machine afterward to ensure that any changes that have been made are able to be fully applied and accepted by the operating system that you are running.
Method Three: Use An Automated Tool
If you wish to always have at your disposal a utility tool to fix these Windows 10 and other related issues when they do arise, download and install a powerful automated tool.
Read More
InternetSpeedTracker is a browser extension developed by MindSpark Inc. This browser add-on offer uses tips on how to boost their “bad” internet connection speed. It displays false internet speed in order to get you to open the sponsored links listed in the toolbar.
This extension also hijacks your browser home page and replaces your default search engine with MyWay. While browsing the internet you will see additional unwanted sponsored ads and links throughout your search results, and sometimes even pop-up ads might appear. While active this extension gathers personal information, website visits, links, and clicks and uses this data to serve ads.
InternetSpeedTracker has been flagged as a Browser Hijacker by several anti-virus scanners, and due to its data mining behavior, it is not recommended to keep it on your computer, especially because it gives false data about your internet speed.
About Browser Hijackers
Browser hijack is a very common type of online fraud where your internet browser settings are modified to allow it to carry out things you don’t intend. They’re created to disrupt browser functions for several purposes. It redirects you to the sponsored sites and inserts ads on the web browser which helps its developer generate earnings. Nevertheless, it’s not that naive. Your web safety is jeopardized and it is also extremely irritating. They don’t just ruin your web browsers, but browser hijackers could also modify the computer registry, making your PC vulnerable to other attacks.
How one can know if your web browser is hijacked
Signs that an internet browser is a hi-jacked include: the browser’s home-page is modified; you find yourself regularly directed to a different site than the one you meant; the default search engine is changed; unwanted new toolbars are added to your web browser; never-ending pop-up ads show up and/or your browser pop-up blocker is disabled; your web browser starts running sluggishly or displays frequent glitches; You simply can’t access specific sites, particularly anti-virus sites.
How they infect PCs
A browser hijacker can be installed on your computer when you check out an infected website, click an e-mail attachment, or download something from a file-sharing website. They are usually included with toolbars, BHO, add-ons, plugins, or browser extensions. A browser hijacker could also be installed as a part of freeware, shareware, demoware, and fake programs. A good example of a notorious browser hijacker is the most recent Chinese malware known as “Fireball”, which has attacked 250 million computer systems worldwide. It acts as a hijacker but can be turned into a fully functioning malware downloader afterward.
Browser hijackers could affect the user’s browsing experience greatly, keep track of the websites visited by users and steal private information, cause difficulty in connecting to the internet, and ultimately create stability issues, making software programs and systems freeze.
How to repair a browser hijack
Some hijackers could be removed by uninstalling the freeware they came with or by eliminating any extension you have recently added to your system. But, many hijackers are hard to get rid of manually. No matter how much you attempt to eliminate it, it can keep coming back over and over again. And there’s no denying the fact that the manual fixes and removal methods can be quite a complicated job for a rookie PC user. Furthermore, there are several risks connected with fiddling around with the system registry files.
What you can do if Virus Stops You From Downloading Anything?
Malware could cause all kinds of damage after they invade your system, ranging from stealing your private information to deleting data files on your computer system. Certain malware variants modify web browser settings by adding a proxy server or modify the computer’s DNS configuration settings. In such cases, you’ll be unable to visit some or all of the websites, and thus not able to download or install the necessary security software to remove the infection. If you’re reading this article, chances are you’re stuck with a virus infection that is preventing you to download or install the Safebytes Anti-Malware program on your PC. There are some fixes you can try to get around with this issue.
Install antivirus in Safe Mode with Networking
If the malware is set to load at Windows startup, then booting in Safe Mode should prevent it. Since only the minimal programs and services start-up in safe mode, there are rarely any reasons for issues to take place. Listed below are the steps you should follow to start your computer into the Safe Mode of your Windows XP, Vista, or 7 computers (visit Microsoft site for instructions on Windows 8 and 10 PCs).
1) At power on/start-up, tap the F8 key in one-second intervals. This will bring up the Advanced Boot Options menu.
2) Select Safe Mode with Networking with arrow keys and hit Enter.
3) As soon as this mode loads, you will have an internet connection. Now, utilize your web browser normally and navigate to https://safebytes.com/products/anti-malware/ to download and install Safebytes Anti-Malware.
4) Right after the software program is installed, let the diagnostic scan run to remove trojans and other malware automatically.
Switch to an alternate web browser
Web-based viruses can be environment-specific, aiming for a particular internet browser or attacking specific versions of the browser. The best solution to avoid this issue is to opt for a browser that is known for its security features. Firefox comprises built-in Phishing and Malware Protection to keep you safe online.
Run anti-virus from a pen drive
Another technique is to download and transfer an anti-malware application from a clean PC to run a scan on the affected computer. Follow these steps to use a flash drive to clean your infected system.
1) Download Safebytes Anti-Malware or Microsoft Windows Defender Offline onto a clean PC.
2) Insert the pen drive on the same system.
3) Double-click the Setup icon of the anti-malware software package to run the Installation Wizard.
4) Pick a USB flash drive as the place when the wizard asks you exactly where you would like to install the application. Follow the instructions on the computer screen to complete the installation process.
5) Now, transfer the pen drive to the infected computer.
6) Run the Safebytes Anti-malware directly from the thumb drive by double-clicking the icon.
7) Click the “Scan” button to run a full system scan and remove malware automatically.
Let’s Talk About SafeBytes Anti-Malware!
Want to install the best anti-malware application for your laptop or computer? There are many applications available in the market which comes in free and paid versions for Windows computers. Some of them are great and some are scamware applications that pretend as legitimate anti-malware programs waiting to wreak havoc on your PC. When looking for an antimalware program, pick one which gives reliable, efficient, and total protection against all known viruses and malware. One of the recommended tools by industry leaders is SafeBytes Anti-Malware, the most dependable program for Windows computers.
SafeBytes anti-malware is a reliable tool that not only secures your system permanently but is also quite user-friendly for people of all ability levels. This application could easily identify, remove, and protect your personal computer from the most advanced malware attacks such as spyware, adware, trojan horses, ransomware, worms, PUPs, and other possibly damaging software applications.
SafeBytes has excellent features when compared to other anti-malware programs. Below are a few of the great ones:
World-class AntiMalware Protection: Built upon a greatly acclaimed anti-virus engine, this malware removal application can identify and remove numerous obstinate malware threats such as browser hijackers, PUPs, and ransomware that other common antivirus applications will miss.
Live Protection: SafeBytes gives real-time active supervision and protection from all known viruses and malware. They’re very effective in screening and eliminating different threats because they are regularly improved with new updates and alerts.
Web Security: SafeBytes provides an instant safety rating on the web pages you are going to visit, automatically blocking risky sites and making sure that you are certain of your safety while browsing the internet.
Very Low CPU and Memory Usage: SafeBytes provides complete protection from online threats at a fraction of the CPU load due to its enhanced detection engine and algorithms.
Premium Support: SafeBytes provides 24/7 technical support, automatic maintenance, and updates for the best user experience.
Technical Details and Manual Removal (Advanced Users)
If you wish to manually remove InternetSpeedTracker without the use of an automated tool, it may be possible to do so by removing the program from the Windows Add/Remove Programs menu, or in cases of browser extensions, going to the browsers AddOn/Extension manager and removing it. You will likely also want to reset your browser.
To ensure the complete removal, manually check your hard drive and registry for all of the following and remove or reset the values accordingly. Please note that this is for advanced users only and may be difficult, with incorrect file removal causing additional PC errors. In addition, some malware is capable of replicating or preventing deletion. Doing this in Safe Mode is advised.
The following files, folders, and registry entries are created or modified by InternetSpeedTracker
Files:
C:DOCUME1USER1LOCALS1Tempnsk1.tmp
C:b418207fbd4b466002312b66521c390947518e9a0d787e4e059af0505f607f3e
C:DOCUME1USER1LOCALS1Tempnsk2.tmp
C:DOCUME1USER1LOCALS1Tempnsk2.tmpnsDialogs.dll
C:DOCUME1USER1LOCALS1Tempnsk2.tmpSystem.dll
C:DOCUME1USER1LOCALS1Tempnsk2.tmpnsDialogs.dll
C:DOCUME1USER1LOCALS1Tempnsk2.tmpSystem.dll
C:Program FilesInternetSpeedTracker_9tEIInstallr.binNP9tEISb.dl_
C:PROGRA1INTERN2Installr.binNP9tEISb.dl_
C:Program FilesInternetSpeedTracker_9tEIInstallr.binNP9tEISb.dll
C:Program FilesInternetSpeedTracker_9tEIInstallr.bintEIPlug.dl_
C:PROGRA1INTERN2Installr.bintEIPlug.dl_
C:Program FilesInternetSpeedTracker_9tEIInstallr.bintEIPlug.dll
C:Program FilesInternetSpeedTracker_9tEIInstallr.bintEZSETP.dl_
C:PROGRA1INTERN2Installr.bintEZSETP.dl_
C:Program FilesInternetSpeedTracker_9tEIInstallr.bintEZSETP.dll
C:WINDOWSsystem32rundll32.exe
C:Program FilesInternetSpeedTracker_9tEIInstallr.binNP9tEISb.dl_
C:Program FilesInternetSpeedTracker_9tEIInstallr.binNP9tEISb.dll
C:Program FilesInternetSpeedTracker_9tEIInstallr.bintEIPlug.dl_
C:Program FilesInternetSpeedTracker_9tEIInstallr.bintEIPlug.dll
C:Program FilesInternetSpeedTracker_9tEIInstallr.bintEZSETP.dl_
C:Program FilesInternetSpeedTracker_9tEIInstallr.bintEZSETP.dll
Registry:
HKLMSOFTWAREClassesInternetSpeedTracker_9t.HTMLMenu
HKLMSOFTWAREClassesInternetSpeedTracker_9t.HTMLPanel
HKLMSOFTWAREClassesInternetSpeedTracker_9t.SettingsPlugin
HKLMSOFTWAREClassesInternetSpeedTracker_9t.ToolbarProtector
HKLMSOFTWAREWow6432NodeMicrosoftWindowsCurrentVersionexplorerBrowser Helper Objects9e28b297-11d4-4293-aa6f-558658ee66ae
HKLMSOFTWAREWow6432NodeMicrosoftWindowsCurrentVersionexplorerBrowser Helper Objectscc28794a-99d4-4b1b-bccf-b065ce5f9feb
HKLMSOFTWAREWow6432NodeInternetSpeedTracker_9t
HKLMSYSTEMControlSet001servicesInternetSpeedTracker_9tService
HKLMSYSTEMCurrentControlSetservicesInternetSpeedTracker_9tService
HKUS-1-5-21-1633355155-4214755471-2067616181-1000SoftwareAppDataLowSoftwareInternetSpeedTracker_9t
HKLMSOFTWAREWow6432NodeMicrosoftWindowsCurrentVersionRunInternet Speed Tracker EPM Support
Read More
Mswrd632.wpc — What is it?
Mswrd632.wpc is a Microsoft Office Word error message. This error message is often displayed in the following format:
‘Word cannot start the converter mswrd632.wpc’
The error message mswrd632.wpc may pop up when computer users try to open certain MS Word documents using the .doc extension.
Solution
Error Causes
Error Mswrd632.wpc may be triggered due to several reasons. Some of the common reasons for the mswrd632.wpc error code include:
- Issues with Microsoft Word application
- MSwrd632.wpc file corrupted
- Changes in the registry configuration settings
- Issues with security updates
Sometimes when you attempt to access the Word file of the older version of the MS Word application after new security updates, you may experience this error code.
This happens because the new security features that you have installed in the updated version blocks old files from being accessed.
Further Information and Manual Repair
If you can’t access important MS Word files on your PC, due to the error Mswrd632.wpc, then don’t you worry! The good news is that it is easy to fix and repair. By following a few simple methods, you can easily resolve this issue and access your MS Word files.
Try the methods listed below to repair error Mswrd632.wpc on your system:
Method 1: Copy the MSwrd632.wpc file From Another Computer
The error may also occur if the MSwrd632.wpc file is corrupted. In such as situation, copy the MSwrd632.wpc file on your PC from another computer.
You can usually find this file in the following path C:Program FilesCommon FilesMicrosoft SharedTextConv.
However, please note this method is not secure and may make your PC vulnerable to a possible security hack. Do it when your PC is not connected to the internet.
Method 2: Unregister the Text Converter
This issue can also be resolved by unregistering the converter. Here is a step-by-step guide to unregister the converter.
- First, go to the start menu and select RUN.
- Type REGEDIT and press the OK button.
- Next, what you have to do is find and click on registry subkeys. Here are the keys that you have to click on
HKEY_LOCAL_MACHINESOFTWAREMicrosoftSharedToolsText ConvertersImportMSWord6.wpc (Windows 32 bit OS)
HKEY_LOCAL_MACHINESOFTWAREWow6432NodeMicrosoftSharedToolsText ConvertersImportMSWord6.wpc (Windows 64 bit OS)
- Choose the key according to your Windows bit operating system. After that, click on the Edit menu, select the Delete option and click ‘Yes’ to activate changes.
This change will effectively unregister the text converter and disable it for third-party applications and for Microsoft Office enabling you to access your desired MS Word files easily.
Method 3 — Download Restoro to Resolve Registry issues
If the error is related to the registry, then the best and most efficient way to fix it is to download Restoro.
This is a powerful registry cleaner and a PC Fixer deployed with a user-friendly interface and compatible with all Windows versions. It scans and removes all registry errors and repairs the registry in seconds.
Click here and download Restoro to resolve the MSwrd632.wpc error now!
Read More
Error code 0xc000021a — What is it?
Error code 0xc000021a occurs when the system is unable to start or there’s a failure in critical system processes. Normally, it would take about several seconds for the system to boot and while on the startup process, error code 0xc000021a may take place to block the system to boot up. Users will get a blue screen of death (BOSD) when this error occurs. When upgrading to Windows 10, be careful; you might encounter other error messages such as error code 8007002c.
Solution
Error Causes
There are several reasons why error code 0xc000021a occurs. It is important to have a full understanding of what caused the blue screen of death before attempting to fix the error by yourself. See below for a few common causes:
• Computer malware has infiltrated your device.
• Important files such as Winlogon.exe and Csrss.exe are damaged. Winlogon.exe file is responsible for handling the login and logout processes while Csrss.exe is a vital part of Microsoft Client or Server ‘Runtime Server Subsystem’. Once one of these files is damaged or deleted, a stop error will occur.
• When there are mismatched system files installed or system upgrading process failed or still incomplete.
• Premature unloading of Wbemprox.dll
• Newly installed third-party software is not compatible with the operating system.
• There are corrupted, outdated, or incorrectly configured device drivers.
• There’s insufficient space in the system partition. Once the system partition is full, certain errors such as error code 0xc000021a will manifest.
• Windows registry is corrupted or damaged due to a software or system change. This means there are registry entries that are not cleared after uninstalling an application.
Further Information and Manual Repair
In fixing error code 0xc000021a, you might want to try and manually do so. Manual repair methods can give users effective and efficient solutions, addressing the root problems in relation to Windows error codes. Once the manual repair method is correctly implemented, users will be able to resolve issues immediately.
However, there might be instances when a Windows professional is needed. In such cases, seek help from a certified Windows expert or you might want to consider using an automated tool whenever necessary.
Method One: Convert the Drive or Partition from NTFS to GPT
In order to fix Error code 0xc000021a in Windows 10, you might need to convert the partition or drive from NTFS to GPT. See below for the procedure:
1. Shut down your device then put in the Windows installation USB key or DVD.
2. Boot your device to the USB key or DVD in UEFI mode.
3. Inside the Windows Setup, open a Command Prompt window by pressing Shift + F10.
4. Type diskpart in the Command Prompt window to open the diskpart tool.
5. Type list disk to identify which drive to reformat.
6. Select which drive to reformat by typing select disk in the command prompt. Afterward, type clean then hit
Enter. Once done, type convert gpt to be able to convert the drive from NTFS to GPT. Finally, type exit and press Enter. You can now close the Command Prompt window.
7. Once the partition or drive is converted from NTFS to GPT, the user can now continue the Windows Setup installation.
NOTE: Select Custom in choosing which installation type to use. The drive will then appear as a single area of unallocated space. Choose that unallocated space then select Next. At this point, Windows will now begin the installation.
Method Two: Fix System File Errors
There are times when system files get corrupted or damaged which will result in system failure. If this is the case, you can use a Windows free tool to repair corrupted or damaged system files.
1. Right-click on the Start button then selects Command Prompt (Admin) from the list to open a Command Prompt window.
2. Once the Command Prompt appears, type sfc /scannow then hit Enter. Wait until the process completes. If the process is completed and it doesn’t report any error or issues that remain unsolved, you might want to employ the next method.
Method Three: Reset Windows 10
Resetting Windows will delete all software and user accounts installed in the operating system and will reinstall a fresh Windows.
1. Boot your device using a Windows installation USB key or DVD. Select Repair your computer to locate the Troubleshoot option. Afterward, choose Reset this PC.
NOTE: If the device is able to boot the system, you can reset Windows without using a Windows installation USB key or DVD. You just have to boot the device then navigate to Settings in the Start button. Choose Update & Recovery then select Recovery found on the left pane. Choose Reset this PC option then select Go back to an earlier build and Advanced startup. Select Get Started button found in the Reset this PC tab.
2. Depending on your device’s condition, you can either select Keep my files or Remove everything. Both options will remove all applications installed in the device and will revert to default settings.
3. Choose either Just remove my files or Remove files and clean the drive depending on the situation. If you choose the Remove files and clean the drive option, the procedure will take longer as it will erase all the files permanently. In this case, deleted files cannot be recovered. However, if you don’t want to remove files permanently, select Just remove my files.
4. Once you’ve decided how to reset your system, click on Next once the Warning screen appears. Afterward, choose Reset once prompted. When the process completed, click on Continue.
Method Four: Download an Automated Tool
Can’t seem to put up with the long and technical manual repair process? You can still fix this error by downloading and installing a powerful automated tool that will surely get the job done in a jiffy!
Read More
Many of us are taking the google search engine for granted and it is no true that it has crawled in almost every spore of our digital lives but if we wanted a little more privacy? Do we have options or we are destined to use google and send our information to this company. What if we really wanted that our searches are well safe, secure, and private? We could try other search engines like BING but since BING belongs to Microsoft we would exchange only one company for another without making any progress in the privacy battle. Enter DuckDuckGo.
DuckDuckGo is a privacy-focused search engine that’s been online since 2008. Find websites, maps, videos, news, and more without tracking your searches and serving you targetted ads. It took DUckDuckGo as you can tell sometimes to gain ground and to be recognized but finally, it got the attention it deserves. Its big breakthrough happened in September of 2014 when Apple offered it as a default search engine in Safari and since it has gained more and more ground. It seems people care about their privacy after all.
Since then DuckDuckGo has been gaining ground and all the major browsers have integrated it as an option for a default search engine.
In this article, we will show you how to switch to DuckDuckGo and set it as your preferred search engine in all major browsers.
-
Google Chrome
Launch Chrome and click on the three dots in the upper right.
Choose settings.
Choose Search engine in the list on the left of the screen.
Click on the drop-down box next to Search engine used in the address bar and choose DuckDuckGo. -
Mozilla Firefox
Launch Firefox, click on the three lines hamburger menu icon in the top-right corner of the window.
Click on Preferences.
Click on Search in the menu to the left of the screen.
Under Default Search Engine, click the drop-down box and choose DuckDuckGo. -
Microsoft Edge
Click on the three dots menu button in the top-right corner of the window
Then select Settings.
Click on Privacy, Search and Services in the menu that appears on the left
Scroll down to the Services menu and choose Address bar and search.
Click the dropdown menu next to Search engine used in the address bar and choose DuckDuckGo. -
Apple Safari
Click Safari in the menu bar at the top of the screen
Then click Preferences.
You can also use the Command+, shortcut to quickly bring up Safari’s Preferences.
Click on the Search tab, then choose DuckDuckGo under the Search engine drop-down box. -
Opera
Click on the Settings cog button in the sidebar on the left of the screen.
Under Basic settings scroll down until you see Search engine and a drop-down box.
Select DuckDuckGo from the list.
Read More
A surprisingly large amount of things present at your home can and do interfere with your wi-fi signal making it weak so devices are dropping it, having trouble connecting, or being slow.
Hello and welcome to our latest article where we will take a look at all things that are present in a lot of homes but are very bad for your WI-Fi signal.
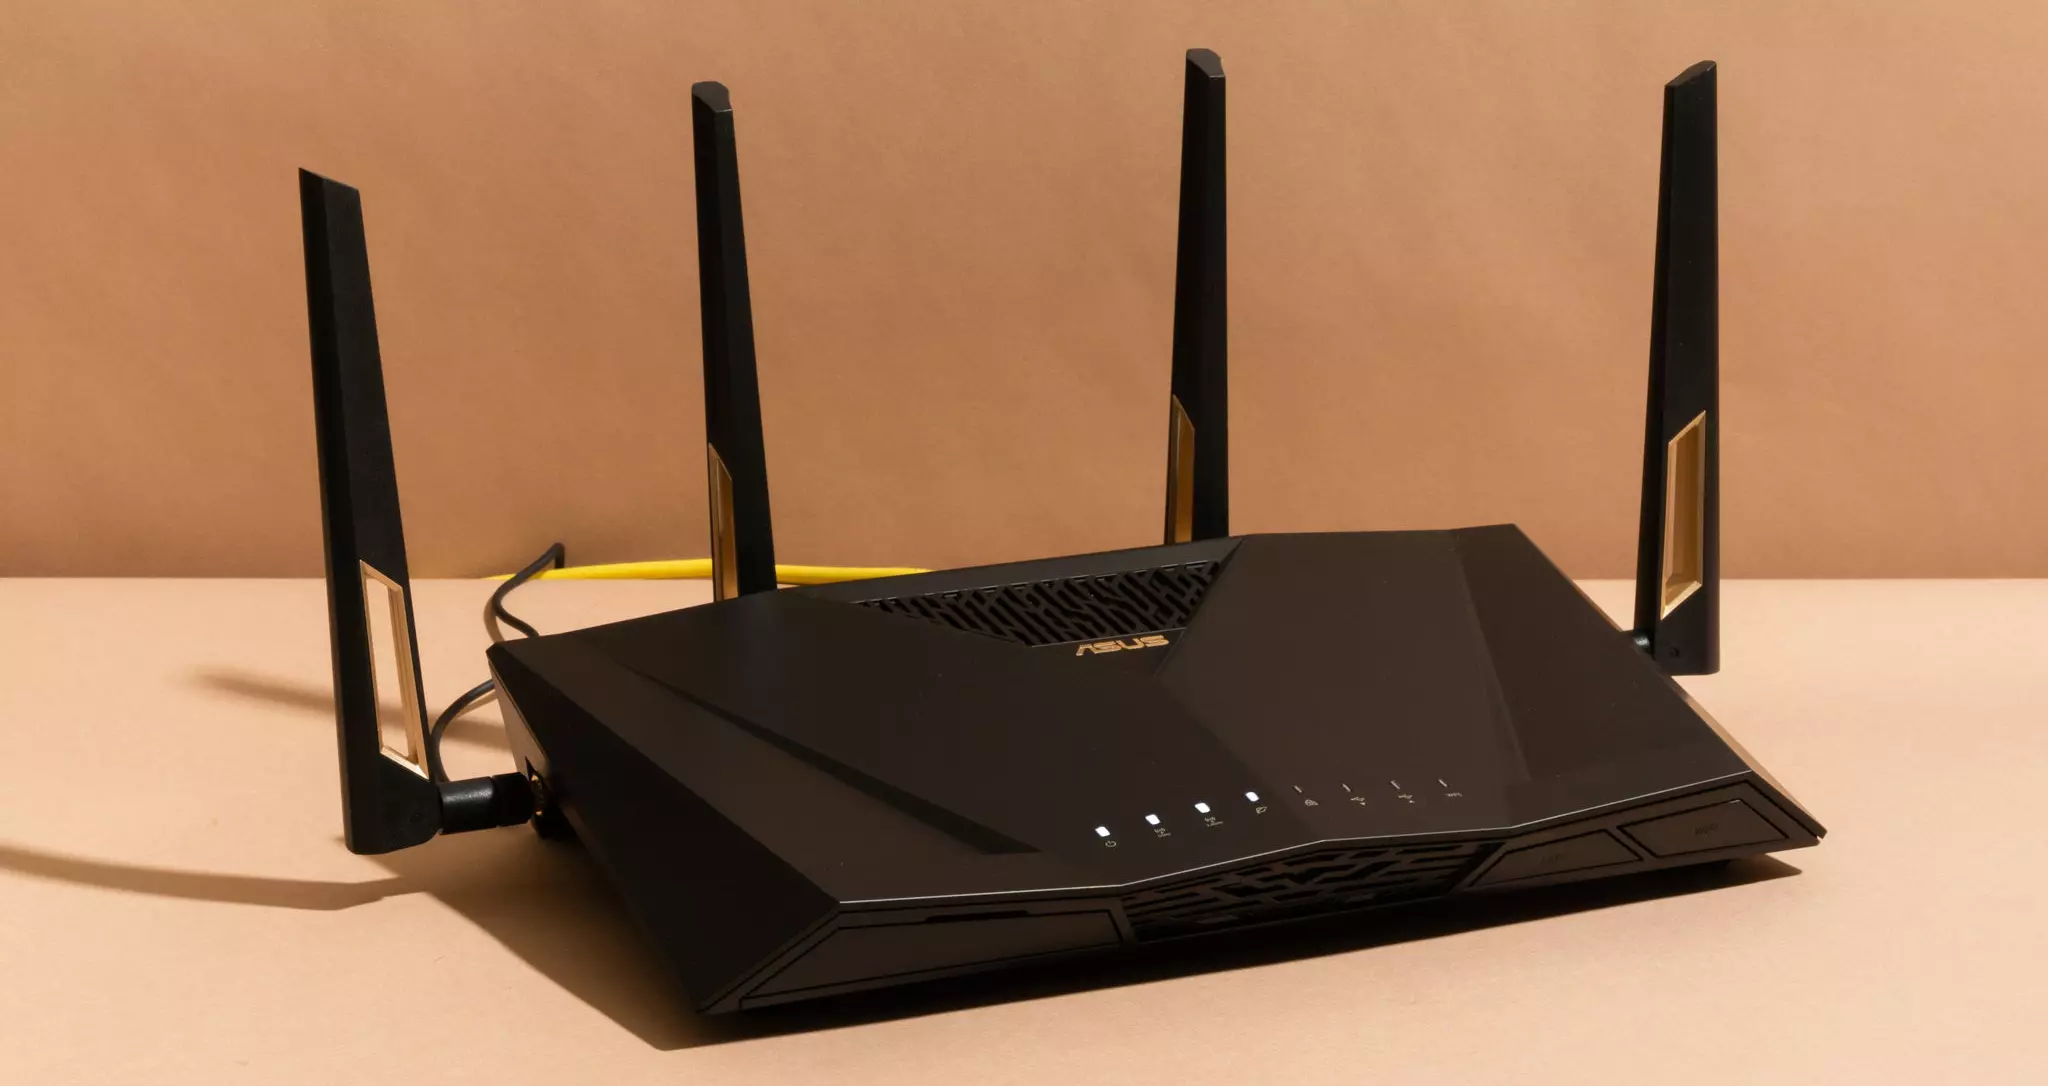
Bad router placement
Having a router in a bad position can have some really large effects on WI-Fi signal strength and its availability. Usually, we do not give great attention to where we are placing our router but it has been proved over and over again that being close to certain objects does indeed have a great influence on the wireless signal strength and performance.
So, what are these objects and bad positions where we could place the router and effectively kill his Wi-Fi capabilities?
Fish Tanks
Water will block all radio waves including Wi-FI signals and waves themselves, so having a router next to the aquarium or any large source of water is a bad idea. You should always look at water as something bad for your Wi-Fi and move your router away from it as far as possible.
Bookshelves
Paper is another story and example of the dampening effect on radio waves. Did you know that various patterns of paper are used in silent rooms and recording studios in order to eliminate sound reflection from surfaces? Well besides absorbing sound waves, the paper also absorbs Wi-Fi signals and if you have a large bookshelf with a lot of books packed one beside another you just have a great wall of signal absorbing.
Mirrors
The problem with mirrors is in their coating that goes over the glass in order to turn it into the mirror, that coating is metal and as such, it is absorbing signals in large amounts. If you have an old or high-quality mirror that has a silver coating things are even worse since silver will absorb even more waves than modern cheap ones.
TV
Yup, TV is also on this list and for a similar reason as a mirror, although TV does not have coatings of metal, they have something even worse: a large metal plating on the back. Metal plating is there to produce structural integrity of the TV set and provide it with shielding from electromagnetic waves and as such it will prevent Wi-Fi waves as well. Do not place the router behind your TV.
Things that influence signals in homes
Any kind of metal decoration
Now when we covered mirrors and TV because of the metal they have, we must take a look at the metal itself. Any kind of metal stuff that you might have like baskets, figures, statues, frames, etc will effectively block your signal.
Kitchen appliances and Home utilities
Kitchen appliances like refrigerators, microwaves, ovens, stoves, etc. along with home appliances and utilities like dishwashers, washing machines, dryers, etc are large metal objects enclosed in a metal cage that will block signals from spreading further and it is no secret that most kitchens have weaker Wi-Fi because of this reason.
Home gyms
This is a logical conclusion as to everything explained so far if you have a workout room or small gym at home it is probably filled with weights that are metal and have mirrors inside, all of that will interfere and block signals.
Things blocking your Wi-Fi that you have no easy control over
Walls
Thick walls will dampen signals, thick walls from bricks will dampen even more and concrete walls will kill it almost completely. Any kind of metal reinforcement wiring inside walls will reduce and kill signals as well.
Floors and ceiling
This is somewhat important if you have a floor beneath or under the room where is your router located, but for the same reason how walls are blocking your signal floor and ceiling can do it as well, especially since most of the time they are made of some stronger material like concrete with metal fence inside.
Heating systems
If you have a heating system that is composed of metal radiators with water inside, then in terms of Wi-Fi signal strength you have an aquarium but in a metal box, and as such it will greatly reduce signal strength.
Read More
Code 0x800488AB – What is it?
The Error Code 0x800488AB will appear when a user is in the Windows 10 Mail app and has provided an Outlook.com e-mail address. The mail app will give a message that the “account information is out of date” and it does provide an option to fix the issue. After clicking the Fix button, this error code will show up to the user.
Common symptoms include:
- A dialog box will appear with the Error Code 0x800488AB
- Microsoft Windows 10 Mail App will not retrieve (or subsequently send) mail
- User cannot delete and re-add the Outlook email account in the Windows 10 Mail app
- User can still access and log in to various Microsoft websites, including logging into the Outlook Mail website
Solution
Error Causes
This error can be caused by a few different actions of the user when they have changed a password or a PIN number to access their Outlook mail. This error does have a relatively easy fix after the cause is determined and where the break-in information has occurred. A few of the causes may be:
- If the user changes their password on the Microsoft website and uses the alternative PIN login method to access the Mail App.
- The log-in information on the Microsoft website does not match the login information on the Windows 10 App.
- The login information was changed on the Microsoft website and was not updated to reflect on the Windows 10 Mail app.
The Microsoft website and Microsoft Mail app do not share the knowledge of the change in login credentials, therefore the log-in credentials appear to be incorrect when trying to access the Microsoft Mail app. It should be noted that a user may bypass the password option if they log in to the Microsoft Mail app while using the alternative PIN log-in method, thus still leaving the password undetected.
Further Information and Manual Repair
As is the case with all new technology and having a few wrinkles, the release of Microsoft Windows 10 is not left out. There have been a few discussions of errors and bugs, including Error Code 0x800488AB. As of right now, there are three different methods that can be utilized by any at-home user. These methods are rather simple and make sense when the problem has been identified.
Method 1:
Run the built-in Windows Store Apps troubleshooter:
- Press the Windows Key and then type ‘troubleshoot’ and hit Enter
- Select “View all” on the left panel and run the “Windows Store Apps” troubleshooter from the list displayed and see if it works.
Method 2:
Use the System File Checker tool to repair corrupted or missing system files:
- Click Start.
- Type cmd, and then press CTRL+SHIFT+ENTER to open the elevated command prompt (I.e. Command prompt with administrative rights).
- The User Account Control window should appear, be sure that the action it exhibits is correct, and then press the Continue button.
- Type or copy-paste the below command line into it without quotes:
“Sfc /scannow”
Method 3:
- Press the Windows Key
- Search for «Credentials Manager»
- Click on Windows Credentials
- Look for any reference to your windows account (generally your @outlook.com is listed)
- Delete them.
- Then select your account at the top of the start menu and select Log Out.
- If using a Pin Code, switch to type input and put your password into the box.
When you go to Mail, and select «Fix Issues» it will detect your password and your account should sync with new emails. In some cases, depending on why this particular error code was caused, you may have to use a powerful automated tool to have it resolved.
Read More
Besides Star Trek, Star Wars was one of my favorite movie franchises, as a kid, it was the first movie I have seen in Theatre and over the years I have rewatched and reached each entry in the franchise. It has significantly grown over the years, sometimes for worse, sometimes for better but what it always did is explored and expanded lore, characters and brought stories interesting and original enough.
The Series has always been original and innovative enough with interesting characters and locations and it managed to capture the imagination of many viewers around the globe.
If you or someone else is watching the franchise for the first time it is recommended actually to watch everything how it was released because of some information that is spoiled in prequels that could spoil some interesting revelations later. But if you have already watched everything and would like to follow the story from the beginning to end we are presenting you with the list of all TV series and movies in tar Wars canon in their chronological order so you can enjoy some good character developments and see the whole story unfold how it was meant to be.
In the following list, as told, we are including TV series (both released and currently in production) in the Star Wars canon.
Chronological order of Star Wars franchise:
Star Wars: The Acolyte
Acolyte is upcoming TV series exploring times in the old republic and the rise of the dark side within
Star Wars Episode I: The Phantom Menace
The first movie entry in the franchise introducing some key characters who will go through various adventures yet to come
Star Wars Episode II: Attack of the Clones
Continuation of story and deepening of the plot laid out in the previous movie
Star Wars: The Clone Wars
Animated TV series exploring war in more detail, set in the period between episodes 2 and 3, before series there is clone wars full length animated movie titles simply as Star wars clone wars serving as a pilot to series.
Star Wars Episode III: Revenge of the Sith
Last movie in so-called prequel trilogy finishing some stories and finalizing some character arcs
Star Wars: The Bad Batch
Upcoming animated series Bad batch will focus on few troopers find their way in changing the galaxy
Solo: A Star Wars Story
Story of everyone loved Han Solo character, this origin story will introduce you to some key characters in the later entry of series
Obi-Wan Kenobi
Upcoming series that will focus on everyone’s favorite JEDI master Obi-Wan
Star Wars Rebels
Animated series exploring first sparks of forming rebel alliance against dreaded empire
Andor
Upcoming series set five years before the events of Rogue One, the series follows rebel spy Cassian Andor during the formative years of the Rebellion.
Star Wars Rogue One
Full feature movie setting up events for episode 4
Star Wars Episode IV: A New Hope
First Star Wars movie, little outdated today with special effects but with a strong story and introducing some new characters which will become main icons of franchise
Star Wars Episode V: The Empire Strikes Back
Arguably the best movie in the whole series, leaning more to serious note and darker than previous entries. Besides Episode 3 this is the most serious and dark movie of the series.
Star Wars Episode VI: Return of the Jedi
Last movie entry in the so-called original trilogy, finishing some stories and wrapping up one era.
Star Wars The Mandalorian
Set after episode 6 show focuses on a Mandalorian bounty hunter character following his adventures in the galaxy.
The Book of Boba Fett
Upcoming Mandalorian spin-off TV series focusing on Bobba Fet, one of most loved bounty hunter characters in the Star Wars universe
Ahsoka
Star Wars: Ahsoka is an upcoming live-action television limited series exploring the character of Ashoka Tano first seen in Clone Wars
Rangers of the New Republic
Set within the timeline of The Mandalorian, Rangers of the New Republic is a new upcoming live-action series.
Star Wars: Resistance
Animated series exploring resistance against first-order setting up events to be followed in the newest trilogy of movies.
Star Wars Episode VII: The Force Awakens
First full feature movie set in the post-empire era introducing new characters and bringing back some fan favorites.
Star Wars Episode VIII: The Last Jedi
The second movie in the last order trilogy, continuing stories of previously establishes characters
Star Wars Episode IX: The Rise of Skywalker
Last entry in new order trilogy of movies, finishing some open stories and concluding arcs for characters previously introduced in Force Awakens.
That’s it, chronological order of canon TV shows and movies of the Star Wars franchise. We are sure there will be more movies and shows in the future and someday we will revisit this list to include them as well. Until then, may the force be with you.
If you would like to read more helpful articles and tips about various software and hardware visit errortools.com daily.
Read More

Copyright © 2022, ErrorTools. All Rights Reserved
Trademarks: Microsoft Windows logos are registered trademarks of Microsoft. Disclaimer: ErrorTools.com is not affiliated with Microsoft, nor claim direct affiliation.
The information on this page is provided for information purposes only.

Repair your PC with one click
Please be aware that our software needs to be installed on a PC system with Windows on it, Open this website on a desktop PC and download the software for easy and quick elimination of your issues.
 Последние лет 10 я с внимательным ужасом наблюдаю как стремительно деградирует сфера информационных технологий. Если еще каких-то 15 лет тому назад работа в IT была доступна только избранным, то сейчас в айтишники идут все кому не лень. А ведь большие зарплаты в отрасли необходимы для поддержания высокого уровня профессионализма сотрудников. Разработчикам и прочему IT-люду платят сотни тысяч рублей не просто так. К сожалению, нынешняя ситуация с IT напоминает больше цирковое представление с постепенным и неуклонным трендом к тотальной деградации. В первую очередь тенденция проявилась у мирового лидера в сфере информационных технологий — США, но от штатов не отстает и Китай, с его бурным развитием и несколькими миллиардами населения. Наши пока еще держатся, но первые отголоски уже ощущаются. Отрасль деградирует, снижается качество продуктов, падает надежность. Кто в этом виноват? Низкоквалифицированные кадры? Внедрение «современных» стандартов разработки? Искаженные требования бизнеса?
Я помню свой первый шок от американской платежной системы PayPal. От ее недружественного интерфейса, огромного количества ошибок в коде и крайне неквалифицированной технической поддержкой. У меня закончился срок действия банковской карты, мой банк ее перевыпустил, но все ее реквизиты, за исключением срока действия оставил прежними. Разумеется, PayPal не давал мне добавить новую карту, так как думал, что я пытаюсь добавить карту старую. Проблему решить удалось спустя месяц общения с поддержкой PayPal. А великий и могучий Facebook? После последнего обновления в конце 2020 года работать с системой со стороны бизнеса стало просто невозможно. Полная рассинхронизация документации и реальных функций, неработоспособность ранее работающих опций, тотальное неудобство и нелогичность интерфейса. А вот и AliExpress с его AliBaba-ой (ну или наоборот). Вы часто замечали, что, работая пользователем вы постоянно натыкаетесь на ошибки системы, например, когда хотите оставить отзыв? А теперь представьте, какой системный хаос творится на стороне продавца. У меня сложилось впечатление, что весь AliExpress построен из китайского навоза и сена. В одном месте нужно использовать Excel, в другом нельзя нажимать сюда, так как потом все сохраненное пропадает, а настройка прав доступа не работает принципиально… И это только вершина айсберга, если копнуть поглубже, пройтись грабельками по другим корпоративным системам, то неподготовленный индивид впадет в перманентное состояние первобытного ужаса бытия от безысходности.
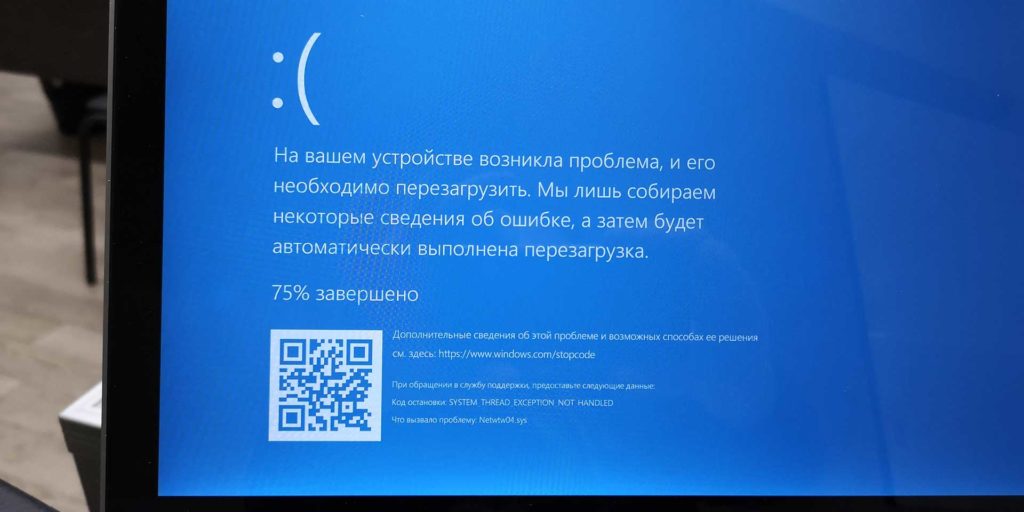
Вот из последнего. Есть у меня ноутбук HP (Ново-Русский). Ноут в принципе не плохой, использую его как рабочий, таскаю туда-сюда, цепляюсь к Wi-Fi. Но после очередного обновления Windows 10 и драйверов на Wi-Fi адаптер от Intel я с толкнулся с такой проблемой, как появление «синего экрана смерти» или BSoD после включения ноутбука из выключенного состояния. Диагностика на экране бодренько сообщает, что проблема заключается в SYSTEM_THREAD_EXCEPTION_NOT_HANDLED и возникла она в файле netwtw04.sys. Система создавала дамп памяти на случай, если я вдруг захочу его проанализировать (живьем я видел только одного человека, который пробовал провести подобную операцию), а затем шла перезагрузка. После чего все продолжало работать как ни в чем не бывало, Wi-Fi принимался, таблицы Excel работали, интернет серфился.
В моем HP-ноутбуке установлена Wi-Fi плата производства Intel AC 7265 (полное название Intel® Dual Band Wireless-AC 7265) на разъеме M2 (подключение PCIe для Wi-Fi и USB для BT). Адаптер AC-7265 весьма интересная штука, которая позволяет подключаться по Wi-Fi на каких-то умопомрачительных скоростях, на рабочем месте я подключаюсь к сети стабильно на скоростях свыше 800 Mbps, и оно работает. Правда внешний канал у нас в десять раз «уже», но внутренние ресурсы доступны на полной скорости. Файл netwtw04.sys относится к файлам драйвера Wi-Fi от компании Intel. Ошибка SYSTEM_THREAD_EXCEPTION_NOT_HANDLED означает возникшую проблему с необработанной исключительной ситуацией в программном коде драйвера от Intel. Другими словами, в программном коде драйвера возникла некая ситуация, которую разработчик драйвера не предусмотрел и соответствующим образом не обработал. И эта ошибка «полезла» дальше. А поскольку драйвера устройств исполняются в операционной системе с высокими привилегиями, то ошибка в драйвере приводит к аварийной остановке всей операционной системы. Собственно, по этой причине и возникает синий экран. Подобные ошибки зачастую появляются, когда программный код пытается обработать данные, которые находятся за пределами рабочего диапазона, полностью отсутствуют, либо происходит обращение к неинициализированным программным/аппаратным компонентам.
Постепенно ситуация с частыми синими экранами мне начала досаждать. Включаешь компьютер, а потом ждешь пока он загрузится, «упадет», и еще раз загрузится. Неудобно. Я начал копать в сторону исправления ситуации. Пробовал переустанавливать драйвера, менять всяческие настройки, но все оказалось тщетным. Проблема сохранялась. У меня даже возникло желание заменить Intel на что-то более другое, но ни одного альтернативного производителя в наличии не оказалось. Только разнообразные модули от Intel. Ситуация начала накаляться. Почему пришлось провести небольшое расследование.
В общем проблема с синими экранами не только у меня, не только с AC 7265 и не только на HP. В сети обнаружилось великое множество жалоб пользователей на синие экраны после одного из обновлений Windows 10. Если в моем случае проблема возникала только при перезагрузке системы, то у некоторых синий экран мог возникнуть во время работы. Что уже вообще ни в какие ворота не лезет. После некоторого количества попыток и неудач, мне удалось, не без помощи базы знаний форума поддержки Community Intel решить проблему. Итак, способов решения оказалось несколько и не факт, что они все могут помочь.
Способ нулевой — настроечки
Проблема с ошибками может возникать в том числе и по причине каких-то экзотических настроек самого беспроводного адаптера. На форуме Intel рекомендуют привести следующие настройки к их значениям по умолчанию:
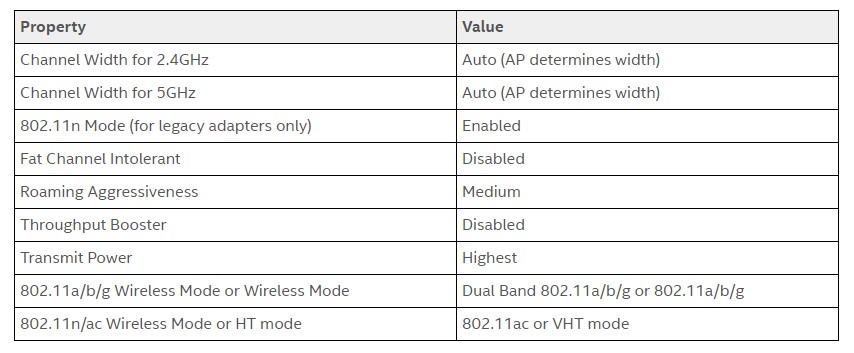
Наиболее полный список рекомендаций настроек для Wi-Fi от Intel
Увы, как эти настройки выглядят на языках отличных от английского, мне не ведомо. Способ мне не помог.
Способ первый — USB и BIOS
Поскольку PCIe и USB шины также управляются драйверами, то проблема может крыться где-то на их уровне. Поэтому имеет смысл попробовать либо обновить драйвер чипсета (в моем случае это так же Intel) и USB, либо откатить их до штатных, которые идут в поставке операционной системы. Дополнительно стоит попробовать посмотреть на обновление BIOS, особенно если ноутбук не самый свежий, вероятно, что там тоже были какие-то ошибки и их уже успели исправить. Не лишним будет попробовать скинуть настройки BIOS (UEFI) до стандартных, а если не поможет, то покрутить настройки PCIe (если таковые имеются) и USB в BIOS.
Переустановка драйверов куда легче, чем переустановка всей операционной системы, хотя последний способ, как правило самый действенный. На форуме Intel рекомендуют следующий способ переустановки:
- Скачиваем последние драйвера от Intel для используемого Wi-Fi адаптера.
- Заходим в диспетчер устройств и удаляем Wi-Fi и BT адаптеры (в теории достаточно удалить только Wi-Fi, т.к. BT удалится сам). При удалении ставим галку «Delete driver software for this device», т.е., удаляя устройство, удалям еще и драйвера от него.
- Нажимаем кнопку (все там же в диспетчере устройств) на пересканирование устройств. Если находится старый драйвер от Intel или от производителя ноутбука, то повторяем предыдущий пункт.
- Делаем очистку временных файлов: запускаем очистку системного диска, либо вызываем утилиту cleanmgr.exe. На забываем поставить галку на очистке временных файлов. Таким образом мы подчищаем все ошметки и настройки старых драйверов.
- Перезагружаем компьютер, устанавливаем драйвера скачанные в первом пункте.
Вариант мне не помог, увы.
Способ третий — родные драйвера от производителя ноутбука
Все то же самое, что во втором способе, только драйвера скачиваем с сайта производителя. В случае HP вариант не помог, поскольку они прямиком дают ссылку на драйверы от Intel.
Способ четвертый — стандартные драйвера от Microsoft
Все тоже самое, что и во втором способе, только после перезагрузки не устанавливаем драйвера от Intel (но не забываем их скачать, если вдруг что-то пойдет не так). В этом случае должны установиться стандартные драйвера от Microsoft лохматого года. В теории Wi-Fi должен будет запуститься, но не гарантировано, что он будет работать на полную катушку, либо будут активными специфические функции.
Способ пятый — Fast boot
Отключение режима быстрой загрузки в Windows 10. Fast boot работает следующим образом: когда пользователь выключает свой компьютер, то хитрая система записывает в специальный гибернационный файл текущее состояние всех своих устройств, включая тот самый злосчастный Wi-Fi + BT адаптер. При включении же ПК, происходит обратный процесс, всё загружается из файла в оперативную память, а всё оборудование считается проинициализированным. Таким образом, система загружается существенно быстрее, чем при обычной загрузке.
Но не тут-то было. Все драйвера и все устройства в моем ноутбуке реагировали на режим быстрой загрузки адекватно, работали как ни в чем не бывало, а вот драйвер от Intel вступал в контры и «кидал» исключение. После отключения режима быстрого запуска ситуация нормализовалась, синие экраны исчезли. Да, ноут стал загружаться немного медленнее, но на SSD время загрузки не так критично и даже те несколько секунд, пока лэптоп загружает операционную систему, да инициализирует устройства, не вызывают глубокой печали, так как прежде, во времена двойной загрузки.
Вот таким вот образом удалось победить «синие экраны смерти» при загрузке моего ноутбука. Конечно, в случае, когда BSOD-ы возникают во время работы, а не перезагрузки, простым отключением быстрой загрузки не исправить, тут следует попробовать применить оставшиеся варианты. А в самом запущенном случае поменять Wi-Fi адаптер на устройство другого производителя. Что уж делать, придется заказывать их из-за границы. Нет, конечно, я соглашусь, что сложности систем возросли многократно, но ведь и раньше они простыми не были. А ведь мы в IT раньше как-то старались, выдавали качество, надежность, безопасность и удобство. И ведь получалось.
Download PC Repair Tool to quickly find & fix Windows errors automatically
This post will help you if you receive DRIVER IRQL NOT LESS OR EQUAL or SYSTEM THREAD EXCEPTION NOT HANDLED, Netwtw04.sys failed error in Windows 11/10. This error can also occur due to Netwtw08.sys, Netwtw06.sys, Netwtw10.sys, etc, files. System files or .sys files are an essential part of the Windows operating system. It is a repository of system driver settings used by the Windows system to communicate with the connected hardware and devices. System files are necessary for the normal functioning of the operating system. Many Windows users are facing the Window Blue Screen of Death error during the app launch or while disconnecting the external devices from the system.

Netwtw08.sys,Netwtw04.sys, Netwtw06.sys, Netwtw10.sys are a part of the Intel PROSet/Wireless WiFi software. You may see two Stop Errors if these drivers fail to load:
- DRIVER_IRQL_NOT_LESS_OR_EQUAL What failed: Netwtw04.sys. This indicates that a kernel-mode driver attempted to access pageable memory at a process IRQL that was too high.
- SYSTEM_THREAD_EXCEPTION_NOT_HANDLED What failed: Netwtw04.sys. The root cause of this error might be incompatible drivers with the operating system.
Generally speaking, the cause for the Netwtw04.sys blue screen error may be because of several reasons like corrupt files, misconfigured device drivers, malicious programs, outdated drivers, bad drivers, corrupted Windows registry, or due to damaged system files.
In this article, we explain some solutions to fix Netwtw08.sys,Netwtw04.sys, Netwtw06.sys, Netwtw10.sys Bblue screen errors on Windows 11/10.
If you can log in normally, good; else you will have to boot into Safe Mode, enter Advanced Startup options screen, or use the Installation Media to boot to be able to carry out these instructions.
1] Rollback Network driver
If you recently updated the driver software, you need to Rollback the device driver, ie, go back to the previous working version.
Open the Device Manager and click on the entry labeled as Network adapters and expand it. Then, select the driver entries labeled appropriately other than anything in the context of WAN Miniport. Select them one by one and double click on them. It will open a new mini window.
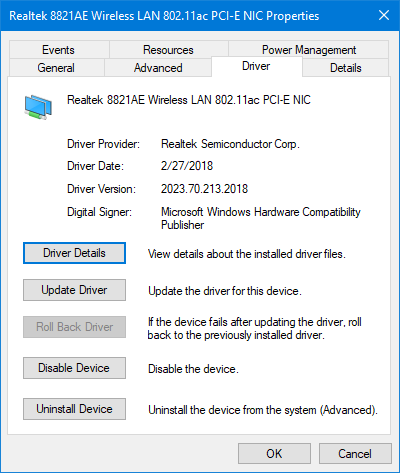
Make sure that you are on the tab named Driver. If you are not, navigate to it. Now, click on the button called Roll Back Driver.
This will install the previously known stable version of the driver installed on your computer.
Restart your computer for the changes to take effect.
2] Update Network driver
If your present driver is giving you this problem, you need to update the device driver. Open Control Panel and click on Device Manager. Click on Network adaptor and right-click on the current driver. Click on Update driver option from the drop-down menu.
You can also download the driver from the manufacturers’ website, use Intel Driver Update Utility or can update it online automatically.
3] Run SFC scan
System File Checker is a command prompt tool that scans for corrupted system files including Netwtw04.sys files as well as repair the corrupted system files. It is recommended to run an SFC scan to repair the problematic system files.
4] Run DISM
Search Command Prompt in the Start Menu. Right-click on the Command Prompt and select the option Run as administrator from the drop-down menu
Type the command the following command to Run DISM and click Enter:
DISM /Online /Cleanup-Image /RestoreHealth
Restart your system. This will repair a corrupted system image.
5] Run CHKDSK
A corrupted hard drive may lead to Netwtw04.sys blue screen error. CHKDSK scans the disk to check if there are any corrupt hard drives.
Open Command Prompt as administrator. Type the command CHKDSK and click enter to check your disk.
Restart your system.
If nothing helps, you may want to consider disabling Hardware Acceleration or performing System Restore and see if that helps you.
All the best!

Anand Khanse is the Admin of TheWindowsClub.com, a 10-year Microsoft MVP (2006-16) & a Windows Insider MVP (2016-2022). Please read the entire post & the comments first, create a System Restore Point before making any changes to your system & be careful about any 3rd-party offers while installing freeware.
Этот пост поможет вам, если вы получите сообщение Драйвер IRQL НЕ МЕНЬШЕ ИЛИ РАВЕН или ИСКЛЮЧЕНИЕ СИСТЕМНОЙ РЕЗЬБЫ НЕ ОБРАБОТАНО , ошибка Netwtw04.sys в Windows 10. Системные файлы или файлы .sys являются неотъемлемой частью операционной системы Windows. Это хранилище настроек системного драйвера, используемое системой Windows для связи с подключенным оборудованием и устройствами. Системные файлы необходимы для нормального функционирования операционной системы. Многие пользователи Windows сталкиваются с ошибкой Window Blue Screen of Death во время запуска приложения или при отключении внешних устройств от системы.

Netwtw04.sys является частью программного обеспечения Intel PROSet/Wireless WiFi. Вы можете увидеть две ошибки Stop для файла драйвера Netwtw04.sys:
- DRIVER_IRQL_NOT_LESS_OR_EQUAL Что не удалось: Netwtw04.sys. Это указывает на то, что драйвер режима ядра попытался получить доступ к доступной памяти в процессе IRQL, который был слишком высоким.
- SYSTEM_THREAD_EXCEPTION_NOT_HANDLED Что не удалось: Netwtw04.sys. Основной причиной этой ошибки могут быть несовместимые драйверы с операционной системой.
Вообще говоря, причина появления синего экрана Netwtw04.sys может быть вызвана несколькими причинами, такими как поврежденные файлы, неправильно настроенные драйверы устройств, вредоносные программы, устаревшие драйверы, плохие драйверы, поврежденный реестр Windows или поврежденные системные файлы.
Содержание
- Netwtw04.sys Ошибка синего экрана
- 1] Откат сетевого драйвера
- 2] Обновление сетевого драйвера
- 3] Запустите сканирование SFC
- 4] Запустите DISM
- 5] Запустите CHKDSK
Netwtw04.sys Ошибка синего экрана
В этой статье мы расскажем о некоторых решениях для исправления ошибок типа «синий экран» netwtwo4.sys в Windows 10.
1] Откат сетевого драйвера
Если вы недавно обновили программное обеспечение драйвера, вам необходимо откатить драйвер устройства, т. Е. Вернуться к предыдущей рабочей версии.
Откройте Диспетчер устройств , щелкните запись, помеченную как Сетевые адаптеры , и разверните ее. Затем выберите записи драйвера, помеченные соответствующим образом, кроме чего-либо, в контексте WAN Miniport. Выберите их по одному и дважды щелкните по ним. Откроется новое мини-окно.

Убедитесь, что вы находитесь на вкладке с именем Драйвер. Если нет, перейдите к нему. Теперь нажмите кнопку Откатить драйвер.
Это установит предыдущую известную стабильную версию драйвера, установленного на вашем компьютере.
Перезагрузите компьютер, чтобы изменения вступили в силу.
2] Обновление сетевого драйвера
Если ваш текущий драйвер создает вам эту проблему, вам необходимо обновить драйвер устройства. Откройте Панель управления и нажмите «Диспетчер устройств». Нажмите Сетевой адаптер и щелкните правой кнопкой мыши текущий драйвер. В раскрывающемся меню выберите Обновить драйвер .
Вы также можете загрузить драйвер с веб-сайта производителя, использовать утилиту обновления драйверов Intel или автоматически обновить его через Интернет. Вы можете скачать последнюю версию этого драйвера Intel здесь на intel.com.
3] Запустите сканирование SFC
Проверка системных файлов – это инструмент командной строки, который сканирует поврежденные системные файлы, включая файлы Netwtw04.sys, а также восстанавливает поврежденные системные файлы. Рекомендуется запустить сканирование SFC для восстановления проблемных системных файлов.
4] Запустите DISM
Найдите команду Командная строка в меню «Пуск». Щелкните правой кнопкой мыши командную строку и выберите параметр «Запуск от имени администратора» в раскрывающемся меню.
Введите команду следующую команду для запуска DISM и нажмите Enter:
DISM/Online/Cleanup-Image/RestoreHealth
Перезагрузите вашу систему. Это восстановит поврежденный образ системы.
5] Запустите CHKDSK
Поврежденный жесткий диск может привести к ошибке синего экрана Netwtw04.sys. CHKDSK сканирует диск на наличие поврежденных жестких дисков.
Откройте командную строку от имени администратора. Введите команду CHKDSK и нажмите Enter, чтобы проверить свой диск.
Перезагрузите вашу систему.
Если ничего не помогает, вы можете отключить HardwareAcceleration или выполнить восстановление системы и посмотреть, поможет ли это вам.
Всего наилучшего!
Этот пост поможет вам, если вы получите DRIVER IRQL НЕ МЕНЬШЕ ИЛИ РАВНЫЙ или ИСКЛЮЧЕНИЕ РЕЗЬБЫ СИСТЕМЫ НЕ ОБРАБОТАНО, Ошибка Netwtw04.sys в Windows 10. Эта ошибка также может возникать из-за файлов Netwtw06.sys и т. Д. Системные файлы или файлы .sys являются важной частью операционной системы Windows. Это хранилище настроек системных драйверов, используемых системой Windows для связи с подключенным оборудованием и устройствами. Системные файлы необходимы для нормального функционирования операционной системы. Многие пользователи Windows сталкиваются с ошибкой Window Blue Screen of Death во время запуска приложения или при отключении внешних устройств от системы.
Netwtw04.sys является частью программного обеспечения Intel PROSet / Wireless WiFi. Вы можете увидеть две ошибки Stop для файла драйвера Netwtw04.sys:
- DRIVER_IRQL_NOT_LESS_OR_EQUAL Что не удалось: Netwtw04.sys. Это указывает на то, что драйвер режима ядра попытался получить доступ к выгружаемой памяти при слишком высоком IRQL процесса.
- SYSTEM_THREAD_EXCEPTION_NOT_HANDLED Что не удалось: Netwtw04.sys. Основная причина этой ошибки может заключаться в несовместимости драйверов с операционной системой.
Вообще говоря, причиной ошибки синего экрана Netwtw04.sys может быть несколько причин, таких как поврежденные файлы, неправильно настроенные драйверы устройств, вредоносные программы, устаревшие драйверы, плохие драйверы, поврежденный реестр Windows или из-за поврежденных системных файлов.
В этой статье мы расскажем о некоторых решениях, позволяющих исправить ошибку netwtwo4.sys типа «синий экран» в Windows 10.
1]Откат сетевого драйвера
Если вы недавно обновили программное обеспечение драйвера, вам необходимо выполнить откат драйвера устройства, т.е. вернуться к предыдущей рабочей версии.
Открой Диспетчер устройств и щелкните запись, помеченную как Сетевые адаптеры и расширить его. Затем выберите записи драйвера, помеченные соответствующим образом, кроме чего-либо в контексте Минипорт WAN. Выделите их по одному и дважды щелкните по ним. Откроется новое мини-окно.
Убедитесь, что вы находитесь на вкладке с именем Водитель. Если нет, перейдите к нему. Теперь нажмите кнопку «Откатить драйвер».
Это установит ранее известную стабильную версию драйвера, установленную на вашем компьютере.
Перезагрузите компьютер, чтобы изменения вступили в силу.
2]Обновите сетевой драйвер
Если ваш нынешний драйвер вызывает эту проблему, вам необходимо обновить драйвер устройства. Откройте Панель управления и щелкните Диспетчер устройств. Щелкните Сетевой адаптер и щелкните правой кнопкой мыши текущий драйвер. В раскрывающемся меню выберите опцию «Обновить драйвер».
Вы также можете загрузить драйвер с веб-сайта производителя, использовать утилиту обновления драйверов Intel или автоматически обновить его через Интернет.
3]Запустить сканирование SFC
Средство проверки системных файлов — это инструмент командной строки, который сканирует поврежденные системные файлы, включая файлы Netwtw04.sys, а также восстанавливает поврежденные системные файлы. Рекомендуется запустить сканирование SFC для восстановления проблемных системных файлов.
4]Запустите DISM
Поиск Командная строка в меню «Пуск». Щелкните правой кнопкой мыши командную строку и выберите в раскрывающемся меню пункт «Запуск от имени администратора».
Введите следующую команду для запуска DISM и нажмите Enter:
DISM / Онлайн / Очистка-Образ / RestoreHealth
Перезагрузите вашу систему. Это восстановит поврежденный образ системы.
5]Запустите CHKDSK
Поврежденный жесткий диск может привести к ошибке синего экрана Netwtw04.sys. CHKDSK сканирует диск на наличие поврежденных жестких дисков.
Откройте командную строку от имени администратора. Введите команду CHKDSK и нажмите Enter, чтобы проверить свой диск.
Перезагрузите вашу систему.
Если ничего не помогает, вы можете рассмотреть возможность отключения HardwareAcceleration или выполнения восстановления системы и посмотреть, поможет ли это вам.
Всего наилучшего!
.
Содержание
- Исправить ошибки NETwtw04.sys и скачать
- Обзор файла
- Что такое сообщения об ошибках NETwtw04.sys?
- NETwtw04.sys — ошибки «синего экрана» (BSOD)
- Крайне важно устранять ошибки «синего экрана»
- Как исправить ошибки NETwtw04.sys — 3-шаговое руководство (время выполнения:
- Шаг 1. Восстановите компьютер до последней точки восстановления, «моментального снимка» или образа резервной копии, которые предшествуют появлению ошибки.
- Шаг 2. Если вы недавно установили приложение 3DP Net (или схожее программное обеспечение), удалите его, затем попробуйте переустановить 3DP Net.
- Шаг 3. Выполните обновление Windows.
- Если эти шаги не принесут результата: скачайте и замените файл NETwtw04.sys (внимание: для опытных пользователей)
- Как исправить ошибку «Синий экран» (Netwtw04.sys)?
- Netwtw04.sys
- Спасибо, ваш файл запроса был получен.
- Ошибки Netwtw04.sys
- Эпицентры Netwtw04.sys Головные боли
Исправить ошибки NETwtw04.sys и скачать
Последнее обновление: 07/01/2022 [Среднее время чтения: 4,5 мин.]
Разработка Intel® Wireless WiFi Link Adapter компанией 3DP послужила толчком для создания последней версии файла NETwtw04.sys. Он также известен как файл Intel® Wireless WiFi Link Driver (расширение SYS), который классифицируется как файл Win64 EXE (Драйвер).
Файл NETwtw04.sys изначально был выпущен с 3DP Net 18.12 12/03/2018 для ОС Windows 10. Это не только самый последний выпуск от компании 3DP, но и, насколько известно, единственная существующая версия.
В этой статье приведены подробные сведения о NETwtw04.sys, руководство по устранению неполадок с файлом SYS и список версий, доступных для бесплатной загрузки.
Рекомендуемая загрузка: исправить ошибки реестра в WinThruster, связанные с NETwtw04.sys и (или) 3DP Net.


Совместимость с Windows 10, 8, 7, Vista, XP и 2000
Средняя оценка пользователей
Обзор файла
| Общие сведения ✻ | |
|---|---|
| Имя файла: | NETwtw04.sys |
| Расширение файла: | расширение SYS |
| Описание: | Intel® Wireless WiFi Link Driver |
| Тип объектного файла: | Driver |
| Комментарии: | NDIS650_MINIPORT |
| Файловая операционная система: | Windows NT 32-bit |
| Тип MIME: | application/octet-stream |
| Пользовательский рейтинг популярности: |
| Сведения о разработчике и ПО | |
|---|---|
| Разработчик ПО: | Intel Corporation |
| Программа: | Intel® Wireless WiFi Link Adapter |
| Авторское право: | Copyright © Intel Corporation 2011 |
| Сведения о файле | |
|---|---|
| Набор символов: | Unicode |
| Код языка: | English (U.S.) |
| Флаги файлов: | (none) |
| Маска флагов файлов: | 0x003f |
| Точка входа: | 0x255f8 |
| Размер кода: | 3680256 |
| Информация о файле | Описание |
|---|---|
| Размер файла: | 6.8 MB |
| Дата и время изменения файла: | 2019:11:11 15:16:55+00:00 |
| Тип файла: | Win64 EXE |
| Тип MIME: | application/octet-stream |
| Тип компьютера: | AMD AMD64 |
| Метка времени: | 2016:02:25 18:26:53+00:00 |
| Тип PE: | PE32+ |
| Версия компоновщика: | 14.0 |
| Размер кода: | 3680256 |
| Размер инициализированных данных: | 3590656 |
| Размер неинициализированных данных: | |
| Точка входа: | 0x255f8 |
| Версия ОС: | 10.0 |
| Версия образа: | 10.0 |
| Версия подсистемы: | 10.0 |
| Подсистема: | Native |
| Номер версии файла: | 18.40.0.9 |
| Номер версии продукта: | 1.0.1.0 |
| Маска флагов файлов: | 0x003f |
| Флаги файлов: | (none) |
| Файловая ОС: | Windows NT 32-bit |
| Тип объектного файла: | Driver |
| Подтип файла: | 6 |
| Код языка: | English (U.S.) |
| Набор символов: | Unicode |
| Наименование компании: | Intel Corporation |
| Описание файла: | Intel® Wireless WiFi Link Driver |
| Версия файла: | 18.40.0.9 |
| Внутреннее имя: | .sys |
| Авторское право: | Copyright © Intel Corporation 2011 |
| Название продукта: | Intel® Wireless WiFi Link Adapter |
| Комментарии: | NDIS650_MINIPORT |
✻ Фрагменты данных файлов предоставлены участником Exiftool (Phil Harvey) и распространяются под лицензией Perl Artistic.
Что такое сообщения об ошибках NETwtw04.sys?
NETwtw04.sys — ошибки «синего экрана» (BSOD)
Существует ряд причин, по которым вы можете столкнуться с проблемами с NETwtw04.sys. Большинство проблем с файлами SYS связаны с ошибками «синего экрана» (BSOD). Эти типы ошибок NETwtw04.sys могут быть вызваны аппаратными проблемами, устаревшей прошивкой, поврежденными драйверами или другими проблемами, связанными с программным обеспечением (например, обновление 3DP Net). В число этих ошибок входят:

Обнаружена проблема, в результате которой ОС Windows завершила работу, чтобы предотвратить повреждение компьютера. По всей видимости, причиной проблемы стал следующий файл: NETwtw04.sys.
🙁 На вашем ПК возникла проблема, которую не удалось устранить, и его необходимо перезагрузить. Сведения об ошибке можно найти в Интернете: [BSOD] (NETwtw04.sys).
STOP 0x0000007E: SYSTEM THREAD EXCEPTION NOT HANDLED (NETwtw04.sys)
STOP 0×0000007A: KERNEL DATA INPAGE (NETwtw04.sys)
STOP 0x00000050: PAGE FAULT IN A NONPAGED AREA (NETwtw04.sys)
STOP 0x0000001E: KMODE EXCEPTION NOT HANDLED (NETwtw04.sys)
STOP 0x0000000A: IRQL NOT LESS EQUAL (NETwtw04.sys)
STOP 0x0000003B: SYSTEM SERVICE EXCEPTION (NETwtw04.sys)
Крайне важно устранять ошибки «синего экрана»
В большинстве случаев ошибки BSOD NETwtw04.sys возникают после установки нового оборудования, программного обеспечения (3DP Net) или выполнения неудачного обновления Windows. В остальных случаях к ошибке «синего экрана» NETwtw04.sys может привести повреждение программного обеспечения, вызванное заражением вредоносным программным обеспечением. Таким образом, крайне важно, чтобы антивирус постоянно поддерживался в актуальном состоянии и регулярно проводил сканирование системы.

СОВЕТ ОТ СПЕЦИАЛИСТА: Как показывает опыт, целесообразно всегда создавать резервную копию системы Windows и (или) точку восстановления системы, прежде чем вносить какие-либо изменения в аппаратное или программное обеспечение на компьютере. Таким образом, в случае неблагоприятного поворота событий и возникновения связанной с файлом NETwtw04.sys ошибки «синего экрана» после недавних изменений можно восстановить систему в предыдущее состояние.
Как исправить ошибки NETwtw04.sys — 3-шаговое руководство (время выполнения:
Если вы столкнулись с одним из вышеуказанных сообщений об ошибке, выполните следующие действия по устранению неполадок, чтобы решить проблему NETwtw04.sys. Эти шаги по устранению неполадок перечислены в рекомендуемом порядке выполнения.
Шаг 1. Восстановите компьютер до последней точки восстановления, «моментального снимка» или образа резервной копии, которые предшествуют появлению ошибки.
Чтобы начать восстановление системы (Windows XP, Vista, 7, 8 и 10):
Если на этапе 1 не удается устранить ошибку NETwtw04.sys, перейдите к шагу 2 ниже.
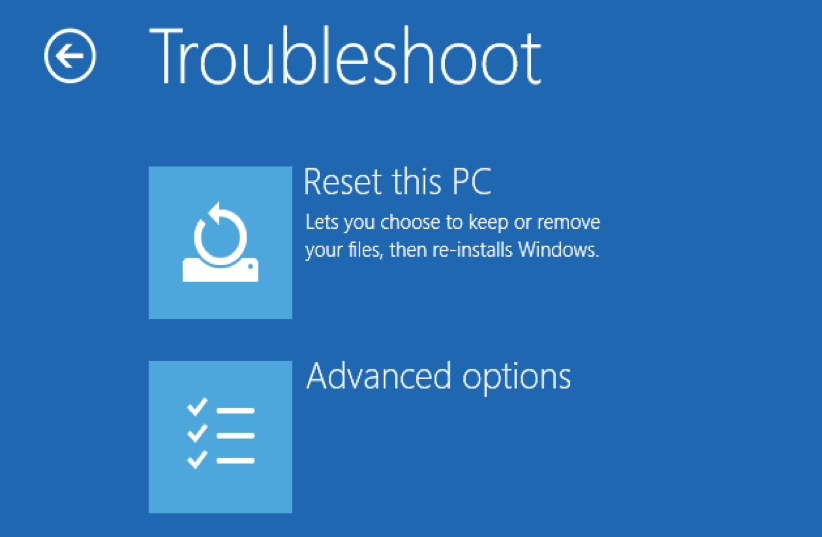
Шаг 2. Если вы недавно установили приложение 3DP Net (или схожее программное обеспечение), удалите его, затем попробуйте переустановить 3DP Net.
Чтобы удалить программное обеспечение 3DP Net, выполните следующие инструкции (Windows XP, Vista, 7, 8 и 10):
После полного удаления приложения следует перезагрузить ПК и заново установить 3DP Net.
Если на этапе 2 также не удается устранить ошибку NETwtw04.sys, перейдите к шагу 3 ниже.

Шаг 3. Выполните обновление Windows.
Когда первые два шага не устранили проблему, целесообразно запустить Центр обновления Windows. Во многих случаях возникновение сообщений об ошибках NETwtw04.sys может быть вызвано устаревшей операционной системой Windows. Чтобы запустить Центр обновления Windows, выполните следующие простые шаги:
Если Центр обновления Windows не смог устранить сообщение об ошибке NETwtw04.sys, перейдите к следующему шагу. Обратите внимание, что этот последний шаг рекомендуется только для продвинутых пользователей ПК.
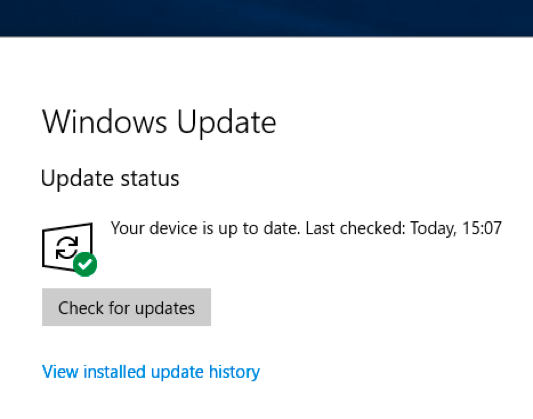
Если эти шаги не принесут результата: скачайте и замените файл NETwtw04.sys (внимание: для опытных пользователей)
Если этот последний шаг оказался безрезультативным и ошибка по-прежнему не устранена, единственно возможным вариантом остается выполнение чистой установки Windows 10.
СОВЕТ ОТ СПЕЦИАЛИСТА: Мы должны подчеркнуть, что переустановка Windows является достаточно длительной и сложной задачей для решения проблем, связанных с NETwtw04.sys. Во избежание потери данных следует убедиться, что перед началом процесса вы создали резервные копии всех важных документов, изображений, установщиков программного обеспечения и других персональных данных. Если вы в настоящее время не создаете резервных копий своих данных, вам необходимо сделать это немедленно.
Источник
Как исправить ошибку «Синий экран» (Netwtw04.sys)?
Основными причинами ошибок SYS типа BSOD («синий экран смерти»), связанных с Netwtw04.sys, являются отсутствие или повреждение драйвера для Intel 3165 7265 8260 8265 Wi-Fi Driver или драйвера режима ядра, неисправное оборудование, а также заражение вредоносным ПО. Как правило, решить проблему можно заменой файла SYS. Кроме того, в качестве меры предосторожности мы рекомендуем выполнить сканирование обновлений драйверов, чтобы убедиться, что все драйверы вашего устройства, связанные с Netwtw04.sys, обновлены и совместимы с текущей версией операционной системы.
Windows System File форматы классифицируют в качестве Системные файлы, и они имеют расширение SYS. В таблице ниже представлен список доступных для загрузки файлов Netwtw04.sys, подходящих для большинства версий Windows (включая %%os%%). Если в настоящее время необходимая вам версия Netwtw04.sys недоступна для загрузки, вы можете запросить её копию, нажав на кнопку Request (Запрос) ниже. Если ниже отсутствует необходимая версия файла, мы рекомендуем вам связаться непосредственно с Dell Inc..
Размещение вновь загруженного файла Netwtw04.sys в правильном каталоге (в месте расположения исходного файла), скорее всего, решит проблему, однако, чтобы однозначно в этом убедиться, следует выполнить проверку. Убедитесь в том, что вам удалось устранить ошибку, открыв Intel 3165 7265 8260 8265 Wi-Fi Driver и (или) выполнив операцию, при выполнении которой возникала проблема.
| Netwtw04.sys Описание файла | |
|---|---|
| Формат файла: | SYS |
| Функция: | Drivers |
| Program: | Intel 3165 7265 8260 8265 Wi-Fi Driver |
| Вер: | Jan. 04, 2018 |
| Разработчик: | Dell Inc. |
| Имя: | Netwtw04.sys Запрос |
| KB: | 7638536 |
| SHA-1: | 3c0c18c25746c1c99ce8da17edeb7a7bc600f3c7 |
| MD5: | e4a52d125b1cfd1b58d08ef9f6c97cb8 |
| CRC32: | 737adf8c |
Идентификатор статьи: 306336

Netwtw04.sys
Выберите версию ОС
| File | Идентификатор файла (контрольная сумма MD5) | Размер (в байтах) | Загрузить | |||||||||||||||
|---|---|---|---|---|---|---|---|---|---|---|---|---|---|---|---|---|---|---|
| + Netwtw04.sys | e4a52d125b1cfd1b58d08ef9f6c97cb8 | 7.28 MB | Запрос | |||||||||||||||
|
||||||||||||||||||
| + Netwtw04.sys | e4a52d125b1cfd1b58d08ef9f6c97cb8 | 7.28 MB | Запрос | |||||||||||||||
|
||||||||||||||||||
| + Netwtw04.sys | ccf9ff5616904bcfcb410f613bb1ac67 | 6.79 MB | Запрос | |||||||||||||||
|
||||||||||||||||||
| + Netwtw04.sys | ccf9ff5616904bcfcb410f613bb1ac67 | 6.79 MB | Запрос | |||||||||||||||
|
||||||||||||||||||
| + Netwtw04.sys | 3359536a0b74a52f3f892e192b953923 | 6.88 MB | Запрос | |||||||||||||||
|
||||||||||||||||||
| + Netwtw04.sys | 3359536a0b74a52f3f892e192b953923 | 6.88 MB | Запрос | |||||||||||||||
|
||||||||||||||||||
| + Netwtw04.sys | 3359536a0b74a52f3f892e192b953923 | 6.88 MB | Запрос | |||||||||||||||
|
||||||||||||||||||
| + Netwtw04.sys | 3359536a0b74a52f3f892e192b953923 | 6.88 MB | Запрос | |||||||||||||||
|
||||||||||||||||||
| + Netwtw04.sys | 3359536a0b74a52f3f892e192b953923 | 6.88 MB | Запрос | |||||||||||||||
|
||||||||||||||||||
| + Netwtw04.sys | 3359536a0b74a52f3f892e192b953923 | 6.88 MB | Запрос | |||||||||||||||
|
||||||||||||||||||
| + Netwtw04.sys | 3359536a0b74a52f3f892e192b953923 | 6.88 MB | Запрос | |||||||||||||||
|
||||||||||||||||||
| + Netwtw04.sys | 3359536a0b74a52f3f892e192b953923 | 6.88 MB | Запрос | |||||||||||||||
|
||||||||||||||||||
| + Netwtw04.sys | 3359536a0b74a52f3f892e192b953923 | 6.88 MB | Запрос | |||||||||||||||
|
||||||||||||||||||
| + Netwtw04.sys | 3359536a0b74a52f3f892e192b953923 | 6.88 MB | Запрос | |||||||||||||||
|
||||||||||||||||||
| + Netwtw04.sys | 3359536a0b74a52f3f892e192b953923 | 6.88 MB | Запрос | |||||||||||||||
|
||||||||||||||||||
| + Netwtw04.sys | 3359536a0b74a52f3f892e192b953923 | 6.88 MB | Запрос | |||||||||||||||
|
||||||||||||||||||
| + Netwtw04.sys | 3359536a0b74a52f3f892e192b953923 | 6.88 MB | Запрос | |||||||||||||||
|
||||||||||||||||||
| + Netwtw04.sys | 3359536a0b74a52f3f892e192b953923 | 6.88 MB | Запрос | |||||||||||||||
|
||||||||||||||||||
| + Netwtw04.sys | 3359536a0b74a52f3f892e192b953923 | 6.88 MB | Запрос | |||||||||||||||
|
||||||||||||||||||
| + Netwtw04.sys | ccf9ff5616904bcfcb410f613bb1ac67 | 6.79 MB | Запрос | |||||||||||||||
|
||||||||||||||||||
| + Netwtw04.sys | ccf9ff5616904bcfcb410f613bb1ac67 | 6.79 MB | Запрос | |||||||||||||||
|
||||||||||||||||||
| + Netwtw04.sys | ccf9ff5616904bcfcb410f613bb1ac67 | 6.79 MB | Запрос | |||||||||||||||
|
||||||||||||||||||
| + Netwtw04.sys | ccf9ff5616904bcfcb410f613bb1ac67 | 6.79 MB | Запрос | |||||||||||||||
|
||||||||||||||||||
| + Netwtw04.sys | ccf9ff5616904bcfcb410f613bb1ac67 | 6.79 MB | Запрос | |||||||||||||||
|
||||||||||||||||||
| + Netwtw04.sys | ccf9ff5616904bcfcb410f613bb1ac67 | 6.79 MB | Запрос | |||||||||||||||
|
||||||||||||||||||
| + Netwtw04.sys | ccf9ff5616904bcfcb410f613bb1ac67 | 6.79 MB | Запрос | |||||||||||||||
|
||||||||||||||||||
| + Netwtw04.sys | ccf9ff5616904bcfcb410f613bb1ac67 | 6.79 MB | Запрос | |||||||||||||||
|
||||||||||||||||||
| + Netwtw04.sys | ccf9ff5616904bcfcb410f613bb1ac67 | 6.79 MB | Запрос | |||||||||||||||
|
||||||||||||||||||
| + Netwtw04.sys | ccf9ff5616904bcfcb410f613bb1ac67 | 6.79 MB | Запрос | |||||||||||||||
|
||||||||||||||||||
| + Netwtw04.sys | ccf9ff5616904bcfcb410f613bb1ac67 | 6.79 MB | Запрос | |||||||||||||||
|
||||||||||||||||||
| + Netwtw04.sys | ccf9ff5616904bcfcb410f613bb1ac67 | 6.79 MB | Запрос | |||||||||||||||
|
||||||||||||||||||
| + Netwtw04.sys | ccf9ff5616904bcfcb410f613bb1ac67 | 6.79 MB | Запрос | |||||||||||||||
|
||||||||||||||||||
| + Netwtw04.sys | ccf9ff5616904bcfcb410f613bb1ac67 | 6.79 MB | Запрос | |||||||||||||||
|
||||||||||||||||||
| + Netwtw04.sys | ccf9ff5616904bcfcb410f613bb1ac67 | 6.79 MB | Запрос | |||||||||||||||
|
||||||||||||||||||
| + Netwtw04.sys | ccf9ff5616904bcfcb410f613bb1ac67 | 6.79 MB | Запрос | |||||||||||||||
|
||||||||||||||||||
| + Netwtw04.sys | ccf9ff5616904bcfcb410f613bb1ac67 | 6.79 MB | Запрос | |||||||||||||||
|
||||||||||||||||||
| + Netwtw04.sys | ccf9ff5616904bcfcb410f613bb1ac67 | 6.79 MB | Запрос | |||||||||||||||
|
||||||||||||||||||
| + Netwtw04.sys | ccf9ff5616904bcfcb410f613bb1ac67 | 6.79 MB | Запрос | |||||||||||||||
|
Спасибо, ваш файл запроса был получен.
Ошибки Netwtw04.sys
Ошибки Netwtw04.sys обычно связаны с синим экраном смерти (BSOD) или ошибкой «Stop»:
В большинстве случаев после установки нового оборудования или программного обеспечения возникнут ошибки синего экрана Netwtw04.sys. Ошибки Netwtw04.sys, связанные с Intel 3165 7265 8260 8265 Wi-Fi Drivers, часто возникают во время установки программного обеспечения, связанного с Netwtw04.sys, во время завершения работы или запуска Windows или во время загрузки драйвера устройства, связанного с Dell Inc.. Документирование случаев BSOD Netwtw04.sys является ключевым для определения причины проблемы и сообщения о них Dell Inc. для исправлений.
Эпицентры Netwtw04.sys Головные боли
Проблемы BSOD, связанные с Netwtw04.sys, обычно создаются соответствующим оборудованием, программным обеспечением, драйверами устройств или микропрограммным обеспечением. Эти BSOD могут быть вызваны проблемами Intel 3165 7265 8260 8265 Wi-Fi Driver или проблемами с оборудованием, связанным с Dell Inc..
Более конкретно, данные ошибки Netwtw04.sys могут быть вызваны следующими причинами:
Источник
If you are facing the Netwtw04.sys BSOD error on your computer but you don’t know how to deal with it, you’ve come to the right place. This post from MiniTool Solution will help you out. It will show you multiple fixes for this BSOD error.
About Netwtw04.sys Blue Screen Error
You are here because you are experiencing the Netwtw04.sys BSOD error in Windows 10.
You may encounter two Netwtw04.sys stop errors:
1.DRIVER_IRQL_NOT_LESS_OR_EQUAL
It means that a kernel-mode driver is trying to access too high pageable memory at a process IRQL.
2.SYSTEM_THREAD_EXCEPTION_NOT_HANDLED
It indicates that this error may be caused by the driver being incompatible with the operating system.
However, the Netwtw04.sys failed error may occur because of several reasons such as malicious programs, outdated/bad drivers, damaged Windows registry and more.
Fixes for Netwtw04.sys BSOD Error
Some Windows users reported that they have managed to fix Windows 10 error Netwtw04.sys via restarting their PCs. Thus, you can simply try to restart your PC after you get this error and then check if the error is solved successfully.
If the Netwtw04.sys error still exists, right now, you can keep reading to get the full fixes for this error.
Tip: If your PC can’t boot to desktop, you need to enter Safe Mode firstly and then you can proceed to the following fixes.
Fix 1: Run a Full System Scan
If there are viruses and malware on your PC and your system file are infected, the netwtw04.sys error may occur. Thus, you can try to run a full system scan on your PC to fix this error.
You can do this job using Windows’ built-in antivirus — Windows Defender or any third-party antivirus. Here is a quick guide on how to run a full system scan with Windows Defender.
Step 1: Firstly, press the Win key + I key together to open the Windows Settings window.
Step 2: Click the Update & Security section and then click the Windows Defender option on the left from the new pop-up window.
Step 3: Click the Open Windows Defender Security Center button from the right side.
Step 4: In the new pop-up window, click Virus & threat protection.
Step 5: Next, click Advanced scan next to the Quick scan button.
Step 6: Check Full scan and then click Scan now. Windows Defender will start to scan your computer and report any findings to you.
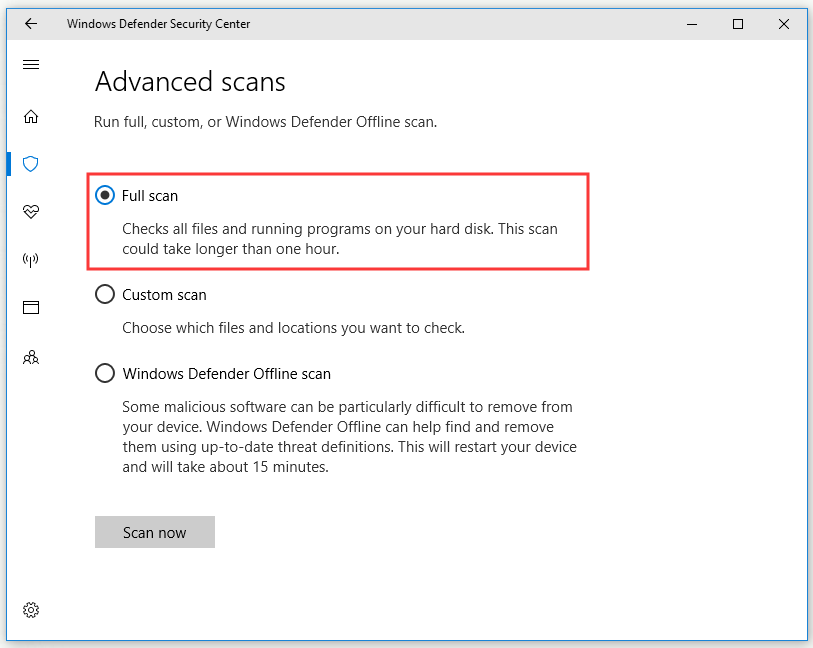
After the scan to complete, remove every possible virus corruption. Next, check if the Netwtw04.sys failed error has left your PC. If the error persists, now move down to the next method below.
Fix 2: Temporarily Disable Your Third-party Antivirus
Sometimes, the Netwtw04.sys BSOD error may also appear because of some antivirus programs. Therefore, you can try to temporarily disable your antivirus or firewall to solve this BSOD error.
Some antivirus programs have the “temporarily disable protection” option and you can directly use it. However, other antivirus programs don’t have this option.
In the end, you can try to uninstall your Antivirus programs which are causing the Netwtw04.sys error. Then remove these antivirus programs and try alternatives with excellent performance like Malwarebytes and Bitdefender.
After you temporarily disable your antivirus or firewall or uninstall the antivirus programs which are causing the issue, check if the Windows 10 BSOD error Netwtw04.sys is solved.
Fix 3: Update Network Adapter Driver
If you are using the wrong or out of date network driver, the Netwtw04.sys BSOD error may happen. Hence, you need to update your network driver to fix your problem.
There are 2 available ways to update your network driver. You can automatically update it or download the driver manually from the manufacturer’s website and install it on your computer. Here is a guide on how to automatically update it.
Step 1: Press the Win key + R key together to open the Run dialog box. Next, type devmgmt.msc in the dialogue box and press Enter.
Step 2: Once in the Device Manager window, click Display adapters to expand it, right-click on your network adapter and select Update driver.

Step 3: Click Search automatically for updated driver software.
Step 3: Follow the on-screen instructions to finish updating your network driver.
After finishing the steps below, check if the error has gone. If updating the driver does not fix this issue, you can also revert back the old driver versions. The following part will show you how to roll back your network adapter driver.
Fix 4: Roll Back Network Adapter Driver
Most of the time, the Netwtw04.sys error arises due to network adapter driver issues. Hence, you can try to roll back your network adapter driver to fix this problem. Here are the steps to do that.
Step 1: Right-click the Start menu and then choose Device Manager from the pop-up menu to open it.
Step 2: Click Network adapters to expand it.
Step 3: Double-click your network adapter/Wi-Fi adapter to open its Properties window.
Step 4: Switch to the Driver tab and then click the Roll Back Driver button. Finally, confirm to roll back to the previously installed driver and click Yes.
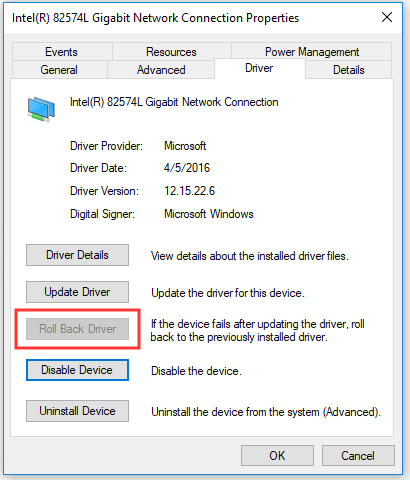
Step 5: Follow the instructions to finish the driver rollback process.
Restart your computer and check if the Netwtw04.sys error has been resolved.
If the error remains, move down to the methods below.
Fix 5: Run an SFC Scan to Repair Your PC Registry
Your Windows registry will be damaged because of corrupted system files, then the Netwtw04.sys error may occur. Hence, you can use System File Checker (SFC) to check for system file corruption. Here’s how to run an SFC scan.
Step 1: Firstly, type cmd in the Search bar, right-click Command Prompt and select Run as administrator. When the User Account Control window pops up, click Yes.
Step 2: Input this command: sfc /scannow and press Enter. System File Checker will help you verify the integrity of all system files and then repair corrupted files when possible.

Step 3: Wait until the scanning process is completed and then restart your PC. All corrupted files will be replaced on reboot.
Now check if the error is solved. If not, move down to the next method below.
Fix 6: Run the DISM Commands
If the Netwtw04.sys BSOD error appears due to corruption and misconfigurations on your computer, you can try to run the DISM commands.
To run the DISM commands, follow the steps below.
Step 1: Type cmd in the Search bar, right-click Command Prompt and choose Run as administrator to run it with administrator privileges.
Step 2: After that, input each one of the commands listed below separately and press Enter after each to execute them:
Dism /Online /Cleanup-Image /CheckHealth
Dism /Online /Cleanup-Image /ScanHealth
Dism /Online /Cleanup-Image /RestoreHealth
Step 3: After you finish executing the commands given above, restart your PC for the changes to take effect.
Now, check if the Netwtw04.sys BSOD error has been fixed.
Fix 7: Run CHKDSK in File Explorer
The Netwtw04.sys BSOD error might also appear because of a corrupted hard drive. Running CHKDSK to scan the disk may help. Here is a quick guide on how to run CHKDSK in File Explorer.
Step 1: Open File Explorer on your PC.
Step 2: Right-click on the target disk that you want to check and select Properties from the pop-up menu.
Step 3: Then, switch to the Tools tab.
Step 5: Find the Error checking section and click the Check button.

After finishing the process, restart your PC. Next, check if the Netwtw04.sys BSOD error has gone.
Fix 8: Install the Latest Windows Updates
You can also try updating your Windows 10 OS to the latest version to fix the Netwtw04.sys error. The latest Windows updates may help you improve the stability of your system and repair various issues and errors related to the startup error.
Step 1: Press the Win key + I key, click Update & Security and then click Windows Update from the left side.
Step 2: Click Check for updates from the right side. Windows Update will download and install any available updates automatically.

Step 3: After the update is complete, restart your PC.
Check if this BSOD error is solved.
Fix 9: Run the Blue Screen Troubleshooter
Blue Screen troubleshooter is a built-in tool in Windows that can help troubleshoot this BSOD error. Here is a quick guide.
Step 1: Press the Win key + I key, click Update & Security and then click Troubleshoot from the left side.
Step 2: In the right side, find Blue Screen. Click it and then click the Run the troubleshooter button.

Step 3: Follow the instruction and then restart your PC.
Check if the blue screen problem still exists.
Fix 10: Run a System Restore
If you have created a restore point already, now it will be easier to fix the Netwtw04.sys error. You can try to perform a system restore to revert back to a certain restore point on your system. Here is a guide on how to do that.
Step 1: Type restore point in the Search box and then click Create a restore point.
Step 2: In the System Protection tab, click the System Restore… button.
Step 3: Click Next to continue.
Step 4: Select a restore point that you want to revert your system to and click the Next button.
Step 5: Now confirm you select a correct restore point that is created before the Netwtw04.sys error happened. Click Finish.

Step 6: Click Yes to continue.
After the System Restore process is completed, check if the error disappears.
After reading this post, I solve the Netwtw04.sys error successfully with the methods mentioned from it. Now, I can use my PC normally.Click to Tweet
Useful Suggestion: Protect Your PC by Creating a System Image
Right now, you should manage to fix the Netwtw04.sys BSOD error after trying the fixes above.
In order to avoid a similar problem with your system in the future, here is a useful suggestion for you: protect your PC by creating a system image. If the BSOD error occurs again, you can perform quick disaster recovery with the created system image.
So how to create a system image? A piece of free backup software — MiniTool ShadowMaker will be your good assistant. It can help you back up files, folders, partitions, the hard drive or your Windows OS.
More features are waiting to be discovered. Now, free download MiniTool ShadowMaker Trial. You can use the Trial Edition for 30 days for all backup features. To use MiniTool ShadowMaker permanently, upgrade it to Pro Edition.
Free Download
Right now, let’s start to create a system image with MiniTool ShadowMaker.
Step 1: Choose a Backup Mode
1.Run MiniTool ShadowMaker.
2.Click Keep Trail to keep using the Trial Edition.
3.Then click Connect in the Local section to manage your local computer.

Step 2: Select Your System as Backup Source
Actually, the system reserved partition and C drive are already selected by default. Hence, there is no need to choose them again.

Step 3: Select a Destination Path to Save Your System Image
1.Click the Destination tab in the Backup page.
2.Choose a suitable destination path and then click OK.

Step 4: Start to Back up
1.Click Back up Now to create a backup image right now.
2.Click Yes. Then wait for the backup image to create.
It’s really frustrating to have a BSOD problem on my PC. To protect my system, I successfully make a backup of my system with MiniTool ShadowMaker. Click to Tweet
Conclusion
Now, you should have solved the Netwtw04.sys error. At the same time, you should know clearly how to create a system image with our powerful backup program -MiniTool ShadowMaker.
Free Download
If you have some trouble while using MiniTool ShadowMaker, contact us by sending an email to [email protected].
Системные файлы (файлы .sys) важны для операционной системы Windows. Если какой-либо из них поврежден или отсутствует, система может столкнуться с проблемой. Одним из таких случаев является отсутствие или повреждение файла netwtw04.sys. В такой ситуации пользователи получат следующую ошибку:
IRQL ДРАЙВЕРА НЕ МЕНЕЕ ИЛИ РАВНО, или ИСКЛЮЧЕНИЕ СИСТЕМНОГО ПОТОКА НЕ ОБРАБОТАНО, ошибка Netwtw04.sys
Или
SYSTEM_THREAD_EXCEPTION_NOT_HANDLED, ошибка Netwtw04.sys
Файл Netwtw04.sys используется сетевыми компонентами. Это указывает на проблему с драйверами.
Причина
Ошибка может быть вызвана вирусом или вредоносным ПО, недавно установленными программами, проблемой с драйверами и т. д.
Предварительные шаги
1]Обновите Windows: процедура обновления окна описана здесь.
2]Запустите полное сканирование системы на наличие вирусов и вредоносных программ.
3]Временно удалите сторонние антивирусные программы.
Попробуйте следующие решения для решения проблемы:
Решение 1]Откатите сетевой драйвер
1]Нажмите Win + R, чтобы открыть окно «Выполнить», и введите команду devmgmt.msc. Нажмите Enter, чтобы открыть окно диспетчера устройств.
2]Разверните список сетевых адаптеров и щелкните правой кнопкой мыши те, которые указаны как мини-порт WAN. Выберите Свойства.
3]На вкладке «Драйвер» выберите «Откатить драйвер».
4]Нажмите OK, чтобы сохранить настройки.
Решение 2]Обновите сетевые драйверы
1]Откройте диспетчер устройств, как описано в решении 1.
2]Разверните список сетевых драйверов. Щелкните правой кнопкой мыши и обновите сетевые драйверы.
Другое предложение — обновить драйверы с Центр загрузки Intel.
Решение 3]Запустите команду DISM и сканирование SFC
Файл Netwtw04.sys может быть повторно добавлен в систему с помощью сканирования SFC. Процедура для того же упомянута здесь.
Решение 4]Запустите сканирование CHKDSK
Сканирование CHKDSK помогает проверить поврежденные сектора на жестком диске и исправить их. Вот процедура сканирования CHKDSK.