
Почему появляется BIOS id Check Error при обновлении Bios?
С данной ошибкой можно столкнуться в процессе обновления прошивки BIOS на материнских платах Gigabyte. Появляется она после выбора файла обновления в стандартной утилите Q-Flash. В данной статье мы рассмотрим возможные варианты устранения этой ошибки, а также способы ее обхода для удачного обновления BIOS.
Из-за чего может появляться ошибка?
BIOS id Check Error говорит о том, что проверка идентификатора BIOS не пройдена. Другими словами – этот BIOS, который Вы пытаетесь прошить, несовместим с материнской платой.
Итак, первое, что Вам стоит знать для успешного обновления BIOS через утилиту Q-Flash – флешка, на которую вы сбрасываете файл обновления, должна быть отформатирована в системе Fat32.
Далее проверяем все пункты, описанные ниже.
Соответствие BIOS вашей материнской плате
Как бы банально это не звучало, но достаточно часто пользователи неправильно определяют модель своей материнской платы и как следствие, скачивают неподходящий BIOS.
Поэтому внимательно сверьте модель своей мат.платы с той, для которой вы скачиваете BIOS. Соответствие должно быть полным! Вплоть до последней цифры и буквы!
Промежуточное обновление
Бывает так, что если между той версией BIOS, которая у Вас установлена, и той, которую вы пытаетесь установить, выходили промежуточные обновления, сперва следует установить их.
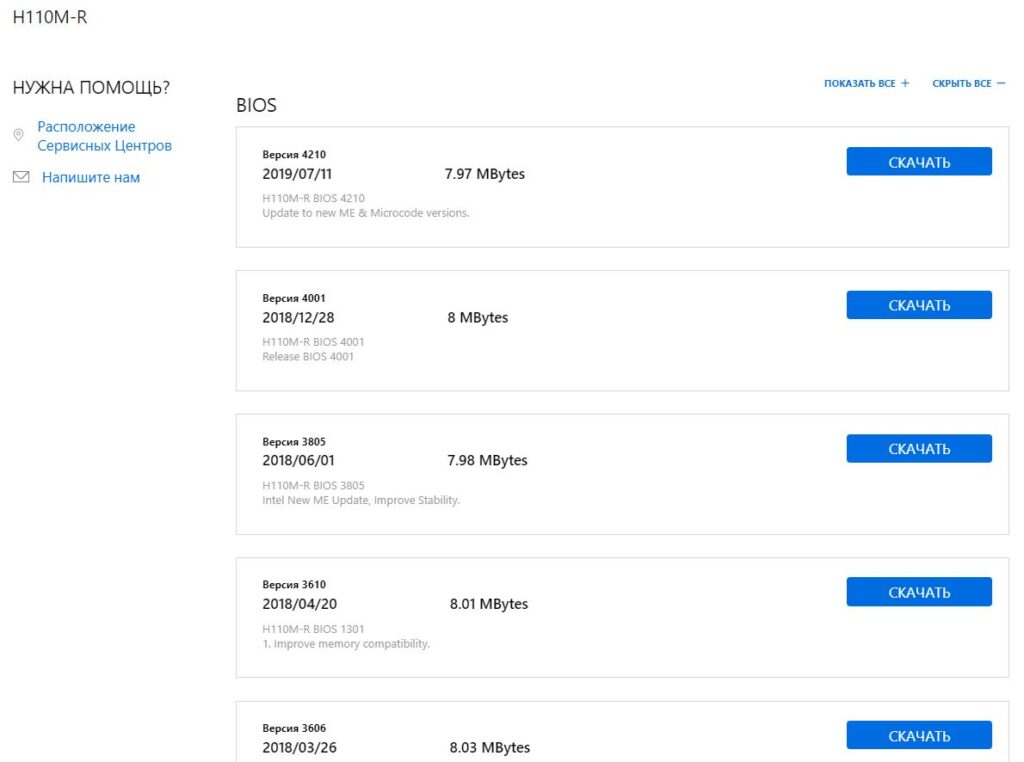
Разнообразие версий BIOS
К примеру, на Вашей плате стоит BIOS версии 1a, установить Вы пытаетесь версию 3c, а между ними были еще 1b, 2a, 2c и 3b, то при возникновении ошибки BIOS id Check Error перед установкой версии 3c попробуйте поставить 1b или 2a, а после успешной установки уже версию 3c.
Использование утилиты @bios
На сайте Gigabyte в разделе поддержки есть ссылка на скачивание утилиты @BIOS. Она позволяет легко и быстро обновить BIOS прямо из-под Windows.
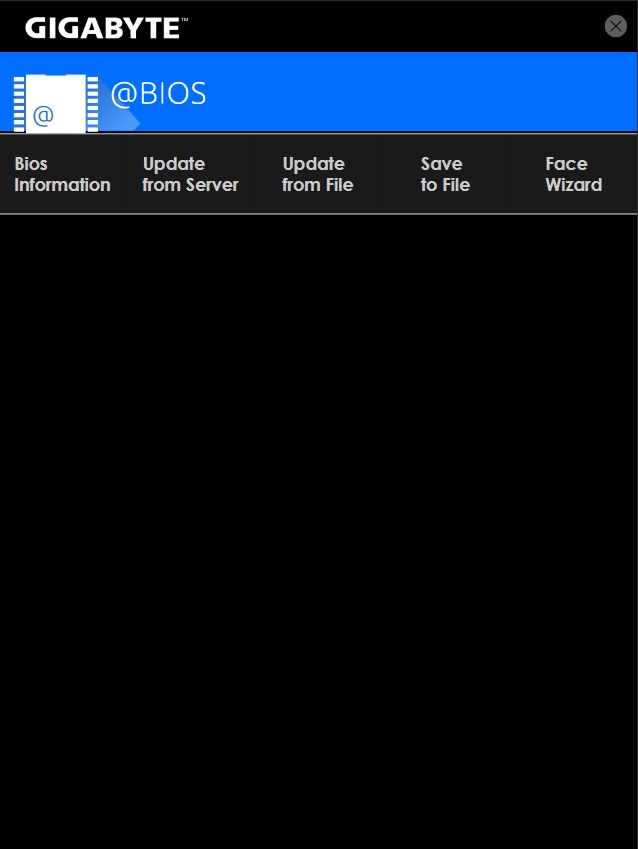
Утилита @BIOS
Поэтому при возникновении проблем с обновлением BIOS утилитой Q-Flash можно попробовать @BIOS.
Прошивка программатором
Если ничего из вышеперечисленного не помогло и обновить BIOS все равно не получилось, то остается лишь один вариант – прошивка программатором. Но для этого потребуется снятие флешки BIOS с мат. платы, а также специальный программатор. Доверить это лучше сервисному центру.
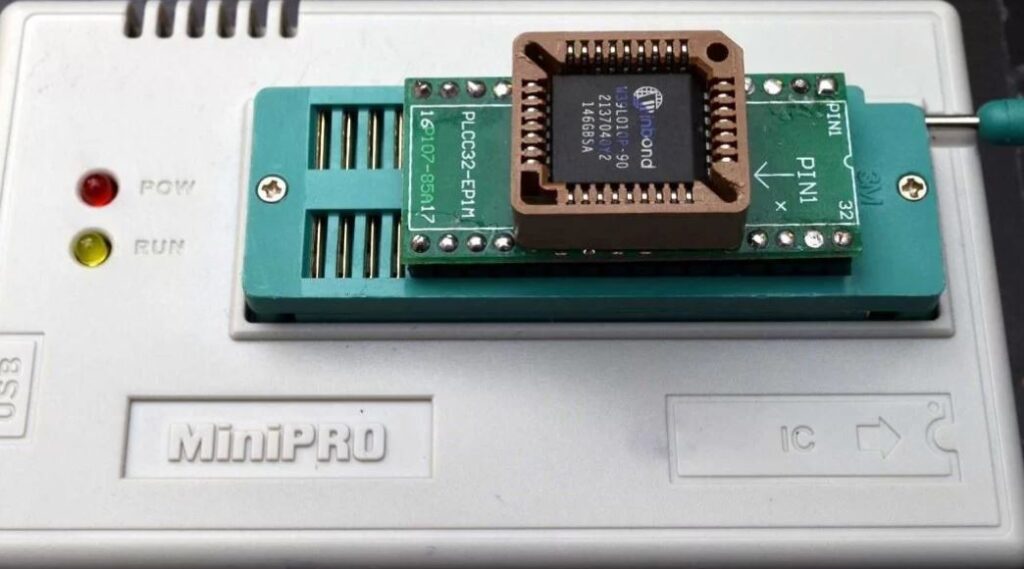
Прошивка на программаторе
Лучшая благодарность автору — репост к себе на страничку:
What can be more frustrating than to be slapped with an error code while upgrading the BIOS? I know your pain as I was in your shoes once.
As a lifelong user of Gigabyte motherboards for multiple years on different platforms, I know how to fix the error more elegantly and effortlessly.
In this article, I’m going to help you with only two questions, why this error occurs and how to solve it.
Sounds fair? Let’s get to the first question. Why does Gigabyte BIOS Id check error happen?
The primary reason behind this blunder is installing the wrong BIOS version. Other than that, a corrupted BIOS file that you have downloaded, a bad internet connection, and a non-bootable drive containing media files also can be responsible for BIOS error.
So, which one is causing you all the trouble? Continue reading to find out.
Check out our separate post: What is SVM mode in BIOS
What Causes BIOS ID Error?
The BIOS is the prime source of your operating system. So, any improper implementation of settings would likely fail the BIOS. Connectivity issues or downloading a corrupted update may also cause BIOS errors. I have shortlisted some common reasons behind the id check error in this part. Determine which one is causing you the hassle and follow the measures accordingly.
Here are the possible reasons behind BIOS Id error:
- Corrupted BIOS version: In order to upgrade BIOS, you need to download the latest available version from the internet. If that downloaded variant is corrupted, then there is a possibility that your screen will show a BIOS id error.
- Terrible Internet Connection; Another reason behind the id check error can be an awful internet connection. Imagine downloading an update with several disconnectivity. The fact that it kills your time and some parts of the downloaded file can get corrupted easily. This will undoubtedly lead to a BIOS error.
- Installing Existing Update: Have you ever tried updating the BIOS version before this time? If yes, then there is a possibility that you have already installed the latest version and you are trying to do that again. In that case, your computer might notify this as an Id check error.
- Mismatched BIOS Version: Are you sure that the edition you are downloading does match exactly with your motherboard? Most of the time, downloading the mismatched version of BIOS creates this issue. You can consider this as the main reason behind the BIOS id check error.
- Failed Devices: It is not so common a reason but still possible that failed USB drivers, broken Hard drives can lead you to this horrific problem. If you have recently installed new hardware on your computer and after that, the error appears, then it’s because of the recent hardware changes.
These are the most possible causes behind your computer’s ID check error, and finding the exact one will help you to solve the issue.
Don’t you know how to solve the error? No worries, I’m here to guide you. Just read the following chapters, and you are going to solve the issue effortlessly.
Follow our guide to Fix keyboard not working in BIOS
How to Solve BIOS ID Check Error
There are plenty of fixes available throughout the web. Most of them are temporary solutions. But, in this document, I’ll be explaining the advanced procedures that will permanently disappear the BIOS error.
This might be a little tricky, but as I am here to help, I’ll explain it in an adequate method.
So, without bushing around, let’s make your system workable.
Go through our epic guide: Is SSD Compatible with All Motherboards
Here are the steps to fix the BIOS ID error:
First Method: Reset BIOS to Default
Resetting BIOS to default settings helps the system to get over compatibility issues. BIOS returns to the last saved configuration if you complete the action, and most of the error messages get solved automatically.
You can reset BIOS either by getting into the boot menu or reinstalling the CMOS battery. I’m explaining both so that you can choose whichever seems easy.
You may also like to read: Will motherboard boot without CMOS battery
Reinstall CMOS: You can reinstall CMOS by following these steps:
- Shut down the computer and remove power cables.
- Locate a small, silver-colored battery on your motherboard.
- Remove the battery for 5-10 minutes and put it back on.
- Close the computer casing.
Your BIOS settings will be default if you follow these steps. Or you can do it manually by getting into the boot menu.
Quickly check out our epic guide on how to fix CPU fan not detected in BIOS
Boot menu settings: You can perform the following steps>
- Press F2 / Delete while booting up the pc to enter the boot menu.
- Press F9 to set the BIOS settings to default.
- Go to the last tab and select Save & Exit.
Restart the computer to complete the process.
These are the proper ways to reset BIOS settings to default. Once you complete either one of these processes, check if the BIOS id error has been resolved or not.
If not, apply the next method precisely as I explain.
You may check out the easiest way to gateway BIOS updates
Second Method: Update BIOS Properly
The most probable reason behind the BIOS id error is updating a version that is not particularly made for your motherboard. That happens when you download without being sure about the BIOS model.
In this method, I am going to teach you how you can get proper BIOS information and install it in a more efficient way.
Here’s the method to check BIOS version:
- Type cmd on your windows search box.
- Right click on the result and select Run as administrator from the list.
- Type this command wmic bios get smbiosbiosversion and press Enter.
The command prompt will show the current BIOS version of your motherboard. Download the latest version from the motherboard’s manufacturer website and follow the installation process.
NOTE: Before installing, remember that, while flashing the BIOS, if the power goes away, you will face more trouble than you are in right now. It can even fail your motherboard. So, try to get an alternative power source like UPS and then proceed.
Also, check our exclusive tutorial on BIOS not detecting USB
How to Install the Files
At this point, I can assume you’ve downloaded the exact BIOS file, and you’re ready to move further. Now you only need to install the files.
Here’s how you flash the BIOS properly:
- Insert an empty USB flash drive into your computer.
- Extract the downloaded files onto the flash drive. Note down the name of the update file exactly as it is named.
- Restart the computer after copying. And press F2 to enter the boot menu.
- Change the Primary Boot Device to the attached USB drive.
- Press F10 to save changes and exit to reboot the computer.
- Wait for a moment for the Command Prompt to appear on display.
- Type the name of BIOS files that you took a note of.
- Press Enter to begin the process and press the Y key to confirm the process.
That’s a lot to do, right? Trust me; this is by far the simplest yet workable solution you can find. Don’t hesitate to perform the action. Just do it and see the result.
Pro tip: Don’t install the update if there’s a b on the file name. Like “ U1b.exe,” That b means beta version. They are most likely bugged and problematic to install. Bonus tip: Before extracting the files to the USB, make sure it is formatted as FAT32. The other formats prevent updating efficiently. That problem happened to me.
Check out our separate post on how to Fix motherboard HDMI no signal
Conclusion
The very last thing I would like to add is you must be careful with the downloading process. I have said earlier and I am repeating again, Match the BIOS model and the downloaded version character by character.
Did that already? Well, do it for the last time and proceed to install. In this manner, the solution will work properly.
If you are at this point of the article and read every word I have put there, I can ensure you that you will be able to solve the BIOS id error all by yourself, and you won’t feel a slight complication doing that.
Then again, If you face any difficulties solving the issue, feel free to comment below, and I’ll solve them as soon as possible.
-

Tastic
Member- Messages:
- 17
- Likes Received:
- 1
- GPU:
I cannot flash my motherboard, Gigabyte Z68ma-d2h-b3 rev 1.3, to the newly available UEFI bios. In Q-Flash, I receive the error, «BIOS ID CHECK ERROR,» which suggests I have the wrong version but this just isn’t the case.
I tried resetting my bios to default, unplugged my system from the wall, tried the same bios version from different mirror sites, yet I still receive the same error.
Has anyone dealt with a similar issue?
-T
-
smashly
Master Guru- Messages:
- 988
- Likes Received:
- 0
- GPU:
I’m only guessing,
But under the description for U1b(UEFI BIOS):There’s a «FLASHEFI.EXE» in the bios package, use it to flash the bios and not Q-Flash.
I’d be weary of the U1b bios, that b in the bios version makes it look like a beta bios, if it is expect bugs.
Last edited: Jul 17, 2012
-
Tastic
Member- Messages:
- 17
- Likes Received:
- 1
- GPU:
Smashly,
Thx for the input.
I shortly realized that after put up this thread, so I created a bootable usb and placed the 3 included bios files on the stick as well.
When I tried to use the flashefi utility (Flashefi <biosnamehere>) in dos, I quickly received an error that said: «Bad Bios Version.»
This error is clearly just that, an error. I have the proper BIOS update for my motherboard, yet I still receive this error. Perhaps this is due to exactly what you stated… this this version, u1b is a BETA version and clearly has its bugs. Can’t even install the dang thing.
-T
-
smashly
Master Guru- Messages:
- 988
- Likes Received:
- 0
- GPU:
Hi,
Another thing you could try is contacting gigabyte tech support and shoot them a question.
http://ggts.gigabyte.com.tw/
Just login with your email address and no password.
They usually respond within 3 days.
I’ve shot them queries about my z77 board before.Also you could probably post a question in the Gigabyte forums and see if anyone else has had any luck or the same issue.
http://forum.giga-byte.co.uk/index.php/board,5.0.html -
Tastic
Member- Messages:
- 17
- Likes Received:
- 1
- GPU:
Thx Smashly, I’ll give that a try.
I did however create a bootable USB and put the bios update files on that, but I encountered the same problem. This time I received a similar error — «BAD BIOS VERSION»
Seems that updating to GA’s new UEFI bios is a difficult and faulty process at this point.
-T
-
unless your having issues with your current BIOS I wouldn’t bother updating and I’d not install an BETA BIOS unless at the behest of gigabyte techs
after saying that can you use switches like / ? to find out how to force an update something like this
(drivename):flashefi.exe /?
Share This Page

Актуальная версия BIOS позволяет материнской плате полноценно выполнять свои функции в ногу с нововведениями. Как правило, производители материнских плат рекомендуют обновление биос, Gigabyte же наоборот, просит не обновлять микрокод, если он работает без ошибок и справляется с запросами пользователя.
В статье я расскажу, как установить обновление BIOS загрузкой с флешки через Q-Flash и Q-Flash Plus. Отмечу, что прошить может любой уверенный пользователь, главное соблюдать пошаговую инструкцию.
Содержание
- Как обновить BIOS Gigabyte через Q-Flash
- Как пользоваться Q-Flash Plus Gigabyte
Шаг 1. Для начала необходимо войти в биос, чтобы посмотреть версию вашей микропрограммы, запоминаем. Далее лучше выйти и выключить компьютер с помощью выключателя на блоке питании.
Шаг 2. Откройте левую боковую крышку и выпишите модель материнской платы в плоть до ревизии, например GA-H110M-S2.

Шаг 3. Откройте сайт производителя gigabyte.ru. Щелкните на значок поиска, укажите выписанную модель вашей материнки, нажмите Enter.

Шаг 4. Из представленного списка необходимо найти точную запрашиваемую модель, остальные похожие модели нас не интересуют. Кликните на ссылку Driver.

Шаг 5. В списке загрузок разверните категорию BIOS, выберите любую версию прошивки, рекомендую скачать последнюю (не скачивайте beta-версии). Напротив каждой версии биос в описании вы можете прочитать какие присутствуют изменения (дополнения).

Шаг 6. Распакуйте скачанный архив.

Скопируйте файлы на отформатированную флешку, на самом деле достаточно перенести только один файл с названием материнской платы и версией биос, в нашем примере это «GA-H110M-S2.F24». USB-носитель оставляем подключенным к ПК, на котором требуется прошить микрокод.
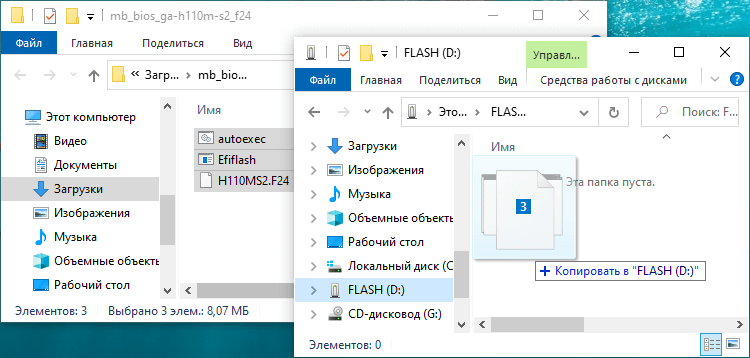
Шаг 7. Перезагрузите компьютер, войдите в BIOS, найдите утилиту Q-Flash.

Если ее там нет, перезагрузите ПК, при запуске нажмите несколько раз на клавиатуре клавишу End или F8 в зависимости от версии вашей микропрограммы, чтобы войти в Q-Flash.

Шаг 8. Здесь есть две опции:
- Uploads BIOS – обновление микрокода с USB-флешки.
- Save BIOS – сохранение существующей версии микрокода на USB-флешку.
Выберите первое – обновление BIOS для платы Gigabyte.
Шаг 9. Микропрограмма автоматически определит вашу новую версию микропрограммы на флешке, щелкните Enter.
Пойдет процесс обновления, ничего не нажимайте, компьютер перезагрузится, затем еще раз с полным выключением, дожидаемся окончания загрузки Windows.
Как пользоваться Q-Flash Plus Gigabyte
Ни так давно Gigabyte внедрил в дорогие материнские платы новую функцию Q-Flash Plus, что значительно упростило обновление BIOS. Это особенно актуально для тех, у кого мать в стоковой прошивке не определяет процессор. Отмечу, что обновить микропрограмму можно без вставленного в материнскую плату процессора и оперативной памяти.
Как пользоваться Q-Flash Plus покажу на примере материнской платы GIGABYTE Z690 AORUS MASTER. Проделываем все шаги с первого по пятый, что описаны в предыдущем подзаголовке.
Шаг 6. Распакуйте архив.
Шаг 7. Перенесите файл BIOS (например, Z690AORUSMASTER.F5) на отформатированный в FAT32 флэш-накопитель.
Шаг 8. Переименуйте ваш файл биос в GIGABYTE.bin. Во всплывающем окне с предупреждением, подтвердите Да. На моем примере, БЫЛО:

СТАЛО:

Шаг 9. Подключите кабели блока питания к разъему питания 12 В (подключите один, если их два – для процессора) и к основному источнику питания 20+4 pin.
Шаг 10. Отключите все подключенные к компьютеру устройства. Включите блок питание перед подключением USB-накопителя к порту Q-Flash Plus на задней панели.

Шаг 11. Нажмите кнопку Q-Flash Plus, и система автоматически найдет и сопоставит файл BIOS на USB-накопителе. QFLED и кнопка Q-Flash Plus на задней панели будут мигать во время процесса сопоставления и перепрограммирования BIOS. Подождите пока светодиоды перестанут мигать (это займет 6-8 минут), погашенные индикаторы означают, что перепрошивка BIOS завершена.
Не прерывайте процедуру установки, даже если вам покажется, что у вас просто черный экран, – ждите! Прерванная операция приведет ваше железо в «кирпич», чтобы реанимировать его, придется обращаться в сервисный центр для прошивки биос через программатор.
Как вы видите, обновить биос материнской платы gigabyte просто, и это под силу практически каждому пользователю.