boot stops at 5A
Discussion in ‘Intel’ started by arkentoss, Jul 10, 2006.
-
Hi I’ve Intel D945GNT classic motherboard with Intel P4 3.0 Ghz HT
processor,I’ve problems while booting the machine..
It stops at the fist screen, with intel logo and displays one line with
«F2 for settings 5A»sometimes it proceeds but again stops just displaying 5A on black
screen..I’m unable to figure out problem because it can’t boot
where should i look for solution
thanks in advance
ark -
Advertisements
-
Code 5A is «Resetting PATA/SATA bus and all devices»
Try resetting the CMOS. Also, remove any add-in cards that are not
required to get video. Lastly, disconnect the hard drives(s) from the
motherboard. -
Advertisements
-
Thanks for replying… I’ll try, but how can I reset CMOS..? because
I’m unable to enter to bios setup by pressing F2.. I’ve installed
Geforce 6600 graphics card, is there any need to remove it…? Also I
forget to mention it early that, I’ve SATA hard drive..thanks in advance
ark -
At first I was going to say RTFM, but on closer inspection this board does
not have this feature. You could remove the on-board lithium battery and
short the two terminals of the battery holder for 5 to 10 seconds or so.For reference, your user manual is here:
ftp://download.intel.com/design/motherbd/nt/D1406901US.pdfThat has nothing to do with resetting the CMOS. However, if you set jumper
J7J3 to position 2-3, then power on the board, does it then enter setup?
Since this MB has onboard VGA, yes — if only to eliminate the video card
as being part of the problem. Plug your monitor into the built-in VGA port
located on the motherboard.
Did you try disconnecting it to see if the POST goes any further? -
Hi, thanks for help..
I’ll follow these steps & let u know if it works…
thanks again..
ark
-

bertmcd
- Joined:
- Sep 10, 2006
- Messages:
- 1
- Likes Received:
- 0
Fix for this problem
I also have D945GNT with this error. I have SATA hard drives and IDE (PATA) CD and an IDE (PATA) tape drive (Segate Travan 40?), and floppy.
The travan had no power hooked up (forgot to plug in cable).I simply disconnected the IDE devices (CD and tape drive) and then the board booted to the point that I could go into cmos setup and set the boot order. Everything worked after that.
Moral of the story — Disconnect the IDE devices (simplify). -
5A and IDE problem solved
I discovered something. I just built a new machine on a D975XBX with a Core 2 Quad. I put in an old CD Drive and the machine would hang on 5A but eventually startup if I waited several minutes. When I read here that if you unplug the IDE, the machine might not hang on 5A, I tried that and it worked, it booted in 30 seconds. Since I had a stack of old CD Drives I decided to see if another one would misbehave. Wouldn’t you know it, I replaced the CD Drive with another old one and the machine would not hang on 5A, and booted in 30 seconds. The different old CD Drive worked OK so I used it to install the OS. I am gussing that some old CD Drives are not compatible with new BIOS so all that about Resetting CMOS and BIOS is not necessary.
-
nafreire
- Joined:
- Jan 19, 2008
- Messages:
- 1
- Likes Received:
- 0
pauses on post code 5A on DG33TL
I got the same issue.
running a DG33TL, with a quad core cpu, SATA DVD-RW DL Pioneer, SATA Western digital 500gb Hard Drive.
I just installed a PCI Express video card and encountered the same issue, bios pauses on post code 5A.
Disconnected both my SATA connectors and computer Post successfully. I got the latest bios update.
This is the second PCI Express I installed on this machine both with the same issue, anyone have any suggestions on what might resolve this issue.
-
manu
- Joined:
- Feb 7, 2008
- Messages:
- 1
- Likes Received:
- 0
Hi I’ve also an Intel D945GNT classic motherboard
I’ve the exact same problems while booting the machine..
It stops at the fist screen, with intel logo and displays one line with
«F2 for settings 5A»I did everything that says in the post but even with all the ides disconnected still shows the 5A on the first screen…
Help please!!!
-
irie111
- Joined:
- Feb 8, 2008
- Messages:
- 2
- Likes Received:
- 0
5A POST ISSUE (Intel)
OK folks… I am running the Intel DG33TL w/Quad Core… I will share what I have learned concerning this 5A issue… I have SATA hard drive and IDE DVD/RW… Running onboard video, I have no issues… After installing a PCIe video card in this machine I encounter the 5A post message hanging issue… Unplugging the IDE DVD/RW does not fix the issue for me… However, after unplugging the SATA hard drive cable, the machine completes post no problem… I have spent hours on the phone with Intel, and they are clueless to this issue… They even went as far as telling me I needed to flash bios on my hard drive (come on, that’s ridiculous)… But, I even phoned Western Digital and there is no update for my 400GB SATA drive (and they laughed at the concept of that being the problem, as did I… lol)…
Bottom line… I’m very disappointed with this board at this point; as I’m stuck using onboard video with my Quad-Core and using my ATI HD2600XT upgrade video as a paper weight…
Clearly this is becoming a known issue, and I hope that it is only a matter of time before Intel addresses it… It is clearly a motherboard related issue…
Hope this helps iron out some of the guess work on this issue…
irie111

-
irie111
- Joined:
- Feb 8, 2008
- Messages:
- 2
- Likes Received:
- 0
Yeah!!!…
Problem resolved with the latest BIOS update from Intel for my DG33TL…
I am very happy now!!!… A little surprised it took Intel so long to recognize such a major issue… Turns out the incompatibility was with a combination of ANY PCIe video card and ANY SATA hard drive… Go figure… I’m amazed these boards even made a release without being tested in this configuration… lolAnyways, I’m pimpin’ a 5.5 on Windows Vista Experience Index now with my ATI HD2600XT… I’m very happy, and really this system has been very fast and very stable, so I’m over complaining about Intel now, they fixed it (after pulling my hair out for months)… lol
The fix was finally released in a January 21st, 2008 BIOS update…
Release notes (search 5A in PDF)… http://downloadmirror.intel.com/15422/ENG/DP_0372_ReleaseNotes.pdfI’m assuming that all your model motherboards have this issue fixed with the latest BIOS as well…
Good luck…
irie111
Intel Q6700 Quad-Core processor
Intel DG33TL motherboard
ATI HD2600XT PCIe graphics
4GB Corsair DDR2 800Mhz
Western Digital 400GB SATA hard drive
Sony DVD/RW IDE
Antec TP-650 power supply
32bit Vista UltimateLast edited: Feb 10, 2008 -
gggcc
- Joined:
- Nov 12, 2009
- Messages:
- 1
- Likes Received:
- 0
I found the problem but….
I was having the same problem
The CMOS reset did not work. After pulling each board one at a time, I isolated it to either a port or SATA drive. The port works with another device and the drive is not recognized in another port, so it is the HD.Now, my system has 4 HD. Program, Data, Program Backup, and Data Backup.
The bad HD is my master data drive. The last backup was 3 weeks ago.
The drive is humming when powered. Is there anyway to pull the data off?A friend of mine said that he heard that SOMETIMES if you put the HD in the freezer for an hour it will work long enough to pull the data off. If the MB is not recognizing the HD how would I do this?
-
- Joined:
- Feb 22, 2010
- Messages:
- 1
- Likes Received:
- 0
same problem but got the solution !!!!
well this is a problem that i been dealing with intel motherboards for long time, the problem is when you change something in the motherboard(in my case hard drive), the motherboard is so dumb that it cannot understant that you just remove a harddrive and you have another one, instead is trying to find the old hd that you have before and gets confuse with the new one, so basicaly just restart the motherboard with no hard drive them go to set up save and exit, restart and them turn of mother connect new hd (by the way with this intel mothers also seem to be it works better with cable select configuration in the hard drive when only installing 1 hd) them turn on mother and it should work, i remember also in some case the need to disable automatic function in the id menu and put it manual. maybe this donsn’t work for you but it will give you an idea of whats going on with this friking motherboard.
good luck
-
Rudi
- Joined:
- Dec 5, 2011
- Messages:
- 1
- Likes Received:
- 0
Hi, I had the same issue with the 5A stop code, after I installed the «GTX550» display card. PC would boot when I disconnect SATA HDD. Started pc with older display card and updated my bios through windows. Found latest bios update from intel web site. All working fine now. -
BIOS update didn’t work…Hi,
I’ve thought that i’d found the solution of my problem. But i’m still having the same issue ‘5A’ desperately after i’ve installed my «HD3870».
I found and updated latest bios from intel web site. I’m running ‘D945PLNM’ with ‘X1950’ already.
I’ve done all that you’ve mentioned above… centplay.com/affiliate/id_366/Do you have any other suggestions to fix this? Thank you in advance…
-
I bought the motherboard in 08/09 with a SATA Western digital 500gb Hard Drive. From time to time the monitor would go from Windows to a pink screen with a cursor, so I replaced the PCI Express video card. I then had the same issue above. With me, I could pull the HDD and I could get to the BIOS screen.I’ll look into the BIOS update. Just goes to show that you that even six years down the road this info is still important.
-
alokesh_p
- Joined:
- Sep 30, 2013
- Messages:
- 1
- Likes Received:
- 0
Sir,
I have 945gcr intel motherboard .It just booting then stop show error 5A.What is the problem.disconnect all peripheral and other device but not solve .is it bios related or motherboard related problem
-
Hi,
I have a dp55wb and a have a video card failure.
I try to install a Radeon R5 230 (XFX R5-230A-CLH V2.A) to replace the old one and I my boot always stop in 5A.
This video card is a PCI-E 3.0 and all sites said the same thing «PCI-e 3.0 is compatible with PCI-e 2.x and older)
This is not true with Intel MB???
My PC started now with a old NVidia GTS250, and yes,,, the new one, R5 230 works perfect in other PC -
Moreno
- Joined:
- Jun 24, 2019
- Messages:
- 1
- Likes Received:
- 0
Hi
I have a dg33tl that also postung the same but the thing is that it seems to freeze and i cant go into f2 for the bios i have tried everything to update the bios and i cant. And the recovery of this board is not posting anything. -
Advertisements
- Ask a Question
Want to reply to this thread or ask your own question?
You’ll need to choose a username for the site, which only take a couple of moments (here). After that, you can post your question and our members will help you out.

-
- Feb 22, 2015
-
- 16
-
- 0
-
- 4,520
- 2
-
#1
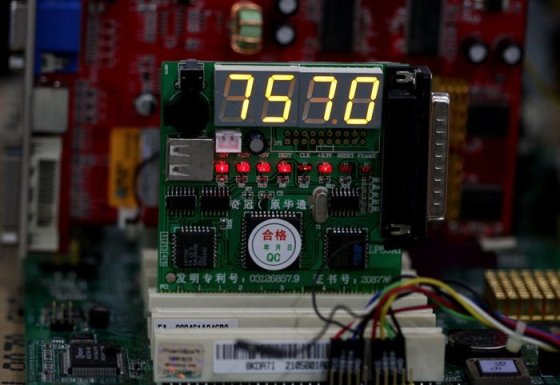
About a week ago my monitor started going on standby at different times. The only way to wake it up, was to switch power off at the wall and back on again, then restart the computer. It started getting worse until Thursday when nothing I did could wake up the monitor. There were no POST error codes or beeps, the pc worked fine except for the monitor going on standby. On Friday I tried again by switching the power off and on and starting the pc, and now suddenly I get BIOS POST error code 5A, 2 long beeps, a pause and 2 long beeps again. Then the POST carries on and stops at 5b (or S6 or Sb). It is not clear since the monitor does not come on, I can only see the code on the motherboard’s display.
I bought a new monitor and connected it to the pc with the same result. I removed all RAM modules and tried different modules in DIMM 1 slot, still the same. Removed one by one the sound card, removed Graphics card, removed all SATA devices: 2 x DVD-Roms and 3 x HDD and 1 x SSD. (one by one and all together). Tried a CMOS reset (removed battery for 20 minutes) and BIOS recovery (removed jumper, restarted, replaced jumper and restarted)
I will be borrowing a Graphics Card from a friend tomorrow to test the card, but since I get the same error code even with the card removed, I do not have high hopes.
Could the cause be a faulty motherboard or CPU and how will I check this without buying new ones (unnecessarily like the monitor)
There has been no changes to hardware, programs or applications. This PC has been the same for 2 years, except the replacement of a faulty Graphics card more than 6 months ago.
Thank you for any help and advice
System:
Motherboard: DX79T0 Lga 2011
Chipset: Intel core i7 2011
RAM: Kingston HyperX Predator 1866 (4 x 4gb)
Graphics Card: Gigabyte Radeon R9 290X Windforce
HDD: 3 x Seagate 2 TB
SSD: 1 x Intel SSD
-
- Feb 22, 2015
-
- 16
-
- 0
-
- 4,520
- 2
-
#2
So I borrowed a Graphics card from a friend, switched out the cards, and everything is working fine. Switched it back and bleep bleep bleep….
So in this situation it was the Graphics card gone bad.
Thanks
(I have read the postings on how to mark as solved, but there is no choose best answer available in this thread. Can a moderater please mark this as solved or close it?)
-
- Feb 22, 2015
-
- 16
-
- 0
-
- 4,520
- 2
-
#2
So I borrowed a Graphics card from a friend, switched out the cards, and everything is working fine. Switched it back and bleep bleep bleep….
So in this situation it was the Graphics card gone bad.
Thanks
(I have read the postings on how to mark as solved, but there is no choose best answer available in this thread. Can a moderater please mark this as solved or close it?)
| Thread starter | Similar threads | Forum | Replies | Date |
|---|---|---|---|---|
|
A
|
Question Asus Rog Strix Z590-E black pins, killed the CPU ? | Motherboards | 4 | Jan 20, 2023 |
|
|
Question BIOS update for Intel DQ57TM motherboard ? | Motherboards | 2 | Jan 20, 2023 |
|
D
|
[SOLVED] What is the best value Micro ATX mobo for Core i5 13600K | Motherboards | 4 | Jan 16, 2023 |
|
T
|
Question Intel Z690 / Z790 DDR5 error checking ? | Motherboards | 1 | Jan 14, 2023 |
|
C
|
Question Intel Gigabyte z790 UC AC BIOS M2 drive problem | Motherboards | 2 | Jan 12, 2023 |
|
J
|
[SOLVED] If I have a intel 12400 than what bios version should I use? | Motherboards | 5 | Jan 9, 2023 |
|
|
Question Intel DH55TC: How much TB of maximum storage does this mobo support and how many Internal Hard Drives can be installed on this mobo? | Motherboards | 6 | Jan 9, 2023 |
|
|
Question Problem weath mothear board Gigabyte Ga-B58M-DEV PLUS-SI | Motherboards | 1 | Jan 7, 2023 |
|
R
|
Question Will my motherboard (Intel dh61ww) support Corsair vs450 PSU? | Motherboards | 3 | Jan 1, 2023 |
|
|
Question No restart after power failure option in BIOS | Motherboards | 2 | Dec 31, 2022 |


- Advertising
- Cookies Policies
- Privacy
- Term & Conditions
- Topics
-
- Feb 22, 2015
-
- 16
-
- 0
-
- 4,520
- 2
-
#1
About a week ago my monitor started going on standby at different times. The only way to wake it up, was to switch power off at the wall and back on again, then restart the computer. It started getting worse until Thursday when nothing I did could wake up the monitor. There were no POST error codes or beeps, the pc worked fine except for the monitor going on standby. On Friday I tried again by switching the power off and on and starting the pc, and now suddenly I get BIOS POST error code 5A, 2 long beeps, a pause and 2 long beeps again. Then the POST carries on and stops at 5b (or S6 or Sb). It is not clear since the monitor does not come on, I can only see the code on the motherboard’s display.
I bought a new monitor and connected it to the pc with the same result. I removed all RAM modules and tried different modules in DIMM 1 slot, still the same. Removed one by one the sound card, removed Graphics card, removed all SATA devices: 2 x DVD-Roms and 3 x HDD and 1 x SSD. (one by one and all together). Tried a CMOS reset (removed battery for 20 minutes) and BIOS recovery (removed jumper, restarted, replaced jumper and restarted)
I will be borrowing a Graphics Card from a friend tomorrow to test the card, but since I get the same error code even with the card removed, I do not have high hopes.
Could the cause be a faulty motherboard or CPU and how will I check this without buying new ones (unnecessarily like the monitor)
There has been no changes to hardware, programs or applications. This PC has been the same for 2 years, except the replacement of a faulty Graphics card more than 6 months ago.
Thank you for any help and advice
System:
Motherboard: DX79T0 Lga 2011
Chipset: Intel core i7 2011
RAM: Kingston HyperX Predator 1866 (4 x 4gb)
Graphics Card: Gigabyte Radeon R9 290X Windforce
HDD: 3 x Seagate 2 TB
SSD: 1 x Intel SSD
-
- Feb 22, 2015
-
- 16
-
- 0
-
- 4,520
- 2
-
#2
So I borrowed a Graphics card from a friend, switched out the cards, and everything is working fine. Switched it back and bleep bleep bleep….
So in this situation it was the Graphics card gone bad.
Thanks
(I have read the postings on how to mark as solved, but there is no choose best answer available in this thread. Can a moderater please mark this as solved or close it?)
-
- Feb 22, 2015
-
- 16
-
- 0
-
- 4,520
- 2
-
#2
So I borrowed a Graphics card from a friend, switched out the cards, and everything is working fine. Switched it back and bleep bleep bleep….
So in this situation it was the Graphics card gone bad.
Thanks
(I have read the postings on how to mark as solved, but there is no choose best answer available in this thread. Can a moderater please mark this as solved or close it?)
| Thread starter | Similar threads | Forum | Replies | Date |
|---|---|---|---|---|
|
A
|
Question Asus Rog Strix Z590-E black pins, killed the CPU ? | Motherboards | 4 | Jan 20, 2023 |
|
|
Question BIOS update for Intel DQ57TM motherboard ? | Motherboards | 2 | Jan 20, 2023 |
|
D
|
[SOLVED] What is the best value Micro ATX mobo for Core i5 13600K | Motherboards | 4 | Jan 16, 2023 |
|
T
|
Question Intel Z690 / Z790 DDR5 error checking ? | Motherboards | 1 | Jan 14, 2023 |
|
C
|
Question Intel Gigabyte z790 UC AC BIOS M2 drive problem | Motherboards | 2 | Jan 12, 2023 |
|
J
|
[SOLVED] If I have a intel 12400 than what bios version should I use? | Motherboards | 5 | Jan 9, 2023 |
|
|
Question Intel DH55TC: How much TB of maximum storage does this mobo support and how many Internal Hard Drives can be installed on this mobo? | Motherboards | 6 | Jan 9, 2023 |
|
|
Question Problem weath mothear board Gigabyte Ga-B58M-DEV PLUS-SI | Motherboards | 1 | Jan 7, 2023 |
|
R
|
Question Will my motherboard (Intel dh61ww) support Corsair vs450 PSU? | Motherboards | 3 | Jan 1, 2023 |
|
|
Question No restart after power failure option in BIOS | Motherboards | 2 | Dec 31, 2022 |
- Advertising
- Cookies Policies
- Privacy
- Term & Conditions
- Topics
Порт 80-е коды POST [post-code] для системных плат для настольных ПК
В этом документе определены звуковые сигналы, сообщения об ошибках и POST-коды (post-code), относящиеся к некоторым версиям BIOS на базе интерфейса EFI (Extensible Framework Interface).
Звуковые сигналы
Сообщения об ошибках, выдаваемые BIOS
POST-коды порта 80h
Отображение POST-кодов
Диапазоны POST-кодов
POST-коды
Последовательность типовых POST-кодовЗвуковые сигналы
Встроенный динамик выдает звуковые коды ошибок во время процедуры POST.Не все системные платы для настольных ПК содержат встроенный динамик, поэтому необходимо подключить так называемую пищалку.
| Напечатайте | Образец | Frequency |
| Ошибка памяти | Три длинных сигнала | 1,280 Гц |
| Предупреждение системы охлаждения | Четыре перемежающихся сисгнала: Высокий тон, низкий тон, высокий тон, низкий тон |
Высокий тон: 2,000 Гц Низкий тон: 1,600 Гц |
Сообщения об ошибках, выдаваемые BIOS
| Сообщение об ошибке | Описание |
| Обнаружен процессор, который не предназначен для использования с данной системной платой. Использование неподдерживаемых процессоров может привести к неправильной работе, повреждению системной платы для настольных ПК или процессора, или сокращению срока эксплуатации. Система отключится через 10 секунд. | Установленный процессор не совмести с системной платой для настольных ПК. |
| CMOS Battery Low | Возможна, разрядка батареи. Замените батарею. |
| CMOS Checksum Bad | Ошибка проверки контрольной суммы ОЗУ. Возможно, память CMOS повреждена. Запустите программу BIOS Setup для обновления значений. |
| Memory Size Decreased | Объем памяти уменьшился со времени последней загрузки. Если модули памяти не были удалены, возможно, память неисправна. |
| No «Boot» Device Available | Система не нашла загрузочного устройства. |
POST-коды порта 80h
Во время теста POST BIOS генерирует коды прохождения (POST-коды [post-code]) и направляет их в порт ввода/вывода 80h. Если процедура POST завершилась неудачно, последний сгенерированный POST-код остается в порту 80h. Этот код можно использовать для определения причины ошибки.
Отображение POST-кодов
Для отображения POST-кодов можно использовать один из следующих методов.
Диапазоны POST-кодов порта 80h
В таблицах ниже все POST-коды и значения представлены в шестнадцатеричном формате.
| Диапазон | Категория/Подсистема |
| 00 – 0F | Коды отладки: Могут использоваться, как средство для отладки любым модулем PEIM/драйвером |
| 10 – 1F | Процессоры системы |
| 20 – 2F | Память/набор микросхем |
| 30 – 3F | Восстановление |
| 40 – 4F | Зарезервировано для использования |
| 50 – 5F | Шины ввода/вывода: PCI, USB, ISA, ATA и т.д. |
| 60 – 6F | Сейчас не используется |
| 70 – 7F | Устройства вывода: Все консоли вывода |
| 80 – 8F | Зарезервировано для будущего использования (для новых кодов консоли вывода) |
| 90 – 9F | Устройства ввода: Клавиатура/Мышь |
| A0 – AF | Зарезервировано для будущего использования (для новых кодов консоли ввода) |
| B0 – BF | Загрузочные устройства: Включают в себя стационарные и съемные носители. |
| C0 – CF | Зарезервировано для использования |
| D0 – DF | Выбор загрузочного устройства |
| E0 – FF | E0 – EE: Другие коды F0 – FF: FF — ошибка прерывания процессора |
POST-коды порта 80h
| Код POST | Описание эксплуатации POST |
| 00 — 0F | Коды отладки: может использоваться, как средство для отладки любым модулем PEIM/диском |
| 10 — 1F | Процессор системы |
| 10 | Включение процессора системы (загрузочный процессор) |
| 11 | Инициализация кэш-памяти процессора (включая SP) |
| 12 | Начало инициализации приложений процессора |
| 13 | Инициализация SMM |
| 14 | Инициализация сетевого подключения |
| 15 | Преждевременный выход при инициализации драйвера платформы |
| 16 | Инициализация драйвера SMBUS |
| 17 | Вход в исполнимый код SMBUS в режиме чтения/записи |
| 19 | Вход в режим программирования тактового генератора CK505 |
| 1F | Невосстановимая ошибка процессора |
| 20 — 2F | Память/набор микросхем |
| 21 | Инициализация компонентов набора микросхем |
| 22 | Чтение SPD через модули памяти DIMM |
| 23 | Идентификация модулей памяти DIMM |
| 24 | Программирование параметров тактовой частоты с помощью контроллера памяти и модулей DIMM |
| 25 | Конфигурирование памяти |
| 26 | Оптимизация установок памяти |
| 27 | Инициализация памяти, например ECC |
| 28 | Тестирование памяти |
| 2F | Системе не удалось обнаружить память или пригодную память |
| 30 — 3F | Восстановление |
| 30 | Восстановление после сбоя было запущено по запросу пользователя |
| 31 | Восстановление после сбоя было запущено ПО (повреждено флэш-устройство) |
| 34 | Загрузка капсулы восстановления |
| 35 | Передача управления капсуле восстановления |
| 3F | Невозможно восстановить |
| 50 — 5F | Шины ввода/вывода (PCI, USB, ISA, ATA и т.д) |
| 50 | Нумерация шин PCI |
| 51 | Передача ресурсов на шину PCI |
| 52 | Инициализация контроллера Hot Plug PCI |
| 53 – 57 | Зарезервировано для шины PCI |
| 58 | Переустановка шины USB |
| 59 | Зарезервировано для USB |
| 5A | Переустановка шины PATA/SATA и всех устройств |
| 5B | Зарезервировано для ATA |
| 5C | Переустановка SMBUS |
| 5D | Зарезервировано для SMBUS |
| 5F | Невосстановимая ошибка шины ввода/вывода |
| 60 — 6F | Сейчас нет действительных POST-кодов в диапазоне 60 — 6F.
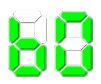
Если POST-код будет отображен в данном диапазоне, это код из диапазона B0 — BF. (На 7-сегментном ЖК-дисплее, символ ‘b’ выглядит как 6). Пример: |
| 70 — 7F | Устройства вывода |
| 70 | Переустановка контроллера VGA |
| 71 | Отключение контроллера VGA |
| 72 | Включение контроллера VGA |
| 78 | Переустановка контроллера консоли |
| 79 | Отключение контроллера консоли |
| 7A | Включение контроллера консоли |
| 7F | Невосстановимая ошибка устройства вывода |
| 90 — 9F | Устройства ввода |
| 90 | Переустановка клавиатуры |
| 91 | Отключение клавиатуры |
| 92 | Определение присутствия клавиатуры |
| 93 | Включение клавиатуры |
| 94 | Очистка входного буфера клавиатуры |
| 95 | Информация о контроллере клавиатуры — запуск самотестирования (только PS2) |
| 98 | Переустановка мыши |
| 99 | Disabling mouse |
| 9A | Определение присутствия мыши |
| 9B | Включение мыши |
| 9F | Невосстановимая ошибка устройства ввода (клавиатура или мышь) |
| B0 – BF | Загрузочные устройства |
| B0 | Переустановка стационарных носителей |
| B1 | Отключение стационарных носителей |
| B2 | Определение присутствия стационарных носителей (обнаружение жесткого диска IDE и т.д.) |
| B3 | Подключение/настройка стационарных носителей |
| B8 | Переустановка съемных носителей |
| B9 | Отключение съемных носителей |
| BA | Определение присутствия съемных носителей (обнаружение IDE, CD-ROM и т.д.) |
| BC | Подключение/настройка съемных носителей |
| BF | Невосстановимая ошибка загрузочного устройства |
| D0 – DF | Выбор загрузочного устройства |
| Dy | Перезагрузка через параметр y (y=от 0 до 15) |
| E0 – FF | Другие коды |
| E0 | Начато распределение PEIM (возникает при первом сообщении EFI_SW_PC_INIT_BEGIN EFI_SW_PEI_PC_HANDOFF_TO_NEXT) |
| E2 | Обнаружена постоянная память |
| E1, E3 | Зарезервировано для PEI/PEIM |
| E4 | Начало фазы DXE |
| E5 | Начало распределения драйверов |
| E6 | Начало соединения драйверов |
| E7 | Ожидание воода данных пользователем |
| E8 | Проверка пароля |
| E9 | Вход в утилиту BIOS Setup |
| EB | Вызов установленных дополнительных ПЗУ |
| EF | Загрузка/S3 повторение сбоя |
| F4 | Вход в режим сна |
| F5 | Выход из режима сна |
| F8 | Произошел вызов службы загрузки EFI ExitBootServices ( ) |
| <F9 | Была вызвана служба выполнения работы EFI SetVirtualAddressMap () |
| FA | Произошел вызов службы прогона EFI ResetSystem ( ) |
| FF | Ошибка процессора |
Типичный порт 80-я последовательность POST
Обычно значения кодов порта 80h увеличиваются в процессе загрузки. Меньшие значения кодов относятся к подсистемам, расположенным ближе к процессору, а большие значения кодов – к периферийным устройствам. Обычно используется следующий порядок инициализации: Процессор -> Память -> Шины -> Устройства ввода-вывода -> Устройства загрузки. Последовательность POST-кодов зависит от используемой системы.
| Код POST | Описание |
| 21 | Инициализация компонентов набора микросхем |
| 22 | Чтение SPD через модули памяти DIMM |
| 23 | Идентификация модулей памяти DIMM |
| 25 | Конфигурирование памяти |
| 28 | Тестирование памяти |
| 34 | Загрузка капсулы восстановления |
| E4 | Начало фазы DXE |
| 12 | Начало инициализации приложений процессора |
13Инициализация SMM50Нумерация шин PCI51Передача ресурсов на шину PCI92Обнаружение присутствия клавиатуры90Переустановка клавиатуры94Очистка входного буфера клавиатуры95Самотестирование клавиатурыEBВызов графических режимов BIOS58Переустановка шины USB5AПереустановка шины PATA/SATA и всех устройств92Обнаружение присутствия клавиатуры90Переустановка клавиатуры94Очистка входного буфера клавиатуры5AПереустановка шины PATA/SATA и всех устройств28Тестирование памяти90Переустановка клавиатуры94Очистка входного буфера клавиатурыE7Ожидание воода данных пользователем01INT 1900Готово для перезагрузки
— Этот материал подготовлен с использованием человеческого и машинного перевода для удобства пользователей. Данная информация предоставляется в ознакомительных целях и не должна расцениваться как исключительная, либо безошибочная.
© 2023 Ремонт материнских плат пайка BGA SMD в СПб · Копирование материалов сайта без разрешения запрещено
193232 Санкт-Петербург ул Шотмана дом 3 • Тел. +7 (962) 685-2-100 • 8 (812) 985-2-100
| Текущее время: 29 янв 2023, 20:47 |
Сообщения без ответов | Активные темы
| Страница 1 из 1 [ Сообщений: 3 ] |
 |
 |
||||||||||||||||||||||||||||||||||||
Показать сообщения за: Поле сортировки
|
|||||||||||||||||||||||||||||||||||||
 |
 |
 Добавлено: 19 фев 2016, 19:19



| Страница 1 из 1 [ Сообщений: 3 ] |
|
|
|||||||||||||||||||||||||||||||||||||
|
||||||||||||||||||||||||||||||||||||||
|
|


| Вы не можете начинать темы Вы не можете отвечать на сообщения Вы не можете редактировать свои сообщения Вы не можете удалять свои сообщения Вы не можете добавлять вложения |
-
10-28-2012 04:07 PM
#1

ROG Member
Array
 Help, 5A «Internal CPU Error»
Hello, I bought this mobo and the entire Rig recently, but when built, tried to turn it on, it doesn’t work. Black screen and debug code «5A» appear in debug leds «Internal CPU Error». I don’t know what to do and I’m a little scared of it.
Everything in this rig is new:
Mb: Asus Rampage IV Extreme (BIOS 2003)
Proc: i7 3960x
Ram: 16GB (2×8) Corsair Dominator Platinum 2400mhz (put in recommended slots for dual channel)
Cooling: Water Cooler Corsair H100 hydro series
PSU: Corsair ax1200w
Video: Evga GTX690 Signature
Case: Thermaltake Level 10 GTS (1 cooler removed to put in the radiator)
Monitor: Asus vk278q (DVI) 27″Tested monitor in other pc just in case someone ask about it, works fine.
Everything seems to be working just fine, but the mobo or processor, I’m not sure. I checked 3 times before trying to turn it on, as always, and it seems that I did nothing wrong. Every cable connected, every piece steady in place.I tried looking at other posts in Rog forum and around the web, but found no answer. Please, any help? I’m scared! Maybe I need to return it?
-
10-28-2012 04:33 PM
#2
ROG Enthusiast
Array
I had a similar problem. Another RIVE board I had decided it was going to up my vcore voltage 1.5 and 3.3Ghz and fry my chip for me. It was only after a couple reboots I realized the vcore was so high.
Your Rig is very similar to mine, except i have 2 GTX 580s, NXZT Swith 810 Case, everything else we’re rocking the same equipment.
Each Reboot would let me in the bios ..maybe and if It did that’s is far as it would go. the LED would display random codes each time
Replaced the board, nothing, replaced the chip …presto! it worked again.
Make sure extreme tweaking is turned OFF.
Things you can try:
turn off the pc, hold down the clear CMOS button in the back
Pull your CPU , check for bent pins on the board, and reseat the chip.
Pull all your RaM and a video cards except one stick of ram and 1 video card (if you have 2 or more)
Pull the power for 5 minutes (meaning yank the power cord from the PSU so there is no current, the RAM and board sometimes hang on to data for a bit)
Edit: I should mention that I run my RAM at 1600Mhz, 2400. it gets to be to unstable for me.
Last edited by VoXPCS; 10-28-2012 at 04:37 PM.
-
10-28-2012 04:55 PM
#3
ROG Guru: Grand Master
Array
The first thing I would do is remove the CPU and inspect the socket for any bent or misaligned pins.
When you tighten the cooler make sure you do so evenly, and in small increments. If possible I would have the CPU tested.
To help us help you — please provide as much information about your system and the problem as possible.
-
10-28-2012 06:31 PM
#4
ROG Member
Array

 Originally Posted by VoXPCS

I had a similar problem. Another RIVE board I had decided it was going to up my vcore voltage 1.5 and 3.3Ghz and fry my chip for me. It was only after a couple reboots I realized the vcore was so high.
Your Rig is very similar to mine, except i have 2 GTX 580s, NXZT Swith 810 Case, everything else we’re rocking the same equipment.
Each Reboot would let me in the bios ..maybe and if It did that’s is far as it would go. the LED would display random codes each time
Replaced the board, nothing, replaced the chip …presto! it worked again.
Make sure extreme tweaking is turned OFF.
Things you can try:
turn off the pc, hold down the clear CMOS button in the back
Pull your CPU , check for bent pins on the board, and reseat the chip.
Pull all your RaM and a video cards except one stick of ram and 1 video card (if you have 2 or more)
Pull the power for 5 minutes (meaning yank the power cord from the PSU so there is no current, the RAM and board sometimes hang on to data for a bit)
Edit: I should mention that I run my RAM at 1600Mhz, 2400. it gets to be to unstable for me.
Thanks for the fast reply. I did everything, checked CPU and Socket pins first, they look perfectly fine. pulled all memory cards and the Gtx as you said, also checked if they are ok and put in place again. Cleaned Cmos. Nothing, at least I thought So. I was really tired of trying so I waited, It looped from 5A to other Post codes, it worked. Entered in BIOS, but still, things are weird.
In the Bios it says:
«All Core Target CPU Turbo-mode Speed: 4017MHz»
«Target DRAM Speed: 1373MHz»It still does 5A before I can enter Bios, what is really weird. Memory speed is even weirder, It shows 824, 1098, 1373, 1648, 1922, 2197, 2472, 2746MHz, shouldn’t be 1333MHz by default and the options like 1600mhz, 2133mhz, 2400mhz?
I don’t need «turbo-mode» or super fast memory speed just for now, I just want it working, working good. How should I config it? Any solution for 5A before post? Bios update would solve it?
-
10-28-2012 07:03 PM
#5
ROG Guru: Green Belt
Array
Something is wrong with your CPU.
I doubt it will ever ‘work good’ until you fix the issue.
My money is on bad CPU with that error code or bent socket pins.
-
10-28-2012 07:11 PM
#6
ROG Member
Array
Originally Posted by Necrosan
Something is wrong with your CPU.
I doubt it will ever ‘work good’ until you fix the issue.
My money is on bad CPU with that error code or bent socket pins.Can’t test CPU separatelly. How to fix it? If there’s no way fixing it myself I’m still not sure which I should returt Processor or Mobo.
-
10-28-2012 07:13 PM
#7
ROG Guru: Green Belt
Array
If no pins are bent I personally would get the CPU exchanged with that error code.
-
10-28-2012 07:21 PM
#8
ROG Member
Array
And what about memory with weird speed limits? are those affected by CPU?
-
10-28-2012 07:26 PM
#9
ROG Guru: Green Belt
Array
If you’ve cleared the BIOS as you’ve said I don’t know why your memory would report like that.
Could a bad CPU cause this? Possibly. A bad motherboard? Also possible.Your error code is indicating CPU though, so that is where I would start.
-
10-28-2012 08:01 PM
#10
ROG Guru: Grand Master
Array
The CPU houses the memory controller. I would send the CPU in for testing.
To help us help you — please provide as much information about your system and the problem as possible.
Статьи » Расшифровка кодов ошибок POST (ПОСТ) карты
Расшифровка кодов ошибок POST (ПОСТ) карты
Award BIOS 6.0: полная загрузка
Данная таблица содержит POST-коды, которые отображаются при полной процедуре POST.
- CF Определяется тип процессора и тестируется чтение/запись CMOS
- C0 Предварительно инициализируется чипсет и L1-, L2-кэш, программируется контроллер прерываний, DMA, таймер
- C1 Детектируется тип и объем оперативной памяти
- C3 Код BIOS распаковывается во временную область оперативной памяти
- 0С Проверяются контрольные суммы BIOS
- C5 Код BIOS копируется в теневую память и управление передается модулю Boot Block
- 01 Модуль XGROUP распаковывается по физическому адресу 1000:0000h
- 02 Инициализация процессора. Устанавливаются регистры CR и MSR
- 03 Определяются ресурсы ввода/вывода (Super I/O)
- 05 Очищается экран и флаг состояния CMOS
- 06 Проверяется сопроцессор
- 07 Определяется и тестируется контроллер клавиатуры
- 08 Определяется интерфейс клавиатуры
- 09 Инициализация контроллера Serial ATA
- OA Определяется клавиатура и мышь, которые подключены к портам PS/2
- 0B Устанавливаются ресурсы звукового контроллера AC97
- OE Тестируется сегмент памяти F000h
- 10 Определяется тип flash-памяти
- 12 Тестируется CMOS
- 14 Устанавливаются значения для регистров чипсета
- 16 Первично инициализируется тактовый генератор
- 18 Определяется тип процессора, его параметры и объемы кэша L1 и L2
- 1B Инициализируется таблица векторов прерываний
- 1С Проверяются контрольные суммы CMOS и напряжение питания аккумулятора
- 1D Определяется система управления питанием Power Management
- 1F Загружается матрица клавиатуры (для ноутбуков)
- 21 Инициализируется система Hardware Power Management (для ноутбуков)
- 23 Тестируется математический сопроцессор, дисковод, инициализация чипсета
- 24 Обновляется микрокод процессора. Создается карта распределения ресурсов устройств Plug and Play
- 25 Начальная инициализация PCI: перечисляются устройства, поиск адаптера VGA, запись VGA BIOS по адресу C000:0
- 26 Устанавливается тактовая частота по CMOS Setup. Отключается синхронизация неиспользуемых слотов DIMM и PCI. Инициализируется система мониторинга (H/W Monitor)
- 27 Разрешается прерывание INT 09h. Снова инициализируется контроллер клавиатуры
- 29 Программируются регистры MTRR, инициализируется APIC. Программируется контроллер IDE. Измеряется частота процессора. Вызывается расширение BIOS видеосистемы
- 2B Поиск BIOS видеоадаптера
- 2D Отображается заставка Award, информация о типе процессора и его скорости
- 33 Сбрасывается клавиатура
- 35 Тестируется первый канал DMA
- 37 Тестируется второй канал DMA
- 39 Тестируются страничные регистры DMA
- 3C Настраивается контроллер 8254 (таймер)
- 3E Проверка контроллера прерываний 8259
- 43 Проверяется контроллер прерываний
- 47 Тестируются шины ISA/EISA
- 49 Вычисляется объем оперативной памяти. Настраиваются регистры для процессора AMD K5
- 4E Программируются регистры MTRR для процессоров Syrix. Инициализируются кэш L2 и APIC
- 50 Определяется шина USB
- 52 Тестируется ОЗУ с отображением результатов. Очищается расширенная память
- 53 Если выполнена очистка CMOS, то сбрасывается пароль на вход в систему
- 55 Отображается количество процессоров (для многопроцессорных платформ)
- 57 Отображается логотип EPA. Начальная инициализация устройств ISA PnP
- 59 Определяется система защиты от вирусов
- 5B Вывод подсказки для запуска обновления BIOS с дискеты
- 5D Запускается контроллер Super I/O и интегрированный аудиоконтроллер
- 60 Вход в CMOS Setup, если была нажата клавиша Delete
- 65 Инициализируется мышь PS/2
- 69 Включается кэш L2
- 6B Настраиваются регистры чипсета согласно BIOS Setup
- 6D Назначаются ресурсы для устройств ISA PnP и COM-порты для интегрированных устройств
- 6F Инициализируется и настраивается контроллер гибких дисков
- 75 Детектируются и устанавливаются IDE-устройства: жесткие диски, CD/DVD, LS-120, ZIP и др.
- 76 Выводится информация об обнаруженных IDE-устройствах
- 77 Инициализируются последовательные и параллельные порты
- 7A Сбрасывается и готовится к работе математический сопроцессор
- 7C Определяется защита от несанкционированной записи на жесткие диски
- 7F При наличии ошибок выводится сообщение и ожидается нажатие клавиш Delete и F1
- 82 Выделяется память для управления питанием и заносятся изменения в таблицу ESCD.
- Убирается заставка с логотипом EPA. Запрашивается пароль, если нужен
- 83 Все данные сохраняются из временного стека в CMOS
- 84 Вывод на экран сообщения Initializing Plug and Play Cards
- 85 Завершается инициализация USB
- 87 Создаются таблицы SYSID в области DMI
- 89 Устанавливаются таблицы ACPI. Назначаются прерывания для PCI-устройств
- 8B Вызывается BIOS дополнительных ISA- или PCI-контроллеров, за исключением видеоадаптера
- 8D Устанавливаются параметры контроля четности ОЗУ по CMOS Setup. Инициализируется APM
- 8F IRQ 12 разрешается для «горячего» подключения мыши PS/2
- 94 Завершение инициализации чипсета. Отображение таблицы распределения ресурсов. Включение кэша L2. Установка режима перехода на летнее/зимнее время
- 95 Устанавливается частота автоповтора клавиатуры и состояния Num Lock
- 96 Для многопроцессорных систем настраиваются регистры (для процессоров Cyrix). Создается таблица ESCD. Устанавливается таймер DOS Time по показаниям часов RTC CMOS. Сохраняются разделы загрузочных устройств для использования встроенным антивирусом. Динамик оповещает об окончании POST. Создается таблица MSIRQ FF Выполняется прерывание BIOS INT 19h. Поиск загрузчика в первом секторе загрузочного устройства
Award BIOS 6.0: сокращенная загрузка
Сокращенная процедура выполняется при установке в BIOS параметра Quick Power On Self Test.
- 65 Сбрасывается видеоадаптер. Инициализируются звуковой контроллер, устройства ввода/вывода,тестируется клавиатура и мышь. Проверяется целостность BIOS
- 66 Инициализируется кэш-память. Создается таблица векторов прерываний. Инициализируется система управления питанием
- 67 Проверяется контрольная сумма CMOS и тестируется батарейка питания. Настраивается чипсет на основе параметров CMOS
- 68 Инициализируется видеоадаптер
- 69 Настраивается контроллер прерываний
- 6A Тестируется оперативная память (ускоренно)
- 6B Отображается логотип EPA, результаты тестов процессора и памяти
- 70 Отображается подсказка для входа в BIOS Setup. Инициализируется мышь, подключенная к PS/2 или USB
- 71 Инициализируется контроллер кэш-памяти
- 72 Настраиваются регистры чипсета. Создается список устройств Plug and Play.& Инициализируется контроллер дисковода
- 73 Инициализируется контроллер жестких дисков
- 74 Инициализируется сопроцессор
- 75 Если нужно, жесткий диск защищается от записи
- 77 Если нужно, запрашивается пароль и выводятся сообщения Press F1 to continue, DEL to enter Setup
- 78 Инициализируются платы расширения с собственной BIOS
- 79 Инициализируются ресурсы платформы
- 7A Генерируются корневая таблица RSDT, таблицы устройств DSDT, FADT и т. п.
- 7D Собирается информациия о разделах загрузочных устройств
- 7E BIOS готовится к загрузке операционной системы
- 7F Состояние индикатора NumLock устанавливается в соответствии с настройками
- BIOS Setup
- 80 Вызывается INT 19 и запускается операционная система
- FF Загрузка операционной системы
AMIBIOS 8.0
- D0 Инициализация процессора и чипсета. Проверка контрольных сумм загрузочного блока BIOS
- D1 Начальная инициализация портов ввода/вывода. Контроллеру клавиатуры передается команда для самотестирования BAT
- D2 Запрет кэш-памяти L1/L2. Определяется объем установленной ОЗУ
- D3 Настраиваются схемы регенерации памяти. Разрешается использовать кэш-память
- D4 Тест 512 Кбайт памяти. Устанавливается стек и назначается протокол обмена с кэш-памятью
- D5 Код BIOS распаковывается и копируется в теневую память
- D6 Проверяются контрольные суммы BIOS и нажатие клавиш Ctrl+Home (восстановление BIOS)
- D7 Управление передается интерфейсному модулю, распаковывающему код в область Run-Time
- D8 Выполняемый код распаковывается из flash-памяти в оперативную. Сохраняется информация CPUID
- D9 Распакованный код переносится из области временного хранения в сегменты 0E000h и 0F000h ОЗУ
- DA Восстанавливаются регистры CPUID. Выполнение POST переносится в оперативную память
- E1–E8, EC–EE Ошибки, связанные с конфигурацией системной памяти
- 03 Запрещается обработка NMI, ошибок четности, выдача сигналов на монитор. Резервируется область для журнала событий GPNV, устанавливаются начальные значения переменных из BIOS
- 04 Проверяется работоспособность батареи и подсчитывается контрольная сумма CMOS
- 05 Инициализируется контроллер прерываний и строится таблица векторов
- 06 Тестируется и готовится к работе таймер
- 08 Тестируется клавиатура (мигают индикаторы клавиатуры)
- C0 Начальная инициализация процессора. Запрещается использовать кэш-память. Определяется APIC
- C1 Для многопроцессорных систем определяется процессор, отвечающий за запуск системы
- C2 Завершается назначение процессора для запуска системы. Идентификация с помощью CPUID
- C5 Определяется количество процессоров, настраиваются их параметры
- C6 Инициализируется кэш-память для более быстрого прохождения POST
- C7 Завершается начальная инициализация процессора
- 0A Определяется контроллер клавиатуры
- 0B Поиск мыши, подключенной к порту PS/2
- 0C Проверяется наличие клавиатуры
- 0E Детектируются и инициализируются различные устройства ввода
- 13 Начальная инициализация регистров чипсета
- 24 Распаковываются и инициализируются модули BIOS, специфические для платформы.
- Создается таблица векторов прерываний и инициализируется обработка прерываний
- 2A С помощью механизма DIM определяются устройства на локальных шинах. Готовится к инициализации видеоадаптер, строится таблица распределения ресурсов
- 2C Обнаружение и инициализация видеоадаптера, видеоадаптер вызывается BIOS
- 2E Поиск и инициализация дополнительных устройств ввода/вывода
- 30 Готовится к обработке SMI
- 31 Инициализируется и активизируется модуль ADM
- 33 Инициализируется модуль упрощенной загрузки
- 37 Отображается логотип AMI, версия BIOS, процессора, подсказка клавиши для входа в BIOS
- 38 С помощью DIM инициализируются различные устройства на локальных шинах
- 39 Инициализируется контроллер DMA
- 3A Устанавливается системное время в соответствии с показаниями часов RTC
- 3B Тестируется оперативная память и отображаются результаты
- 3C Настраиваются регистры чипсета
- 40 Инициализируются последовательные и параллельные порты, математический сопроцессор и др.
- 52 По результатам теста памяти обновляются данные об ОЗУ в CMOS
- 60 По BIOS Setup устанавливается состояние NumLock и настраиваются параметры автоповтора
- 75 Запускается процедура для работы с дисковыми устройствами (прерывание INT 13h)
- 78 Создается список устройств IPL (с которых возможна загрузка операционной системы)
- 7C Создаются и записываются в NVRAM таблицы расширенной системной конфигурации ESCD
- 84 Регистрация ошибок, обнаруженных при выполнении POST
- 85 Выводятся сообщения об обнаруженных некритических ошибках.
- 87 Если нужно, запускается BIOS Setup, которая предварительно распаковывается в ОЗУ
- 8C В соответствии с BIOS Setup настраиваются регистры чипсета
- 8D Строятся таблицы ACPI
- 8E Настраивается обслуживание немаскируемых прерываний (NMI)
- 90 Окончательно инициализируется SMI
- A1 Очистка данных, которые не нужны при загрузке операционной системы
- A2 Для взаимодействия с операционной системой готовятся модули EFI
- A4 В соответствии с BIOS Setup инициализируется языковой модуль
- A7 Выводится итоговая таблица процедуры POST
- A8 Устанавливается состояние регистров MTRR
- A9 Если нужно, выполняется ожидание ввода команд с клавиатуры
- AA Удаляются векторы прерываний POST (INT 1Ch и INT 09h)
- AB Определяются устройства для загрузки операционной системы
- AC Завершающие этапы настройки чипсета в соответствии с BIOS Setup
- B1 Настраивается интерфейс ACPI
- 00 Вызывается обработка прерывания INT 19h (поиск загрузочного сектора, загрузка ОС)
PhoenixBIOS 4.0
- 02 Verify Real Mode
- 03 Disable Non-Maskable Interrupt (NMI)
- 04 Get CPU type
- 06 Initialize system hardware
- 08 Initialize chipset with initial POST values
- 09 Set IN POST flag
- 0A Initialize CPU registers
- 0B Enable CPU cache
- 0C Initialize caches to initial POST values
- 0E Initialize I/O component
- 0F Initialize the local bus IDE
- 10 Initialize Power Management
- 11 Load alternate registers with initial POST values
- 12 Restore CPU control word during warm boot
- 13 Initialize PCI Bus Mastering devices
- 14 Initialize keyboard controller
- 16 (1-2-2-3) BIOS ROM checksum
- 17 Initialize cache before memory autosize
- 18 8254 timer initialization
- 1A 8237 DMA controller initialization
- 1C Reset Programmable Interrupt Controller
- 20 (1-3-1-1) Test DRAM refresh
- 22 (1-3-1-3) Test 8742 Keyboard Controller
- 24 Set ES segment register to 4 GB
- 26 Enable A20 line
- 28 Autosize DRAM
- 29 Initialize POST Memory Manager
- 2A Clear 512 KB base RAM
- 2C (1-3-4-1) RAM failure on address line xxxx
- 2E (1-3-4-3) RAM failure on data bits xxxx of low byte of memory bus
- 2F Enable cache before system BIOS shadow
- 30 (1-4-1-1) RAM failure on data bits xxxx of high byte of memory bus
- 32 Test CPU bus-clock frequency
- 33 Initialize Phoenix Dispatch Manager
- 34 Disable Power Button during POST
- 35 Re-initialize registers
- 36 Warm start shut down
- 37 Re-initialize chipset
- 38 Shadow system BIOS ROM
- 39 Re-initialize cache
- 3A Autosize cache
- 3C Advanced configuration of chipset registers
- 3D Load alternate registers with CMOS values
- 40 CPU speed detection
- 42 Initialize interrupt vectors
- 45 POST device initialization
- 46 (2-1-2-3) Check ROM copyright notice
- 48 Check video configuration against CMOS
- 49 Initialize PCI bus and devices
- 4A Initialize all video adapters in system
- 4B QuietBoot start (optional)
- 4C Shadow video BIOS ROM
- 4E Display BIOS copyright notice
- 50 Display CPU type and speed
- 51 Initialize EISA board
- 52 Test keyboard Тестируется клавиатура
- 54 Set key click if enabled
- 55 Initialize USB bus
- 58 (2-2-3-1) Test for unexpected interrupts
- 59 Initialize POST display service
- 5A Display prompt “Press F2 to enter SETUP”
- 5B Disable CPU cache
- 5C Test RAM between 512 and 640 KB
- 60 Test extended memory
- 62 Test extended memory address lines
- 64 Jump to UserPatch1
- 66 Configure advanced cache registers
- 67 Initialize Multi Processor APIC
- 68 Enable external and CPU caches
- 69 Setup System Management Mode (SMM) area
- 6A Display external L2 cache size
- 6B Load custom defaults (optional)
- 6C Display shadow-area message
- 6E Display possible high address for UMB recovery
- 70 Display error messages Выводятся сообщения об ошибках
- 72 Check for configuration errors
- 76 Check for keyboard errors
- 7C Set up hardware interrupt vectors
- 7D Initialize hardware monitoring
- 7E Initialize coprocessor if present
- 80 Disable onboard Super I/O ports and IRQs
- 81 Late POST device initialization
- 82 Detect and install external RS232 ports
- 83 Configure non-MCD IDE controllers
- 84 Detect and install external parallel ports
- 85 Initialize PC-compatible PnP ISA devices
- 86 Re-initialize onboard I/O ports
- 87 Configure Motheboard Configurable Devices (optional)
- 88 Initialize BIOS Data Area
- 89 Enable Non-Maskable Interrupts (NMIs)
- 8A Initialize Extended BIOS Data Area
- 8B Test and initialize PS/2 mouse
- 8C Initialize floppy controller
- 8F Determine number of ATA drives (optional)
- 90 Initialize hard-disk controllers
- 91 Initialize local-bus harddisk controllers
- 92 Jump to UserPatch2
- 93 Build MPTABLE for multi-processor boards
- 95 Install CD ROM for boot
- 96 Clear huge ES segment register
- 97 Fixup Multi Processor table
- 98 (1-2) Search for option ROMs. One long, two short beeps on checksum failure
- 99 Check for SMART Drive (optional)
- 9A Shadow option ROMs
- 9C Set up Power Management
- 9D Initialize security engine (optional)
- 9E Enable hardware interrupts
- 9F Determine number of ATA and SCSI drives
- A0 Set time of day
- A2 Check key lock
- A4 Initialize Typematic rate
- A8 Erase F2 prompt
- AA Scan for F2 key stroke
- AC Enter SETUP
- AE Clear Boot flag
- B0 Check for errors
- B2 POST done – prepare to boot operating system
- B4 (1) One short beep before boot
- B5 Terminate QuietBoot (optional)
- B6 Check password (optional)
- B9 Prepare Boot
- BA Initialize DMI parameters
- BB Initialize PnP Option ROMs
- BC Clear parity checkers
- BD Display MultiBoot menu
- BE Clear screen (optional)
- BF Check virus and backup reminders
- C0 Try to boot with INT 19
- C1 Initialize POST Error Manager (PEM)
- C2 Initialize error logging
- C3 Initialize error display function
- C4 Initialize system error handler
- C5 PnPnd dual CMOS (optional)
- C6 Initialize notebook docking (optional)
- C7 Initialize notebook docking late
- D2 Unknown interrupt
- E0 Initialize the chipset
- E1 Initialize the bridge
- E2 Initialize the CPU
- E3 Initialize system timer
- E4 Initialize system I/O
- E5 Check force recovery boot
- E6 Checksum BIOS ROM
- E7 Go to BIOS
- E8 Set Huge Segment
- E9 Initialize Multi Processor
- EA Initialize OEM special code
- EB Initialize PIC and DMA
- EC Initialize Memory type
- ED Initialize Memory size
- EE Shadow Boot Block
- EF System memory test
- F0 Initialize interrupt vectors
- F1 Initialize Real Time Clock
- F2 Initialize video
- F3 Initialize System Management Mode
- F4 (1) Output one beep before boot
- F5 Boot to Mini DOS
- F6 Clear Huge Segment
- F7 Boot to Full DOS