
Update 20/05/2022
I tested the drive train again after keeping the set built for a long time, and also tried if the new improved gears could help getting rid of the cracking:
Unfortunately the new gears did not solve the situation either, so I have to say that despite the most careful assembly, the set will start to show the cracking behavior sooner or later.
Introduction
I shared many videos with you about the LEGO Technic Land Rover Defender already, you saw my detailed building review, the details of the drive train and the one about the cracking noise and the possible fixes. I received hundreds of comments from you and many-many requests for help, hopefully in most of the cases I was able to assist to find the proper solution.
I decided to create a summary and a video about all the potential issues I found during the building process. I’ll also go through the drive train from the wheels to the engine, how to verify your build, and what are the problems that are not really problems. Each section is linked to the proper part of the video, use the summery below to find the section you are looking for:
- Introduction
- Drive train walk trough, how does it work
- Body removal guide
- Building errors based on steps
- Step 3 – incorrect gear used, issue at step 62
- Step 4 – rear differential direction swap
- Step 45 – gears swapped or not placed correctly
- Step 65 – small cross block inserted incorrectly
- Step 74 – small cross block inserted incorrectly
- Step 84 – small cross block inserted incorrectly
- Step 88-89 – U-joint orientation
- Step 102 – Red 2L axle
- Step 104-106 – rear suspension – lower attachment point of the springs
- Step 134 – front differential direction swap
- Step 152 – front suspension – lower attachment point of the springs
- Step 259-261 – correct assembly of the DNR and Hi/Lo selectors
- Step 271 – correct gear usage
- Step 272 – U joint should not touch the 24 tooth gear
- Building errors based on the symptoms
- Cannot connect the two assemblies properly at step 62
- Rear wheels are blocked when the car is pushed forward – mistake at step 65
- Gears does not fit properly at step 45
- All wheels are blocked when turned together – possible issue at step 84
- Front and rear wheels turn against each other when the central differential is manually turned – differential direction swap at the front or at the rear
- Gearbox and fake engine does not work at all – possible differential direction swap at the front or at the rear
- Cracking noise in the drive train – U joints not aligned properly at step 88-89 or U joint touches the 24 tooth gear at step 272
- Suspension seems to be soft, the front axle or the rear axle of the car sits down
- Verification steps
- What shall work at the end of bag 1 at step 123
- Verification of all functions at step 321
- General advises
- Problems that are not really problems
- Left/right or front/rear wheels are turning in the opposite direction
- Step 62 – wheels are not turning the gears in the gearbox
- End of bag 1 – wheels are not turning the gears in the gearbox
- What to do if everything is built correctly and the gears are still cracking
Drive train walk trough, how does it work
I go through the drive train from the wheels up to the engine to demonstrate how it works. I suggest to watch it to have a better understanding on the mechanism, it helps to find the issue with your build.
Body removal guide
This section shows you how to remove the body of the car in bigger pieces to gain access to the internals
Building errors based on steps
Step 3 – incorrect gear used, issue at step 62
Error: a 12 tooth black gear is used at step 3 instead of the 8 tooth dark bluish gray gear
Symptom: the two assemblies cannot be properly joined at step 62, the axle won’t turn
Step 4 – rear differential direction swap
Error: The orientation of the differential is important at step 4
Symptom: If one of the two differentials is built in reversed then the front and rear wheels will work against each other and the central differential won’t turn, it won’t drive the gearbox and the engine. Click here to see how does it look like.
How to fix with a finished build : Follow these instructions:
Step 45 – gears swapped or not placed correctly
Error: If incorrect gears are used at step 45 then the assembly cannot be completed
Step 65 – small cross block inserted incorrectly
Error: a common mistake that can be made a lot of times in this build. If the #6536 Technic cross block is inserted incorrectly then the axle that supposed to turn freely in the pin hole will be blocked in the axle hole.
Symptom: The rear wheels does not turn when the car is pushed on the ground as the output of the rear differential is blocked
How to fix with a finished build : Follow these instructions:
Step 74 – small cross block inserted incorrectly

Error: a common mistake that can be made a lot of times in this build. If the #6536 Technic cross block is inserted incorrectly then the axle that supposed to turn freely in the pin hole will be blocked in the axle hole.
Symptom: The central differential or the gearbox is blocked
Step 84 – small cross block inserted incorrectly
Error: a common mistake that can be made a lot of times in this build. If the #6536 Technic cross block is inserted incorrectly then the axle that supposed to turn freely in the pin hole will be blocked in the axle hole.
Symptom: The central differential is blocked
Step 88-89 – U-joint orientation
Error: if the universal joints on the input and output shafts of the gearbox are not aligned correctly
Symptom: the drive train will not run smoothly and in higher gears you’ll hear a cracking noise.
How to fix with a finished build: Follow these steps:
Step 102 – Red 2L axle
Error: if the 2L red axle is not pushed in then the some beams will not be linked together and the structure becomes unstable
Step 104-106 – rear suspension – lower attachment point of the springs
Error: The lower attachment point of the springs in the rear suspension are chosen incorrectly, the inner hole is used on the suspension arm instead of the outer axle hole
Symptom: the suspension will not work properly and the whole rear of the car will sit lower than the front
How to fix with a finished build: follow these steps:
Step 134 – front differential direction swap
Error: The direction of the differential is important at step 134
Symptom: If one of the two differentials is built in reversed then the front and rear wheels will work against each other and the central differential won’t turn, it won’t drive the gearbox and the engine.
How to fix with a finished build : Same as the fix for Step 4
Step 152-154 – front suspension – lower attachment point of the springs
Error: The lower attachment point of the springs in the front suspension are chosen incorrectly, the inner hole is used on the suspension arm instead of the outer axle hole
Symptom: the suspension will not work properly and the whole front of the car will sit lower than the rear
How to fix with a finished build : Same as the fix for Step 104-106
Step 259-261 – correct assembly of the DNR and Hi/Lo selectors
Error: the assembly of the DNR and the Hi/Lo selector requires a lot of parts to be aligned correctly, if there’s a mistake they won’t work properly
Step 271 – correct gear usage
Error – if the dark bluish gray 8 tooth gear is not added at step 271 or an incorrect one is used then the front wheels won’t drive the central differential
Symptom: The front wheels are not driving the central differential
Step 272 – U joint should not touch the 24 tooth gear
Error: The U-joint on the input shaft of the gearbox is placed incorrectly and it touches the 24 tooth gear next to it
Symptom: Cracking noise coming from the drive train
How to fix with a finished build: Follow these steps:
Verification steps
I suggest to follow these verification steps to see if everything works correctly at that stage.
What shall work at the end of bag 1 at step 123
Verification of all functions at step 321
General advises
- There should be no bigger pieces or gears left after any building stages. You can see the list of the leftover parts here at the end of the inventory. If you have any bigger parts left after finishing a section go back and find where it belongs.
Problems that are not really problems
Left/right or front/rear wheels are turning in the opposite direction
Step 62 – wheels are not turning the gears in the gearbox
At this stage the wheels are not yet connected to the gearbox
End of bag 1 – wheels are not turning the gears in the gearbox
At this stage the wheels are not yet connected to the gearbox
What to do if everything is built correctly and the gears are still cracking
As you see in the video, if the car is still cracking then the best solution is to take it apart and try to rebuild it with everything aligned properly. There’s no ultimate fix for the cracking, you need to verify each section carefully to ensure a smooth operation.
There is one additional thing you can try to fix the cracking if everything else fails, although this falls in the “might or might not work” category. For some people flipping both differentials at the front and rear axle eliminates the cracking.
Haven’t got this set yet?

Check out here…
Choose your local online LEGO Store below to get the LEGO Technic 42110 Land Rover Defender.
lego.com US / lego.com UK / lego.com AU
Disclaimer: the post contains affiliate links, they won’t cost you extra money but any purchase made through them might help to run the site with a small commission.
- Главная
- Lego custom
- Улучшенная версия Land Rover Defender 42110
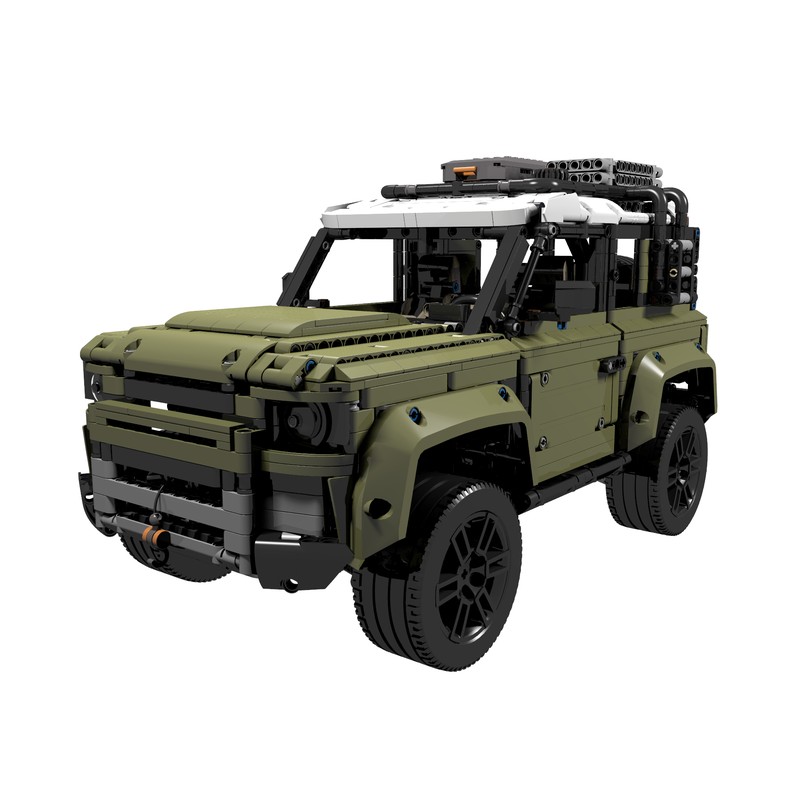
Автор Администратор в 05.12.2019. Опубликовано Lego custom, Внедорожники, Разное
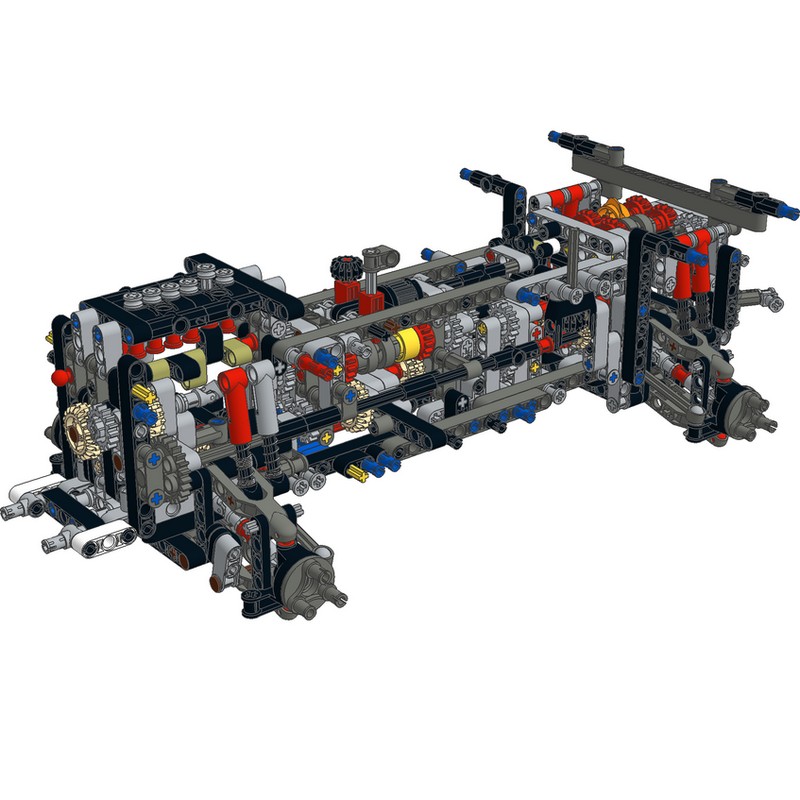
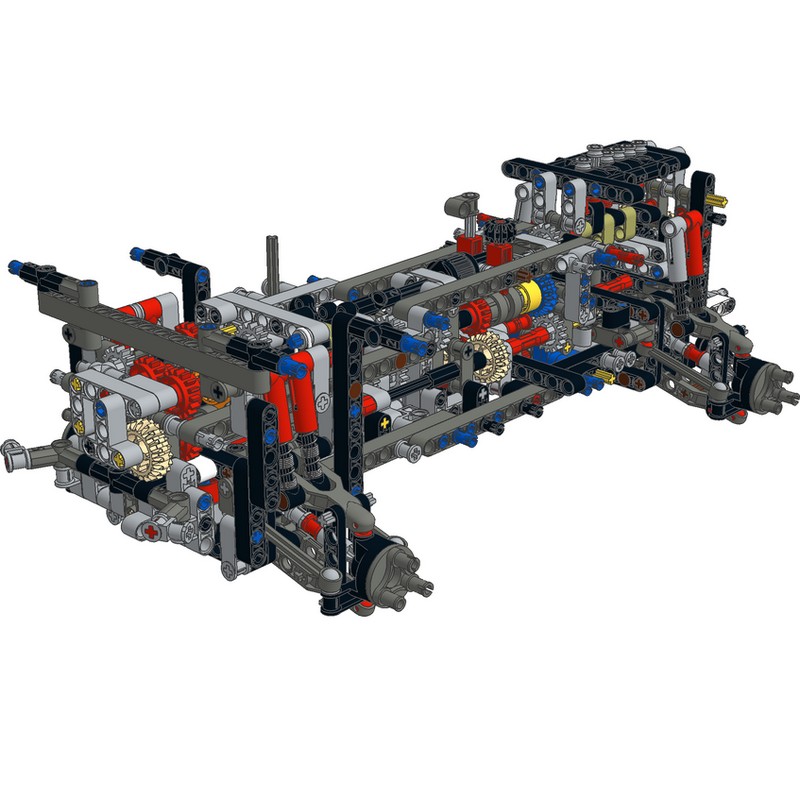
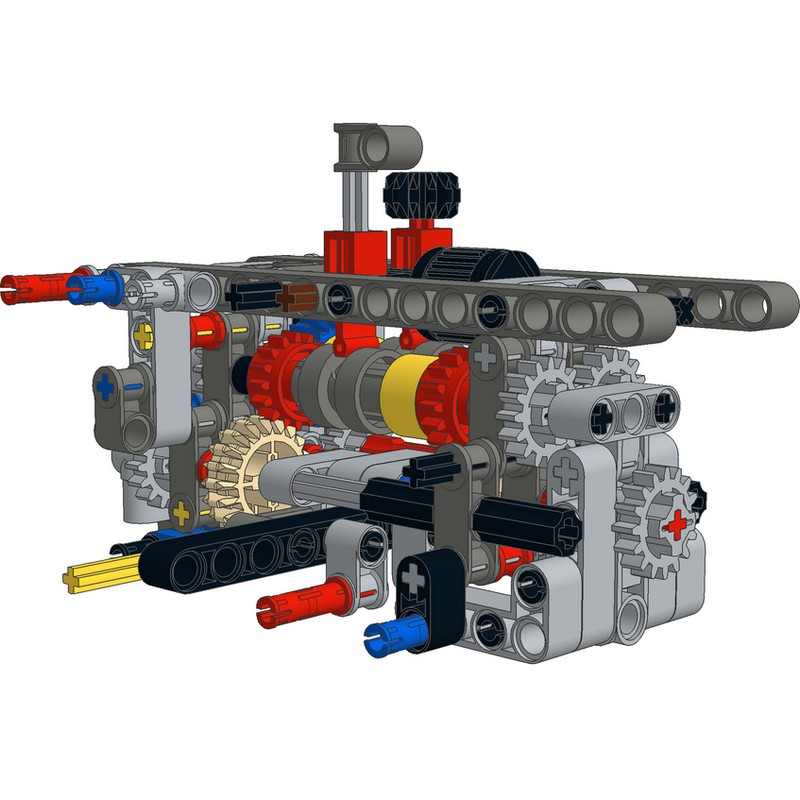
Улучшенная версия Land Rover Defender 42110 — автор: jb70. От автора — Оригинальный дизайн имел эти ошибки: смещение вверх приводит к большему обороту двигателя; переднее передаточное число было сопоставимо с 4-й передачей; Переключатель Hi / Lo не влияет на задний ход. А так же следующие недостатки: низкая частота вращения двигателя в целом; высокий крутящий момент в зубчатой передаче и проскальзывание, вызванное универсальными шарнирами.
Поэтому автор перепроектировал совершенно новую последовательность зубчатых передач, включая DNR, Hi / Lo и 4-скоростную коробку передач, которые в итоге получили прямые соединения без каких-либо универсальных шарниров:
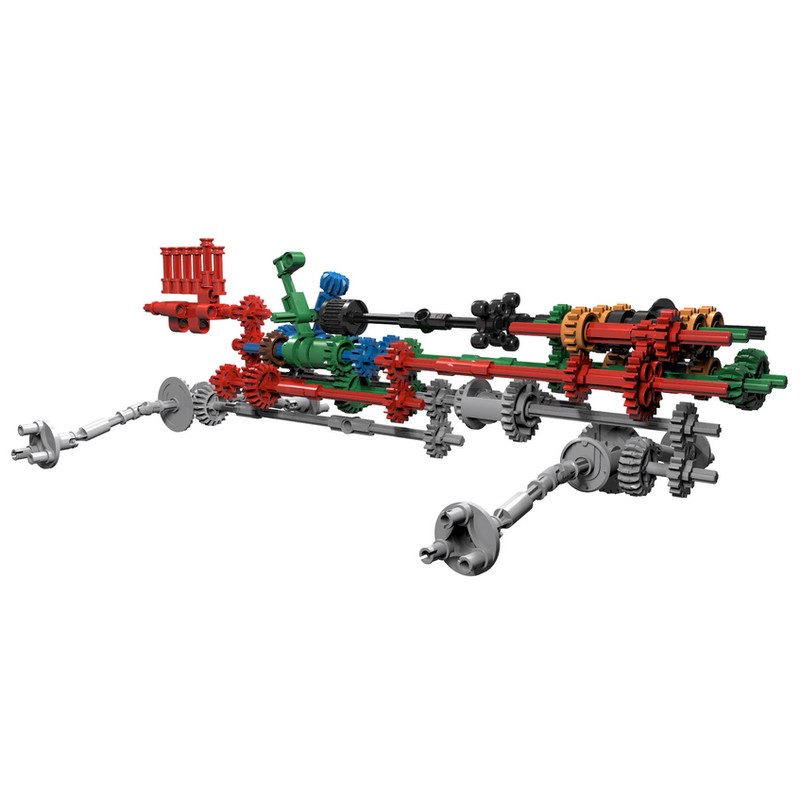
Скачать инструкцию по сборке
Теги: Land Rover, lego technic
Lego 42110 Land Rover defender Лучший набор техник 2019
На днях приобрёл себе набор 42110, когда появились первые фото интереса набор не вызвал, ну что в нём интересного обычный большой автомобиль. Я ошибся он оказался хоть и обычным, но очень крутым)
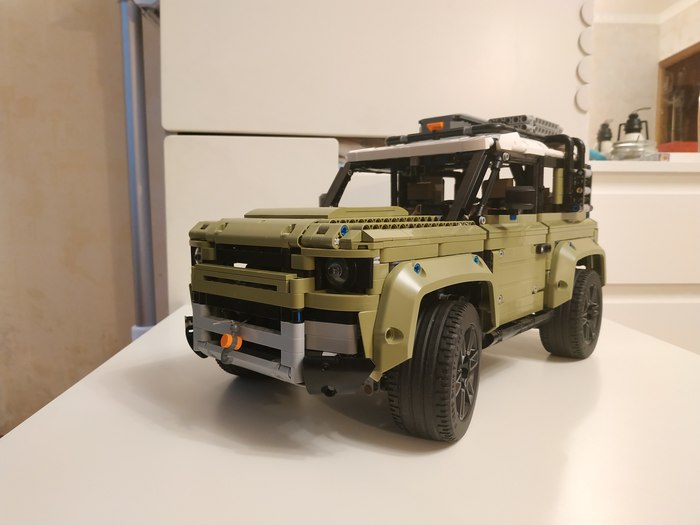
Набор состоит из 2573 деталей, на сегодняшний день не так много, но всё равно прилично. Рекомендованная цена 14999р, дофига, но лего дорогое
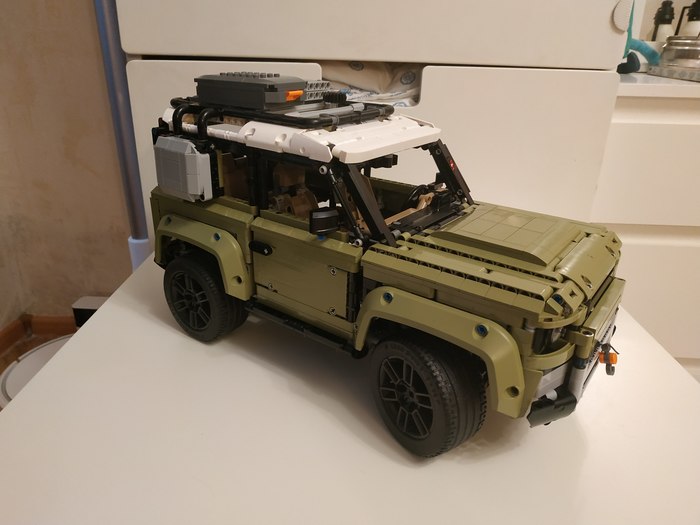
Прототипом для набора послужил новый дефендер, как и у настоящей машины набор оснащён полным приводом, независимой подвеской на все колёса и 6 цилиндровым двигателем
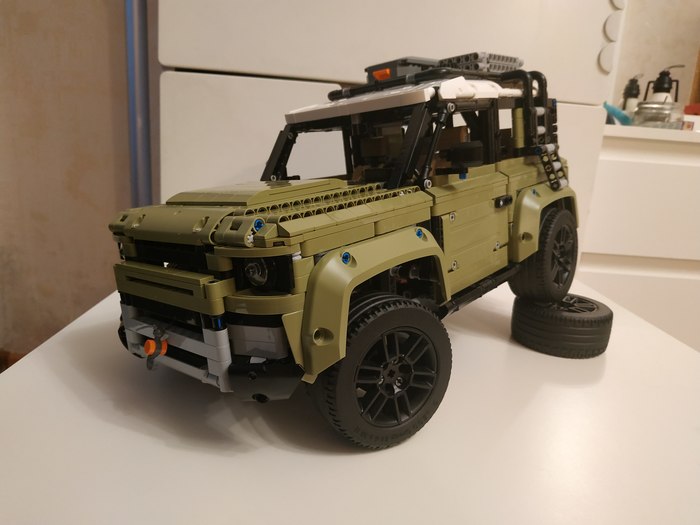
трансмиссия со всеми дифференциалами (два межколёсных и один межосевой)
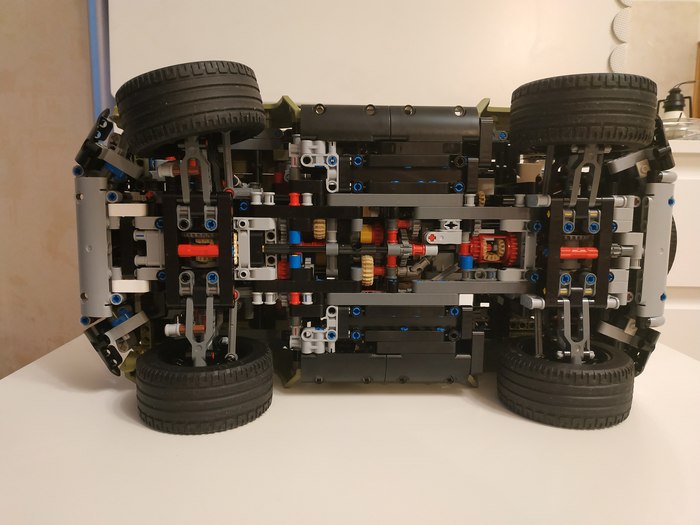
Коробка передач по заявлению лего самая сложная из когда либо выходивших наборов, тут точно соглашусь

передач 4, переключаются чёрным цилиндром (его надо крутить), серый рычаг отвечает за режимы D N R, второй рычаг с чёрной шестернёй за понижающую передачу
Коробка получилось большой поэтому её часть торчит в багажнике

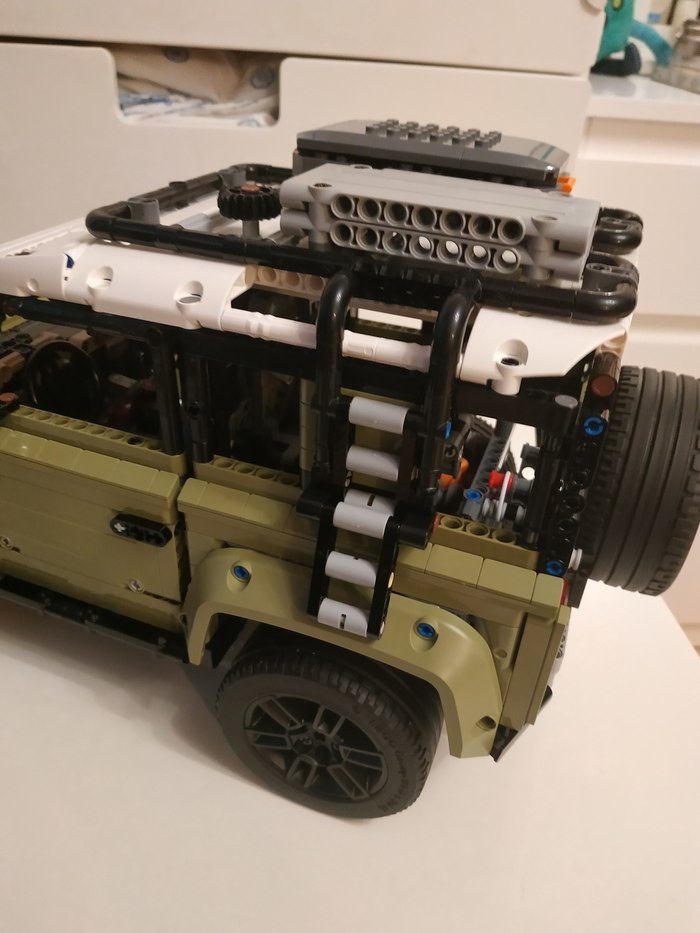
На крыше есть доп оснащение как и у настоящей машины: кофр, лестница и сендтраки
В наборе наконец появились колёса с реалистичным вылетом, я этого очень долго ждал
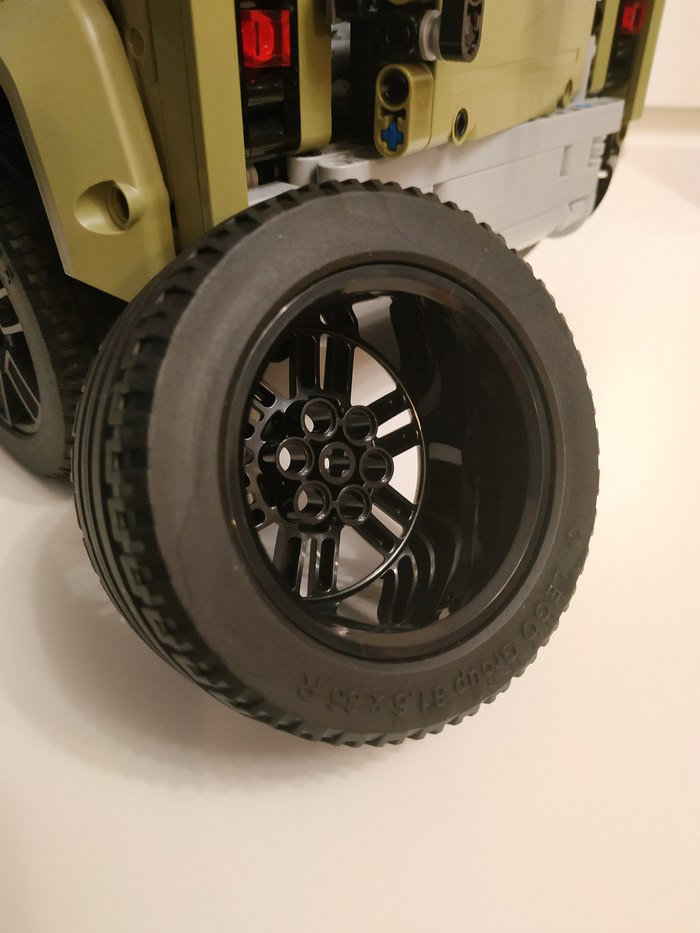
Фото настоящей машины:

Видео с обзором модели:
Спасибо за внимание, если у вас есть вопросы с удовольствием отвечу на них в комментариях)

1.7K постов 5.5K подписчиков
Правила сообщества
— Уважайте друг друга.
— Не присваивайте чужие работы.
— Тематика группы: LEGO. Аналоги допускаются.
— Не спамить, не флудить, не вбрасывать.
— Если правила сайта не понятны, я пропишу отдельно в правилах сообщества: НИКАКОЙ РЕКЛАМЫ. Вообще. Реселлеров, магазинов, частных лиц и прочего.
Немного не по теме. Скажите, есть ли у вас опыт полировки деталей lego? Есть старые наборы типа того как на фото. Большие элементы, которые должны быть глянцевыми и прозрачные «стекла» со временем поистрепались и зашоркались. Как и чем их можно отполировать?


Несколько новых рисунков Авто в ЧБ формате. И видео-процесс
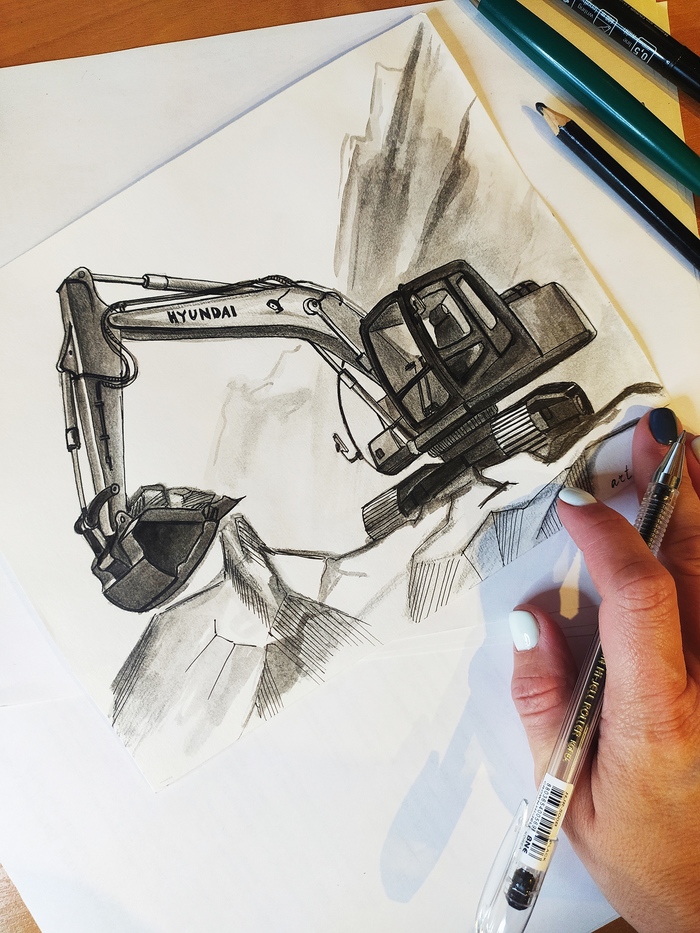
Зарисовки Автомобилей.
Автомобильный Инктобер-каждый день по одному рисунку авто в ЧБ.
Начало Инктобера смотрите в предыдущей публикации.
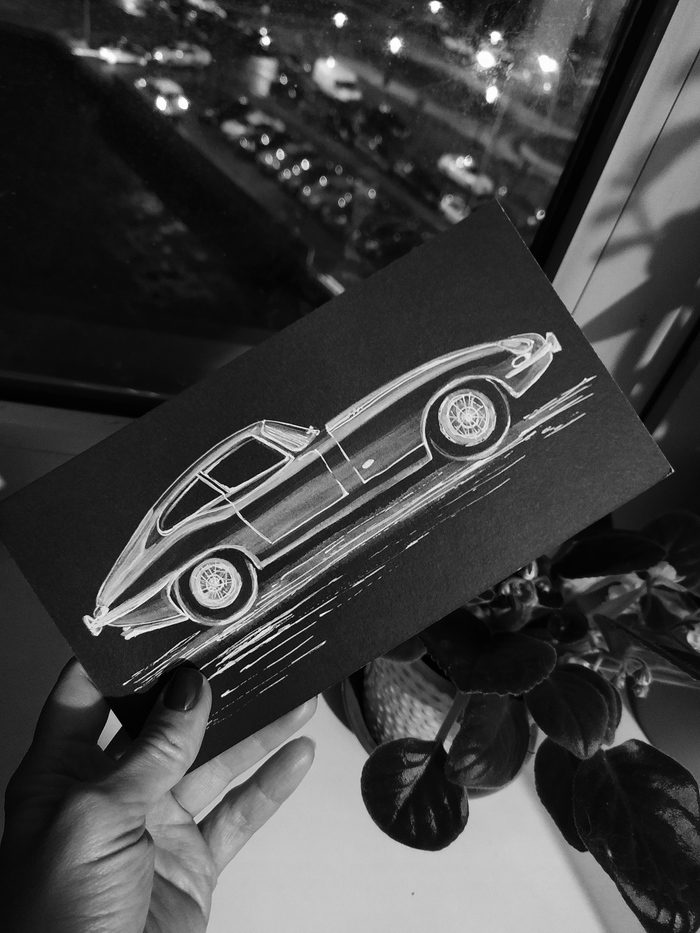
Небольшое видео-процесса. Ford Gran Torino.
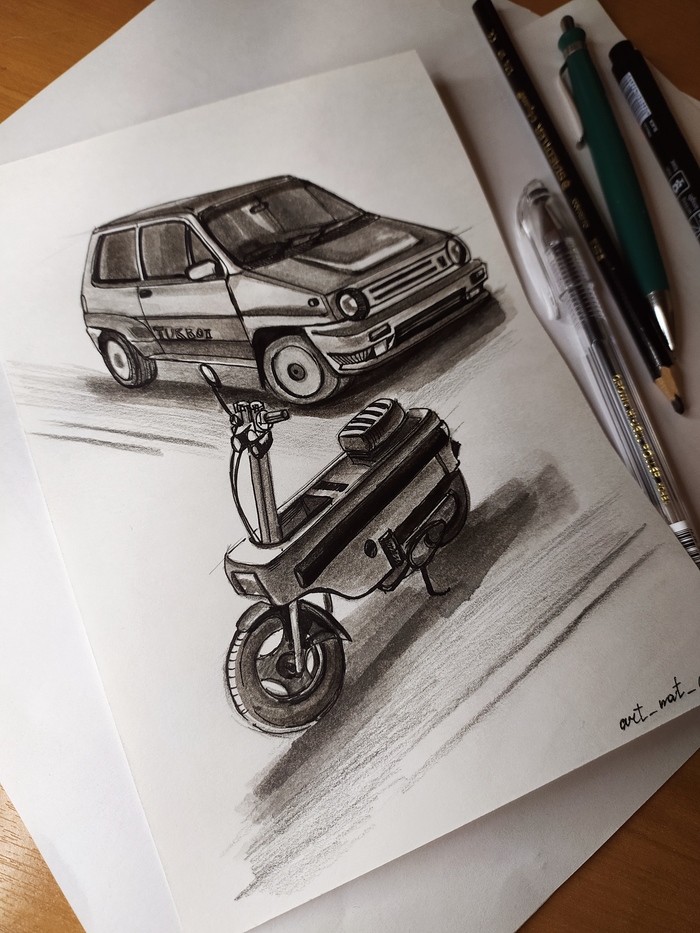
Honda Turbo 2 City Motocompo 1985г.
Видео-процесс Land Rover Defender
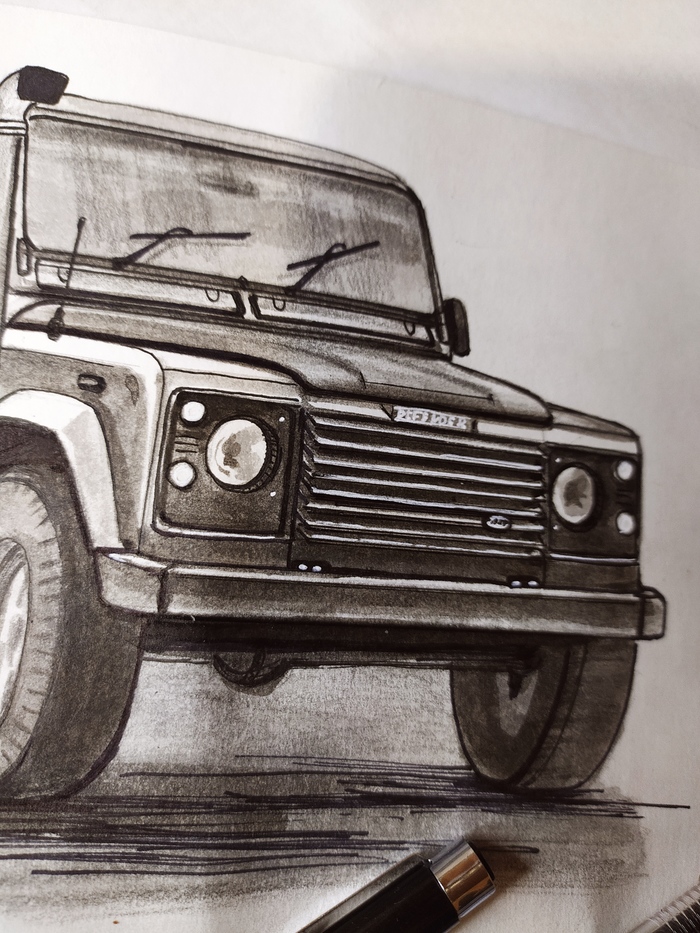
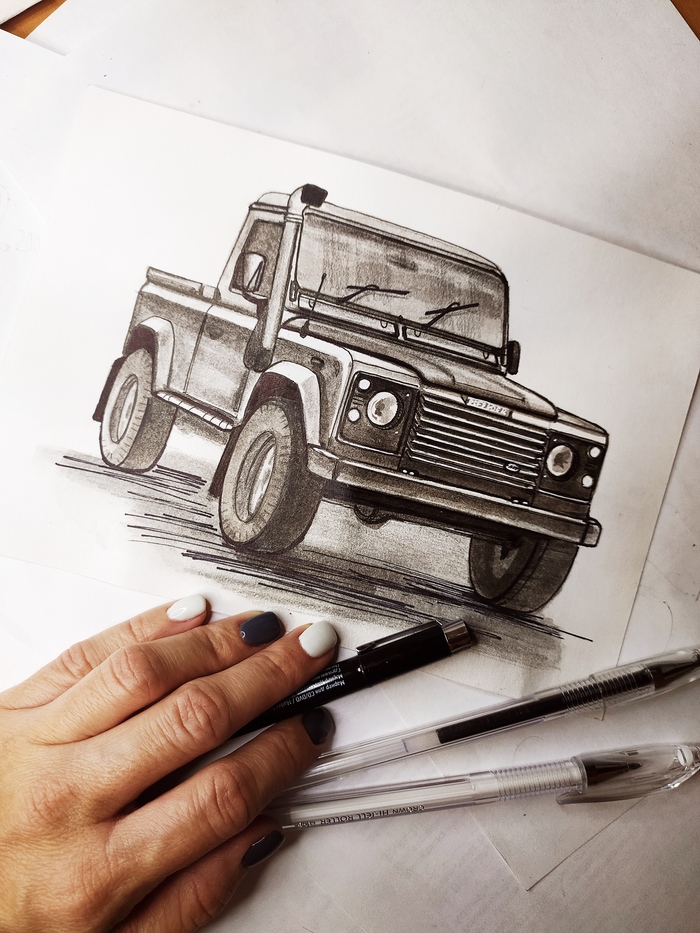

Дефендерчик
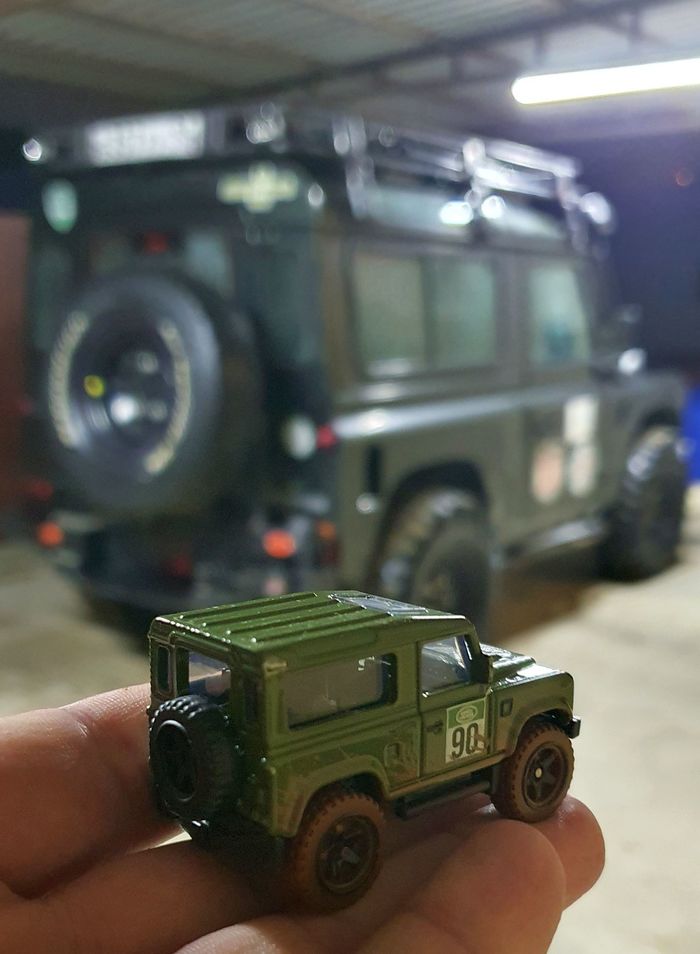
Не котик и не собачка 🙂

Lego Land Rover Defender
Привет всем кто решится прочитать этот пост. В ноябре 2019 года я загремел в инфекцию с пневмонией. Как раз пришел очередной набор 42110 и я решил его забрать в больнице. Фото сделано на моей больничной кровати. На данный момент я считаю его самым лучшим из всей моей колекции техник. Фото коллекции будет в конце поста. Этот набор содержит 2573 детали и на момент выхода обошелся мне в 10 тыс.
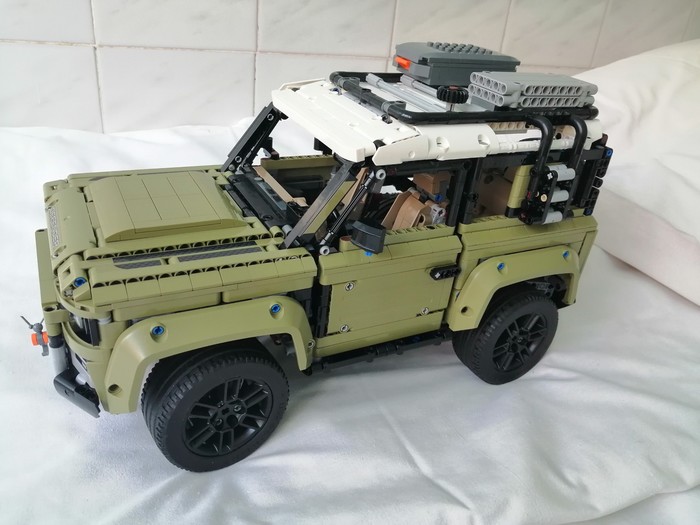
Чем же так хорош этот набор? Во-первых — функционал: 4 ступенчатая кпп, понижающая передача, 6 цилиндровый рядный мотор, рабочая лебёдка с трещёткой, подвеска на амортизаторах, полноразмерное запасное колесо, ручка управления на крыше, набор аксесуаров. Во-вторых — внешний вид. В-третьих -цена. В-четвертых — играбельность, эта модель подходит не только для полки. И главное нет серьезных косяков, как у ultimate моделей.
Инструкция обычная без дополнительной информации о реальном авто. Есть две серьезные ошибки, из-за которых ваш мотор будет трещать на высоких передачах. Обратите внимание на установку двух карданов идущих из КПП.
Собирал я её в маленькой палате на 3 человек, откуда меня не выпускали 3 недели. На фото сборки должно быть видно интерьер палаты. В реальности палата была еще хуже.
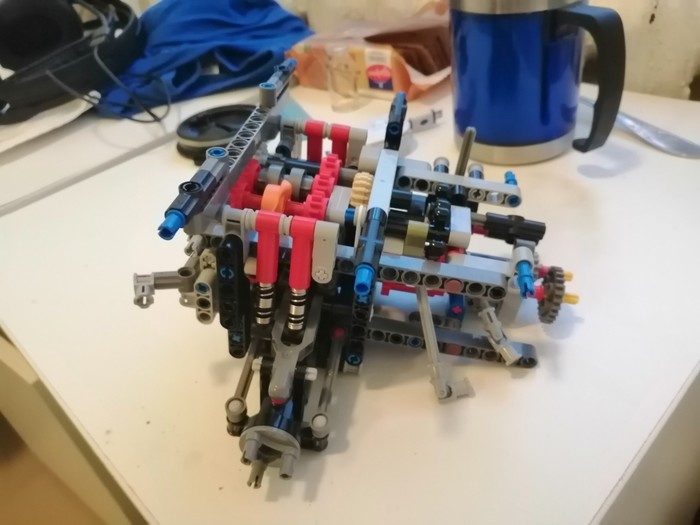
КПП и задний мост в этой модели собираются компактно. Видно два проблемных кардана. В первый раз я собрал их по инструкции, а потом сидел в недоумении — почему не работает?
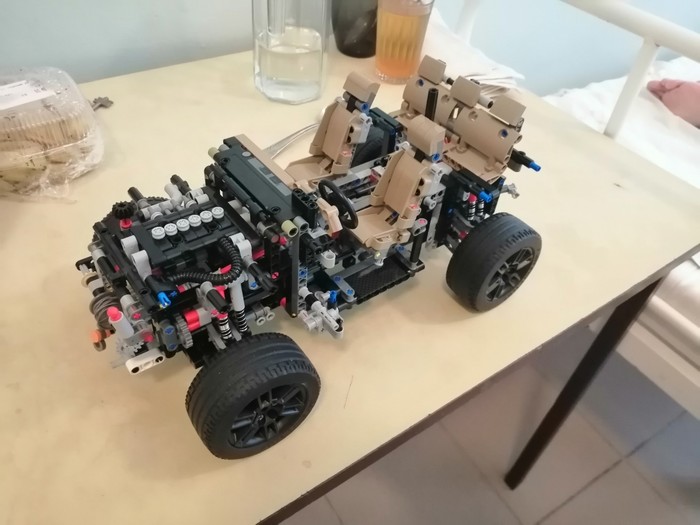
«Свадьба» передней и задней части авто. На этом шаге можно понять правильно ли работает КПП.
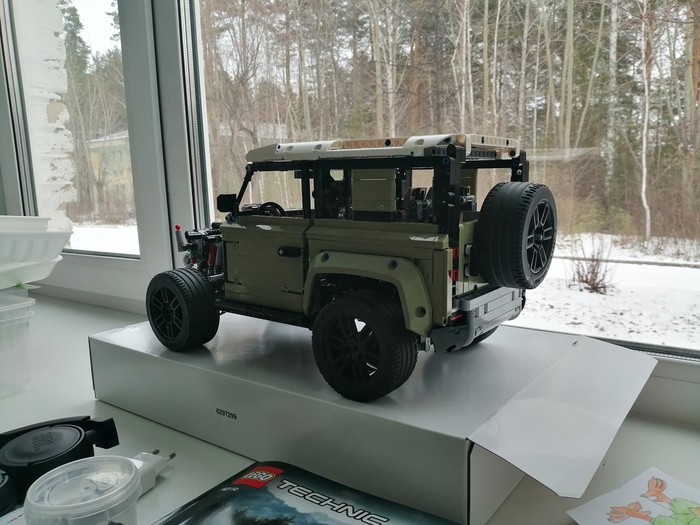
Чтобы открыть заднюю дверь — поверни запасное колесо.
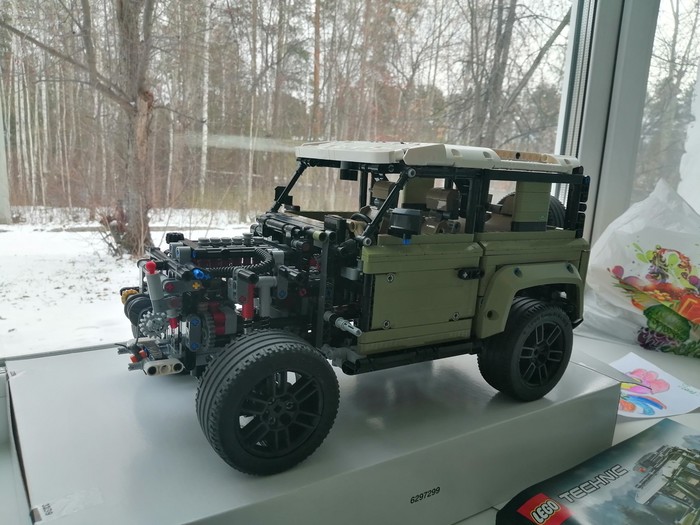
На этом фото видно лебёдку и механизм трещётки.
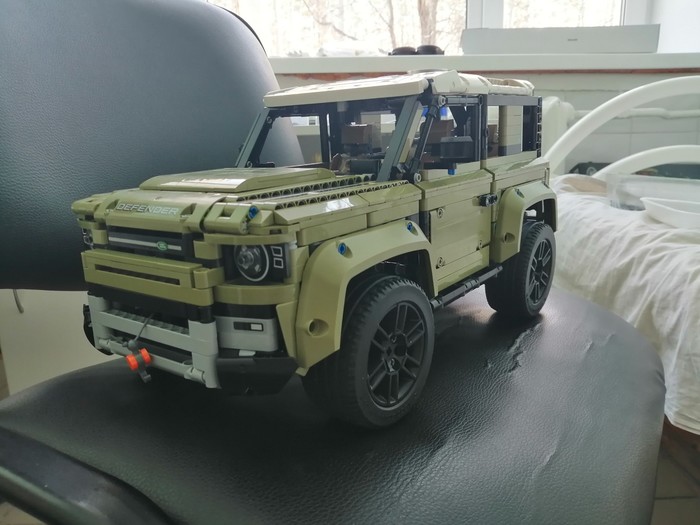
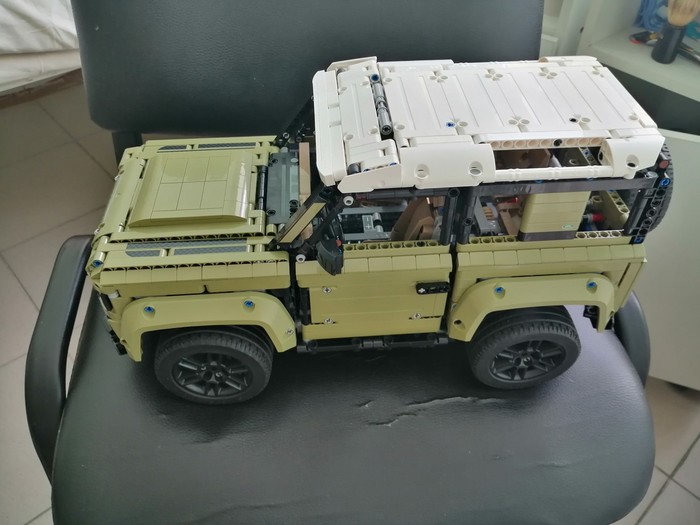
Авто собрано, но без аксесуаров на крыше.
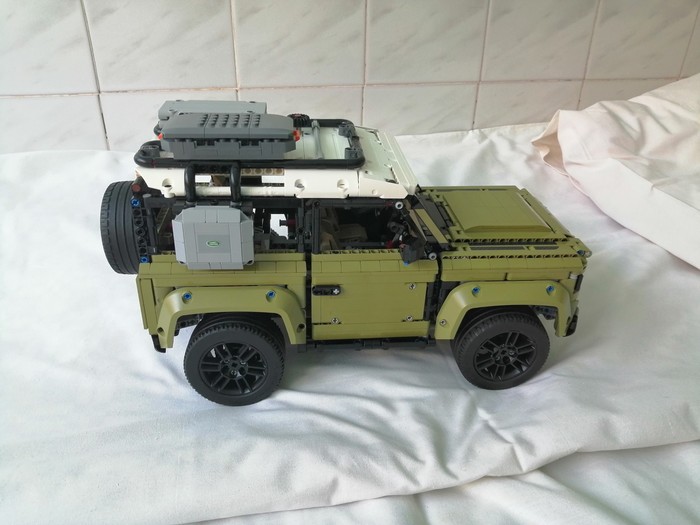
Окончательный вид после сборки. Оба кейса открываются.
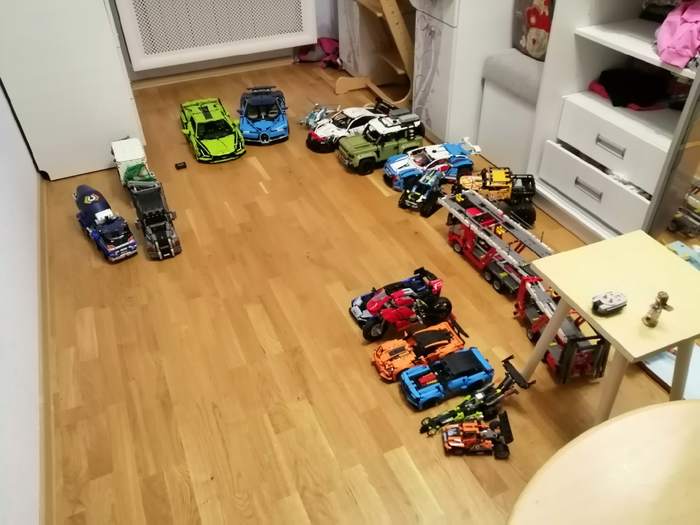
Дле тех кто долистал до конца поста — фото моих авто из серии техник. Ребёнок недавно стащил их к себе в комнату. В кадре присутствуют не только модели техник.

«Защитник» — Land Rover Defender 1975 Series III
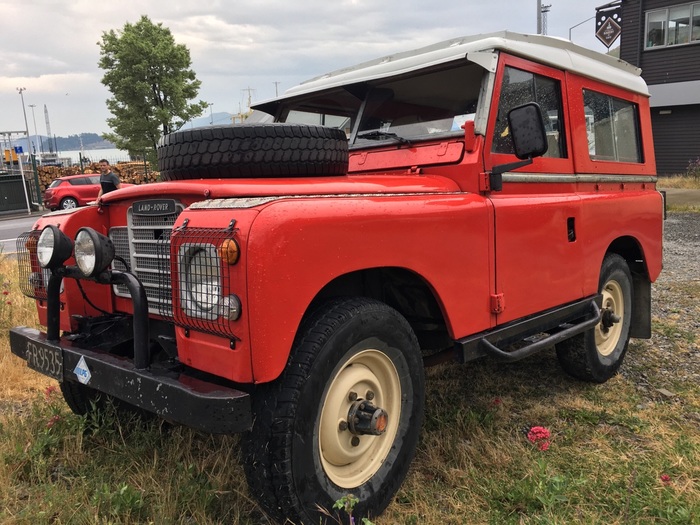
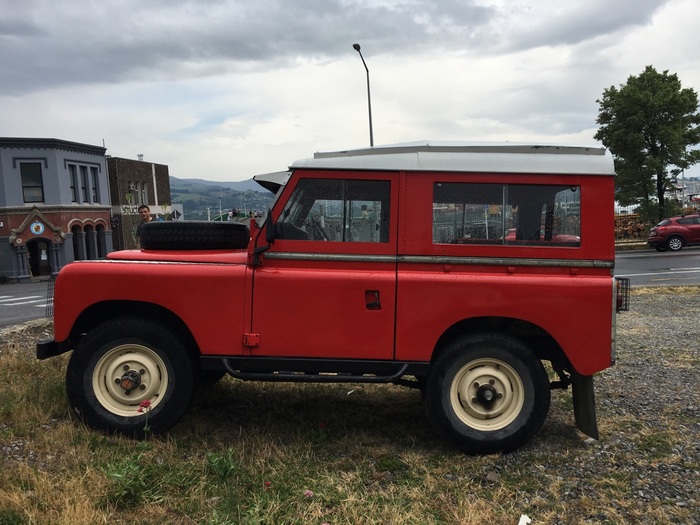
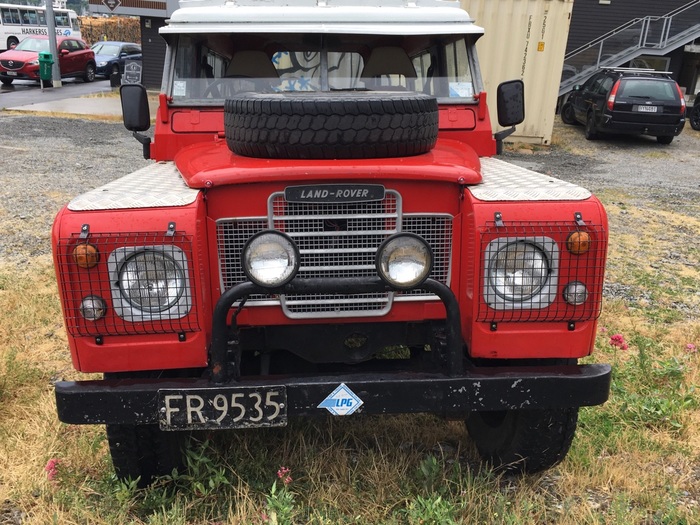
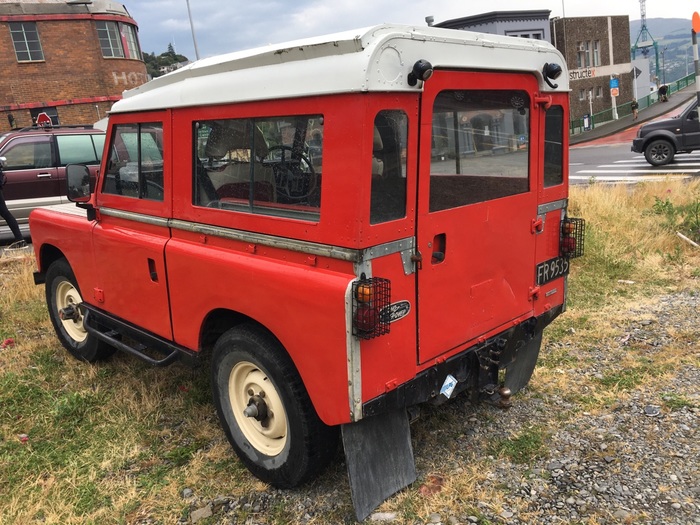


Land Rover Defender — внедорожник известной британской компании. Первая серия внедорожников был построена под впечатлением Jeep Willys.
Серия III является наиболее распространенным серийным транспортным средством, 440 000 автомобилей этого типа были построенных с 1971 по 1985 годы. У серии III были те же самые варианты кузова и двигателя, что и у предыдущей серии II. Мало что изменилось косметически. В соответствии с тенденциями автомобильного дизайна начала 1970-х годов, как с точки зрения безопасности, так и использования более совершенных материалов, простая металлическая приборная панель более ранних моделей была переработана с учетом новой литой пластиковой панели.
У 2,25-литрового двигателя была увеличена степень сжатия с 7:1 до 8:1, что несколько увеличило мощность. Моторы шли от 2,25 л. 73 hp до 3,5 л. 93 hp, и был также представлен дизельный 2,25 л. 63 hp.
Подвеска в зависимости от серии была либо полностью зависимая с листовыми рессорами, либо с передней независимой — пружинной. Все модели имеют постоянный привод на четыре колеса (4WD) и только небольшая часть с передним.
В 1992 году компания Land Rover заявила, что 70 % всех транспортных средств этого типа ещё используется. Также они до сих пор используются в армиях ряда стран (в частности Омана и Тонга) и частными лицами.
Источник
LEGO Technic 42110 Land Rover Defender ultimate repair guide
Introduction
I shared many videos with you about the LEGO Technic Land Rover Defender already, you saw my detailed building review, the details of the drive train and the one about the cracking noise and the possible fixes. I received hundreds of comments from you and many-many requests for help, hopefully in most of the cases I was able to assist to find the proper solution.
I decided to create a summary and a video about all the potential issues I found during the building process. I’ll also go through the drive train from the wheels to the engine, how to verify your build, and what are the problems that are not really problems. Each section is linked to the proper part of the video, use the summery below to find the section you are looking for:
Drive train walk trough, how does it work
I go through the drive train from the wheels up to the engine to demonstrate how it works. I suggest to watch it to have a better understanding on the mechanism, it helps to find the issue with your build.
Body removal guide
This section shows you how to remove the body of the car in bigger pieces to gain access to the internals
Building errors based on steps
Step 3 – incorrect gear used, issue at step 62
Error: a 12 tooth black gear is used at step 3 instead of the 8 tooth dark bluish gray gear
Symptom: the two assemblies cannot be properly joined at step 62, the axle won’t turn
Step 4 – rear differential direction swap
Error: The orientation of the differential is important at step 4
Symptom: If one of the two differentials is built in reversed then the front and rear wheels will work against each other and the central differential won’t turn, it won’t drive the gearbox and the engine. Click here to see how does it look like.
How to fix with a finished build : Follow these instructions:
Step 45 – gears swapped or not placed correctly
Error: If incorrect gears are used at step 45 then the assembly cannot be completed
Step 65 – small cross block inserted incorrectly
Error: a common mistake that can be made a lot of times in this build. If the #6536 Technic cross block is inserted incorrectly then the axle that supposed to turn freely in the pin hole will be blocked in the axle hole.
Symptom: The rear wheels does not turn when the car is pushed on the ground as the output of the rear differential is blocked
How to fix with a finished build : Follow these instructions:
Step 74 – small cross block inserted incorrectly
Error: a common mistake that can be made a lot of times in this build. If the #6536 Technic cross block is inserted incorrectly then the axle that supposed to turn freely in the pin hole will be blocked in the axle hole.
Symptom: The central differential or the gearbox is blocked
Step 84 – small cross block inserted incorrectly
Error: a common mistake that can be made a lot of times in this build. If the #6536 Technic cross block is inserted incorrectly then the axle that supposed to turn freely in the pin hole will be blocked in the axle hole.
Symptom: The central differential is blocked
Step 88-89 – U-joint orientation
Error: if the universal joints on the input and output shafts of the gearbox are not aligned correctly
Symptom: the drive train will not run smoothly and in higher gears you’ll hear a cracking noise.
How to fix with a finished build: Follow these steps:
Step 102 – Red 2L axle
Error: if the 2L red axle is not pushed in then the some beams will not be linked together and the structure becomes unstable
Step 104-106 – rear suspension – lower attachment point of the springs
Error: The lower attachment point of the springs in the rear suspension are chosen incorrectly, the inner hole is used on the suspension arm instead of the outer axle hole
Symptom: the suspension will not work properly and the whole rear of the car will sit lower than the front
How to fix with a finished build: follow these steps:
Step 134 – front differential direction swap
Error: The direction of the differential is important at step 134
Symptom: If one of the two differentials is built in reversed then the front and rear wheels will work against each other and the central differential won’t turn, it won’t drive the gearbox and the engine.
How to fix with a finished build : Same as the fix for Step 4
Step 152-154 – front suspension – lower attachment point of the springs
Error: The lower attachment point of the springs in the front suspension are chosen incorrectly, the inner hole is used on the suspension arm instead of the outer axle hole
Symptom: the suspension will not work properly and the whole front of the car will sit lower than the rear
How to fix with a finished build : Same as the fix for Step 104-106
Step 259-261 – correct assembly of the DNR and Hi/Lo selectors
Error: the assembly of the DNR and the Hi/Lo selector requires a lot of parts to be aligned correctly, if there’s a mistake they won’t work properly
Step 271 – correct gear usage
Error – if the dark bluish gray 8 tooth gear is not added at step 271 or an incorrect one is used then the front wheels won’t drive the central differential
Symptom: The front wheels are not driving the central differential
Step 272 – U joint should not touch the 24 tooth gear
Error: The U-joint on the input shaft of the gearbox is placed incorrectly and it touches the 24 tooth gear next to it
Symptom: Cracking noise coming from the drive train
How to fix with a finished build: Follow these steps:
Verification steps
I suggest to follow these verification steps to see if everything works correctly at that stage.
What shall work at the end of bag 1 at step 123
Verification of all functions at step 321
General advises
- There should be no bigger pieces or gears left after any building stages. You can see the list of the leftover parts here at the end of the inventory. If you have any bigger parts left after finishing a section go back and find where it belongs.
Problems that are not really problems
Left/right or front/rear wheels are turning in the opposite direction
Step 62 – wheels are not turning the gears in the gearbox
At this stage the wheels are not yet connected to the gearbox
End of bag 1 – wheels are not turning the gears in the gearbox
At this stage the wheels are not yet connected to the gearbox
What to do if everything is built correctly and the gears are still cracking
As you see in the video, if the car is still cracking then the best solution is to take it apart and try to rebuild it with everything aligned properly. There’s no ultimate fix for the cracking, you need to verify each section carefully to ensure a smooth operation.
There is one additional thing you can try to fix the cracking if everything else fails, although this falls in the “might or might not work” category. For some people flipping both differentials at the front and rear axle eliminates the cracking.
Fantastic, job well done, Thanks a million !
My central differential (red thing) is stuck. Please help me
I suggest to follow the troubleshooting steps in the article
The pistons do not move up and down when I roll the car. Am I setting the shifting properly?
Hi! My car is only making crackling noises when the highest gear (4) is in use… It runs smooth on all the lower gears (1-3). What can I do to solve that kind of problem? Any suggestions?
Check all potential issues, if no solution then dismantle, rebuild, verify each phase during build.
Same 🙁 but if I roll the wheels slowly without rapid movements cracking noise disappeares. So it might be just the friction
Did you manage to fix the clicking in high gear? I’ve re built the whole car following all of the above steps and still have the same problem?
Try rolling the car backwards (and not forward), but still on D. Does it work that way and doesn’t crack? If that’s the case, flip both the front and rear differentials so their large side is facing the passenger side of the car.
Wow, thank you so much that actually worked
As far as I understand, there are two gears that are offset to each other (one that comes from the differentials and one that is connected to the DNR gears) which have a better grip on each other on this specific rotation direction. Flipping both differentials effectively swaps their rotation direction.
^^^ This fixed our build as well. Many thanks.
This comment is the one! You’ve just spared me from driving myself nuts! Thankyou!
como se llama el programa que utiliza para simular en 3D y utra pregunta la transmision truena mucho podria agregarle un poko de aceite de maquina de coser …
saludos excelente su perfil
Don’t put oil in it, it’ll ruin your build. The 3d program is LDCad – http://www.melkert.net/LDCad
Um… I did everything but it is still cracking and my car is bought in new less than a week, so someone please help me for the annoying cracking from my new car.
I’ve often found that newer LEGO sets gears have more friction, as they get used they wear down and run more smoothly. Run it a lot, disassemble it if you have to, but over time the gears should run smoothly.
I’ve built my model but when I turn the red diff (in front of the grey one) all the wheels turn, however when I turn the front or rear diff only the respective diffs turn up to the centre diff. My engine does not operate only when I turn the cog in the boot Also I don’t think my gearbox/hi-Lo or +- fines done seem to do anything thing??
I’m struggling to get the pistons to move.
I’ve followed the guide posted above it all appears to be in order but yet, the pistons will not go up and down when the car moves.
Does anyone have any idea?
Remove the body, put the car in D, then follow the guide that shows how the drive train works from the wheels until the engine. If something does not move as it is supposed to move, you’ll find the source of the problem.
Hi! I like this a lot but I must have Done something Wrong I cant steer my front Wheeling Will not turn.
Hi, I had the same issue and went back. In my case, one of the small pins in number 132 was upside down. For both, the top level should be equal to the brick, the very small part that sticks out should be at the bottom.
Hi, love the guide but I’m still having issues. I can only get the pistons to work when in R. I’ve rebuilt the whole gearbox several times but cannot get it to work in D.
Please help
Thanks
If it does work in R but not in D then check the Hi/Lo selector and the gearbox itself. Does the input shaft of the gearbox rotate when you push the car? Does the output shaft rotate? You can narrow down the issue if you have a look at my video, understand what parts should be engaged when it’s in D and compare it to your build.
Did you manage to fix this issue? I’m having the exact same issue works fine in R but if try to run in D will go so far and then will run backward when I pick it up. Its so frustrating and I really don’t want to have to take to bits again.
Hi mate did you find out what the issue is I’m having the same dam problem. Works in R but like binds fights against each other in D when u pick it up it’s like a wind up car.
The U Joints are placed correctly,the red diferencial cracks in Most Gears and the engine doesnt works good.
Please Help me.
My problem was not listed. Both the rear wheels are incapable of moving in the same direction and the entire rear gearbox is wont move and will make the cracking sounds if forced. I think the problem is that there is a gear that is stuck in the back, but I was wondering if this was a more common problem.
Check the video which axles and gears should be able to rotate and verify them in your build
Had the same issue. The gray piece that the axl goes into was in wrong which did not allow the gear to move at all.
Very helpful guide. Thanks ! After going through the steps I’m left with a strange issue. I get cracking noises only in 1st and 2nd gears (both Hi and Lo). Is this a known/fixable issue ?
The cracking is quite difficult to eliminate fully, you need to have every gear/axle and piece aligned without adding extra tension to the drive train.
Is it possible that in the newest production run some of the manual issues have been resolved?
The mistake with the U-joint alignment was corrected already some time ago in both the printed and the online manuals, I’m not sure if there’s anything else to correct.
I’m sorry, I misunderstood what these errors are; they’re common mistakes, not errors in the manual. Thank you for clarifying, and even more for putting all of this together!
When in gear, my front and back wheels spin against each other… all differentials appear to be in the correct orientations (the larger end of the differentials are both along the left side of the car).. tried doing a rebuild of bags 1 and 2… still no luck..
Any suggestions to try??
My front and rear wheels spin against each other when in drive… all differentials appear to be in correct orientations…. I noticed when I spin the small grey gear that connects far right side u connector with the gears that move the pistons, manually, the wheels spin correctly…
Hi, I love this site. Thanks for sharing this info. I figured out one of the problems I had. But, I have a big question remaining. The gear in my car works if I pull the shifts, but nothing happend and also the motor ins’t running. https://youtu.be/Qz8FYlMixQI
Can you help? Hoping to hear from you.
Did you check the differentials?
I fixed some clacking due to u joint connections hitting gears. Thanks.
But in the highest gear, or lowest – I can’t tell – the car acts like pull back wind up toy. Either the pistons do nothing and then go in a fast burst. Or if I push the vehicle and then lift the wheels they unwind in the opposite direction! 🙁 In other gears it’s ok.
Differential orientation is correct and my u joints are aligned thanks to you. Any thoughts?
Hi Douglas, I have same issue with engine and gears not moving much and then running really fast. Also if you push the car forwards it then starts to run backwards! Did you find the cause ? About to go for a rebuild here. Thanks
Hi Jim, I have the same issue here. Have you managed to solve it?
I really enjoyed watching the whole video, thank you very much for putting it together!
Thank you for this guide !
Step 88-89 above fixed the cracking noise. Good thing it was an easy fix, just had to remove 1 seat and 1 door.
Do you have any videos for building steps 206-246, I’m on my third go building this section and every time I connect everything up the engine does nothing when I move the various cogs. The selectors appear to be in the right position but they don’t do anything in terms of engaging different gears.
Also on my fifth go of trying to make the wheels all go in the same direction as each other. I own more than twenty bits of Lego technic and no kit has flummoxed me like this ! Almost getting to the point where I’m not enjoying it.
I only have the video that you see in this post. Try to follow the drive train from the wheels from the central differential and see which gears are engaged.
Thanks, I’ll try again. I’m a Lego enthusiast not an engineer or a mechanic, I think for this build you need to be the latter. I’m obviously making the same mistake every time because the instructions aren’t clear enough to me as a non-mechanic.
Slightly different problem for me. It runs okay in reverse in lowest gear (i.e. engine turning over fastest), but clicks when pushed forward. Does anyone have any ideas?
I should clarify when I say ‘reverse’ I mean pushing it backwards. The gear selector is in ‘D’ in both circumstances.
Fantastic! That’s not cracking anymore! Thanks for all. You’r the best!!
i have the mistake instructions in step 89 the u joints are wrong position but you help guide help me a lot i build this set like you after 2 bags (number one and number 2) i put wheels on land rover and test if anything works wrong and everything was correct thanks you help guide i build land rover complety today and everything works smooth if you hadnt made these videos i would be in trouble like step 89 im maybe could have built wrong
i have two problems. i have the shifter on D, at 1st or 2nd gear it’s ok bot on 3rd and 4th i hear the carcking noise. if the shifter is on R then all the gears (1-4) are ok. the other problem is that if i steer the wheels at the roof then it feels a little bit hard to steer but if i steer on the steering wheel inside the car or if i steer the wheels from the actual wheels it feels even more harder. Can you help please?
Sorry for my bad english.
I am not sure the order of the 4 gears is correct. In the sense that they don’t go from faster to slower as I rotate the selector, they seem in some random order. Could you please double check on your and tell me how the orange gear selector is positioned when the lower (-) gear is selected? Thanks!
I have the same problem but only in D mode. Everything is checked and still no results.
Really appreciate the effort going into this blog and the videos. Very helpful! I watched it prior to my full rebuild of the model and it helped me in avoiding the U-joint mistake.
My situation is that I have no cracking noise as which is caused by the mis-aligned U-joints. Also no cases of the wheel turning backwards once you pick it up. All gears are working and the fake engine is moving. So basically I think I have the build correct. However, I do find the resistance that the model has in High gear a bit unpleasant. More specifically only in D/Hi/2 and D/Hi/3 you notice that the output shaft is playing catchup sometimes and thereś just more stress on the drivetrain as I would like. (I am unable to make it crack, even when driving it very quickly) I would still want/desire a more smooth/fluid experience but I am at a point of believing it is simply not possible to get everything running buttery smooth on this model. (I think this is also what RacingBrick indicates in his videos).
@RacingBrick: at those moments when you demo what sounds “normal”, dropping the music would be helpful! 😀
– Gearbox alone is smooth (ratating in and out shafts)
– Fake engine is smooth (when using R)
– DNR and Hi/Lo selector is smooth
> Just when everything is together with those high gears…
Maybe it’s time to let it rest and just build the body of the car.
I think this is pretty much the maximum you can achieve, it will not be smoother than that. Just take a look at all the plastic gears working together (with their tolerance rate) and you will understand why it works like this. To make it better a drastic simplification would be needed.
Yes, I think you’re right. But it sure feels nice having you confirm that once again. 😉 Thanks again for all your efforts, really enjoy your content!
Источник
Hello Eurobrickers,
Finally I am ready to present my latest MOC, the so called Bruiser Conversion of the 4-door Jeep Wrangler. The real thing is done by JK Crew, it looks like this (more awesome pictures here):
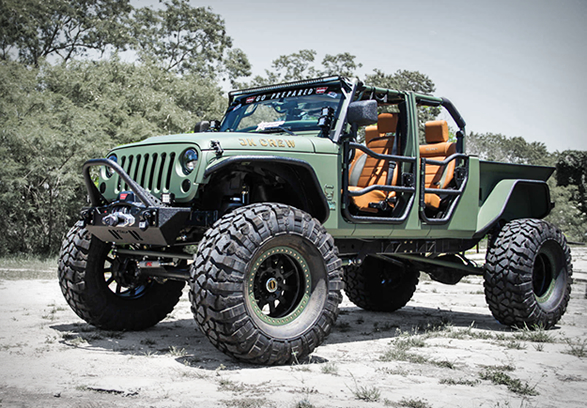
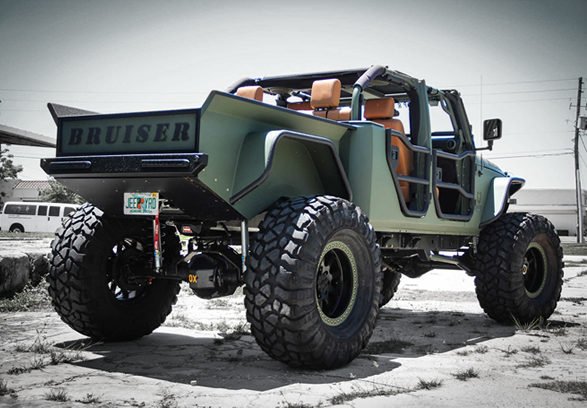
The conversion includes pimped up suspension, a longer body on the rear part, turned into a pickup, and larger wheels. As for the scale, the real Jeep Wrangler has around 80 cm wheels, and the conversion has around 110 cm wheels. I thought this would be an excellent material for an alternate build from the 42110 Land Rover set because of the color match and the available parts (like those rear mudguards), and the 80 mm wheels of the Defender, and the 107 mm Lego tractor tires result in a good 1:10 scale match. I thought it would deserve the large tires and a motorization, all available in the set 42099. So I ended up with two versions:
— Manual version, pure alternate build from 42110, with an optional raised geometry and large tires
— RC version that is a dual alternate with 42099
I will present both versions below. They are identical on the outside, they differ in the chassis build and the gearbox / drivetrain.
Manual version (42110 alternate)
I wanted to build something from the Land Rover that has a more aggressive suspension with large articulation. I have been playing with the idea of 4-link suspensions on both axles, and the 8 A-arms in the set are just enough for that. However, I had to do it with short springs only, so I used similar geometry as the rear axle of Grohl’s stadium truck, but with longer lower links on both axles. Furthermore, I wanted to build it in a way that works both with the stock Defender wheels, and with larger ones. So I built a chassis in a way that the springs can be positioned in two places, and the suspension geometry becomes lower or higher. Along with this, the front axle is also moved one stud to the front, to make space for the steering of the front wheel (just like in the real version).

As such a suspension requires a lot of space (if you want large articulation), the actual useful space in the middle of the model becomes relatively short. I wanted to preserve the same functions of the gearbox as in the Defender, so I had to compact it. Taking ideas from the Pimp my Land Rover project I managed to create a version of it that fits into the available space, keeping the same layout of the controls. Furthermore, I have included a functional V8 engine (the real one has a V8 Corvette engine).

One part that I struggled with a lot was the HoG steering, as it was quite hard to bypass the gearbox and the front seats as well. Finally I managed to do it under the seats, but I could not fit a functional steering wheel as the chassis structure that holds the front suspension was just in the middle of its way. The interior came out quite clean and also replicates the real one quite well I think. The seats are similar to those of the Defender, but I had to make them shorter, as the roof is also shorter:

On the outside one key point is that the real thing (at least this version) has its doors made of steel bars (which gives it a great look I think). This is good as the Defender would not have enough green panels to build 4 doors, but the bar doors could be built (at first I did not think I could get such a clean look, but I am quite happy with the result). On the front, I reused some ideas from my Willys Jeep, but changed it to a bit more modern look. On the rear part, the fender piece was an obvious fit, and I wanted to emphasize the bed with system parts, which also came out nicely I think. At first the A and B pillars and the roof was tricky to make solid, as it is only built from a few liftarms. But the final assembly is super strong, thanks to the column in the middle that goes through the gearbox (that was a key structural element to make). The model can be lifted safely with the roof. Some side panelling was also tricky to get into place, but I am satisfied with the overall looks. The doors, the hood and the tailgate are openable. The spare wheel fits nicely in the bed. One last feature I could add thanks to the Defender parts is the front bullbar with a compact functional winch (with rachet mechanism).
Here are some side-by-side images for a comparison. I think it works well with both wheel options.


More info, pictures and building instructions are available on Rebrickable.
RC version (42110 + 42099 alternate)
For the RC version I decided to use components from set 42099 as it has everything required: XL motors for torque, heavy-duty CV joints, planetary hubs, more A-arms and hard springs for suspension and the few extra parts in black color. First of all, I wanted to motorize it in a way that I keep the interior and the functional fake engine as well. Second, I wanted to add a simplified gearbox. The placement of the battery was obvious in the bed, the steering motor would go onto the front axle, but the space required for the two (coupled) XL motors was less obvious. Finally, I could squeeze them under the rear seats, and place the gearbox in front of them into the drivetrain. As for the gearbox, incorporating a 2-speed one (hi/lo gear) was simple, but I wanted to do something more with the available parts. Finally, I managed to add an RWD/AWD switch. For this, gearbox routing is a bit tricky, going through itself through idler clutch gears, and returning later. Furthermore, the front and rear parts of the driveshaft rotate in opposing directions, which is resolved later by the proper placement of the differentials on the axles. It was really challenging to brace the whole gearbox properly so that the gears cannot skip anywhere, I had to rebuild and test it several times (those two coupled XLs have a lot of power). On the downside, I suspect the relative complexity of the gearbox add some friction to the system.

As I wanted to maximize ground clearance, the front axle was tricky to build, since the planetary hubs can only be connected with ball joints when steered. For this, I applied the trick used by other as well, that slants the lower A-arms a bit, resulting in very slightly non-vertical front wheels, but it is so negligible I bet you’d never notice. The resulting axle is fairly slick, I am happy with the result.

As the steering motor made the front axle higher, the functional piston engine had to be minimized as well, and I could only do a mini V6 with the available parts. Unfortunately, this small construction does not run super smooth in a V configuration (sometimes the 2L liftarms in the main shaft kind of collide into the half pins that make up the pistons for a moment, instead of smoothly pushing them up; the inline configuration with the same technique works smoother). For this reason, there is some friction resulting from driving the fake engine as well.
Here is the final chassis, and one more image about the ground clearance at the rear:

Although the final gearbox construction is strong enough not to let the gears skip, there is one weak link: the driving ring can move out of the clutch gear under very high torque (although in my tests the model sooner went up the wall if not blocked). This is because the gear stick does not firmly hold it in place. However, it can be solved by fixing it into one position with a linkage coming out of the center column. This issue made me think how much more powerful it could be if the gearbox and the fake piston engine was bypassed, and eventually led to the construction of a heavy-duty variant (in which the gearbox is still kept, but instead controls the speed of the fake engine, when not in neutral). The heavy-duty variant is further geared down a bit to have even more torque. It can climb almost everything if the ground clearance permits, as you can see quite a few cases in the video.
A few more images about the whole model:


More info, images and building instructions are available on Rebrickable.
Let me know how you like it!
Cheers,
Viktor
Edited September 14, 2021 by gyenesvi
- Товары
- Детские товары
- Игрушки и игры
- Конструкторы
Вокруг заказные отзывы о Конструктор LEGO Technic 42110 Land Rover Defender? Читайте плохие отзывы владельцев Конструктор LEGO Technic 42110 Land Rover Defender, НА НЕГАТИВЕ РУ.
Средняя оценка — 2

Написать отзыв без регистрации
► Показать все (не только плохие) отзывы на Конструктор LEGO Technic 42110 Land Rover Defender
—
Конструктор LEGO Technic 42110 Land Rover Defender можно купить значительно дешевле. Кэшбэк порой доходит до 17%, но о нём не любят говорить. Для его получения выбирайте магазин, выбирайте магазин где ниже цена и активируйте кэшбэк, далее совершайте покупку в магазине как обычно, кэшбэк поступит в течение 10 мин. Кэшбэк это не баллы и бонусы, а настоящие деньги, которые можно перевести на свою карту или баланс телефона. Приятная скидка не будет лишней! От нас дарим первый кэшбэк 150р по промокоду: sdx548 Выбрать магазин и активировать кэшбэк нужно здесь: 770 магазинов с Кэшбэком
— 2,
| Плюсы: | Набор супер! |
| Минусы: | Доставили в помятой коробке |
| Отзыв: | Претензии только к доставке! Коробка была упакована просто в пакет, соответственно коробка пришла вся мятая. Не первый раз заказываю игрушки и Лего в том числе, всегда все приходило отлично запаковано. В этот раз просто разочарование. Теперь несколько раз подумаю прежде чем закажу. |
— 2, Иван Морозов
| Плюсы: | Набор интересный, в меру сложный |
| Минусы: | В первый раз столкнулся с некомплектом. И, если мелкие детальки ещё как-то могу понять, то недовложить большое колесо?!? Коробка запечатана качественно. Смотрел отзывы в другой сети доставки — там очень много жалоб на недовложением. |
| Отзыв: | — |
— 2, Вадим Бондаренко
| Плюсы: | Большая, красивая, интересная в сборке модель со множеством узлов, но… |
| Минусы: | Не работает правильно коробка передач. Я пишу этот отзыв, пересобирая модель в третий раз. На 3 и 4 скорости с включённой раздаткой задняя ось начинает вращаться назад, и я не знаю, как это исправить, много чего уже перепробовал. |
| Отзыв: | На данный момент я понимаю, что много денег и времени потрачены на то, что не работает правильно. Моего пятилетнего сына это не беспокоит, но если вы взрослый человек, который хочет, чтобы коробка передач работала, если ты её включаешь — лучше берите другую модель. |
— 2, Анастасия Комушкина
| Плюсы: | Сам набор красив |
| Минусы: | Не хватило 3 основных деталей в наборе. Собирал не ребёнок, потерять не мог. |
| Отзыв: | — |
— 1, Вита А.
| Плюсы: | Если бы в нашем наборе присутствовали все детали, было бы великолепно. Модель полностью повторяет автомобиль. Рулевые наконечники, амортизаторы, клапаны…. Всё, что должно вращаться, крутиться — всё соответствует своему назначению |
| Минусы: | Отсутствие деталей. Наверное придется докупать, потому что очень хочется достроить автомобиль. |
| Отзыв: | Конструктор куплен на день рождения. Отсутствие деталей в наборе расстроило |
— 1, Галина И.
| Плюсы: | Товар классный, но данная упаковка (тонкая пленка) специально для того что бы товар не доехал в хорошем состоянии. Просьба упаковать в коробку- без внимания. |
| Минусы: | коробка с очень большими повреждениями (3,5 кг 2573 деталей — и это все только в тонкой пленке несмотря на просьбу упаковать в коробку. Дорогой набор, дорогой заказ — и только пленка, Вероятно скрыта цель — испортить товар). Неуважение к покупателям |
| Отзыв: | — |
— 1, Mickey_mouse18
| Плюсы: | — |
| Минусы: | Коробка пришла помятая, поцарапанная и всрытая |
| Отзыв: | — |
— 1, Юрий К
| Плюсы: | Конструктор крутой это же Лего |
| Минусы: | Посылка была обернута в ченый полиэтилен, я не знаю где она побывала, но явно ёё там хорошенько кидали, я бы вернул, но сроки поджимали. Вроде запечатана, надеюсь внутри всё ок. |
| Отзыв: | После коробки уже нечего писать. Прошлый конструктор который мне доставили на дом был в идеале. Этот же ну вы сами видите. |
— 1, life_maniac
| Плюсы: | Ничего |
| Минусы: | Худшая, на мой взгляд, модель у Lego Technic. Абсолютно невнятная инструкция, в которой приходится ковыряться с лупой, примеряя каждую деталь. Шестеренки, которых тут несколько видов, друг от друга порой вообще никак не отличаются, поэтому приходится пересобирать какие-то части заново. Механизмы не продуманы и при езде вперед в машине постоянно что-то щелкает и это учитывая тот факт, что инструкция уже нового образца, где «карданы» построены правильно. Сборка в итоге превращается в лежание под машиной вместе с ютубом и гуглом и поиском решений. Причем лучшее решение — разобрать все до основания (не нужно тешить себя мыслью, что разворот дифференциалов хоть как-то вам поможет) и собрать заново. Но не факт, что это поможет. На мой взгляд, не нужно было устраивать здесь ни коробку, ни дифференциалы, а достаточно было просто оставить кузов и раму. |
| Отзыв: | — |
— 1, Kraft M.
| Плюсы: | — |
| Минусы: | Задние амортизаторы не держат машину, она лежит на арках. Не хватает нескольких деталей |
| Отзыв: | — |
— 3, Ярослав Г.
| Плюсы: | Интересно собирать, внешний вид |
| Минусы: | Главная и единственная проблема — недостаток самой модели. Даже если собирать все ровно по инструкции, в итоге будет неправильно работать коробка передач. Можете загуглить эту проблему — про нее в интернете много видео |
| Отзыв: | — |
— 3, Олеся К.
| Плюсы: | Хороший конструктор |
| Минусы: | Пришла в испорченной коробке. Неудобно было дарить. Вся коробка в царапинах и помята. |
| Отзыв: | К самому конструктору нареканий нет, видимо доставка испортила всю коробку |
— 3, Юлия Т.
| Плюсы: | — |
| Минусы: | — |
| Отзыв: | Товар пришел в ужасном качестве. Вся коробка побита. Такое дарить нет желания. |
Написать отзыв без регистрации
Конструктор LEGO Technic 42110 Land Rover Defender отзывы:
Перед тем как купить Конструктор LEGO Technic 42110 Land Rover Defender прочитайте плохие отзывы о неудачных покупках. Мы публикуем только отрицательные отзывы покупателей Конструктор LEGO Technic 42110 Land Rover Defender и не допускаем заказные.
Топ-100 Конструкторы
-
Электромеханический конструктор LEGO Duplo 10874 Поезд на паровой тяге
Отзывы — 12
Сохранить
-
Конструктор LEGO Super Mario 71360 Стартовый набор Приключения вместе с Марио
Отзывы — 10
Сохранить
-
Электромеханический конструктор Mould King Technique 13036
Отзывы — 5
Сохранить
-
Конструктор LEGO Technic 42110 Land Rover Defender
Отзывы — 13
Сохранить
-
Электромеханический конструктор LEGO Technic 42114 Самосвал Volvo 6х6
Отзывы — 7
Сохранить
Статьи от НаНегативе.ру

16.01.2023 07:00
800
Виктор (nanegative.ru)
Realme недавно выпустила серию смартфонов Realme 10 в Индии. На прошлой неделе дебютировала модель Realme 10 4G. Данное устройство оснащено AMOLED-дисплеем с частотой 90 Гц, чипсетом Helio G99 и
Читать далее…

02.01.2023 12:35
3 171
Виктор (nanegative.ru)
Samsung только что выпустила на рынок еще одну новую модель ноутбука: Galaxy Book 2 Go с новым процессором Qualcomm.
Galaxy Book 2 Go от южнокорейского технологического гиганта — это
Читать далее…

19.12.2022 16:43
6 105
Виктор (nanegative.ru)
В последнее время российская платежная система «Мир» испытывает трудности, так как иностранные банки отказываются с ней сотрудничать. В связи с этим многие наши соотечественники
Читать далее…
Администрация сайта не несет ответственности за содержание информации, которую размещают посетители. Все Торговые Марки принадлежат их владельцам.
Оригинальный Defender, конструкция которого уходила корнями в сороковые годы прошлого века, сняли с производства три года назад. И вот на сцену выходит полностью новый Land Rover Defender. Разработчики заявляют, что он унаследовал у легендарного предшественника дух приключений и недюжинные внедорожные способности. Действительно общие у этих двух машин только концепция и имя.
Рама и неразрезные мосты остались в прошлом. Новый вездеход построен на платформе D7x, которая представляет собой доработанную и серьезно усиленную «тележку» D7 нынешнего Discovery. Сохранены несущая конструкция кузова с широким применением алюминия, передняя двухрычажная подвеска и задняя многорычажка. Но заявлено, что 95% элементов новые, а в экстремальных условиях шасси способно выдержать нагрузку до семи тонн! Хотя паспортная грузоподъемность — не более 900 кг, плюс прицеп массой до 3,5 тонны.
Как и раньше, Defender предложен в двух вариантах с индексами 90 и 110, однако эти числа теперь лишь дань традиции и не отражают величину колесной базы в дюймах. Трехдверный Land Rover Defender 90 имеет базу 2587 мм (102 дюйма), а пятидверный Defender 110 располагает 3022 мм между осями (119 дюймов). К слову, база пятидверки на 99 мм больше, чем у Discovery. На выбор — колеса диаметром от 18 до 22 дюймов.
Короткий Defender — это 4323 мм в длину, 1996 мм в ширину и 1974 мм в высоту. Пятидверный вариант имеет длину 4758 мм (в обоих случаях она указана без учета запаски). Стандартная подвеска для «коротышки» — пружинная, но в виде опции (а для пятидверки стандартно) устанавливается пневматическая подвеска. Дорожный просвет в стандартном положении кузова — 216 мм, во внедорожном режиме — 291 мм, но в экстренном случае электроника может кратковременно поднять машину еще на 70 мм, выбрав весь ход подвески. А для погрузки кузов опускается на 50 мм от стандартного уровня.
Хотя разработка новой модели велась в режиме жесточайшей секретности, в сети появлялись некоторые утечки и чем ближе к дате релиза модели, тем их было значительно больше. Но сегодня речь пойдет не о полноразмерной версии нового Land Rover Defender, а о его модели презентация которой состоялась в один день с реальной машиной 4 октября 2019 года.
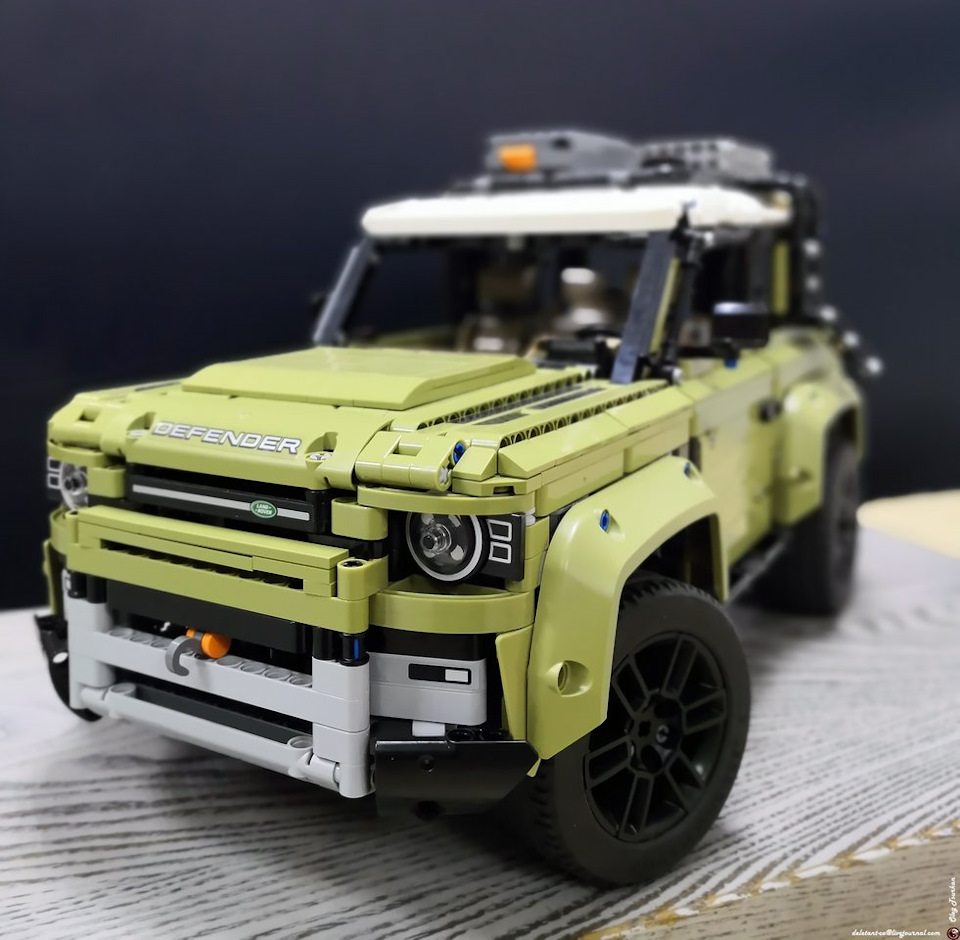
Полный размер
LEGO® Technic 42110
Это брутальная тачка для настоящих мужиков, которая засветилась во множестве экранизаций, включая киноэпопею про Джеймса Бонда и даже в клипе Димы Билана. Если попробовать перечислять все роли легендарного внедорожника на киноэкране, то это может занять очень много времени. И так Land Rover DEFENDER из LEGO собирался уже много раз разными фанатами. Больше всего он известен по модели Land-Rover Defender 110 от Sheepo. Но сегодня мы поговорим о осенней новинке из серии LEGO TECHNIC?
, который вышел осенью 2019 года по индексом 42110. В линейке LEGO TECHNIC всегда были машины и машины большие со множеством действующих реалистичных функций, таких как подвеска, поршневой двигатель, коробка передач, рулевое управление и тому подобное. Как правило в таких моделях более тысячи деталей. Цена у таких наборов соответствующая. На старте продаж рекомендованная розничная цена составляла 14999 рублей.Даже я как владелец двух английских вёдер не смог себе позволить купить эту желанную игрушку. как говорит статистика это не модель стоит дорого, а мы зарабатываем не на столько много как бы нам хотелось. Я даже принимал активное участие в викторине на официальном канале Land Rover в INSTAGRAM. Там разыгрывалось несколько экземпляров. Некоторые вопросы были на столько сложные, что найти на них ответы даже при помощи поисковика мне не удалось. Зато дважды ответы были правильными и отправлял я их спустя несколько секунд спустя публикации, но не был в числе первых и потерпел фиаско. Как же я был огорчен и думал, что никогда больше не смогу прикоснуться к легенде. Но судьба распорядилась иначе. При очередном посещении клубного автосервиса DeD Motors на автомате по продаже всяких вкусностей словно на пьедестале скромно стоял новенький DEFENDER от LEGO Technic. Если честно, то я его сразу и не заметил, хотя каждый раз когда посещаю это место первым делом изучаю витрины с символикой Land Rover.Получив согласие от менеджера, я не упустил шанс прикоснуться к легенде. Конечно же здесь он был уже в собранном виде. Модель имеет внушительные размеры. Габариты упаковки 48см x 58см x 9см. Вес упаковки 3,55 кг. Комплект состоит из 2573 деталей.
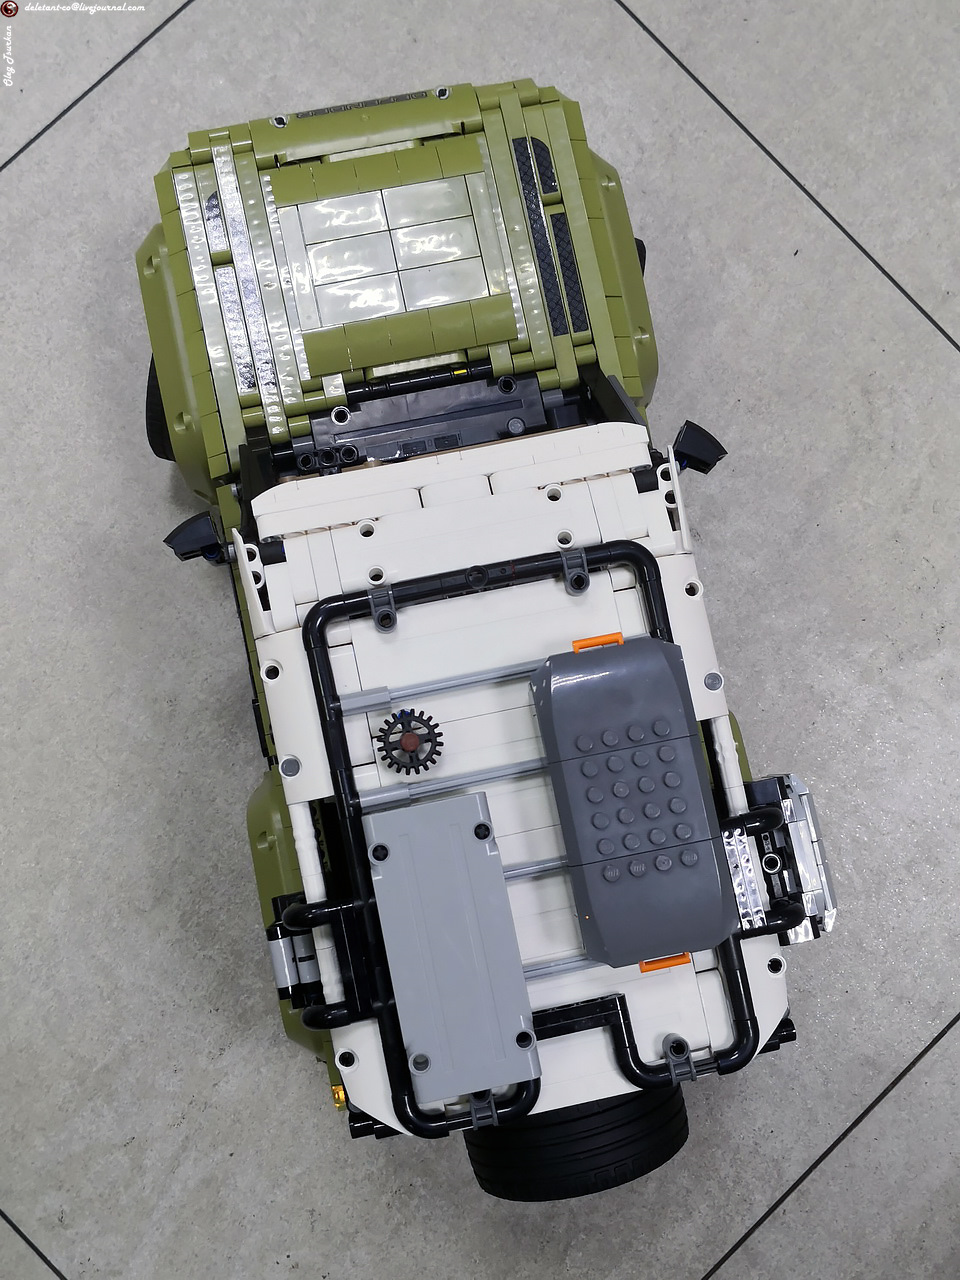
LEGO® Technic 42110
Делая Land Rover в LEGO не могли сделать его простым. Как же его могли сделать без действующей раздатки, без больших колёс и больших ходов подвески и без полного привода естественно. Индекс модели как я уже говорил 42110. Модель LEGO TECHNIC 42110 не является частью основной линейки LEGO TECHNIC, которую планировали заранее за два три года. Эта модель появилась в линейке внезапно. Об этом говорит сам номер 42110 потому как номер 110 был уже занят. Дизайнером модели является Milan Reindl
Это чешский фанат, который в прошлом занимался строительством моделей из деталей LEGO на любительском уровне, а сейчас занимется этим профессионально каждый день. Это самый народный дизайнер в команде LEGO Technic потому, что он пришёл туда в прямом смысле из народа. В прошлом он был учителем русского языка. Модель начали конструировать ещё в прошлом 2018 году как только поступило предложение от компании JAGUAR Land Rover. Сразу начали рассматривать короткобазную девяностую модель потому, что заказчики опирались на прошлый опыт Милана, на его модель экстемального внедорожника на гусеничных траках и другой вариант даже не рассматривался. Именно поэтому в комплекте сразу же появился каркас безопасности, экспедиционный багажник сенд траки и даже полнофункциональная лебёдка.

LEGO® Technic 42110
Самое сложное с чем столкнулся здесь дизайнер это были коробка передач и трансмиссия. В пресс релизах LEGO называет эту коробку передач самой сложной в истории LEGO Technik. Из беседы с Миланом стало известно, что были и другие размышления о других масштабах, были други прототипы в разных размерах. Вполне возможно, что их нам когда-нибудь и покажут. На вопрос почему не представили в этой модели новые покрышки, а ведь такая возможность была, вопрос упёрся в стоимость комплекта. К сожалению модель не модульная и поэтому нельзя посадить отдельно кузов на шасси. Основной цвет кузова OLIVE GREEN это самый близкий цвет, который дизайнеры смогли подобрать на цвет короткобазной комплектации с самым топовым двигателем с элементами пакета EXPLORER, который выражен экспедиционным багажником, открывающимся кофром на крыше, раскладывающейся лестницей на левом боку.

Полный размер
LEGO® Technic 42110
А так же небольшим кофром на правом. Кстати колёса являются довольно реалистичными и в каталоге Land Rover DEFENDER их можно найти как 19″ опциональные колёса с матовым покрытием. Сами покрышки шоссейные. Это довольно редкие колёса, которые редко используются в LEGO.
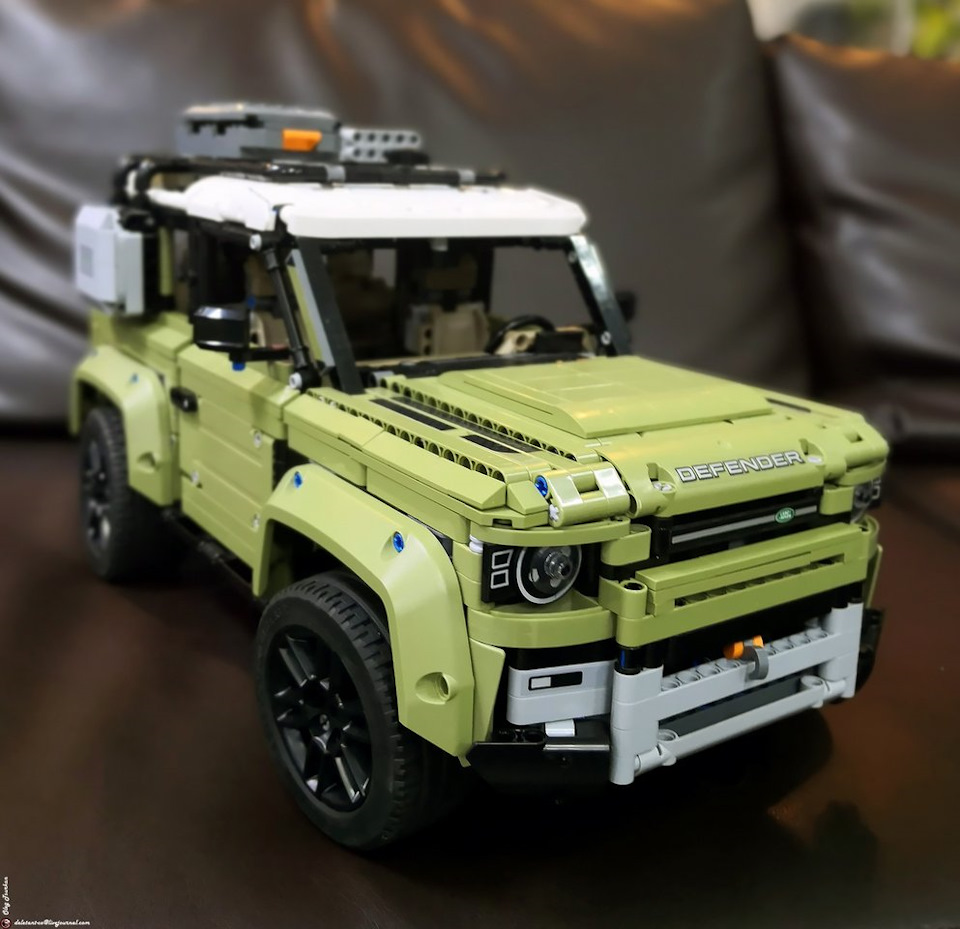
Полный размер
LEGO® Technic 42110
Опять же на ваше усмотрение, если заморочиться, то можно в качестве прокачки, на машине можно смело поменять колёса на более подходящие. Как говорится любой каприз за ваши деньги, а колеса на самом деле удовольствие не из дешевых.
Машина выглядит квадратной, как и все наборы серии LEGO CREATOR, хотя настоящая полноразмерная модель более аэродинамически продуманная. Таким образом модель получилась более близкая к корням, т.е. квадратной форме кузова, характерной для предыдущего модельного ряда. В терминологии LEGO Technic обычно такие модели называют либо кирпич, либо гроб на колёсах. Дизайнеры смогли учесть даже горб на капоте. Арки колёс получились довольно широкие и не совсем реалистичные, они больше соответствуют опциональным элементам тюнинга при использовании нестандартной резины и дисков с увеличенным выносом. Давайте заглянем во внутрь. Там мы видим тёмно бежевый салон с реалистичными сиденьями и большую приборную панель. А так же имеется селектор автоматической коробки передач и переключатель раздатки. В салоне даже есть зеркало заднего вида и несмотря на все косяки туда даже можно посадить человечков серии скала, правда они давно сняты с производства.

LEGO® Technic 42110
Спереди открывается капот и там виден очень подробно проработанный двигатель, впуск, воздушный фильтр, множество патрубков и рычаг управления лебёдкой. Кстати передаточные числа коробки передач здесь реализованы в обратную сторону, т.е. когда мы едем на первой передаче, коленвал вращается медленно, а когда мы едем на четвёртой передаче, то коленвал начинает скакать быстрее.
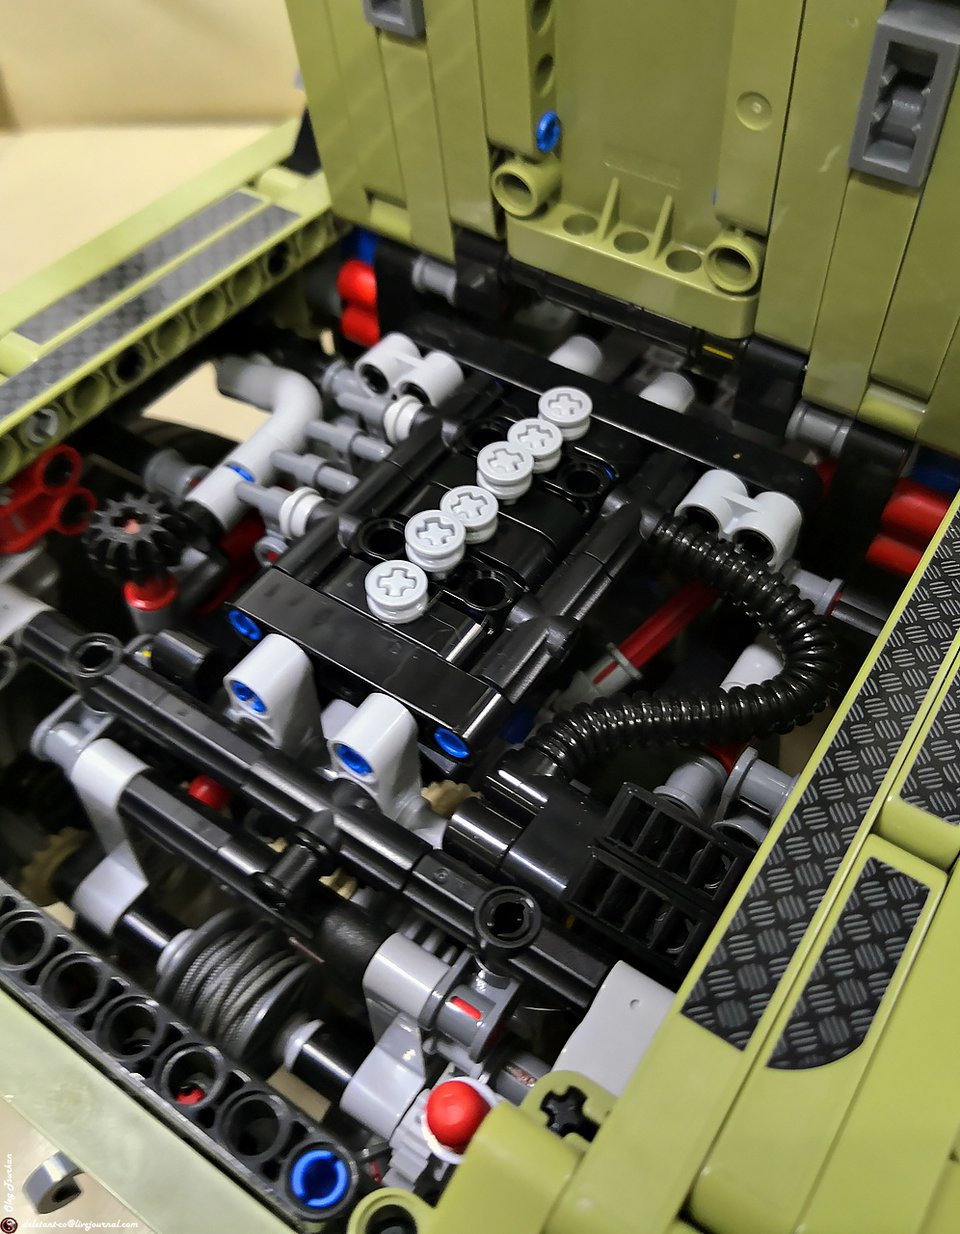
LEGO® Technic 42110
Это прекрасный игровой набор. На крыше имеется колёсико рулевого управления. У модели имеется реальный клиренс, способствующий её проходимости и управляемости.

Полный размер
LEGO® Technic 42110
Конечно же элементами игры может служить последующий тюнинг. Например, в Китае уже доступно несколько комплектов диодной подсветки ценой от полутора до трёх тысяч целковых.
А так же умельцы сделали комплект, превращающий его в полноценную моторизированную радиоуправляемую модель с вполне хорошими внедорожными качествами.
Если кто пожелает повторить, то имеется подробная видеоинструкция этого мода. Кстати они уже готовят полноприводную версию.
За сим я с вами прощаюсь, пока у меня не появится свой комплект, который я уже заказал из Китая по более привлекательной цене, о чем более подробно я расскажу в следующем блоге. Благо, трек на него начал отслеживаться. Доставка ожидается к концу января, а так хотелось получить подарок под ёлочку.