Machine Parts
Indicator
Ready
Data
Attention
Toner
2
There are four indicators located on the top right of the printer. The
indicators are used to identify the status of the printer at any time. To
identify the printer status, check the indicators on the printer and then refer
to the table below.
Status
Lit
Flashing
(Green)
Off
Lit
Flashing
(Green)
Lit
Flashing
(Red)
Off
Lit
Flashing
(Red)
NOTE:
For other combinations of the four indicators, call for service.
KM-NET for Clients (a software included in the CD-ROM) will provide
more detailed information about the printer status.
Indicates online status (printing is possible).
An error has occurred, but printing resumes when the
key is pressed.
Offline status. You cannot print, but the printer can receive
data.
The printer is in sleep mode.
Printing has stopped because an error has occurred.
The printer is processing data.
The printer is receiving data.
The printer cover is open.
A paper jam has occurred.
The cassette is not inserted properly or the paper has run
out.
The printer status is normal.
The printer has stopped because the toner is exhausted.
The toner is running low.
Meaning
OPERATION GUIDE
2. Повреждения данных PWB EEPROM (U17)
2. Обратиться в сервис обслуживания
2. Повреждения данных PWB EEPROM (U17)
2. Обратиться в сервис обслуживания
2. Повреждение провода между платой PWB (YC30) и интерфесным разъемом устройства подачи, либо разъем подключен неправильно.
3. Неисправен кабель между PF основной PWB и подачей бумаги, либо разъем не вставлен. Плата PF неисправна.
4. Неисправность control PWB
2. Убедитесь, что разъем подключен, а кабель не поврежден. При необходимости — замените.
3. Убедитесь, что разъем подключен, а кабель не поврежден.Заменить печатную плату.
4. Заменить плату управления PWB.
2. Неисправность в системе управления факсом PWB
2. Заменить плату управления факсом PWB
2. Отсоединена батарея.
2. Визуально проверить и при необходимости исправить.
2. Неисправен привод основного двигателя.
3. Неисправен двигатель.
4. Неисправность control PWB
2. Проверьте плавность вращения роликов и шестерней. При необходимости смажьте. Убедитесь в отсутсвии разрывов передач.
3. Заменить.
4. Заменить.
2. Неисправность FFC между control PWB (YC6) и сканера WPB (YC103) или неправильная установка FCC.
3. Неисправность датчика исходного положения.
4. Неисправность кабеля между двигателем ISU и сканером PWB (YC104) или разъем вставлен неправильно.
2. Переставить FFC. Проверить на разрыв, при необходимости заменить.
3. Заменить датчик.
4. Вставьте разъем. Проверьте целостность кабеля.
2. Повреждения FFC между CCD PWB (YC1) и control PWB (YC8).
3. Неисправен кабель между CCD PWB (YC3) и LED приводом PWB (YC1) либо разъем не подключен.
4. Неисправен кабель между LED приводом PWB (YC2) и лампой экспонирования.
5. Лампа экспонирования вышла из строя.
6. Неисправен светодиодный привод.
2. Заменить блок сканера.
3. Убедитесь, что разъем подключен, а кабель не поврежден. При необходимости — замените.
4. Убедитесь, что разъем подключен, а кабель не поврежден. При необходимости — замените.
5. Заменить лампу.
6. Заменить привод.
2. Лампа экспонирования вышла из строя.
3. Неисправность CCD PWB
4. Неисправность control PWB
2. Заменить лампу.
3. Заменить CCD PWB
4. Заменить control PWB
2. Неисправность CCD PWB.
3. Неисправность control PWB
2. Заменить CCD PWB
3. Заменить control PWB
2. Неисправен блок лазерного сканера.
3. Неисправность control PWB
2. Заменить блок сканера.
3. Заменить control PWB
2. Неисправен блок лазерного сканера.
2. Заменить блок сканера.
2. Плохой контакт в местах подключения нагревателя термоблока.
3. Термисторы фьюзера установлены неправильно.
4 . Срабатывает термореле
5. Нагреватель фьюзера установлен неправильно
6. Выход из строя термо-элемента
2. Проверьте контакты.
3. Заменить блок закрепления
4. Заменить блок закрепления
5. Заменить блок закрепления
6. Заменить блок закрепления
2. Неисправен шлейф термистора
3. Термистор установлен некорректно
4. Срабатывает термореле
Заменить блок закрепления
2. Дефект соединения между источником питания PWB (YC103) и PWB высокого напряжения (YC201)
3. Неисправен источник питания PWB
4. Неисправность control PWB
2. Переподключите коннектор
3. Заменить источник питания
4. Заменить control PWB
2. Неисправен датчик отработки
3. Неисправность control PWB
2. Замените датчик.
3. Заменить control PWB
4. Очистите драм юнит (инструкция по очистке бункера отработанного тонера)
2. Неисправность панели управления
3. Неисправность control PWB
2. Замените панель.
3. Заменить control PWB
2. Неисправность платы расширения памяти (DIMM)
2. Замените плату расширения (DIMM)
2. Неисправность control PWB
2. Перезагрузите машину кратковременным выключением питания, если ошибка не исчезла, замените control PWB
Все современные копировальные аппараты, мфу и принтеры Kyocera имеют возможность диагностировать все узлы устройства в режиме запуска и во время работы аппарата. По этому, если во время включения или во время работы произошел сбой, то техника Kyocera сможет сообщить о наличии ошибки.
В большинстве случаев у аппаратов Kyocera код ошибки отображается на дисплее, в остальных случаях тип ошибки зависит от последовательности и количества миганий индикаторов.
Если Ваш копировальный аппарат, МФУ или принтер Kyocera выдал на дисплее некий код, то узнать причину, описание возникновения ошибки, а так же в каком узле аппарата стоит искать проблему, Вы можете в этом разделе выбрав интересующую модель из списка.
Но диагностика не решит проблему сбоя аппарата, для этого лучше обратиться к профессиональным и опытным сервисным специалистам компании Kyomart! Позвоните нам по телефону
8 (343) 288-23-45 или отправьте запрос на электронную почту: sales@kyomart.ru , и мы обязательно свяжемся с Вами в кратчайшие сроки.
Processing with the fax software was disabled due to a hardware problem.
Abnormal detection of FAX PWB incompatibility In the initial communication with the FAX PWB, any normal communication command is not transmitted.
For data in which the MAC address is invalid.
Detecting control PWB EEPROM (U17) communication error.
Machine number of main and engine does not match.
Communication error between control PWB and optional paper feeder.
A checksum error occurred with the program of the FAX PWB.
The time is judged to go back based on the comparison of the RTC time and the current time or five years or more have passed.
High-capacity data transfer between the FAX PWB and the control PWB of the machine was not normally performed even if the data transfer was retried the specified times.
The backup data is not retained for file system abnormality of flash memory of the FAX PWB.
The main motor ready input is not given for 2 s during the main motor is ON.
The PF paper feed motor of cassette 2 ready input is not given for 2 s during the PF paper feed motor is ON.
The PF paper feed motor of cassette 3 ready input is not given for 2 s during the PF paper feed motor is ON.
The exposure lamp is not turned on.
After AGC, correct input is not obtained at CCD.
An error code is detected.
The polygon motor ready input is not given for 6 s during the polygon motor is ON.
The fuser temperature does not rise after the fuser heater lamp has been turned on.
Fuser thermistor detects abnormally temperature.
Input from fuser thermistor is 0 (A/D value).
The zero cross signal does not reach the control PWB for specified time.
The waste toner sensor has detected that the waste toner reservoir (drum unit) is full.
A communication error is detected.
A communication error is detected.
Оборудование оснащено функцией самодиагностики. При обнаружении проблемы, аппарат блокируется, на дисплее отображается код вида С#### с указанием характера проблемы. Также появляется сообщение необходимости обслуживания. После устранения проблемы, ошибку можно сбросить тумблером питания, выключив и включив аппарат.
| Код |
Значение |
Описание |
Причина |
Решение |
| C0030 | FAX control PWB system error |
Processing with the fax software was disabled due to a hardware problem. | Defective FAX control PWB. |
Replace the FAX control PWB. |
| C0070 | FAX control PWB incompatible detection Error |
Abnormal detection of FAX control PWB incompatibility In the initial communication with the FAX control PWB, any normal communication command is not transmitted. | Defective fax software. |
Install the fax software. |
| Defective FAX control PWB. |
Replace the FAX control PWB. | |||
| C0100 | Backup memory device error |
Defective flash memory. |
Replace the control PWB. | |
| Defective control PWB. |
Replace the control PWB. | |||
| C0120 | MAC address data error |
Defective flash memory. |
Replace the control PWB. | |
| C0130 | Backup memory read/write error |
Defective flash memory. |
Replace the control PWB. | |
| Defective control PWB. |
Replace the control PWB. | |||
| C0140 | Backup memory data error |
Defective flash memory. |
Replace the control PWB. | |
| Defective control PWB. |
Replace the control PWB. | |||
| C0150 | Control PWB EEPROM error |
Detecting control PWB EEPROM (U17) communication error. | Improper installation control PWB EEPROM (U17). |
Check the installation of the EEPROM (U17) and remedy if necessary. |
| Defective control PWB. |
Replace the control PWB. | |||
| Data damage of control PWB EEPROM (U17). |
Contact the Service Administrative Division. | |||
| C0170 | Billing counting error |
Defective control PWB. |
Replace the control PWB. | |
| Data damage of control PWB EEPROM (U17). |
Contact the Service Administrative Division. | |||
| C0180 | Machine number mismatch |
Machine number of main and engine does not match. | The main PWB or the engine PWB were exchanged. |
U004 Setting the machine number. |
| Data damage of control PWB EEPROM (U17). |
Contact the Service Administrative Division. | |||
| C0420 | Paper feeder communication error |
Communication error between control PWB and optional paper feeder. | Improper installation paper feeder. |
Follow installation instruction carefully again. |
| Defective harness between control PWB (YC30) and paper feeder interface connector, or improper connector insertion. |
Reinsert the connector. Also check for continuity within the connector harness. If none, remedy or replace the harness. | |||
| Defective control PWB. |
Replace the control PWB. | |||
| Defective harness between PF main PWB (YC5) and paper feeder interface connector, or improper connector insertion. |
Reinsert the connector. Also check for continuity within the connector harness. If none, remedy or replace the harness (Refer to the service manual for the paper feeder). | |||
| Defective PF mainPWB. |
Replace the PF main PWB (Refer to the service manual for the paper feeder). | |||
| C0830 | FAX control PWB flash program area checksum error |
A checksum error occurred with the program of the FAX control PWB. | Defective fax software. |
Install the fax software. |
| Defective FAX control PWB. |
Replace the FAX control PWB. | |||
| C0840 | Faults of RTC |
The time is judged to go back based on the comparison of the RTC time and the current time or five years or more have passed. | Defective control PWB. |
Replace the control PWB. |
| The battery is disconnected from the control PWB. |
Check visually and remedy if necessary. | |||
| C0870 | FAX control PWB to control PWB high capacity data transfer problem |
High-capacity data transfer between the FAX control PWB and the control PWB of the machine was not normally performed even if the data transfer was retried the specified times. | Improper installation FAX control PWB. |
Reinstall the FAX control PWB. |
| Defective FAX control PWB or control PWB. |
Replace the FAX control PWB or control PWB and check for correct operation. | |||
| C0920 | Fax file system error |
The backup data is not retained for file system abnormality of flash memory of the FAX control PWB. | Defective FAX control PWB. |
Replace the FAX control PWB. |
| C2000 | Main motor error |
The main motor ready input is not given for 2 s during the main motor is ON. | Defective harness between main motor (CN1) and control PWB (YC17), or improper connector insertion. |
Reinsert the connector. Also check for continuity within the connector harness. If none, remedy or replace the harness. |
| Defective drive transmission system of the main motor. |
Check if the rollers and gears rotate smoothly. If not, grease the bushings and gears. Check for broken gears and replace if any. | |||
| Defective main motor. |
Replace the main motor. | |||
| Defective control PWB. |
Replace the control PWB. | |||
| C2610 | PF paper feed motor error (paper feeder) |
The PF paper feed motor of cassette 2 ready input is not given for 2 s during the PF paper feed motor is ON. | Defective harness between PF paper feed motor and PF main PWB (YC4), or improper connector insertion. |
Reinsert the connector. Also check for continuity within the connector harness. If none, remedy or replace the harness (Refer to the service manual for the paper feeder). |
| Defective PF paper feed motor drive transmission system. |
Check if the gears rotate smoothly. If not, grease the bushings and gears. Check for broken gears and replace if any. | |||
| Defective PF main motor. |
Replace the PF main motor. | |||
| Defective control PWB. |
Replace the control PWB. | |||
| C2620 | PF paper feed motor error (Paper feeder) |
The PF paper feed motor of cassette 3 ready input is not given for 2 s during the PF paper feed motor is ON. | Defective harness between PF paper feed motor and PF main PWB (YC4), or improper connector insertion. |
Reinsert the connector. Also check for continuity within the connector harness. If none, remedy or replace the harness (Refer to the service manual for the paper feeder). |
| Defective PF paper feed motor drive transmission system. |
Check if the gears rotate smoothly. If not, grease the bushings and gears. Check for broken gears and replace if any. | |||
| Defective PF main motor. |
Replace the PF main motor (Refer to the service manual for the paper feeder). | |||
| Defective control PWB. |
Replace the control PWB. | |||
| C3100 | ISU home position error |
Defective FFC between CCD PWB (YC1) and control PWB (YC8). |
Replace the image scanner unit (ISU). | |
| Defective FFC between control PWB (YC6) and scanner PWB (YC103), or improper FFC insertion. |
Reinsert the FFC. Also check for continuity within the FFC. If none, remedy or replace the FFC. | |||
| Defective home position sensor. |
Replace the home position sensor. | |||
| Defective harness between ISU motor and scanner PWB (YC104), or improper connector insertion. |
Reinsert the connector. Also check for continuity within the connector harness. If none, remedy or replace the harness. | |||
| Defective ISU motor. |
Replace the ISU motor. | |||
| C3200 | Exposure lamp error |
The exposure lamp is not turned on. | Defective FFC between scanner PWB (YC103) and control PWB (YC6), or improper FFC insertion. |
Reinsert the FFC. Also check for continuity within the FFC. If none, remedy or replace the FFC. |
| Defective FFC between CCD PWB (YC1) and control PWB (YC8). |
Replace the image scanner unit (ISU) (See page 1-5-21). | |||
| Defective harness between CCD PWB (YC3) and LED drive PWB (YC1), or improper connector insertion. |
Reinsert the connector. Also check for continuity within the connector harness. If none, remedy or replace the harness. | |||
| Defective harness between LED drive PWB (YC2) and exposure lamp, or improper connector insertion. |
Reinsert the connector. Also check for continuity within the connector harness. If none, remedy or replace the harness. | |||
| Defective exposure lamp. |
Replace the exposure lamp. | |||
| Defective LED drive PWB. |
Replace the LED drive PWB. | |||
| Defective control PWB. |
Replace the control PWB. | |||
| C3300 | AGC error |
After AGC, correct input is not obtained at CCD. | Defective FFC between CCD PWB (YC1) and control PWB (YC8). |
Replace the image scanner unit (ISU). |
| Defective exposure lamp. |
Replace the exposure lamp. | |||
| Defective CCD PWB. |
Replace the CCD PWB. | |||
| Defective control PWB. |
Replace the control PWB. | |||
| C3500 | CPU — ASIC (CCD PWB) communication error |
An error code is detected. | Defective FFC between CCD PWB (YC1) and control PWB (YC8). |
Replace the image scanner unit (ISU). |
| Defective CCD PWB. |
Replace the CCD PWB. | |||
| Defective control PWB. |
Replace the control PWB. | |||
| C4000 | Polygon motor (laser scanner unit) error |
The polygon motor ready input is not given for 6 s during the polygon motor is ON. | Defective harness between polygon motor and control PWB (YC10), or improper connector insertion. |
Reinsert the connector. Also check for continuity within the connector harness. If none, remedy or replace the harness. |
| Defective laser scanner unit. |
Replace the laser scanner unit. | |||
| Defective control PWB. |
Replace the control PWB. | |||
| C4200 | BD error (laser scanner unit) error |
BD sensor does not detect laser beam due to condensation on the polygon mirror. |
Turn machine power off for at least 30 minutes, then turn machine on again. If not cured, replace the laser scanner unit. | |
| Defective laser scanner unit. |
Replace the laser scanner unit. | |||
| Defective control PWB. |
Replace the control PWB. | |||
| C6000 | Broken Fuser heater wire |
The fuser temperature does not rise after the Fuser heater has been turned on. | Poor contact in the fuser thermistor connector terminals. |
Reinsert the connector. |
| Poor contact in the Fuser heater connector terminals. |
Reinsert the connector. | |||
| Fuser thermistor installed incorrectly. |
Replace the fuser unit. | |||
| Fuser thermal cutout triggered. |
Replace the fuser unit. | |||
| Fuser heater installed incorrectly. |
Replace the fuser unit. | |||
| Broken Fuser heater wire. |
Replace the fuser unit. | |||
| C6020 | Abnormally high fuser thermistor temperature |
Fuser thermistor detects abnormally temperature. | Shorted fuser thermistor. |
Replace the fuser unit. |
| Defective control PWB. |
Replace the control PWB. | |||
| C6030 | Broken fuser thermistor wire |
Input from fuser thermistor is 0 (A/D value). | Poor contact in the fuser thermistor connector terminals. |
Reinsert the connector. |
| Broken fuser thermistor wire. |
Replace the fuser unit. | |||
| Fuser thermistor installed incorrectly. |
Replace the fuser unit. | |||
| Fuser thermal cutout triggered. |
Replace the fuser unit. | |||
| Fuser heater installed incorrectly. |
Replace the fuser unit. | |||
| Broken Fuser heater wire. |
Replace the fuser unit. | |||
| C6400 | Zero cross signal error |
The zero cross signal does not reach the control PWB for specified time. | Defective harness between high voltage PWB (YC202) and control PWB (YC23), or improper connector insertion. |
Reinsert the connector. Also check for continuity within the connector harness. If none, remedy or replace the harness (See page 1-5-37). |
| Defective connection between power source PWB (YC103) and high voltage PWB (YC201). |
Reinsert the connector. | |||
| Defective power source PWB. |
Replace the power source PWB. | |||
| Defective control PWB. |
Replace the control PWB. | |||
| C7990 | Waste toner full |
The waste toner sensor has detected that the waste toner reservoir (drum unit) is full. | Waste toner reservoir (drum unit) is full. |
Turn the power switch off/on to restart the machine. If the error is not resolved, replace the drum unit. |
| Defective waste toner sensor. |
Replace the waste toner sensor. | |||
| Defective control PWB. |
Replace the control PWB. | |||
| F000 | Control PWB — Operation panel PWB communication error |
Defective harness between operation panel PWB (YC1) and control PWB (YC7), or improper connector insertion. |
Reinsert the connector. Also check for continuity within the connector harness. If none, remedy or replace the harness. | |
| Defective operation panel PWB. |
Replace the operation panel PWB. | |||
| Defective control PWB. |
Replace the control PWB. | |||
| F020 | Control PWB RAM checksum error |
Defective main memory (RAM) on the control PWB. |
Turn the power switch off/on to restart the machine. If the error is not resolved, replace control PWB. | |
| Defective expanded memory (DIMM). |
Replace the expanded memory (DIMM). | |||
| F040 | Control PWB engine communication error |
A communication error is detected. | Defective control PWB. |
Turn the power switch off/on to restart the machine. If the error is not resolved, replace control PWB. |
| F041 | Control PWB — scanner PWB communication error |
A communication error is detected. | Defective control PWB or scanner PWB. |
Turn the power switch off/on to restart the machine. If the error is not resolved, replace control PWB or scanner PWB. |
| F050 | Control PWB engine checksum error |
Some error may have occurred when downloading the firmware of the control PWB. |
Download the firmware of the control PWB again. | |
| Defective control PWB. |
Turn the power switch off/on to restart the machine. If the error is not resolved, replace control PWB. | |||
| F186 | Control PWB video data control error |
Defective control PWB. |
Turn the power switch off/on to restart the machine. If the error is not resolved, replace control PWB. |
-
Contents
-
Table of Contents
-
Troubleshooting
-
Bookmarks
Quick Links
Related Manuals for Kyocera FS-1030D
Summary of Contents for Kyocera FS-1030D
-
Page 1: Operation Guide
FS-1030D Operation Guide…
-
Page 3: Table Of Contents
Prolonged Non-Use and Moving the Printer ……..
-
Page 4
OPERATION GUIDE… -
Page 5: Legal And Safety Information
Copying or other reproduction of all or part of this guide, any copyrightable subject matter without the prior written consent of Kyocera Mita Corporation is prohibited. Any copies made of all or part of this guide, any copyrightable subject must contain the same copyright notice as the material from which the copying is done.
-
Page 6
License Agreements IBM Program License Agreement This product was developed using the Tornado™ Real Time Operating System and Tools from Wind River Systems. This product contains UFST™ and MicroType Inc. THE DEVICE YOU HAVE PURCHASED CONTAINS ONE OR MORE SOFTWARE PROGRAMS (“PROGRAMS”) WHICH BELONG TO INTERNATIONAL BUSINESS MACHINES CORPORATION (“IBM”). -
Page 7
Province of Ontario. Otherwise, this license is governed by the laws of the country in which you acquired the Program. All resident fonts in this printer are licensed from Monotype Imaging Inc. Helvetica, Palatino and Times are registered trademarks of Linotype-Hell AG. -
Page 8
Monotype Imaging License Agreement “Software” shall mean the digitally encoded, machine readable, scalable outline data as encoded in a special format as well as the UFST Software. You agree to accept a non-exclusive license to use the Software to reproduce and display weights, styles and versions of letters, numerals, characters and symbols (“Typefaces”) solely for your own customary business or personal purposes at the address stated on the registration card you return to Monotype Imaging. -
Page 9
Compliance and Conformity FCC statement (for users in the United States) OPERATION GUIDE IN NO EVENT WILL MONOTYPE IMAGING BE LIABLE FOR LOST PROFITS, LOST DATA, OR ANY OTHER INCIDENTAL OR CONSEQUENTIAL DAMAGES, OR ANY DAMAGES CAUSED BY ABUSE OR MISAPPLICATION OF THE SOFTWARE AND TYPEFACES. -
Page 10: Precautions For Use
Shielded circular cables should be used for interfacing with the computer. Any modifications without prior permission of Kyocera may cause harmful interference. If any modifications or changes are made to this equipment without prior permission of Kyocera, Kyocera as the manufacturer does not guarantee the compliance with the FCC Rules.
-
Page 11: Caution Labels
To minimize the concentration of ozone gas to less than 0.1 ppm, we recommend you not to install the printer in a confined area where ventilation is blocked. Label inside the machine (Laser radiation warning) For Europe, Asia, For U.S.A.
-
Page 12
Manufacturer’s address: 704-19 Nojino, Tamaki-Cho, Watarai-Gun, Mie- Ken 519-0497, Japan Declares that the product: Product name: Page Printer Model number: FS-1030D (as tested with the enhancement optional unit: PF-17 and IB-21E) Conforms to the following product specifications. EN 55 022:1998+A1:2000+A2:2003 Class B… -
Page 13
Model number: FS-1030D (as tested with the enhancement optional unit: PF-17 and IB-21E) Description of device: This page printer model FS-1030D is 22-ppm; A4 size and utilized plain paper; laser; dry toner etc. The printer can be equipped with the optional paper feeder model PF-17. -
Page 14: Energy Star Program
Maschinenlärminformations-Verordnung 3. GPSGV: Der höchste Schalldruckpegel beträgt 70 dB (A) oder weniger gemäß EN ISO 7779. Kyocera Mita will not be liable to customers or any other person or entity for any loss or damage caused or alleged to be caused directly or indirectly…
-
Page 15
Group for Energy Efficient Appliances (GEEA) Please read this Operation Guide before using the machine. Keep it close to the machine for easy reference. Symbols OPERATION GUIDE The goal of GEEA is efficient use of energy. This product has a high- efficiency profile and meets the criteria for receiving the GEEA-Label. -
Page 16: Installation Precautions
Installation Precautions Environment The following symbols indicate that the related section includes information on prohibited actions. Specifics of the prohibited action are indicated inside the symbol. [Warning of prohibited action] [Disassembly prohibited] The following symbols indicate that the related section includes information on actions which must be performed.
-
Page 17: Other Precautions
During printing, some ozone is released, but the amount does not cause any ill effect to one’s health. If, however, the printer is used over a long period of time in a poorly ventilated room or when printing an extremely large number of copies, the smell may become unpleasant.
-
Page 18
Power Supply/Grounding the Machine Other Precautions Handling of Plastic Bags WARNING: Do not use a power supply with a voltage other than that specified. Avoid multiple connections in the same outlet. These types of situations present a danger of fire or electrical shock. Plug the power cord securely into the outlet. -
Page 19
Precautions for Use Cautions when Using the Machine WARNING: Do not place metallic objects or containers with water (flower vases, flower pots, cups, etc.) on or near the machine. This situation presents a danger of fire or electrical shock should they fall inside. -
Page 20
CAUTION Do not pull the power cord when removing it from the outlet. If the power cord is pulled, the wires may become broken and there is a danger of fire or electrical shock. (Always grasp the power plug when removing the power cord from the outlet.) Always remove the power plug from the outlet when moving the machine. -
Page 21
Cautions when Handling Consumables Other Precautions OPERATION GUIDE CAUTION Use of controls or adjustments or performance of procedures other than those specified herein may result in hazardous radiation exposure. CAUTION Do not attempt to incinerate the Toner Container. Dangerous sparks may cause burns. Keep the Toner Container out of the reach of children. -
Page 22
Chapter 2 — Loading Paper This chapter explains on loading paper. Chapter 3 — Connecting and Printing This chapter explains on setting the printer up ready for use, and how to print from your workstation. Chapter 4 — Maintenance This chapter explains how to replace the toner container and how to care for your printer. -
Page 23
35 for information. IMPORTANT: Ensure paper is not stapled and clips are removed. CAUTION: Do not attempt to incinerate the toner container. Dangerous sparks may cause burns. WARNING: Keep the plastic bags that are used with the printer away from children. -
Page 24
xxii OPERATION GUIDE… -
Page 25: Machine Parts
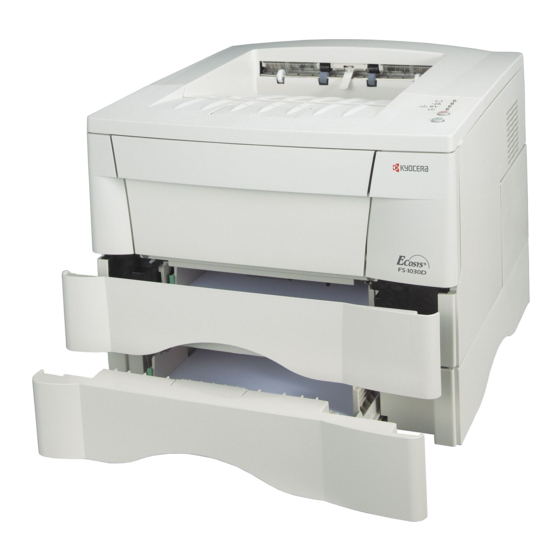
Paper Stopper Top Cover MP Tray Cassette Front Cover OPERATION GUIDE 1 Machine Parts Output Tray Option Interface Slot Cover Side Cover USB Interface Connector Operation Panel Ready Indicator Data Indicator Attention Indicator Toner Indicator Cancel Key GO Key Power Rear Cover Switch Power Cord…
-
Page 26: Indicators
There are four indicators located on the top right of the printer. The indicators are used to identify the status of the printer at any time. To identify the printer status, check the indicators on the printer and then refer to the table below.
-
Page 27: Keys
Keys Refer to the following table for the name and description of the basic functions of each key. Status Cancel At Ready At Error After Power OPERATION GUIDE Operation Press for 1 second or more Press momentarily Press for 3 to 10 seconds Press for 10 seconds or more Press momentarily Press until the…
-
Page 28
Machine Parts OPERATION GUIDE… -
Page 29: Loading Paper
MP Tray 50 sheets (80 g/m 60 to 163 g/m A4, B5 (JIS), A5, Folio, Legal, Letter, Oficio II, Statement, Executive, A6, B6, B5 (ISO), Envelope C5, Envelope #10, Envelope #9, Envelope #6, Envelope Monarch, Envelope DL, 16K, Other 70 × 148 to 216 × 356mm (2.8 × 5.8″ to 8.5 ×…
-
Page 30: Preparing The Paper
IMPORTANT: Ensure paper is not stapled and clips are removed. Pull the cassette completely out of the printer. IMPORTANT: When pulling the cassette out of the printer, ensure it is supported and does not fall out. Adjust the paper length guide to the paper size required.
-
Page 31
Do not load paper above the triangle mark located on the width guide. Ensure the side to be printed is facing down and the paper is not folded, curled, or damaged. Push the cassette back into the printer until it stops. -
Page 32: Mp Tray
MP Tray Paper placed on the MP tray is automatically fed and overrides the cassette. Open the MP tray towards you until it stops. Pull out the subtray and unfold the flap. Adjust the paper width guides and slide the paper into the tray as far as it will go.
-
Page 33
After use, close the flap on the subtray, then push in the subtray and close the MP tray. NOTE: Be careful not to push the tray back into the printer with the subtray folded out horizontally as shown in the figure. OPERATION GUIDE… -
Page 34
Loading Paper OPERATION GUIDE… -
Page 35: Connecting And Printing
USB Interface Connector Parallel Interface Connector Connections Connecting the USB Cable OPERATION GUIDE 3 Connecting and Printing Connect the USB cable (not included) to the USB Interface Connector. NOTE: Use a USB cable with a rectangular Type A plug and a square Type B plug.
-
Page 36: Connecting The Parallel Cable
Connect the other end of the printer cable to the computer’s parallel interface connector. Install the printer close to an AC wall outlet. If an extension cord is used, the total length of the power cord plus extension should be 5 meters (16 feet) or less.
-
Page 37: Loading Software
When the printer is first switched on after toner installation, there will be a delay of approximately 15 minutes before the printer gets ready to print. Once the indicator lights, printer installation is complete.
-
Page 38: Printing
Ensure the paper required is loaded in the printer. From the application File menu, select Print. The Print dialog box displays. Select the drop down list of printer names. All the printers installed are listed. Select the FS-1030D. Select the options required, enter the number of copies required and if printing more than one set, select Collate.
-
Page 39: Maintenance
Cleaning Tasks The printer should be cleaned on a regular basis to ensure optimum performance. Use a clean, lint free cloth to clean dust and dirt from the printer. Process Unit The process unit should be removed to allow for printer cleaning tasks. The charger…
-
Page 40: Toner Container
Toner Container To replace the toner container use the instructions below. CAUTION: Do not attempt to incinerate the toner container. Dangerous sparks may cause burns. Do not attempt to force open or destroy the toner container. Open the top cover. Turn lock lever A to the unlock position, push lock lever B to the right and pull out the toner…
-
Page 41
OPERATION GUIDE Install the new toner container in the printer. Push firmly on the top of the container at the positions marked PUSH HERE, until you hear a click. Turn lock lever A to the lock position and close the top cover. -
Page 42: Cleaning The Printer
Cleaning the Printer To avoid print quality problems, the interior of the printer must be cleaned with every toner container replacement. Open the top cover and front cover. Lift the process unit together with the toner container out of the printer.
-
Page 43
(CLEANER HOME POSITION When cleaning is complete, return the process unit to its position, aligning the guides at both ends with the slots in the printer. Close the front cover and top cover. -
Page 44: Prolonged Non-Use And Moving The Printer
Prolonged Non-Use and Moving the Printer Prolonged Non-use Moving the Printer If you ever leave the printer unused for a long period of time, remove the power cord from the wall outlet. We recommend you consult with your dealer about the additional actions you should take to avoid possible damage that may occur when the printer is used next time.
-
Page 45: Troubleshooting
OPERATION GUIDE 5 Troubleshooting The table below provides basic solutions for problems you may encounter with the printer. We suggest you consult this table to troubleshoot the problems before calling for service. Check Items Check the indicator.
-
Page 46: Print Quality Problems
Gray background Dirt on the top edge or back of the paper The printer will stop when a paper jam occurs in the printer or if paper is misfed. The printer will go offline and the attention indicator ( flash.
-
Page 47: Output Tray And Rear Cover
Check to see if paper is loaded correctly. If not, reload the paper. Push the cassette back in securely. Open and close the top cover to clear the error. The printer warms up and resumes printing. Remove the paper from the MP tray.
-
Page 48
Open the top cover and front cover. Lift the process unit together with the toner container out of the printer. NOTE: The drum in process unit is sensitive to light. Never expose the process unit to light for more than five minutes. -
Page 49
Close the front cover and top cover. Reload the MP tray. The printer warms up and resumes printing. When a paper jam occurs in the duplex section, clear it using the following procedure. Open the rear cover and remove the jammed paper as shown in the figure. -
Page 50
Insert the cassette into the slot in the printer. Open and close the printer’s top cover to clear the error. The printer then automatically warms up and resumes printing. Open the top cover and front cover. -
Page 51
If it has not be fed as far as the metal registration roller, remove the paper from the MP tray side. Insert the process unit together with the toner container, back machine. Close the front cover and top cover. The printer warms up and resumes printing. -
Page 52
Troubleshooting OPERATION GUIDE… -
Page 53: Options
Printer OPERATION GUIDE 6 Options The FS-1030D printer has the following options available to satisfy your printing requirements. For instructions on installing individual options, refer to the documentation included with the option. Some options are explained in the following sections.
-
Page 54: Expansion Memory
Expansion Memory Installing the DIMM To expand the printer memory for more complex print jobs and faster print speed, you can plug in optional memory modules (DIMM) in the memory slot provided on the printer main controller board. You can select additional memory modules from 64, 128, or 256MB.
-
Page 55: Setting The Printer Driver
Click the Windows Start button, and then click Printers and Faxes. Right click the Kyocera Mita FS-1030D KX icon, and click Properties. The Properties dialog box will open. Click the Device Settings tab. Enter the total memory size installed to the printer (up to 288MB) in the…
-
Page 56: Compactflash (Cf) Card
CompactFlash (CF) Card The printer is equipped with a slot for a CompactFlash card with the maximum size of 256MB. A CompactFlash card is useful for storing fonts, macros, and overlays. You can use the IC Link for Windows utility to download fonts, etc., to a CompactFlash card.
-
Page 57: Network Interface Card (Ib-21E)
Windows, Macintosh, UNIX, NetWare, etc. NOTE: If the Serial Interface Board is installed, remove it to use the Network Interface Card. Turn off the printer and disconnect the power cord and printer cable. Remove the option interface slot cover. Insert the Network Interface Card and secure it with the screws removed in step 2.
-
Page 58
Options OPERATION GUIDE… -
Page 59: Specifications
250 sheets (80g/m ), 200 sheets (duplex printing) 10 seconds or less Fast 1200 mode 600 dpi (vertical and horizontal) with KIR (Kyocera Image Refinement) EcoPrint mode More than 100,000 pages (with 5% print coverage) Average 2,000 pages, Maximum 20,000 pages…
-
Page 60
Item Memory Standard Maximum Interfaces Parallel Option Operating Environment Temperature Relative Humidity Altitude Illumination Dimensions (W) × (H) × (D) Weight Operating noise (in accordance with ISO 7779 [Bystander Position, sound pressure level at the front]) Description 32MB 288MB 1 (IEEE 1284) 1 (Full-Speed USB) IB-11: Serial interface board IB-21E: Network interface card (10BASE-T/100BASE-TX) -
Page 61
Index Attention indicator Cancel key Cassette paper length guide paper size stopper triangle mark width guides Caution labels CD-ROM Cleaning charger cleaner lint free cloth process unit registration roller transfer roller CompactFlash card 29, Data indicator DIMM socket Duplexer front cover rear cover Envelope GO key… -
Page 62
Paper Type Parallel interface connector Parallel interface connector Power connecting cord connector switch Precautions for use xvii Printer cable Process unit charger cleaner charger wire cleaner home position drum Ready indicator Serial interface board Service status page Sleep mode Specifications… -
Page 65
©2005 is a trademark of Kyocera Corporation… -
Page 66
Rev. 1.2 2006.1…
-
Contents
-
Table of Contents
-
Troubleshooting
-
Bookmarks
Quick Links
Related Manuals for Kyocera FS-1030D
Summary of Contents for Kyocera FS-1030D
-
Page 1: Operation Guide
FS-1030D Operation Guide…
-
Page 3: Table Of Contents
Prolonged Non-Use and Moving the Printer ……..
-
Page 4
OPERATION GUIDE… -
Page 5: Legal And Safety Information
Copying or other reproduction of all or part of this guide, any copyrightable subject matter without the prior written consent of Kyocera Mita Corporation is prohibited. Any copies made of all or part of this guide, any copyrightable subject must contain the same copyright notice as the material from which the copying is done.
-
Page 6
License Agreements IBM Program License Agreement This product was developed using the Tornado™ Real Time Operating System and Tools from Wind River Systems. This product contains UFST™ and MicroType Inc. THE DEVICE YOU HAVE PURCHASED CONTAINS ONE OR MORE SOFTWARE PROGRAMS (“PROGRAMS”) WHICH BELONG TO INTERNATIONAL BUSINESS MACHINES CORPORATION (“IBM”). -
Page 7
Province of Ontario. Otherwise, this license is governed by the laws of the country in which you acquired the Program. All resident fonts in this printer are licensed from Monotype Imaging Inc. Helvetica, Palatino and Times are registered trademarks of Linotype-Hell AG. -
Page 8
Monotype Imaging License Agreement “Software” shall mean the digitally encoded, machine readable, scalable outline data as encoded in a special format as well as the UFST Software. You agree to accept a non-exclusive license to use the Software to reproduce and display weights, styles and versions of letters, numerals, characters and symbols (“Typefaces”) solely for your own customary business or personal purposes at the address stated on the registration card you return to Monotype Imaging. -
Page 9
Compliance and Conformity FCC statement (for users in the United States) OPERATION GUIDE IN NO EVENT WILL MONOTYPE IMAGING BE LIABLE FOR LOST PROFITS, LOST DATA, OR ANY OTHER INCIDENTAL OR CONSEQUENTIAL DAMAGES, OR ANY DAMAGES CAUSED BY ABUSE OR MISAPPLICATION OF THE SOFTWARE AND TYPEFACES. -
Page 10: Precautions For Use
Shielded circular cables should be used for interfacing with the computer. Any modifications without prior permission of Kyocera may cause harmful interference. If any modifications or changes are made to this equipment without prior permission of Kyocera, Kyocera as the manufacturer does not guarantee the compliance with the FCC Rules.
-
Page 11: Caution Labels
To minimize the concentration of ozone gas to less than 0.1 ppm, we recommend you not to install the printer in a confined area where ventilation is blocked. Label inside the machine (Laser radiation warning) For Europe, Asia, For U.S.A.
-
Page 12
Manufacturer’s address: 704-19 Nojino, Tamaki-Cho, Watarai-Gun, Mie- Ken 519-0497, Japan Declares that the product: Product name: Page Printer Model number: FS-1030D (as tested with the enhancement optional unit: PF-17 and IB-21E) Conforms to the following product specifications. EN 55 022:1998+A1:2000+A2:2003 Class B… -
Page 13
Model number: FS-1030D (as tested with the enhancement optional unit: PF-17 and IB-21E) Description of device: This page printer model FS-1030D is 22-ppm; A4 size and utilized plain paper; laser; dry toner etc. The printer can be equipped with the optional paper feeder model PF-17. -
Page 14: Energy Star Program
Maschinenlärminformations-Verordnung 3. GPSGV: Der höchste Schalldruckpegel beträgt 70 dB (A) oder weniger gemäß EN ISO 7779. Kyocera Mita will not be liable to customers or any other person or entity for any loss or damage caused or alleged to be caused directly or indirectly…
-
Page 15
Group for Energy Efficient Appliances (GEEA) Please read this Operation Guide before using the machine. Keep it close to the machine for easy reference. Symbols OPERATION GUIDE The goal of GEEA is efficient use of energy. This product has a high- efficiency profile and meets the criteria for receiving the GEEA-Label. -
Page 16: Installation Precautions
Installation Precautions Environment The following symbols indicate that the related section includes information on prohibited actions. Specifics of the prohibited action are indicated inside the symbol. [Warning of prohibited action] [Disassembly prohibited] The following symbols indicate that the related section includes information on actions which must be performed.
-
Page 17: Other Precautions
During printing, some ozone is released, but the amount does not cause any ill effect to one’s health. If, however, the printer is used over a long period of time in a poorly ventilated room or when printing an extremely large number of copies, the smell may become unpleasant.
-
Page 18
Power Supply/Grounding the Machine Other Precautions Handling of Plastic Bags WARNING: Do not use a power supply with a voltage other than that specified. Avoid multiple connections in the same outlet. These types of situations present a danger of fire or electrical shock. Plug the power cord securely into the outlet. -
Page 19
Precautions for Use Cautions when Using the Machine WARNING: Do not place metallic objects or containers with water (flower vases, flower pots, cups, etc.) on or near the machine. This situation presents a danger of fire or electrical shock should they fall inside. -
Page 20
CAUTION Do not pull the power cord when removing it from the outlet. If the power cord is pulled, the wires may become broken and there is a danger of fire or electrical shock. (Always grasp the power plug when removing the power cord from the outlet.) Always remove the power plug from the outlet when moving the machine. -
Page 21
Cautions when Handling Consumables Other Precautions OPERATION GUIDE CAUTION Use of controls or adjustments or performance of procedures other than those specified herein may result in hazardous radiation exposure. CAUTION Do not attempt to incinerate the Toner Container. Dangerous sparks may cause burns. Keep the Toner Container out of the reach of children. -
Page 22
Chapter 2 — Loading Paper This chapter explains on loading paper. Chapter 3 — Connecting and Printing This chapter explains on setting the printer up ready for use, and how to print from your workstation. Chapter 4 — Maintenance This chapter explains how to replace the toner container and how to care for your printer. -
Page 23
35 for information. IMPORTANT: Ensure paper is not stapled and clips are removed. CAUTION: Do not attempt to incinerate the toner container. Dangerous sparks may cause burns. WARNING: Keep the plastic bags that are used with the printer away from children. -
Page 24
xxii OPERATION GUIDE… -
Page 25: Machine Parts
Paper Stopper Top Cover MP Tray Cassette Front Cover OPERATION GUIDE 1 Machine Parts Output Tray Option Interface Slot Cover Side Cover USB Interface Connector Operation Panel Ready Indicator Data Indicator Attention Indicator Toner Indicator Cancel Key GO Key Power Rear Cover Switch Power Cord…
-
Page 26: Indicators
There are four indicators located on the top right of the printer. The indicators are used to identify the status of the printer at any time. To identify the printer status, check the indicators on the printer and then refer to the table below.
-
Page 27: Keys
Keys Refer to the following table for the name and description of the basic functions of each key. Status Cancel At Ready At Error After Power OPERATION GUIDE Operation Press for 1 second or more Press momentarily Press for 3 to 10 seconds Press for 10 seconds or more Press momentarily Press until the…
-
Page 28
Machine Parts OPERATION GUIDE… -
Page 29: Loading Paper
MP Tray 50 sheets (80 g/m 60 to 163 g/m A4, B5 (JIS), A5, Folio, Legal, Letter, Oficio II, Statement, Executive, A6, B6, B5 (ISO), Envelope C5, Envelope #10, Envelope #9, Envelope #6, Envelope Monarch, Envelope DL, 16K, Other 70 × 148 to 216 × 356mm (2.8 × 5.8″ to 8.5 ×…
-
Page 30: Preparing The Paper
IMPORTANT: Ensure paper is not stapled and clips are removed. Pull the cassette completely out of the printer. IMPORTANT: When pulling the cassette out of the printer, ensure it is supported and does not fall out. Adjust the paper length guide to the paper size required.
-
Page 31
Do not load paper above the triangle mark located on the width guide. Ensure the side to be printed is facing down and the paper is not folded, curled, or damaged. Push the cassette back into the printer until it stops. -
Page 32: Mp Tray
MP Tray Paper placed on the MP tray is automatically fed and overrides the cassette. Open the MP tray towards you until it stops. Pull out the subtray and unfold the flap. Adjust the paper width guides and slide the paper into the tray as far as it will go.
-
Page 33
After use, close the flap on the subtray, then push in the subtray and close the MP tray. NOTE: Be careful not to push the tray back into the printer with the subtray folded out horizontally as shown in the figure. OPERATION GUIDE… -
Page 34
Loading Paper OPERATION GUIDE… -
Page 35: Connecting And Printing
USB Interface Connector Parallel Interface Connector Connections Connecting the USB Cable OPERATION GUIDE 3 Connecting and Printing Connect the USB cable (not included) to the USB Interface Connector. NOTE: Use a USB cable with a rectangular Type A plug and a square Type B plug.
-
Page 36: Connecting The Parallel Cable
Connect the other end of the printer cable to the computer’s parallel interface connector. Install the printer close to an AC wall outlet. If an extension cord is used, the total length of the power cord plus extension should be 5 meters (16 feet) or less.
-
Page 37: Loading Software
When the printer is first switched on after toner installation, there will be a delay of approximately 15 minutes before the printer gets ready to print. Once the indicator lights, printer installation is complete.
-
Page 38: Printing
Ensure the paper required is loaded in the printer. From the application File menu, select Print. The Print dialog box displays. Select the drop down list of printer names. All the printers installed are listed. Select the FS-1030D. Select the options required, enter the number of copies required and if printing more than one set, select Collate.
-
Page 39: Maintenance
Cleaning Tasks The printer should be cleaned on a regular basis to ensure optimum performance. Use a clean, lint free cloth to clean dust and dirt from the printer. Process Unit The process unit should be removed to allow for printer cleaning tasks. The charger…
-
Page 40: Toner Container
Toner Container To replace the toner container use the instructions below. CAUTION: Do not attempt to incinerate the toner container. Dangerous sparks may cause burns. Do not attempt to force open or destroy the toner container. Open the top cover. Turn lock lever A to the unlock position, push lock lever B to the right and pull out the toner…
-
Page 41
OPERATION GUIDE Install the new toner container in the printer. Push firmly on the top of the container at the positions marked PUSH HERE, until you hear a click. Turn lock lever A to the lock position and close the top cover. -
Page 42: Cleaning The Printer
Cleaning the Printer To avoid print quality problems, the interior of the printer must be cleaned with every toner container replacement. Open the top cover and front cover. Lift the process unit together with the toner container out of the printer.
-
Page 43
(CLEANER HOME POSITION When cleaning is complete, return the process unit to its position, aligning the guides at both ends with the slots in the printer. Close the front cover and top cover. -
Page 44: Prolonged Non-Use And Moving The Printer
Prolonged Non-Use and Moving the Printer Prolonged Non-use Moving the Printer If you ever leave the printer unused for a long period of time, remove the power cord from the wall outlet. We recommend you consult with your dealer about the additional actions you should take to avoid possible damage that may occur when the printer is used next time.
-
Page 45: Troubleshooting
OPERATION GUIDE 5 Troubleshooting The table below provides basic solutions for problems you may encounter with the printer. We suggest you consult this table to troubleshoot the problems before calling for service. Check Items Check the indicator.
-
Page 46: Print Quality Problems
Gray background Dirt on the top edge or back of the paper The printer will stop when a paper jam occurs in the printer or if paper is misfed. The printer will go offline and the attention indicator ( flash.
-
Page 47: Output Tray And Rear Cover
Check to see if paper is loaded correctly. If not, reload the paper. Push the cassette back in securely. Open and close the top cover to clear the error. The printer warms up and resumes printing. Remove the paper from the MP tray.
-
Page 48
Open the top cover and front cover. Lift the process unit together with the toner container out of the printer. NOTE: The drum in process unit is sensitive to light. Never expose the process unit to light for more than five minutes. -
Page 49
Close the front cover and top cover. Reload the MP tray. The printer warms up and resumes printing. When a paper jam occurs in the duplex section, clear it using the following procedure. Open the rear cover and remove the jammed paper as shown in the figure. -
Page 50
Insert the cassette into the slot in the printer. Open and close the printer’s top cover to clear the error. The printer then automatically warms up and resumes printing. Open the top cover and front cover. -
Page 51
If it has not be fed as far as the metal registration roller, remove the paper from the MP tray side. Insert the process unit together with the toner container, back machine. Close the front cover and top cover. The printer warms up and resumes printing. -
Page 52
Troubleshooting OPERATION GUIDE… -
Page 53: Options
Printer OPERATION GUIDE 6 Options The FS-1030D printer has the following options available to satisfy your printing requirements. For instructions on installing individual options, refer to the documentation included with the option. Some options are explained in the following sections.
-
Page 54: Expansion Memory
Expansion Memory Installing the DIMM To expand the printer memory for more complex print jobs and faster print speed, you can plug in optional memory modules (DIMM) in the memory slot provided on the printer main controller board. You can select additional memory modules from 64, 128, or 256MB.
-
Page 55: Setting The Printer Driver
Click the Windows Start button, and then click Printers and Faxes. Right click the Kyocera Mita FS-1030D KX icon, and click Properties. The Properties dialog box will open. Click the Device Settings tab. Enter the total memory size installed to the printer (up to 288MB) in the…
-
Page 56: Compactflash (Cf) Card
CompactFlash (CF) Card The printer is equipped with a slot for a CompactFlash card with the maximum size of 256MB. A CompactFlash card is useful for storing fonts, macros, and overlays. You can use the IC Link for Windows utility to download fonts, etc., to a CompactFlash card.
-
Page 57: Network Interface Card (Ib-21E)
Windows, Macintosh, UNIX, NetWare, etc. NOTE: If the Serial Interface Board is installed, remove it to use the Network Interface Card. Turn off the printer and disconnect the power cord and printer cable. Remove the option interface slot cover. Insert the Network Interface Card and secure it with the screws removed in step 2.
-
Page 58
Options OPERATION GUIDE… -
Page 59: Specifications
250 sheets (80g/m ), 200 sheets (duplex printing) 10 seconds or less Fast 1200 mode 600 dpi (vertical and horizontal) with KIR (Kyocera Image Refinement) EcoPrint mode More than 100,000 pages (with 5% print coverage) Average 2,000 pages, Maximum 20,000 pages…
-
Page 60
Item Memory Standard Maximum Interfaces Parallel Option Operating Environment Temperature Relative Humidity Altitude Illumination Dimensions (W) × (H) × (D) Weight Operating noise (in accordance with ISO 7779 [Bystander Position, sound pressure level at the front]) Description 32MB 288MB 1 (IEEE 1284) 1 (Full-Speed USB) IB-11: Serial interface board IB-21E: Network interface card (10BASE-T/100BASE-TX) -
Page 61
Index Attention indicator Cancel key Cassette paper length guide paper size stopper triangle mark width guides Caution labels CD-ROM Cleaning charger cleaner lint free cloth process unit registration roller transfer roller CompactFlash card 29, Data indicator DIMM socket Duplexer front cover rear cover Envelope GO key… -
Page 62
Paper Type Parallel interface connector Parallel interface connector Power connecting cord connector switch Precautions for use xvii Printer cable Process unit charger cleaner charger wire cleaner home position drum Ready indicator Serial interface board Service status page Sleep mode Specifications… -
Page 65
©2005 is a trademark of Kyocera Corporation… -
Page 66
Rev. 1.2 2006.1…