- Manuals
- Brands
- Saeco Manuals
- Coffee Maker
- Royal OTC SUP060
- Operation and maintenance
-
Contents
-
Table of Contents
-
Troubleshooting
-
Bookmarks
Quick Links
Automatic machine for espresso coffee and hot beverages
ATTENTION: Read this user manual carefully before using the machine.
UK
Related Manuals for Saeco Royal OTC SUP060
Summary of Contents for Saeco Royal OTC SUP060
-
Page 1
Automatic machine for espresso coffee and hot beverages ATTENTION: Read this user manual carefully before using the machine. -
Page 2: Main Parts
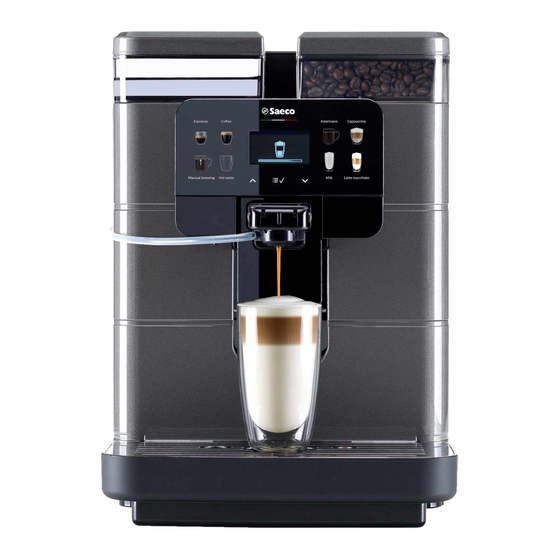
English MAIN PARTS Water tank lid Brew group Water tank Service door Touch control panel Hot water dispensing spout Cappuccinatore compartment cover Cappuccinatore Coffee grounds drawer USB port Full drip tray float Power button Cup holder grill Chassis plug Drip tray Power cord Coffee bean hopper lid Display…
-
Page 3
English SAFETY INSTRUCTIONS Never allow water to The machine may be used come into contact by children older than 8 or with by persons with reduced electrical parts of the physical, mental or sensory machine: danger abilities or lacking sufficient short circuit! experience and/or skills,… -
Page 4
English Power Supply Do not use the power cord to carry or pull the machine. Do not pull out The machine must be the plug by the power connected to the power cord or touch it with wet supply service hands or feet. -
Page 5
English Fire Safety Precautions Do not use open flames and/or incandescent In case of fire, use carbon objects near the machine dioxide (CO2) so as not to damage or extinguishers. Do not use melt the machine housing. water powder extinguishers. Do not use the coffee Suitable Location… -
Page 6
English Cleaning the machine Using Milk Before cleaning Milk must be used and machine, switch OFF (0) stored in accordance with the power button and the the instructions given on remove the plug from the the manufacturer’s original power socket. Wait for the packaging. -
Page 7
English Storing the Machine Only skilled experienced people — with particular reference When the machine will not safety and hygiene — are be used for a long period allowed access of time, turn it off and service area. unplug it from the outlet. Store the machine in a dry place, out of the reach of children. -
Page 8: Table Of Contents
English CONTENTS 9.8 MILK DISPENSING MAIN PARTS 9.9 DISPENSING HOT WATER 1 INTRODUCTION TO THE MANUAL 1.1 PREAMBLE 9.10 ADJUSTING BREWED PRODUCTS 1.2 ICONS USED 9.11 USING THE MACHINE WITH CREDITS 9.12 EMPTYING THE COFFEE GROUNDS 2 INFORMATION ABOUT THE APPLIANCE DRAWER AND DRIP TRAY 2.1 INFORMATION FOR THE MAINTENANCE 10 CLEANING AND MAINTENANCE…
-
Page 9: Introduction To The Manual
This product has been manufactured by SaGa Coffee S.p.A. Preamble and sold under its own responsibility. SaGa Coffee S.p.A. is the guarantor of the product. Saeco is a registered trademark of Koninklijke Philips N.V. and its use is licensed This publication by Koninklijke Philips N.V.
-
Page 10: Icons Used
English Icons Used Various kinds of warnings are contained in this manual to highlight the different hazard or competence levels. Each icon is followed by a message suggesting operating and behaviour procedures and providing useful information for the correct operation of the machine. Warning It is used to highlight danger situations for the persons in charge of using, refilling and servicing the machine.
-
Page 11: Information About The Appliance
English INFORMATION ABOUT THE APPLIANCE The elegant machine housing has been designed for use in Information for the small offices, businesses and institutions. Maintenance Technician Using the machine for any other purpose is considered The appliance must be dangerous and as a misuse. installed well-lit, Misuse voids all forms of…
-
Page 12: Appliance Identification
English Appliance Identification The appliance is identified by the model name and serial number shown on the special plate. The plate contains the following data: • name of the Manufacturer; • marks of conformity; • model; • serial number; • year and month of manufacture; •…
-
Page 13: Technical Specifications
English Technical Specifications Size (w x h x d) 280 x 398 x 460 mm Weight approx. 10 kg Machine housing material Thermoplastic material Power Rating See the data plate Supply Voltage See the data plate Power cord length approx. 1,200 mm Capacity Water tank approx.
-
Page 14: Safety
English SAFETY It is mandatory to: Preamble • check conformity of the power supply; accordance with applicable standards • use original spare parts; regulations, SaGa Coffee has prepared a technical file • carefully read the instructions contained in this manual and relating to the ROYAL machine at its premises, in the attached documents;…
-
Page 15: Operator Requirements
English case failure Maintenance technician malfunctioning, please refer The maintenance technician is the only person authorised to service the machine, start the programming procedures and only qualified perform the adjustment, set up and maintenance operations. personnel of the technical Access to the internal area service.
-
Page 16: Handling And Storage
English HANDLING AND STORAGE Storage operations described in this chapter The machine is packed in cardboard and expanded polystyrene packaging. must performed If the appliance is not immediately installed, it shall be kept exclusively by the service in a sheltered place according to the following instructions: provider or a specialised •…
-
Page 17: Installation
English INSTALLATION Cautions operations described in this chapter The appliance cannot be must performed installed in external areas. exclusively by the service Avoid placing it in areas provider or a specialised where the temperature is technician, shall lower than 2°C or higher organise all the operating than 32°C…
-
Page 18: Unpacking And Positioning
English supporting surface The presence of magnetic must be adequate to bear fields proximity the machine weight and electrical machines which clean. generate interference could cause the electronic Access to the machine and controls of the machine to the plug should be kept malfunction.
-
Page 19
English Cappuccinatore: allows you to dispense milk-based beverages. Water filter: to remove any unpleasant flavours in the water and reduce water hardness. This will improve machine use. Right-hand fitting for Cappuccinatore: it allows you to connect the Cappuccinatore to the milk container on the right-hand side of the machine. -
Page 20: Connection To The Electric Network
English Connection to the Electric Make sure that the power Network cord plug easily This operation must only be reachable after installation. performed by specialised technical personnel or by the service provider. Maintenance Technician, charge of the appliance’s installation, shall make sure that: •…
-
Page 21: Description Of Controls
English DESCRIPTION OF CONTROLS Power button «Coffee» button «Espresso» button “Manual Brewing” button It is located in the lower left part in the rear of the «Hot Water» button machine. If set to the «I» position the machine turns on «Up»…
-
Page 22
English «Latte Macchiato» button When this button is pressed, a Latte Macchiato is brewed. «Milk» button Press this button to start dispensing Frothed Milk. «Down» button Press this button to scroll down the user menu options. Each button is enabled upon re-activating machine… -
Page 23: Supply And Start Up
English SUPPLY AND START UP Coffee Blends The coffee bean hopper may be provided with different • We recommend using fresh, non-oily and medium-ground coffee. safety features according to • Use an espresso coffee blend. the regulations of the country •…
-
Page 24: Filling The Water Tank
English Remove the tank; lift it using the inside handles. If the water tank is not inserted, check that no coffee beans fall into the tank compartment. If this happens, remove them to avoid any malfunctions. Filling the Water Tank Before using the machine for the first time, wash the Rinse and fill it with fresh water;…
-
Page 25: Measuring And Adjusting Water Hardness
English Tech Menu Measuring and Adjusting Settings Water Hardness Statistics Exit Measuring water hardness is very important in order to correctly manage the anti-scale filter and the frequency Select the «SETTINGS» option and press the «OK» button. with which the machine must be descaled. Immerse the water hardness test strip in water for 1 second.
-
Page 26: Water Filter
English Water filter Water is a key element for a good espresso coffee. Therefore, it should always be filtered in a professional manner. This is why all machines can be equipped with a water filter. This filter is easy to use and its sophisticated technology is effective in preventing limescale build-up.
-
Page 27
English Press the «OK» button to enter. Put the filter into the empty tank. Press it to its limit stop. Machine Menu General Menu Display Menu Water Menu Press the «DOWN» button until the «WATER MENU» option is selected. Machine Menu General Menu Display Menu Water Menu… -
Page 28: Coffee Grind Adjustment
English 7.5.1 Replacing the water filter The coffee grinder contains moving parts that may be Replace the water filter as dangerous. Do not insert soon as its capacity drops fingers and/or other to 0% and the filter icon objects. blinks quickly. Turn off the machine by pressing ON/OFF…
-
Page 29: Adjusting The «Aroma» — Amount Of Ground Coffee
English Open the service compartment door and turn the lever by only one notch. Close the door again and brew 1-2 cups of coffee to verify the changes in the grinding degree. Repeat the procedure Open the service compartment door. until you reach the desired grind setting.
-
Page 30: Adjusting The Coffee Dispensing Spout
English Two cups can be placed under the dispensing spout to Adjusting the Coffee brew two cups of coffee at the same time. Dispensing Spout Most of the cups and mugs available on the market can be used with this coffee machine. The height of the dispensing spout can be adjusted to better fit the dimensions of the cups that you wish to use.
-
Page 31: Turning On/Off The Machine
English 7.10 Setting the Language (Upon Before brewing First Use) product and/or when At first start-up, the desired display language of the bringing dispensing messages must be selected and stored. spout back to its normal Language position, ensure that it is ITALIANO ENGLISH correctly positioned.
-
Page 32: Washing The Parts Coming Into Contact With Food
English If the machine fails its first start-up (brewing) make 2 further attempts. At the end of these 3 attempts, if the problem is not solved, let the machine rest for 30 minutes and then try again with 3 brewings. If the problem persists, please contact Customer Service.
-
Page 33: Using The Appliance
English 7.13 Using the Appliance Before using the machine, read this manual carefully and make sure users are familiar with the machine. After the machine has not been used for a certain time, it is recommended to read section “First Use — Use after a Long Period of Inactivity”…
-
Page 34: Programming Menu
English PROGRAMMING MENU Button Description in This chapter contains Programming Mode instructions on how to set Use the buttons described below to scroll the appliance change menus. programming parameters of the appliance. Therefore it is necessary to carefully read it and to understand exact sequence…
-
Page 35: User Programming
English User Programming The PASSWORD will not be requested if set on the The structure of the user menu is indicated in section «Structure of the User Menu». default value (0000). It Section «Description of Messages in the User Menu» describes all options in the user menu.
-
Page 36
PASSWORD, recreate it by entering a PUK code. You have to request the PUK code to the Saeco service centre, who will guide you through the procedure. 8.2.2 Structure of the User Menu The main options of the user menu are:… -
Page 37
English 8.2.3 Description of Messages in the User Menu MENU ITEM Description BREW GROUP CLEAN This function allows the user to wash the brew group using hot water This function allows the user to perform cleaning using the Cappuccinatore hot water CAPP. -
Page 38: Technical Programming
PUK code. You have to the machine has reached request the PUK code to operating temperature. the Saeco service centre, who will guide you through the procedure. menus accessed freely. However, they can be protected via…
-
Page 39
English 8.3.2 Structure of the Technical Menu High This menu allows you to manage certain machine Temperature operation parameters. Range from -5 to +5 The main items of the programming menu are: USER PW TECH. PW MENU ITEM Exit Settings Display Menu Credits Menu Language… -
Page 40
English MENU ITEM Reset errors Exit Water Descaling SINCE LAST SINCE SECOND LAST SINCE THIRD LAST NUMBER OF EXECUTIONS Exit BREW GROUP CLEAN NUMBER OF EXECUTIONS SINCE LAST Exit CAPP. QUICK STANDARD CLEAN QUICK CLEAN Exit SINCE PRODUCTION Exit Exit Exit… -
Page 41
English 8.3.3 Description of Messages in the Technical Menu MENU ITEM Description Settings This menu allows you to access all machine configuration parameters This menu allows you to activate the use of virtual credits, load them onto the machine, reset them and enable Credits Menu the display of the “Ready for use”… -
Page 42
English MENU ITEM Description To activate the acoustic alarms. This function controls the temperature management in the coffee boiler when the Ecomode machine is in the “ready for use” mode. The function is set by default to «OFF». The currently active setting is inside a dotted rectangular box. This way, the coffee boiler is constantly kept at the right dispensing temperature. -
Page 43
TECH. PW NOTE: Enter the value ‘0000’ as password to disable the password. If you forget the PASSWORD, you must start a reset procedure. Please contact Saeco customer service. Warning: The technical menu password also allows you to access the user menu… -
Page 44
English MENU ITEM Description To change the machine water hardness setting. Hardness With the «Hardness» function you can adjust your machine to the level of hardness of the water you use, so that the machine will request descaling at the right time. Measure water hardness as shown in section «Measuring and Adjusting Water Hardness». -
Page 45
English MENU ITEM Description In this section, the user can view the total number of products dispensed since the TOTAL machine was started up. These counters cannot be reset. Espresso Total no. of Espressos dispensed. Espresso x2 Total no. of Espressos x2 dispensed. Coffee Total no. -
Page 46
English MENU ITEM Description Exit This option allows the user to go back to the menu top level CAPP. QUICK This function allows you to view the counters for the performed Cappuccinatore cleaning cycles. STANDARD CLEAN It indicates the performed Cappuccinatore standard clean cycles’ number QUICK CLEAN It indicates the performed Cappuccinatore quick clean cycles’… -
Page 47
English Press the «OK» button to enter. The following screen is 8.3.4 Password setting displayed: TECH. PW The PASSWORD must be set by the service provider in order to prevent access by unauthorised personnel who could change the machine settings and cause malfunctions. To enter the password: You can set two passwords to access the two different Press the «Up»… -
Page 48: Operation And Use
English OPERATION AND USE Warm-up and Rinsing The use by children older Upon start-up, the machine activates the warm-up phase. than 8 years or by persons Wait until it is completed. with reduced physical, mental or sensory abilities or with lack of experience skills allowed, provided that they are…
-
Page 49: Rinse/Self-Cleaning Cycle
English Eco-friendly: Stand-by The cycle can be stopped by pressing the «Espresso» The machine is designed for energy saving. The machine will turn off automatically if it is not used for button. a set period of time after the last dispensing. This period of time is set by the service provider in the technical menu.
-
Page 50: Cappuccinatore
English Cappuccinatore To brew 2 coffees, the machine automatically This chapter explains how to use the milk Cappuccinatore to prepare a cappuccino, a Latte Macchiato or to froth grinds doses milk. Before using correct amount of coffee. Cappuccinatore, clean it thoroughly as described in Brewing two cups of coffee «Cleaning…
-
Page 51: Brewing Cappuccino
English 9.5.1 Installing the Cappuccinatore Brewing Cappuccino Insert the fitting into the Cappuccinatore. The machine can dispense cappuccino quickly and easily with the touch of a button. Danger burning! Dispensing preceded by small jets of hot water. Clean the Cappuccinatore immediately after using it to froth milk (see section «Cappuccinatore Cleaning…
-
Page 52
English Insert the Cappuccinatore into its seat until it locks into To ensure better results place. Check that it cannot be pulled out. when preparing cappuccino, use cold milk. Place the cup under the dispensing spout. Before using Cappuccinatore, clean it as Press the «Cappuccino»… -
Page 53: Brewing Latte Macchiato
English After using the Cappuccinatore, clean it as described in the Insert the Cappuccinatore into its seat until it locks into «Cleaning the Cappuccinatore (After Each Use)» section. place. Check that it cannot be pulled out. Remove the container and clean it if necessary. Brewing Latte Macchiato The machine can dispense Latte Macchiato quickly and easily with the touch of a button.
-
Page 54: Milk Dispensing
English To ensure better results Clean the Cappuccinatore when preparing a Latte immediately after using it Macchiato, use cold milk. to froth milk (see section «Cappuccinatore Cleaning (After Each Use)»). We recommend using tall glasses for this type of preparation, thus properly moving the coffee dispensing spout.
-
Page 55: Dispensing Hot Water
English We recommend using tall glasses for this type of preparation, thus properly moving the coffee dispensing spout. Before using Cappuccinatore, clean it as When the machine is ready, press the «Milk» button to described in the «Cleaning start dispensing the hot milk. The machine prepares the hot milk automatically.
-
Page 56: Adjusting Brewed Products
English Ensure the machine is ready for use before dispensing hot 9.10 Adjusting Brewed Products water. Place a container under the hot water dispensing spout. The machine allows you to adjust the product length according to your needs and to the type of cup used. Adjusting the product length can be performed by the service provider via keypad in visual mode.
-
Page 57: Using The Machine With Credits
English Select “Espresso”. Press the «OK» button to enter. The Press the “OK” button to select “BEVERAGE LENGTH”. machine starts brewing coffee. The following screen is displayed: BEVERAGE LENGTH Press the “DOWN” or “UP” button to select the desired value and then let the bar advance. The number on the side identifies the bar value (in pulses).
-
Page 58: Emptying The Coffee Grounds Drawer And Drip Tray
English In this case, the machine does not allow beverages to be Hot water dispensing is not dispensed. In order to dispense beverages, the coffee grounds drawer must be emptied of used coffee. subject to credit and can Extract the drip tray and the coffee grounds drawer. always performed provided that there is…
-
Page 59
English If the drip tray is inserted without the coffee grounds drawer, the machine will not dispense products. After inserting them, the display shows: The machine is now ready to brew coffee. -
Page 60: Cleaning And Maintenance
English CLEANING AND MAINTENANCE 10.1 General Notes for Correct Before performing Operation maintenance and/or Non-removable cleaning operation, unplug components the power cord. machine itself must be cleaned, when differently specified, only The Manufacturer is not by using cold or lukewarm liable damage water, with a non-abrasive…
-
Page 61: Cleaning And Scheduled Maintenance
English 10.2 Cleaning and Scheduled 10.2.1 Maintenance Schedule Maintenance Operation to be carried out All parts requiring cleaning Drip tray yes — Emptying and cleaning the coffee grounds yes — are easily accessible, so no drawer Cappuccinatore quick clean yes yes — tools are needed.
-
Page 62
English 10.2.3 Cleaning the Water Tank 10.2.4 Cappuccinatore quick clean (After each use) Remove the lid from the water tank. Failure clean Cappuccinatore after use with milk cause proliferation bacteria which may be harmful for the user. The milk circuit must be quickly rinsed after use to always ensure… -
Page 63
English Place a container under the Cappuccinatore spout. The Cappuccinatore quick cleaning cycle can be performed any time by following the procedure below: With the machine on, press the «OK» button. Select «OK» and press the «OK» button. The machine dispenses a quantity of water sufficient to rinse the milk circuit. -
Page 64
Thorough Cleaning of the Cappuccinatore Clean all the Cappuccinatore parts thoroughly every month using the Saeco detergent. The Saeco detergent may be purchased at your local dealer or at authorised service centres. The lack of cleaning before and after each use can affect… -
Page 65
English The following screen is displayed: Wait for the bag content to dissolve completely and then press the «OK» button to confirm. Menu PUT TUBE IN User menu Cappuccinatore Tech Menu Exit IN THE CONTAINER Exit Select the “USER MENU” option and press the “OK” button. -
Page 66
English Rinse the water tank and fill it with fresh drinking water. Here is an explanation of Press the «OK» button to confirm. how to disassemble and INSERT TUBE WITH 1/2 L WATER wash the Cappuccinatore Cappuccinatore with left-hand fitting. If the right-hand fitting is installed, Wash the container used for the solution thoroughly and you can carry out the same… -
Page 67
English Remove the ring from the Cappuccinatore. After washing reassembling Cappuccinatore, it can be installed back machine. 10.2.6 Brew Group Cleaning The brew group should be cleaned whenever the coffee bean hopper is filled, or at least once a week. Turn off the machine by switching the power button to the «O»… -
Page 68
English Remove the brew group by pulling it by the handle and pressing the «PRESS» button. The brew group must be washed with lukewarm water only. Do not use any detergent. Make sure that the hook which locks the brew group is in the correct position. -
Page 69
Extract the drip tray and the coffee grounds drawer. The «Coffee Oil Remover» system has no descaling properties. For descaling, use the Saeco descaling solution and follow the procedure described in the «Descaling» chapter. The wash cycle cannot be interrupted. Do not leave the machine unattended during this operation. -
Page 70
(see Brew Group Clean section “Description messages programming menu”). Before lubricating the brew group, clean it under running water as described in the «Brew Group Cleaning» chapter. Lubricate the brew group guides using Saeco grease only. -
Page 71
English 10.2.9 Descaling Limescale is a natural part of the water used for machine operation. It needs to be removed regularly as it may clog the water and coffee circuit of your appliance. The machine indicates on the display when descaling is required. -
Page 72
English Check that the Cappuccinatore is correctly positioned. This screen will be visible Select «OK» and press the «OK» button. The following screen is displayed: only if the water filter has PLACE A CONTAINER been activated. UNDER ALL THE SPOUTS Remove the tank from the machine and empty it. -
Page 73
English Remove and empty the drip tray. After emptying it put the If you wish to carry out a descaling cycle with the machine drip tray back into place. Press the «OK» button. The already on, you need to access programming as indicated following screen is displayed: in section “Accessing the tech. -
Page 74: Troubleshooting
English TROUBLESHOOTING 11.1 Warning signals This chapter describes all the warning messages that the machine may display to the user and the actions that can and/or must be performed by the user. Warning Signals How to reset the message The machine is starting up. Machine in Stand-by.
-
Page 75
English Warning Signals How to reset the message The machine indicates that after a few cycles it will be necessary to empty the coffee grounds drawer (see section “Emptying the coffee grounds drawer and drip tray”). The machine still allows to dispense products. The credits available to dispense products have run out. -
Page 76
English Warning Signals How to reset the message Empty the coffee grounds drawer. Fill the coffee bean hopper with coffee beans and select one product. ADD BEANS AND SELECT A BEVERAGE Fill the water tank. Insert the brew group into its seat. Turn off the machine. -
Page 77: Problems — Causes — Solutions
English 11.2 Problems — Causes — Solutions The following table indicates the possible error or alarm causes which may lead to a partial or total shutdown of the appliance. Error code Description Error 01: GRINDER_FAIL GRINDER LOCKED It indicates that there is a grinder failure. Coffee grinder broken or not working properly.
-
Page 78: Storage — Disposal
English STORAGE — DISPOSAL 12.1 Location Change Should the machine be placed in a different location, it is necessary to: • disconnect the appliance from the supply network; • carry out the general cleaning of the appliance as indicated in chapter «Cleaning and Maintenance»; •…
-
Page 79: Instructions For End Of Operational Life Disposal
English INSTRUCTIONS FOR END OF OPERATIONAL LIFE DISPOSAL INFORMATION TO THE USER in compliance with art. 13 of the Italian Legislative Decree dated 25 July 2005, no. 151 «Implementation of Directives 2002/95/EC, 2002/96/EC and 2003/108/EC on the restriction of the use of certain hazardous substances in electrical and electronic equipment, as well as waste disposal».
- Manuals
- Brands
- Saeco Manuals
- Coffee Maker
- Royal OTC SUP060
- Operation and maintenance
-
Contents
-
Table of Contents
-
Troubleshooting
-
Bookmarks
Quick Links
Automatic machine for espresso coffee and hot beverages
ATTENTION: Read this user manual carefully before using the machine.
UK
Related Manuals for Saeco Royal OTC SUP060
Summary of Contents for Saeco Royal OTC SUP060
-
Page 1
Automatic machine for espresso coffee and hot beverages ATTENTION: Read this user manual carefully before using the machine. -
Page 2: Main Parts
English MAIN PARTS Water tank lid Brew group Water tank Service door Touch control panel Hot water dispensing spout Cappuccinatore compartment cover Cappuccinatore Coffee grounds drawer USB port Full drip tray float Power button Cup holder grill Chassis plug Drip tray Power cord Coffee bean hopper lid Display…
-
Page 3
English SAFETY INSTRUCTIONS Never allow water to The machine may be used come into contact by children older than 8 or with by persons with reduced electrical parts of the physical, mental or sensory machine: danger abilities or lacking sufficient short circuit! experience and/or skills,… -
Page 4
English Power Supply Do not use the power cord to carry or pull the machine. Do not pull out The machine must be the plug by the power connected to the power cord or touch it with wet supply service hands or feet. -
Page 5
English Fire Safety Precautions Do not use open flames and/or incandescent In case of fire, use carbon objects near the machine dioxide (CO2) so as not to damage or extinguishers. Do not use melt the machine housing. water powder extinguishers. Do not use the coffee Suitable Location… -
Page 6
English Cleaning the machine Using Milk Before cleaning Milk must be used and machine, switch OFF (0) stored in accordance with the power button and the the instructions given on remove the plug from the the manufacturer’s original power socket. Wait for the packaging. -
Page 7
English Storing the Machine Only skilled experienced people — with particular reference When the machine will not safety and hygiene — are be used for a long period allowed access of time, turn it off and service area. unplug it from the outlet. Store the machine in a dry place, out of the reach of children. -
Page 8: Table Of Contents
English CONTENTS 9.8 MILK DISPENSING MAIN PARTS 9.9 DISPENSING HOT WATER 1 INTRODUCTION TO THE MANUAL 1.1 PREAMBLE 9.10 ADJUSTING BREWED PRODUCTS 1.2 ICONS USED 9.11 USING THE MACHINE WITH CREDITS 9.12 EMPTYING THE COFFEE GROUNDS 2 INFORMATION ABOUT THE APPLIANCE DRAWER AND DRIP TRAY 2.1 INFORMATION FOR THE MAINTENANCE 10 CLEANING AND MAINTENANCE…
-
Page 9: Introduction To The Manual
This product has been manufactured by SaGa Coffee S.p.A. Preamble and sold under its own responsibility. SaGa Coffee S.p.A. is the guarantor of the product. Saeco is a registered trademark of Koninklijke Philips N.V. and its use is licensed This publication by Koninklijke Philips N.V.
-
Page 10: Icons Used
English Icons Used Various kinds of warnings are contained in this manual to highlight the different hazard or competence levels. Each icon is followed by a message suggesting operating and behaviour procedures and providing useful information for the correct operation of the machine. Warning It is used to highlight danger situations for the persons in charge of using, refilling and servicing the machine.
-
Page 11: Information About The Appliance
English INFORMATION ABOUT THE APPLIANCE The elegant machine housing has been designed for use in Information for the small offices, businesses and institutions. Maintenance Technician Using the machine for any other purpose is considered The appliance must be dangerous and as a misuse. installed well-lit, Misuse voids all forms of…
-
Page 12: Appliance Identification
English Appliance Identification The appliance is identified by the model name and serial number shown on the special plate. The plate contains the following data: • name of the Manufacturer; • marks of conformity; • model; • serial number; • year and month of manufacture; •…
-
Page 13: Technical Specifications
English Technical Specifications Size (w x h x d) 280 x 398 x 460 mm Weight approx. 10 kg Machine housing material Thermoplastic material Power Rating See the data plate Supply Voltage See the data plate Power cord length approx. 1,200 mm Capacity Water tank approx.
-
Page 14: Safety
English SAFETY It is mandatory to: Preamble • check conformity of the power supply; accordance with applicable standards • use original spare parts; regulations, SaGa Coffee has prepared a technical file • carefully read the instructions contained in this manual and relating to the ROYAL machine at its premises, in the attached documents;…
-
Page 15: Operator Requirements
English case failure Maintenance technician malfunctioning, please refer The maintenance technician is the only person authorised to service the machine, start the programming procedures and only qualified perform the adjustment, set up and maintenance operations. personnel of the technical Access to the internal area service.
-
Page 16: Handling And Storage
English HANDLING AND STORAGE Storage operations described in this chapter The machine is packed in cardboard and expanded polystyrene packaging. must performed If the appliance is not immediately installed, it shall be kept exclusively by the service in a sheltered place according to the following instructions: provider or a specialised •…
-
Page 17: Installation
English INSTALLATION Cautions operations described in this chapter The appliance cannot be must performed installed in external areas. exclusively by the service Avoid placing it in areas provider or a specialised where the temperature is technician, shall lower than 2°C or higher organise all the operating than 32°C…
-
Page 18: Unpacking And Positioning
English supporting surface The presence of magnetic must be adequate to bear fields proximity the machine weight and electrical machines which clean. generate interference could cause the electronic Access to the machine and controls of the machine to the plug should be kept malfunction.
-
Page 19
English Cappuccinatore: allows you to dispense milk-based beverages. Water filter: to remove any unpleasant flavours in the water and reduce water hardness. This will improve machine use. Right-hand fitting for Cappuccinatore: it allows you to connect the Cappuccinatore to the milk container on the right-hand side of the machine. -
Page 20: Connection To The Electric Network
English Connection to the Electric Make sure that the power Network cord plug easily This operation must only be reachable after installation. performed by specialised technical personnel or by the service provider. Maintenance Technician, charge of the appliance’s installation, shall make sure that: •…
-
Page 21: Description Of Controls
English DESCRIPTION OF CONTROLS Power button «Coffee» button «Espresso» button “Manual Brewing” button It is located in the lower left part in the rear of the «Hot Water» button machine. If set to the «I» position the machine turns on «Up»…
-
Page 22
English «Latte Macchiato» button When this button is pressed, a Latte Macchiato is brewed. «Milk» button Press this button to start dispensing Frothed Milk. «Down» button Press this button to scroll down the user menu options. Each button is enabled upon re-activating machine… -
Page 23: Supply And Start Up
English SUPPLY AND START UP Coffee Blends The coffee bean hopper may be provided with different • We recommend using fresh, non-oily and medium-ground coffee. safety features according to • Use an espresso coffee blend. the regulations of the country •…
-
Page 24: Filling The Water Tank
English Remove the tank; lift it using the inside handles. If the water tank is not inserted, check that no coffee beans fall into the tank compartment. If this happens, remove them to avoid any malfunctions. Filling the Water Tank Before using the machine for the first time, wash the Rinse and fill it with fresh water;…
-
Page 25: Measuring And Adjusting Water Hardness
English Tech Menu Measuring and Adjusting Settings Water Hardness Statistics Exit Measuring water hardness is very important in order to correctly manage the anti-scale filter and the frequency Select the «SETTINGS» option and press the «OK» button. with which the machine must be descaled. Immerse the water hardness test strip in water for 1 second.
-
Page 26: Water Filter
English Water filter Water is a key element for a good espresso coffee. Therefore, it should always be filtered in a professional manner. This is why all machines can be equipped with a water filter. This filter is easy to use and its sophisticated technology is effective in preventing limescale build-up.
-
Page 27
English Press the «OK» button to enter. Put the filter into the empty tank. Press it to its limit stop. Machine Menu General Menu Display Menu Water Menu Press the «DOWN» button until the «WATER MENU» option is selected. Machine Menu General Menu Display Menu Water Menu… -
Page 28: Coffee Grind Adjustment
English 7.5.1 Replacing the water filter The coffee grinder contains moving parts that may be Replace the water filter as dangerous. Do not insert soon as its capacity drops fingers and/or other to 0% and the filter icon objects. blinks quickly. Turn off the machine by pressing ON/OFF…
-
Page 29: Adjusting The «Aroma» — Amount Of Ground Coffee
English Open the service compartment door and turn the lever by only one notch. Close the door again and brew 1-2 cups of coffee to verify the changes in the grinding degree. Repeat the procedure Open the service compartment door. until you reach the desired grind setting.
-
Page 30: Adjusting The Coffee Dispensing Spout
English Two cups can be placed under the dispensing spout to Adjusting the Coffee brew two cups of coffee at the same time. Dispensing Spout Most of the cups and mugs available on the market can be used with this coffee machine. The height of the dispensing spout can be adjusted to better fit the dimensions of the cups that you wish to use.
-
Page 31: Turning On/Off The Machine
English 7.10 Setting the Language (Upon Before brewing First Use) product and/or when At first start-up, the desired display language of the bringing dispensing messages must be selected and stored. spout back to its normal Language position, ensure that it is ITALIANO ENGLISH correctly positioned.
-
Page 32: Washing The Parts Coming Into Contact With Food
English If the machine fails its first start-up (brewing) make 2 further attempts. At the end of these 3 attempts, if the problem is not solved, let the machine rest for 30 minutes and then try again with 3 brewings. If the problem persists, please contact Customer Service.
-
Page 33: Using The Appliance
English 7.13 Using the Appliance Before using the machine, read this manual carefully and make sure users are familiar with the machine. After the machine has not been used for a certain time, it is recommended to read section “First Use — Use after a Long Period of Inactivity”…
-
Page 34: Programming Menu
English PROGRAMMING MENU Button Description in This chapter contains Programming Mode instructions on how to set Use the buttons described below to scroll the appliance change menus. programming parameters of the appliance. Therefore it is necessary to carefully read it and to understand exact sequence…
-
Page 35: User Programming
English User Programming The PASSWORD will not be requested if set on the The structure of the user menu is indicated in section «Structure of the User Menu». default value (0000). It Section «Description of Messages in the User Menu» describes all options in the user menu.
-
Page 36
PASSWORD, recreate it by entering a PUK code. You have to request the PUK code to the Saeco service centre, who will guide you through the procedure. 8.2.2 Structure of the User Menu The main options of the user menu are:… -
Page 37
English 8.2.3 Description of Messages in the User Menu MENU ITEM Description BREW GROUP CLEAN This function allows the user to wash the brew group using hot water This function allows the user to perform cleaning using the Cappuccinatore hot water CAPP. -
Page 38: Technical Programming
PUK code. You have to the machine has reached request the PUK code to operating temperature. the Saeco service centre, who will guide you through the procedure. menus accessed freely. However, they can be protected via…
-
Page 39
English 8.3.2 Structure of the Technical Menu High This menu allows you to manage certain machine Temperature operation parameters. Range from -5 to +5 The main items of the programming menu are: USER PW TECH. PW MENU ITEM Exit Settings Display Menu Credits Menu Language… -
Page 40
English MENU ITEM Reset errors Exit Water Descaling SINCE LAST SINCE SECOND LAST SINCE THIRD LAST NUMBER OF EXECUTIONS Exit BREW GROUP CLEAN NUMBER OF EXECUTIONS SINCE LAST Exit CAPP. QUICK STANDARD CLEAN QUICK CLEAN Exit SINCE PRODUCTION Exit Exit Exit… -
Page 41
English 8.3.3 Description of Messages in the Technical Menu MENU ITEM Description Settings This menu allows you to access all machine configuration parameters This menu allows you to activate the use of virtual credits, load them onto the machine, reset them and enable Credits Menu the display of the “Ready for use”… -
Page 42
English MENU ITEM Description To activate the acoustic alarms. This function controls the temperature management in the coffee boiler when the Ecomode machine is in the “ready for use” mode. The function is set by default to «OFF». The currently active setting is inside a dotted rectangular box. This way, the coffee boiler is constantly kept at the right dispensing temperature. -
Page 43
TECH. PW NOTE: Enter the value ‘0000’ as password to disable the password. If you forget the PASSWORD, you must start a reset procedure. Please contact Saeco customer service. Warning: The technical menu password also allows you to access the user menu… -
Page 44
English MENU ITEM Description To change the machine water hardness setting. Hardness With the «Hardness» function you can adjust your machine to the level of hardness of the water you use, so that the machine will request descaling at the right time. Measure water hardness as shown in section «Measuring and Adjusting Water Hardness». -
Page 45
English MENU ITEM Description In this section, the user can view the total number of products dispensed since the TOTAL machine was started up. These counters cannot be reset. Espresso Total no. of Espressos dispensed. Espresso x2 Total no. of Espressos x2 dispensed. Coffee Total no. -
Page 46
English MENU ITEM Description Exit This option allows the user to go back to the menu top level CAPP. QUICK This function allows you to view the counters for the performed Cappuccinatore cleaning cycles. STANDARD CLEAN It indicates the performed Cappuccinatore standard clean cycles’ number QUICK CLEAN It indicates the performed Cappuccinatore quick clean cycles’… -
Page 47
English Press the «OK» button to enter. The following screen is 8.3.4 Password setting displayed: TECH. PW The PASSWORD must be set by the service provider in order to prevent access by unauthorised personnel who could change the machine settings and cause malfunctions. To enter the password: You can set two passwords to access the two different Press the «Up»… -
Page 48: Operation And Use
English OPERATION AND USE Warm-up and Rinsing The use by children older Upon start-up, the machine activates the warm-up phase. than 8 years or by persons Wait until it is completed. with reduced physical, mental or sensory abilities or with lack of experience skills allowed, provided that they are…
-
Page 49: Rinse/Self-Cleaning Cycle
English Eco-friendly: Stand-by The cycle can be stopped by pressing the «Espresso» The machine is designed for energy saving. The machine will turn off automatically if it is not used for button. a set period of time after the last dispensing. This period of time is set by the service provider in the technical menu.
-
Page 50: Cappuccinatore
English Cappuccinatore To brew 2 coffees, the machine automatically This chapter explains how to use the milk Cappuccinatore to prepare a cappuccino, a Latte Macchiato or to froth grinds doses milk. Before using correct amount of coffee. Cappuccinatore, clean it thoroughly as described in Brewing two cups of coffee «Cleaning…
-
Page 51: Brewing Cappuccino
English 9.5.1 Installing the Cappuccinatore Brewing Cappuccino Insert the fitting into the Cappuccinatore. The machine can dispense cappuccino quickly and easily with the touch of a button. Danger burning! Dispensing preceded by small jets of hot water. Clean the Cappuccinatore immediately after using it to froth milk (see section «Cappuccinatore Cleaning…
-
Page 52
English Insert the Cappuccinatore into its seat until it locks into To ensure better results place. Check that it cannot be pulled out. when preparing cappuccino, use cold milk. Place the cup under the dispensing spout. Before using Cappuccinatore, clean it as Press the «Cappuccino»… -
Page 53: Brewing Latte Macchiato
English After using the Cappuccinatore, clean it as described in the Insert the Cappuccinatore into its seat until it locks into «Cleaning the Cappuccinatore (After Each Use)» section. place. Check that it cannot be pulled out. Remove the container and clean it if necessary. Brewing Latte Macchiato The machine can dispense Latte Macchiato quickly and easily with the touch of a button.
-
Page 54: Milk Dispensing
English To ensure better results Clean the Cappuccinatore when preparing a Latte immediately after using it Macchiato, use cold milk. to froth milk (see section «Cappuccinatore Cleaning (After Each Use)»). We recommend using tall glasses for this type of preparation, thus properly moving the coffee dispensing spout.
-
Page 55: Dispensing Hot Water
English We recommend using tall glasses for this type of preparation, thus properly moving the coffee dispensing spout. Before using Cappuccinatore, clean it as When the machine is ready, press the «Milk» button to described in the «Cleaning start dispensing the hot milk. The machine prepares the hot milk automatically.
-
Page 56: Adjusting Brewed Products
English Ensure the machine is ready for use before dispensing hot 9.10 Adjusting Brewed Products water. Place a container under the hot water dispensing spout. The machine allows you to adjust the product length according to your needs and to the type of cup used. Adjusting the product length can be performed by the service provider via keypad in visual mode.
-
Page 57: Using The Machine With Credits
English Select “Espresso”. Press the «OK» button to enter. The Press the “OK” button to select “BEVERAGE LENGTH”. machine starts brewing coffee. The following screen is displayed: BEVERAGE LENGTH Press the “DOWN” or “UP” button to select the desired value and then let the bar advance. The number on the side identifies the bar value (in pulses).
-
Page 58: Emptying The Coffee Grounds Drawer And Drip Tray
English In this case, the machine does not allow beverages to be Hot water dispensing is not dispensed. In order to dispense beverages, the coffee grounds drawer must be emptied of used coffee. subject to credit and can Extract the drip tray and the coffee grounds drawer. always performed provided that there is…
-
Page 59
English If the drip tray is inserted without the coffee grounds drawer, the machine will not dispense products. After inserting them, the display shows: The machine is now ready to brew coffee. -
Page 60: Cleaning And Maintenance
English CLEANING AND MAINTENANCE 10.1 General Notes for Correct Before performing Operation maintenance and/or Non-removable cleaning operation, unplug components the power cord. machine itself must be cleaned, when differently specified, only The Manufacturer is not by using cold or lukewarm liable damage water, with a non-abrasive…
-
Page 61: Cleaning And Scheduled Maintenance
English 10.2 Cleaning and Scheduled 10.2.1 Maintenance Schedule Maintenance Operation to be carried out All parts requiring cleaning Drip tray yes — Emptying and cleaning the coffee grounds yes — are easily accessible, so no drawer Cappuccinatore quick clean yes yes — tools are needed.
-
Page 62
English 10.2.3 Cleaning the Water Tank 10.2.4 Cappuccinatore quick clean (After each use) Remove the lid from the water tank. Failure clean Cappuccinatore after use with milk cause proliferation bacteria which may be harmful for the user. The milk circuit must be quickly rinsed after use to always ensure… -
Page 63
English Place a container under the Cappuccinatore spout. The Cappuccinatore quick cleaning cycle can be performed any time by following the procedure below: With the machine on, press the «OK» button. Select «OK» and press the «OK» button. The machine dispenses a quantity of water sufficient to rinse the milk circuit. -
Page 64
Thorough Cleaning of the Cappuccinatore Clean all the Cappuccinatore parts thoroughly every month using the Saeco detergent. The Saeco detergent may be purchased at your local dealer or at authorised service centres. The lack of cleaning before and after each use can affect… -
Page 65
English The following screen is displayed: Wait for the bag content to dissolve completely and then press the «OK» button to confirm. Menu PUT TUBE IN User menu Cappuccinatore Tech Menu Exit IN THE CONTAINER Exit Select the “USER MENU” option and press the “OK” button. -
Page 66
English Rinse the water tank and fill it with fresh drinking water. Here is an explanation of Press the «OK» button to confirm. how to disassemble and INSERT TUBE WITH 1/2 L WATER wash the Cappuccinatore Cappuccinatore with left-hand fitting. If the right-hand fitting is installed, Wash the container used for the solution thoroughly and you can carry out the same… -
Page 67
English Remove the ring from the Cappuccinatore. After washing reassembling Cappuccinatore, it can be installed back machine. 10.2.6 Brew Group Cleaning The brew group should be cleaned whenever the coffee bean hopper is filled, or at least once a week. Turn off the machine by switching the power button to the «O»… -
Page 68
English Remove the brew group by pulling it by the handle and pressing the «PRESS» button. The brew group must be washed with lukewarm water only. Do not use any detergent. Make sure that the hook which locks the brew group is in the correct position. -
Page 69
Extract the drip tray and the coffee grounds drawer. The «Coffee Oil Remover» system has no descaling properties. For descaling, use the Saeco descaling solution and follow the procedure described in the «Descaling» chapter. The wash cycle cannot be interrupted. Do not leave the machine unattended during this operation. -
Page 70
(see Brew Group Clean section “Description messages programming menu”). Before lubricating the brew group, clean it under running water as described in the «Brew Group Cleaning» chapter. Lubricate the brew group guides using Saeco grease only. -
Page 71
English 10.2.9 Descaling Limescale is a natural part of the water used for machine operation. It needs to be removed regularly as it may clog the water and coffee circuit of your appliance. The machine indicates on the display when descaling is required. -
Page 72
English Check that the Cappuccinatore is correctly positioned. This screen will be visible Select «OK» and press the «OK» button. The following screen is displayed: only if the water filter has PLACE A CONTAINER been activated. UNDER ALL THE SPOUTS Remove the tank from the machine and empty it. -
Page 73
English Remove and empty the drip tray. After emptying it put the If you wish to carry out a descaling cycle with the machine drip tray back into place. Press the «OK» button. The already on, you need to access programming as indicated following screen is displayed: in section “Accessing the tech. -
Page 74: Troubleshooting
English TROUBLESHOOTING 11.1 Warning signals This chapter describes all the warning messages that the machine may display to the user and the actions that can and/or must be performed by the user. Warning Signals How to reset the message The machine is starting up. Machine in Stand-by.
-
Page 75
English Warning Signals How to reset the message The machine indicates that after a few cycles it will be necessary to empty the coffee grounds drawer (see section “Emptying the coffee grounds drawer and drip tray”). The machine still allows to dispense products. The credits available to dispense products have run out. -
Page 76
English Warning Signals How to reset the message Empty the coffee grounds drawer. Fill the coffee bean hopper with coffee beans and select one product. ADD BEANS AND SELECT A BEVERAGE Fill the water tank. Insert the brew group into its seat. Turn off the machine. -
Page 77: Problems — Causes — Solutions
English 11.2 Problems — Causes — Solutions The following table indicates the possible error or alarm causes which may lead to a partial or total shutdown of the appliance. Error code Description Error 01: GRINDER_FAIL GRINDER LOCKED It indicates that there is a grinder failure. Coffee grinder broken or not working properly.
-
Page 78: Storage — Disposal
English STORAGE — DISPOSAL 12.1 Location Change Should the machine be placed in a different location, it is necessary to: • disconnect the appliance from the supply network; • carry out the general cleaning of the appliance as indicated in chapter «Cleaning and Maintenance»; •…
-
Page 79: Instructions For End Of Operational Life Disposal
English INSTRUCTIONS FOR END OF OPERATIONAL LIFE DISPOSAL INFORMATION TO THE USER in compliance with art. 13 of the Italian Legislative Decree dated 25 July 2005, no. 151 «Implementation of Directives 2002/95/EC, 2002/96/EC and 2003/108/EC on the restriction of the use of certain hazardous substances in electrical and electronic equipment, as well as waste disposal».
Я вчера потратил много времени, пока мне удалось понять что имелось в виду в руководстве по эксплуатации для российских пользователей, которое прилагалось к этой кофе-машине.
Поскольку, думаю, данная информация будет полезна многим если не всем владельцам кофе-машин Saeco решено было написать небольшой ликбез (сокр. ликбез : ликвидация безграмотности) как именно делать очистку от накипи Saeco Royal Professional. Сразу замечу, судя по простоте программного обеспечения этой кофе-машины, скорее всего данная последовательность подойдет и для других ихних машинок.
Для начала, если ваша кофе-машина Saeco показывает на своем дисплее сообщение Decalcify, что означает, – “проведите очистку от накипи”, то следует провести процедуру Descaling (англ.: очистка от накипи). У меня такое сообщение было показано где-то на 850-чашке и через полгода после покупки машинки. Следует заметить. что мы пользуемся только очищенной водой и фильтром “брита интенза”.Есть небольшая вероятность, что данное сообщение, при использовании водопроводной воды, могло появиться раньше.

Как происходит очистка машины:
Для начала, следует вытащить водяной фильтр


Он дорогой, и его менять надо раз в 2000 чашек, если пользуетесь , конечно, очищенной водой, а не той бодягой, которая льется из кранов. У нас по Львове вода просто ужасного качества, налет в чайнике, при использовании воды из-под крана – вырастает за пару кипячений. Поэтому, лично считаю что использовать фильтр обязательно.
Далее следует налить полчашки (100мл) вот такого средства (Pufas Glutoclean очиститель накипи), прямо в емкость для воды:

Продается это дело в Украине в супермаркетах “Эпицентр”. Стоит это дело 100 гривен ($12). Использовать ли фирменное, в 8-мь раз более дорого средство от Saeco – личное дело каждого. Я решил, что Saeco немного обнаглела с ценами. Посмотрим, был ли я прав или нет.
Далее следует долить емкость для воды, под самый верх. В кофе-приемное отделение, под паранелло надо поставить кастрюльку где-то на 2.5 литра. Если же у вас нет такой можно использовать емкость меньшего размера и стакан, которые поочередно менять. Цикл слива жидкости занимает по времени около 1 минуты, то есть желательно делать это рядом с канализацией, или иметь дополнительную емкость. Можно использовать вот такую емкость:

Далее следует нажать кнопку меню, и выбрать (жмем много раз мнопку “вниз”) режим Descalling

Когда режим Descalling найден,

жмем кнопку “Enter” (правая Верхняя). При этом на экране дисплея отображается Descaling.
После этого надо повернуть ручку “паранелло” (снизу на фото), в крайнее положение против часовой стрелки, то есть открыть ее:

При этом машина начнет лить воду. Выливает где-то 50 миллилитров и делает перерыв на минуту. Все это будет повторяться до тех пор, пока в емкости не кончиться вода. Занимает это дело от 45-минут до часа времени. Я выполнит эту процедуру по незнанию два раза.
Как только это произошло, то есть вода кончилась, – закрываете кран “паранелло” выливаете все что есть в вашей емкости. Ставите емкость назад. Нажимаете ESC на клавиатуре. Это нижняя правая клавиша. Выбираете пункт меню “Signal Descal”, заходите в него кнопкой “Enter”, изменяете его значение Вверх-Вниз. на “Yes”, и жмете ESC несколько раз, – для выхода из меню. После чего машина перестает показывать сообщение про необходимость очистки. А выводит нормальное меню.

После всего этого следует выполнить четыре раза процедуру приготовления капучино используя чистую воду в качестве “молока”, и залив в емкость для воды до отказа. При этом прочищается трубка для капучинатора и сам капучинатор.
Далее следует подставить емкость и слить всю воду, с помощью режима приготовления кипятка (левая верхняя кнопка).

То есть всю воду выливаете в емкость, через паранелло. Это займет немного времени. И возможно придется сделать пару перерывов. После этого вставляете водяной фильтр. если у вас около 2000 чашек, то меняете его на новый, конечно. Заливаете воду. Все, на этом машина работоспособна.
Теперь по частоте обслуживания. Делать такую процедуру следует где-то каждые 500-600 чашек. Посмотреть, сколько чашек приготовлено на данный момент можно в меню, там есть специальный пункт меню “Total Caps”.
Хочется отметить, что руководство по обслуживанию самой фирмой Saeco подготовлено недостаточно тщательно, и было бы правильно, для такой большой фирмы как Philips, немного подкорректировать свое руководство для эксплуатации.
Ну это совсем не логично.
Логика работы такова, что если после нажатия на кнопку приготовления кофе, кончились бобы, то нечем заполнить камеру дозатора и через время таймаута микрик остаётся незамкнут, что и приводит к выдаче сообщения — насыпьте бобы. НО! Кнопки приготовления при этом не блокируются и стоит только нажать на кнопку как сообщение должно исчезнуть. Естественно если снова таймаут будет исчерпан то снова появится сообщение. А так-же после выключения и включения сообщение должно исчезнуть. А так-же сообщение должно исчезнуть если в момент его отображения сработает микрик дозатора. Сейчас ты включил машину при сработавшем микрике, и сообщение не исчезло. Это совершенно нелогично. Могу предположить, что сообщению соответствует бит в байте статуса аппарата, который находится в епроме и этот бит физически испорчен. Все попытки его сбросить ни к чему не приводят. Только так могу объяснить такое зацикливание. Замени память, просто перелей в неё всё из старой, но главное чтобы память стояла новая. Думаю только это вылечит аппарат.

Сообщение от Edgar
а может щеточки у мельнички того, стерлись? вот она и думает что зернышек надо! я бы тестером ткнул на всякий пожарный
А ты уверен, что обрыв мельницы контролируется? Думаешь при обрыве должно выскакивать сообщение «насыпь кофе»? Как-то нелогично. У саеки на каждый дефект есть своё сообщение, не думаю чтобы тут на две разных причины использовалось одно и то-же сообщение.
Сообщение от Сергей12345
Выключил с сети, ждем, включаю на дисплее:
FILL COFFEE BEANS
READY FOR USE
Вообще надпись READY FOR USE говорит за то, что аппарат готов к работе. Опять-же нелогично что при этом он не реагирует на кнопки приготовления кофе.
А если нажать кнопку кофе и подержать с минуту?
Я вот смотрю на эту галочку там в конце сообщения. Она там не просто так. Что-то это да значит. При работе в меню три кнопки имеют значения — вход, вверх и вниз. Сдаётся мне что эта галочка намекает что надо нажать среднюю кнопку. Возможно ещё и подержать её несколько секунд.
Кстати, ещё раз внимательно рассмотрел картинки трёх режимов что ты нашёл. Вот на всех трёх есть комбинации из двух кнопок. Но во всех трёх комбинациях используются три кнопки. А ты не пробовал использовать сразу все три эти кнопки? Я как-бы уже несколько раз на это намекал, но чую это так и не попробовано.
Сообщение от Сергей12345
правильно так говорить?
Говори как хочешь, лишь бы мы друг друга понимали.
Сообщение от Сергей12345
Это опции сервиса без подменю.
CREDIT MANAGEMENT >
AUDIT SINCE RESET >
AUDIT SINCE INIT >
SETTINGS >
CODE 111111
TIMER
PAYMENT SYSTEM >
DECALCIFICATION EXECUTE NOW
CLEANING CYCLE EXECUTE NOW
А вот внутрь этого меню SETTINGS > ты не заходил? Какие там внутри установки есть?
И что внутри меню CREDIT MANAGEMENT >? Там случайно не настроено ли на использование совместно с монетоприёмником?
