Eloma Oven Error Code, Troubleshooting , Wiring Diagram , How to Diagnose Machine ,
Software Updates , Eloma oven Spares Parts , Service Code, How to do the Programming


| Error code |
Description | Possible cause / solution |
|---|---|---|
| 111 | Probe chamber 1 (top) No signal |
Check probe 0,789mV at 20°C, replace defective probe. Shorten the terminals 11 & 12. Reset, if error still there replace the PCB Oven will NOT operate with a defective probe. |
| 112 | Probe chamber 2 (bottom) No signal |
Check probe 0,789mV at 20°C, replace defective probe. Shorten the terminals 13 & 14. Reset, if error still there replace the PCB Oven will NOT operate with a defective probe. |
| 113 | Meat probe No signal sensor 1 |
Check probe 0,789mV at 20°C, replace defective probe. Shorten the terminals 1 & 2. If error still there replace the PCB Meat probe operation is possible |
| 114 | Meat probe No signal sensor 2 |
Check probe 0,789mV at 20°C, replace defective probe. Shorten the terminals 1 & 4. If error still there replace the PCB Meat probe operation is possible |
| 115 | Meat probe No signal sensor 3 |
Check probe 0,789mV at 20°C, replace defective probe. Shorten the terminals 1 & 6. If error still there replace the PCB Meat probe operation is possible |
| 116 | Meat probe No signal sensor 4 |
Check probe 0,789mV at 20°C, replace defective probe. Shorten the terminals 1 & 8. If error still there replace the PCB Meat probe operation is possible |
| 113 114 115 116 |
Meat probe No signal off all 4 sensors |
The common wire is defective, change the probe. Meat probe operation is NOT possible |
| 117 | Probe waste water (drain) No signal |
Check probe 0,789mV at 20°C, replace defective probe. Shorten the terminals 15 & 16. If error still there replace the PCB Oven will operate with a defective probe. |
| 127 | Probe waste water (drain) {Genius/Genius-T only} |
Follows error 117: Value for temperature is not correct. Oven will operate with a defective probe. |
| Error code |
Description | Possible cause / solution |
|---|---|---|
| 211 | Upper safety thermal release |
Reset the upper safety thermal release. Check the fuse F1 (8 Amps slow) on PCB. If the STR has not released, check if the motor temperature sensor switched of, this is a bi-metal trip, which resets itself when cooled down. If so, control the main/motor fuses. Replace and check possible causes: Defective motor windings or the motor is blocked. Is the contact 13/14 of main contactor K1/Q1 closed? Or check X10, pin 1/2. This is a security loop; if this loop is open the contactor goes off after a few seconds. If this error occurs a couple of times it is likely that a motor contactor or the main-contactor has a bad contact, in this case replace the contactor. Oven cannot operate! |
| 212 | Lower safety thermal release |
Reset the lower safety thermal release. Check the fuse F1 (8 Amps slow) on PCB. If the STR has not released, check if the motor temperature sensor switched of, this is a bi-metal trip, which reset itself when cooled down. If so, control if the main/motor fuses. Replace and check possible causes: Defective motor windings or the motor is blocked. Is the contact 13 / 14 of main contactor K2/Q2 closed? Or check X10, pin 3/4.This is a security loop; if this loop is open the contactor goes off after a few seconds. Oven cannot operate! |
| 1 | Door open | Close the door / operating panel. Check the door switch, inside the operating panel. You may check this by shorting the terminal 9 & 10 at X10. Is the magnet lost (Inside the door frame)? |
| 2 | Emergency opening door |
Door was opened with the emergency opening. Check closure mechanism. Oven can’t operate! |
| 3 | Door switch | Micro switch of door from motor not activated. Micro switch is loose. Oven can’t operate! |
| 4 | Door not closed | Door hook defective. Magnet switch faulty. Oven can’t operate! |
| 5 | Door motor works permanently |
Door can’t get closed. Oven can’t operate! |
| 6 | Door not in position | .No defined position. Oven can’t operate! |
| 311 | No water / low water pressure |
Open the water tap. The water flow pressure must be checked, 2 bar / 29 SI for soft water. Check the water pressure switch, terminal 11 & 12. Autoclean will pause until pressure is high enough. |
| 312 | Not enough water | Is the appliance connected to water? Check if water tap is open. Control the flow water pressure Adjust the solenoid valve to the correct amount of water. See table “Table 1.2.2”. Refer 2.3.1 No steam! |
| 313 | Hand shower | Hand shower is not working; only Joker models! |
| 314 | Fill level tank | Water tank is empty. Only EB30 |
| 315 | Water flow w/o request | Water flows into the cavity but not required by program/user. Only EB 30 B/T and XL Oven cannot operate! |
| 711 | No flame upper chamber |
Is the phase at L1, polarity! Is the kitchen ventilation system working? Interlock? Check the ionisation current of the gas firing (Part A4 pin J5, older version X3) Reset: Pressing restart. Refer 2.6.2 Restart Gas |
| 712 | No flame lower chamber | Is the phase at L1, polarity! Is the kitchen ventilation system working? Interlock? Check the ionisation current of the gas firing (Part A4 pin J5, older version X3) Reset: Pressing restart. |
| Error code |
Description | Possible cause / solution |
|---|---|---|
| 213 | No motor signal Only Genius, Genius-T, MB- Gas, EB50/80T models! | Check the main / motor fuses. Replace them, if blown and check possible causes: Defective motor windings or the motor is blocked. Check motor parameters for start up and slow down. See programming manual. Check the hall generator. Units with frequency converter may block operation when switched Off/On instantly. Please wait 5 seconds after switch off before switch on again. Oven cannot operate! |
| Error code |
Description | Possible cause / solution |
| 511 | Pre-warning: PCB temperature 65°C |
Clean air filter, located at the bottom of the front panel. Check if the compartment fan and the fan in the front panel are working. See chapter 2.2.4 Oven can operate! |
| 512 | Warning: PCB temperature 70°C |
Clean air filter, located at the bottom of the front panel. Check if the compartment fan and the fan in the front panel are working. See chapter 2.2.4 Oven switches off! |
| 0 513 |
Warning: PCB temperature 68°C |
Slow overheated PCB. The installation prevents ambient air flow for a cooling effect. |
| AC | Breaking off Autoclean |
Press start, the oven will operate the flushing mode. Message comes up after breaking off the Autoclean cycle or interrupting the power supply. |
| Appliance | Water amount steam | Water amount drainage |
|---|---|---|
| Joker B, T, (Old C) | 6 l/h (0.1 l/min) 1.32 Imp. Gal. |
30 l/h (0.5 l/min) 6.60 Imp. gal. |
| MA, MB, GT 6-11 |
16 l/h (0.26 l/min) 3.52 Imp. Gal. |
55 l/h (1.09 l/min) 14.30 Imp. Gal. |
| MA, MB, GT 10-11 |
19 l/h (0.32 l/min) 4.18 Imp. Gal. |
55 l/h (1.09 l/min) 14.30 Imp. Gal. |
| MA, MB, GT 12-21 |
25 l/h (0.42 l/min) 5.28 Imp. Gal. |
55 l/h (1.09 l/min) 14.30 Imp. Gal. |
| MA, MB, GT 20-11 Per chamber! |
19 l/h (0.32 l/min) 4.18 Imp. Gal. |
55 l/h (1.09 l/min) 14.30 Imp. Gal. |
| MA, MB, Genius-T 20-21 Per chamber! |
25 l/h (0.42 l/min) 5.28 Imp. Gal. |
55 l/h (1.09 l/min) 14.30 Imp. Gal. |
| EB-B/T 50 | 25 l/h (0.42 l/min) 5.5 Imp. Gal. |
— |
| EB-B/T 80 | 30 l/h (0.5 l/min) 6.6 Imp. Gal. |
— |
| EB-B/T 30 | 15 l/h (0.25 l/min) 3.52 Imp. Gal. |
— |
| EB-B/T 30 XL | 18 l/h (0.3 l/h) 3.96 Imp. Gal. |
— |
| EB-B/T 30 (XL) Tank | Solenoid open! | — |
Страница 1 из 2
-
Добрый день!
Пароконвектомат Eloma Genius T10-11 ошибка 211.
Нужна хоть какая-то информация, если есть, схемы, мануалы, сервисные инструкции.Если нет, может, подскажете, кто этим занимается?
Спасибо!
-
211 Over temperature STB cooking chamber or motor safety M1 released Operation stop! Customer service call!
-
перегрев платы или двигателя
— Добавлено, 8 ноя 2017 —
кулер проверь и уплотение двери
-
Может это пригодиться?
Вложения:
-
если перегрев то смотреть входы вентиляции, фильтра, и куллер
-
Спасибо большое! Сегодня попробую.
За схему отдельная благодарность! -
Итак, парик починен!)
Может, кому пригодится. Есть и схема (благодаря Elef), и инструкция, и деталировка
Ошибка 211 — перегрев рабочей камеры или мотора. Вырубается аварийный термостат или теплозащита на двигателе.
У меня все работало. Только не заметил перегоревший предохранитель 8А на плате, который, как я понял защищает общий контакт на силовую выходящую часть.Всего предохранителей 5 в парике.
Следствие перегорания было капание воды из ослабшего шланга мойки на газовый контроллер (там тоже предохранитель и варистор перегорели).Заменил контроллер и предохранители и все заработало!
-
Отключи защиту от скачков напряжения.Это на клемнике на вводе чёрный коробок.
-
Нужно изменить на экране логотип Eloma Standby-screen на стандартный, поскольку сейчас высвечивается чужой бренд сети супермаркетов которая продала этот аппарат. Кто в курсе как это сделать или поделитесь сервис-мануалом Eloma Genius.
![[IMG]](http://i.piccy.info/i9/2c9f02f2d84d72e35b7cb51bb57bcf49/1512645024/14058/1154075/oooo.jpg)
-
Добрый день! Коллеги, не можем разобраться с париком Eloma multimax b 20-11. нет никакой интсрукции, и тех документации. Перестал подаваться пар. Весь интеренет облазили, тех документацию не нашли( представители компании не предоставляют.. может кто чем располагает?
-
смотрите соленойды и редуктор. зачем вам для этого тех документация
-
Я ремонтирую печи Eloma. Всегда к вашим услугам. 926-709-85-32
-
Здравствуйте! Не понял вопрос. Могу выехать на ремонт, диагностика , ремонт, запчасти
-
Тут засада. Какой вопрос у вас по работе печи ?
-
Здрасьте! Что вас интересует по поводу работы печи ?
Страница 1 из 2
Поделиться этой страницей

Error
Description
111
Probe cooking chamber 1
no signal
113
Meat probe
no signal sensor 1
114
Meat probe
no signal sensor 2
115
Meat probe
no signal sensor 3
116
Meat probe
no signal sensor 4
117
Water vapour elimination
sensor, no signal
127
Water vapour elimination
sensor, no signal
Over temperature STB
212
cooking chamber or motor
safety MI released
311
No water pressure
313
Hand shower off
Control module
511
Control module
512
Reaction, error remedy
Operation stop!
Customer service call!
Warning!
Customer service call!
Meat probe operation is possible!.
Warning!
Customer service call!
Meat probe operation is possible!
Warning!.
Meat probe operation is possible!
Customer service call!
Warning!
Meat probe operation is possible!
Customer service call!
Operation with a defective sensor is possible!
Customer service call!
Operation with a defective sensor is possible!
Customer service call!
Operation stop!
Customer service call!
Cooking operation: Warning / autoclean: Pause Open water
valve. Remedy too low customer-side water pressure. Check
the pressure switch for proper functioning.Attention! The
appliance pauses in autoclean! The appliance can be used
without water in cookingoperation!
Activate Hand shower in the Service
Warning!
PCB temperature above 65°C
Operation possible, Customer service call!
Operation stop!
PCB temperature above 70°C
Customer service call!
39
-
Contents
-
Table of Contents
-
Troubleshooting
-
Bookmarks
Quick Links
&RPEL6WHDPHU
0XOWLPD[
2SHUDWLRQ 0DQXDO
Related Manuals for Eloma Multimax
Summary of Contents for Eloma Multimax
-
Page 1
&RPEL6WHDPHU 0XOWLPD[ 2SHUDWLRQ 0DQXDO… -
Page 3
You have chosen an Eloma combi-steamer. Thank you for your confidence. These operation manual apply to Eloma’s combi-steamer Multimax electrical and gas appliances. Please read the installation and operating instructions in full before starting up the appliance and make sure to pay particular attention to the safety information. -
Page 4: Table Of Contents
Control panel Multimax A 6-11, 10-11, 20-11, …………7 Control panel Multimax B 6-11, 10-11, 12-21, 20-11, 20-21 ……..8 Control panel Multimax B Gas 6-11, 10-11, 12-21, 20-11, 20-21 ……9 Functional description of operating elements …………. 10 …
-
Page 5
Pictograms/symbols used Warning Attention! Danger! Immediate dangerous situation, Possibly dangerous situation, Possibly dangerous situation, that can endanger severe injury that possibly can endanger severe that can endanger minor injury. or death. or death. Caustic substances Risk of explosion Caution: Risk of burns Caution: Hot steam Caution: Hot liquid Risk of fire… -
Page 6: Safety Information
Eloma combi steamers are designed for use in commercial environments. Method of operation The combi-steamer Multimax offers every possibility to experience modern professional cooking technology. Use fresh or convenience products and select for every product the best possible cooking cabinet climate.
-
Page 7
The door must not be opened whilst Autoclean is running (risk of chemical burns). Only use Eloma Multi-Clean special cleaning agents and Eloma Multi-Clean rinse agents. Eloma GmbH accepts no liability for damage caused by using non-Eloma cleaning agents or rinse agents; use of such agents will also invalidate any warranty claims. -
Page 8
Hand shower with automatic pull-back Standard with Multimax B, optional with Multimax A models Pull the hand shower out until you hear it click; this means that it is locked in the correct position for operation. To retract the hose, pull it out until it stops making a clicking noise. -
Page 9: Control Panel And Functional Description
Control panel and functional description Control panel Multimax A 6-11, 10-11, 20-11, Key ON/OFF Key START/STOP Touch keys : Cooking modes Steaming Combi-cooking Convection Regenerating (Rethermalizing) Manual humidification, Reduced blower speed Display TIME Rotary knob Setting : 0:00 to 24.0 hours and * — — — * continuous…
-
Page 10: Control Panel Multimax B 6-11, 10-11, 12-21, 20-11, 20-21
Control panel Multimax B 6-11, 10-11, 12-21, 20-11, 20-21 Key ON/OFF Key START/STOP Program key Arrow key /setting key Touch keys : Cooking modes Steaming Combi-cooking Convection Multifunction key, Manual humidification, ® , Clima-Aktiv Active Temp, Reduced blower speed Display TIME Rotary knob Setting : 0:00 to 24.0 hours and * — — — * continuous operation…
-
Page 11: Control Panel Multimax B Gas 6-11, 10-11, 12-21, 20-11, 20-21
Control panel Multimax B Gas 6-11, 10-11, 12-21, 20-11, 20-21 Key ON/OFF Key START/STOP Program key Arrow key /setting key Touch keys : Cooking modes Steaming Combi-cooking Convection Multifunction key, Manual humidification, ® , Clima-Aktiv Active Temp, Gas fault “Acknowledge” key…
-
Page 12: Functional Description Of Operating Elements
LED cooking mode «steaming» is lit Time 0:00, Temperature 99° C / 210° F Core temperature — OFF -(only B models) If you press again, MULTIMAX is switched off, this key is dark and all LEDs and displays are off as well. Touch key Start/Stop This key starts or stops cooking processes.
-
Page 13
= MEDIUM regeneration, basic setting 120°C = HUMID regeneration basic setting 115°C Press to start the selected program Multifunction key “M” (only Multimax B) Selection: ‘P’ key together with ‘M’ key Assignment options: Banquet / Regeneration LT Cooking Delta-T Cooking E/2 reduced heating power, energy-saving key Key assignment is done as described in Section 3.5. -
Page 14
Pressing the key several times permits various stages between 1 and 5 to be selected. Higher stages give higher humidity. “Active Temp” key (only with Multimax B steamers) With the Active Temp function, the cooking compartment of the combi-steamer is brought to a preselected setpoint temperature. -
Page 15: Selecting / Changing The Multifunction Key Assignment
Display + Rotary knob TIMER (digital display, 3 characters) Turn rotary knob to set the cooking time of the selected cooking mode from 0:00 minutes to 24.0 hours. Turn left for * —* continuous operation. Display up to 10 hours in minutes 10.0), from 10.1 (10 hours 10 min.) in 10-minute intervals.
-
Page 16: Active Temp (Only With Multimax B)
Active Temp (only with Multimax B) The steamer should always be heated up or cooled down before cooking. The Active Temp function is used to bring the cooking compartment of the combi-steamer to a preselected setpoint temperature. If the compartment temperature is below the setpoint value, the heating is switched on.
-
Page 17: Starting The Multimax
Starting the Multimax Prior to start : Open water tap! In case the ambient temperature is lower than + 5° C / +41°F, the oven must be warmed to room temperature. Press ON/OFF, key is lit, oven chamber illuminated, the oven is ready for work.
-
Page 18
Program flow may be stopped by pressing Start/Stop key. A broken off program restarts with the originally set data. Program end the MULTIMAX switches off automatically. An acoustic signal sounds for 30 seconds, to stop it immediately, press Start/Stop Memory The last program entered is again displayed and can be repeated just by restarting. -
Page 19: Combitronic ® Combination Of Different Cooking Modes
® Combitronic combination of different cooking modes Multimax A models A Combitronic ® combination consists of a maximum of three cooking modes, which run down in the following fixed sequence. Steaming, Combi-cooking, Convection Whatever cooking mode is selected, set the corresponding cooking data with the rotary knobs.
-
Page 20: Core Temperature Control
Core temperature control Core temperature control can be used with all cooking modes. However, make sure to enter always higher core temperatures in following steps, since the oven switches automatically off, once the highest core temperature is reached. Function: Delay start programming This function allows to have an entered or stored program or a combination automatically started within a period of up to 24 hours.
-
Page 21: Program Input And Storage
5. Program input and storage How to call and start an existing program “P” ? Briefly press the P key. Use the Run key to select the required program 1 to 99. On electrically-heated steamers you can scroll backwards through the program list …
-
Page 22: How To Enter And Store A New Program
How to enter and store a new program ? Keep P-key pressed for 3 seconds, the LED is lit, a signal sounds and the display indicates “1“. Use the arrow key to select the desired program number, possible program numbers 1 to 9.
-
Page 23: How To Call, Change And Store Individual Steps Of A Program
5.5 How to call, change and store individual steps of a program Keep P-key pressed for 3seconds, the LED is lit, a signal sounds and the display indicates “ 1“ Use the arrow key to select the program in which steps are supposed to be changed.
-
Page 24: Haccp
HACCP HACCP Option only Multimax B models The integrated HACCP control facilities care for recording during the cooking process for each program the exact actual data for time, temperature and core temperature. All processed cooking programs are stored, once the selected cooking time has run down or if the cooking process was terminated by pressing the Start/Stop key.
-
Page 25: Printed Protocol In ° C
Printed protocol in ° C —————————————————————— Serial No. :100100 Unit type :Multimax B Total operating hours of the appliance Print date : 15.07.05 16:00 Total operating hours : 1 CT every 3 minutes —————————————————————— Date of cooking program Date : 14.01.2005…
-
Page 26: Cleaning The Cooking Chamber
Other cleaning products can possibly cause irreparable rust damages in the cooking chamber, as well as damage pumps and seals. Eloma GmbH cannot assume liability for any damages resulting from the use of alternative products. This will void the Eloma warranty.
-
Page 27: Operation
Operation Prior to starting the combi-steamer Multimax B equipped with Autoclean, open the water tap. A sound signal announces that either the water supply is shut or else the water pressure is too low. For safety reasons do not start the appliance under these circumstances.
-
Page 28: Delay Start Programming
Delay start programming It is possible to start a cleaning program at any desired time, after working hours or over night. Start the program according to the instructions given in the operation manual Multimax B, refer to paragraph 5.4. Delay start programming.
-
Page 29: Units Without Autoclean
Units without Autoclean Perfect and regular cleaning of the Multimax is of utmost importance. Reheating old grease and/or food leftovers will impair taste and smell of fresh dishes considerably. How to start the cleaning program Keep key pressed and switch on by pressing…
-
Page 30: Cleaning And Maintenance
7.5 Cleaning and maintenance Regular cleaning of the combi steamer Multimax is of utmost importance. Only Eloma recommended cleaner agents may be used. Please observe the manufacturer’s operating instructions. Caring for the door sealing A door sealing is subject to wear.
-
Page 31
Cleaning the cooking chamber behind the air conducting sheet : Clean monthly, or according to contamination. Switch off the appliance and allow to cool down. Remove shelf — supports (hang-in rack) Remove fixing screws of air conducting sheet. … -
Page 32: Communication Proconnect Combi Steamer
Communication ProConnect Combi steamer Start up communication ProConnect Combi steamer Multimax B Use the appropriate cable to establish a communicating connection between PC and combi steamer, “Point-to-Point” connection RS 232 Plug the connecting cable to external SubD9 port in the hose shower tulip and connect the other end to the PC.
-
Page 33: Adjustment Of Operational Parameters
Adjustment of operational parameters Multimax A All operational parameters are correctly set when the combi steamer is delivered. However, if it is necessary to change time and date (summer/winter time, incorrect setting) proceed as follows : The unit must be switched on but with no program Set the time to 1:23 and press the key “…
-
Page 34: Adjusting The Operating Parameters Multimax B, Multimax B Gas
Adjusting the operating parameters Multimax B, Multimax B Gas The steamer is delivered with correctly adjusted operating parameters. However, should it be necessary to change e.g. time and date (summer/winter time, incorrect time), proceed as follows: The steamer must be switched on, but no program may be running.
-
Page 35: Valuable Information
10. Valuable information 10.1 Error Message Error Description Reaction, error remedy Doors open Close doors or remedy defect on door switch. Err001 Probe cooking chamber 1 Operation stop! Err111 no signal Customer service call! Probe cooking chamber 2 Operation stop! Err112 no signal Customer service call!
-
Page 36: Trouble Shooting
10.2 Trouble Shooting If your Multimax should not work properly, take the following list and try to help yourself. If you do not succeed, switch off, disconnect from mains, close water tap. Call the after-sales-service Failure Possible Cause Remedy ON/OFF touch does not…
-
Page 40
Englisch Art. Nr.: bed_500992_mab_g_1v5_en…
-
Contents
-
Table of Contents
-
Troubleshooting
-
Bookmarks
Quick Links
&RPEL6WHDPHU
0XOWLPD[
2SHUDWLRQ 0DQXDO
Related Manuals for Eloma Multimax
Summary of Contents for Eloma Multimax
-
Page 1
&RPEL6WHDPHU 0XOWLPD[ 2SHUDWLRQ 0DQXDO… -
Page 3
You have chosen an Eloma combi-steamer. Thank you for your confidence. These operation manual apply to Eloma’s combi-steamer Multimax electrical and gas appliances. Please read the installation and operating instructions in full before starting up the appliance and make sure to pay particular attention to the safety information. -
Page 4: Table Of Contents
Control panel Multimax A 6-11, 10-11, 20-11, …………7 Control panel Multimax B 6-11, 10-11, 12-21, 20-11, 20-21 ……..8 Control panel Multimax B Gas 6-11, 10-11, 12-21, 20-11, 20-21 ……9 Functional description of operating elements …………. 10 …
-
Page 5
Pictograms/symbols used Warning Attention! Danger! Immediate dangerous situation, Possibly dangerous situation, Possibly dangerous situation, that can endanger severe injury that possibly can endanger severe that can endanger minor injury. or death. or death. Caustic substances Risk of explosion Caution: Risk of burns Caution: Hot steam Caution: Hot liquid Risk of fire… -
Page 6: Safety Information
Eloma combi steamers are designed for use in commercial environments. Method of operation The combi-steamer Multimax offers every possibility to experience modern professional cooking technology. Use fresh or convenience products and select for every product the best possible cooking cabinet climate.
-
Page 7
The door must not be opened whilst Autoclean is running (risk of chemical burns). Only use Eloma Multi-Clean special cleaning agents and Eloma Multi-Clean rinse agents. Eloma GmbH accepts no liability for damage caused by using non-Eloma cleaning agents or rinse agents; use of such agents will also invalidate any warranty claims. -
Page 8
Hand shower with automatic pull-back Standard with Multimax B, optional with Multimax A models Pull the hand shower out until you hear it click; this means that it is locked in the correct position for operation. To retract the hose, pull it out until it stops making a clicking noise. -
Page 9: Control Panel And Functional Description
Control panel and functional description Control panel Multimax A 6-11, 10-11, 20-11, Key ON/OFF Key START/STOP Touch keys : Cooking modes Steaming Combi-cooking Convection Regenerating (Rethermalizing) Manual humidification, Reduced blower speed Display TIME Rotary knob Setting : 0:00 to 24.0 hours and * — — — * continuous…
-
Page 10: Control Panel Multimax B 6-11, 10-11, 12-21, 20-11, 20-21
Control panel Multimax B 6-11, 10-11, 12-21, 20-11, 20-21 Key ON/OFF Key START/STOP Program key Arrow key /setting key Touch keys : Cooking modes Steaming Combi-cooking Convection Multifunction key, Manual humidification, ® , Clima-Aktiv Active Temp, Reduced blower speed Display TIME Rotary knob Setting : 0:00 to 24.0 hours and * — — — * continuous operation…
-
Page 11: Control Panel Multimax B Gas 6-11, 10-11, 12-21, 20-11, 20-21
Control panel Multimax B Gas 6-11, 10-11, 12-21, 20-11, 20-21 Key ON/OFF Key START/STOP Program key Arrow key /setting key Touch keys : Cooking modes Steaming Combi-cooking Convection Multifunction key, Manual humidification, ® , Clima-Aktiv Active Temp, Gas fault “Acknowledge” key…
-
Page 12: Functional Description Of Operating Elements
LED cooking mode «steaming» is lit Time 0:00, Temperature 99° C / 210° F Core temperature — OFF -(only B models) If you press again, MULTIMAX is switched off, this key is dark and all LEDs and displays are off as well. Touch key Start/Stop This key starts or stops cooking processes.
-
Page 13
= MEDIUM regeneration, basic setting 120°C = HUMID regeneration basic setting 115°C Press to start the selected program Multifunction key “M” (only Multimax B) Selection: ‘P’ key together with ‘M’ key Assignment options: Banquet / Regeneration LT Cooking Delta-T Cooking E/2 reduced heating power, energy-saving key Key assignment is done as described in Section 3.5. -
Page 14
Pressing the key several times permits various stages between 1 and 5 to be selected. Higher stages give higher humidity. “Active Temp” key (only with Multimax B steamers) With the Active Temp function, the cooking compartment of the combi-steamer is brought to a preselected setpoint temperature. -
Page 15: Selecting / Changing The Multifunction Key Assignment
Display + Rotary knob TIMER (digital display, 3 characters) Turn rotary knob to set the cooking time of the selected cooking mode from 0:00 minutes to 24.0 hours. Turn left for * —* continuous operation. Display up to 10 hours in minutes 10.0), from 10.1 (10 hours 10 min.) in 10-minute intervals.
-
Page 16: Active Temp (Only With Multimax B)
Active Temp (only with Multimax B) The steamer should always be heated up or cooled down before cooking. The Active Temp function is used to bring the cooking compartment of the combi-steamer to a preselected setpoint temperature. If the compartment temperature is below the setpoint value, the heating is switched on.
-
Page 17: Starting The Multimax
Starting the Multimax Prior to start : Open water tap! In case the ambient temperature is lower than + 5° C / +41°F, the oven must be warmed to room temperature. Press ON/OFF, key is lit, oven chamber illuminated, the oven is ready for work.
-
Page 18
Program flow may be stopped by pressing Start/Stop key. A broken off program restarts with the originally set data. Program end the MULTIMAX switches off automatically. An acoustic signal sounds for 30 seconds, to stop it immediately, press Start/Stop Memory The last program entered is again displayed and can be repeated just by restarting. -
Page 19: Combitronic ® Combination Of Different Cooking Modes
® Combitronic combination of different cooking modes Multimax A models A Combitronic ® combination consists of a maximum of three cooking modes, which run down in the following fixed sequence. Steaming, Combi-cooking, Convection Whatever cooking mode is selected, set the corresponding cooking data with the rotary knobs.
-
Page 20: Core Temperature Control
Core temperature control Core temperature control can be used with all cooking modes. However, make sure to enter always higher core temperatures in following steps, since the oven switches automatically off, once the highest core temperature is reached. Function: Delay start programming This function allows to have an entered or stored program or a combination automatically started within a period of up to 24 hours.
-
Page 21: Program Input And Storage
5. Program input and storage How to call and start an existing program “P” ? Briefly press the P key. Use the Run key to select the required program 1 to 99. On electrically-heated steamers you can scroll backwards through the program list …
-
Page 22: How To Enter And Store A New Program
How to enter and store a new program ? Keep P-key pressed for 3 seconds, the LED is lit, a signal sounds and the display indicates “1“. Use the arrow key to select the desired program number, possible program numbers 1 to 9.
-
Page 23: How To Call, Change And Store Individual Steps Of A Program
5.5 How to call, change and store individual steps of a program Keep P-key pressed for 3seconds, the LED is lit, a signal sounds and the display indicates “ 1“ Use the arrow key to select the program in which steps are supposed to be changed.
-
Page 24: Haccp
HACCP HACCP Option only Multimax B models The integrated HACCP control facilities care for recording during the cooking process for each program the exact actual data for time, temperature and core temperature. All processed cooking programs are stored, once the selected cooking time has run down or if the cooking process was terminated by pressing the Start/Stop key.
-
Page 25: Printed Protocol In ° C
Printed protocol in ° C —————————————————————— Serial No. :100100 Unit type :Multimax B Total operating hours of the appliance Print date : 15.07.05 16:00 Total operating hours : 1 CT every 3 minutes —————————————————————— Date of cooking program Date : 14.01.2005…
-
Page 26: Cleaning The Cooking Chamber
Other cleaning products can possibly cause irreparable rust damages in the cooking chamber, as well as damage pumps and seals. Eloma GmbH cannot assume liability for any damages resulting from the use of alternative products. This will void the Eloma warranty.
-
Page 27: Operation
Operation Prior to starting the combi-steamer Multimax B equipped with Autoclean, open the water tap. A sound signal announces that either the water supply is shut or else the water pressure is too low. For safety reasons do not start the appliance under these circumstances.
-
Page 28: Delay Start Programming
Delay start programming It is possible to start a cleaning program at any desired time, after working hours or over night. Start the program according to the instructions given in the operation manual Multimax B, refer to paragraph 5.4. Delay start programming.
-
Page 29: Units Without Autoclean
Units without Autoclean Perfect and regular cleaning of the Multimax is of utmost importance. Reheating old grease and/or food leftovers will impair taste and smell of fresh dishes considerably. How to start the cleaning program Keep key pressed and switch on by pressing…
-
Page 30: Cleaning And Maintenance
7.5 Cleaning and maintenance Regular cleaning of the combi steamer Multimax is of utmost importance. Only Eloma recommended cleaner agents may be used. Please observe the manufacturer’s operating instructions. Caring for the door sealing A door sealing is subject to wear.
-
Page 31
Cleaning the cooking chamber behind the air conducting sheet : Clean monthly, or according to contamination. Switch off the appliance and allow to cool down. Remove shelf — supports (hang-in rack) Remove fixing screws of air conducting sheet. … -
Page 32: Communication Proconnect Combi Steamer
Communication ProConnect Combi steamer Start up communication ProConnect Combi steamer Multimax B Use the appropriate cable to establish a communicating connection between PC and combi steamer, “Point-to-Point” connection RS 232 Plug the connecting cable to external SubD9 port in the hose shower tulip and connect the other end to the PC.
-
Page 33: Adjustment Of Operational Parameters
Adjustment of operational parameters Multimax A All operational parameters are correctly set when the combi steamer is delivered. However, if it is necessary to change time and date (summer/winter time, incorrect setting) proceed as follows : The unit must be switched on but with no program Set the time to 1:23 and press the key “…
-
Page 34: Adjusting The Operating Parameters Multimax B, Multimax B Gas
Adjusting the operating parameters Multimax B, Multimax B Gas The steamer is delivered with correctly adjusted operating parameters. However, should it be necessary to change e.g. time and date (summer/winter time, incorrect time), proceed as follows: The steamer must be switched on, but no program may be running.
-
Page 35: Valuable Information
10. Valuable information 10.1 Error Message Error Description Reaction, error remedy Doors open Close doors or remedy defect on door switch. Err001 Probe cooking chamber 1 Operation stop! Err111 no signal Customer service call! Probe cooking chamber 2 Operation stop! Err112 no signal Customer service call!
-
Page 36: Trouble Shooting
10.2 Trouble Shooting If your Multimax should not work properly, take the following list and try to help yourself. If you do not succeed, switch off, disconnect from mains, close water tap. Call the after-sales-service Failure Possible Cause Remedy ON/OFF touch does not…
-
Page 40
Englisch Art. Nr.: bed_500992_mab_g_1v5_en…
29.11.2022
Системные коды пароконвектоматов Abat (ошибки)
Сегодня без пароконвектомата не обходится ни одна профессиональная кухня. Главная причина такой популярности – сочетание функций паровой обработки и конвекции в одном аппарате. Пароконвектомат умеет варить, тушить, выпекать и даже жарить пищу. Поэтому он может заменить много других видов оборудования: жарочный шкаф, гриль плиту, электроварку, пароварку, конвекционную печь и пищеварочный котел.
Для предприятий торговли и общепита поломка пароконвектомата это настоящая трагедия, так как заведения не смогут своевременно подать блюда и потеряют клиентов.
Чаще всего поломками воспринимаются ошибки, которые возникают из-за неправильной эксплуатации оборудования.
Наиболее частые сервисные кода (ошибки) в пароконвектоматах.
Каждое оборудование Abat имеет руководство по эксплуатации, где подробно описаны возможные неисправности и ошибки оборудования. Рассмотрим наиболее частые ошибки пароконвектоматов Abat, возникающие зачастую в случае неправильной эксплуатации оборудования.
Е02 — (отображается после нажатия на кнопку включения и сопровождается звуковым сигналом). Указывает на увеличение предельной температуры (от +75°С) в зоне контроллера либо его неисправность.
Е11 — (при выставлении режима «Пар»). Возможные причины: закрыт кран, который подает воду на аппарат или открыт кран слива воды из бойлера, либо объем воды в пароконвектомате недостаточен (то есть не покрывает электрод).
Е04 — (при попытке запустить устройство) – обрыв термопары.
Список системных кодов (ошибок) пароконвектоматов Abat (контролер 38 ПКА3 исп 85)
Еrr ch1 — Обрыв термопары «Камера»
Е02 — Аварийная защита (плюс)130/160ºС парогенератора или духовки (плюс) 320ºС
Err — Неисправность датчика холодных спаев или перегрев контроллера
Е07 — Неисправность частотного преобразователя
Системные кода (ошибки), частично блокирующие работу контроллера 38 ПКА3 исп 85
Err 1 ch2 — Обрыв первого канала «Щуп» (Блокируется работа с параметром «Щуп»)
Err 1 ch3 — Обрыв второго канала «Щуп» (Блокируется работа с параметром «Щуп»)
Err 1 ch4 — Обрыв третьего канала «Щуп» (Блокируется работа с параметром «Щуп»)
Е03 — Не правильное подключение электродов – уровень воды на верхнем электроде появляется раньше, чем на нижнем (Блокируется работа с параметром «Пар», «Мойка»)
Е04 — Отсутствие воды в парогенераторе (Блокируется работа с параметром «Пар», «Мойка»)
Е06 — Обрыв датчика заслонки (Блокируется работа с параметром «Пар», «Мойка»)
Err 1 ch5 — Обрыв термопары «Бойлер» (Блокируется режим «Мойка»)
Список системных кодов (ошибок) пароконвектоматов Abat (контролер 38 ПКА3 исп 86)
Е01 — Обрыв термопары «Камера»
Е02 — Аварийная защита (плюс)130/160ºС парогенератора или духовки (плюс) 320ºС
Е05 — Неисправность датчика холодных спаев или перегрев контроллера
Е07 — Неисправность частотного преобразователя
Системные кода (ошибки), частично блокирующие работу контроллера 38ПКА3 исп 86
Е10 — Обрыв первого канала «Щуп» (Блокируется работа с параметром «Щуп»)
Е11 — Обрыв второго канала «Щуп» (Блокируется работа с параметром «Щуп»)
Е12 — Обрыв третьего канала «Щуп» (Блокируется работа с параметром «Щуп»)
Е13 — Не правильное подключение электродов – уровень воды на верхнем электроде появляется раньше, чем на нижнем (Блокируется работа с параметром «Пар», «Мойка)
Е14 — Отсутствие воды в парогенераторе (Блокируется работа с параметром «Пар», «Мойка)
Е20 — Сообщение о необходимости проведения декальцинации парогенератора (Блокируется работа с параметром «Пар», «Мойка)
Е26 — Обрыв датчика заслонки (Блокируется работа с параметром «Пар», «Мойка)
Е21* — Требуется очистка парогенератора (Блокируется работа с параметром «Пар», «Мойка)
Е22 — Обрыв термопары «Бойлер» (Блокируется режим «Мойка»)
Способы устранения ошибок в пароконвектоматах Abat
В случае если, при работе с пароконвектоматом, на панели управления появилась одна из перечисленных ошибок, необходимо приостановить работу на оборудовании. Способы устранения данных ошибок указаны в паспортах и руководствах по эксплуатации, достаточно открыть необходимую страницу паспорта и посмотреть пути решения проблем, указанных в нем. Если у Вас не сохранилась техническая документация, то в таком случае паспорт и руководство эксплуатации можно скачать на нашем сайте abat.ru, которые находятся в разделе скачать материалы в каждой карточке товара. В случае если у Вас возникли сложности с решением проблем, то рекомендуем обратится в один из сертифицированных сервисных центров бренда Abat. Ознакомиться со списком сервисных центров можно в разделе «Авторизованные сервисные центры».
Профилактика от возникновения ошибок в пароконвектоматах
В первую очередь, при использовании пароконвектомата стоит следовать всем нормам и требованиям при установке и дальнейшей эксплуатации указанных в руководствах по эксплуатации и паспортах изделий. Не перегружать аппарат в процессе работы. Чтобы не произошли преждевременные поломки, не пренебрегать сервисным обслуживанием.
И помните, аккуратное использование техники – залог бесперебойной работы, а также снижение расходов на ремонт и замену комплектующих.
В сфере общественного питания пароконвектоматы и конвекционные печи стали незаменимы. Пароконвектомат дает возможность настроить и оптимизировать работу профессиональной кухни. Однако, несмотря на четко прописанные правила эксплуатации, поварам время от времени приходится сталкиваться с ошибками пароконвектоматов. К их возникновению, как правило, приводят нарушения правил подключения или эксплуатации оборудования, а также выход из строя отдельных элементов.
Часто агрегаты отказываются работать по следующим причинам:
- уплотнительные резинки на дверцах износились, что привело к потере герметичности;
- нагревательные ТЭНы прогорели;
- вышел из строя редуктор давления (если оборудование работает на газе);
- сломалась дверная ручка;
- возникли проблемы с термостатом и не только.
В случае неисправности пароконвектомат выдает ошибку. По модели техники и коду можно понять, что произошло и что необходимо срочно исправлять.
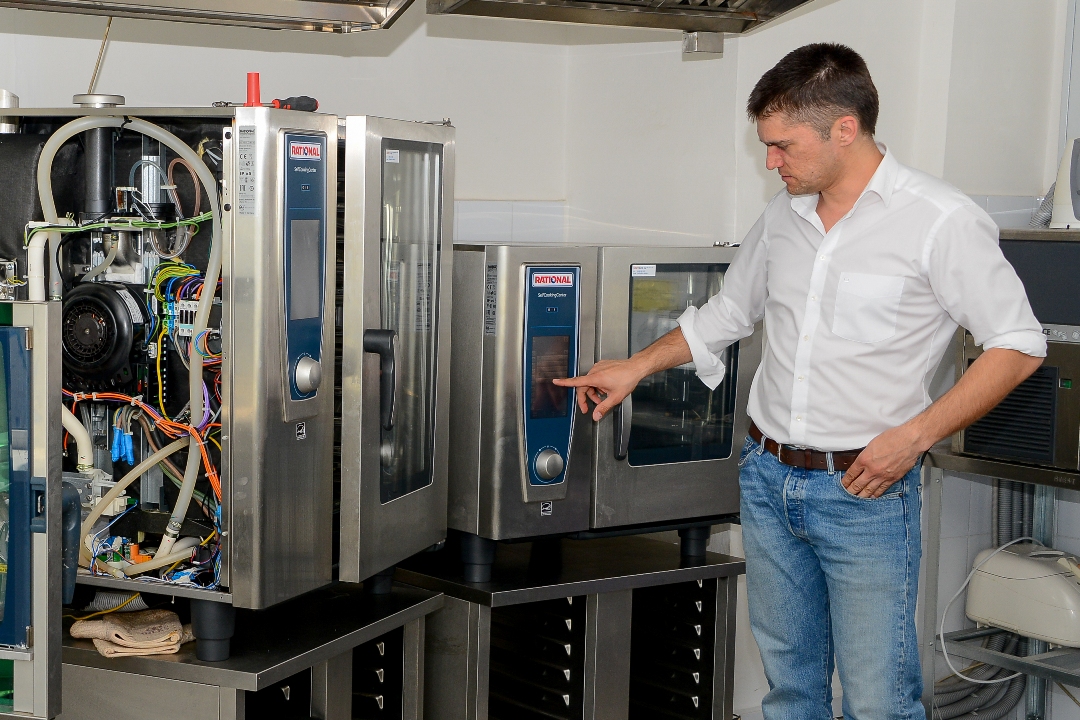
Что обозначают коды ошибок пароконвектоматов?
Нельзя однозначно ответить на вопрос, что означает в пароконвектомате ошибка Е02 или другая. Чтобы получить точный ответ, следует указать марку и модель оборудования. Каждый производитель подобной техники прописывает коды в индивидуальном порядке. Найти их можно в инструкции по эксплуатации агрегата.
Так, к примеру, на пароконвектоматах моделей Tecnoeka ошибки выглядят следующим образом:
- ошибка Г06 в пароконвектомате модели ЕКА указывает на перегоревшую лампочку в камере;
- ошибка Г07 в пароконвектомате модели ЕКА говорит о необходимости менять прокладки, поскольку при закрытой печи пар выходит наружу, потеряна герметичность.
Отдельные модели техники «Абат» могут демонстрировать такие неисправности:
- появление Е02 свидетельствует о повышении температуры в зоне контроллера;
- Е11 говорит о том, что на входе перекрыта вода, которая необходима для работы;
- ошибка Е07 в пароконвектомате показывает, что вышла из строя термопара платы управления;
- ошибка Е14 в пароконвектомате может свидетельствовать об обрыве термопары и т.д.
Частая ошибка cl5 на пароконвектомате Atesy указывает на перегрев мотора в процессе конвекции пара внутри камеры.
Что может привести к поломке пароконвектомата?
- Нарушения правил установки или подключения техники.
- Проблемы с напряжением в сети – частые перепады. Дорогостоящее оборудование рекомендуется подключать в сеть через стабилизаторы.
- Отсутствие фильтрации воды на входе в печь. Техника бесперебойно работает дольше, если фильтры чистятся, своевременно заменяются.
- Нарушение правил эксплуатации. Инструкцию по использованию функций печи следует держать перед глазами.
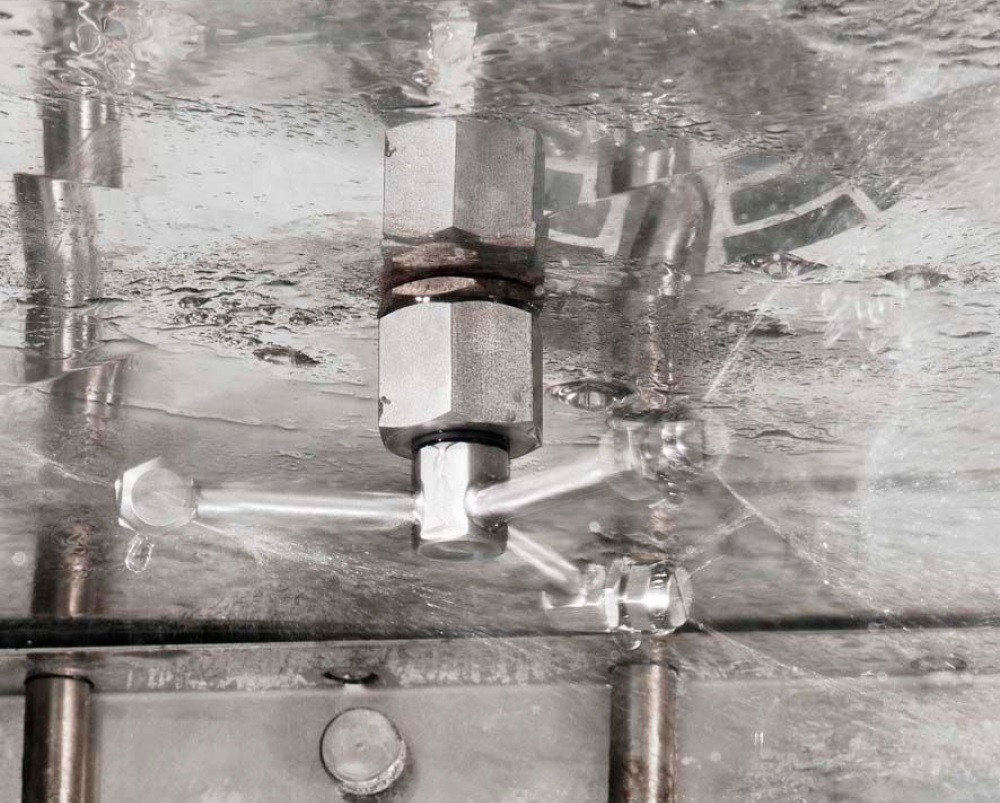
Профилактика возможных ошибок пароконвектомата
Владельцу конвекционной печи стоит следовать нормам и требованиям к установке и эксплуатации техники, не перегружать оборудование в процессе работы. Дорогостоящим моделям нужно обеспечить регулярное сервисное обслуживание. Игнорирование сервисных проверок работоспособности печи может не только привести к преждевременной поломке, но и стать причиной отказа в гарантийном обслуживании.
В процессе эксплуатации следите за тем, чтобы:
- дверцы техники плотно закрывались сотрудниками общепита;
- между корпусом печи и стенами было место для свободной циркуляции воздуха (не менее 3-4 см);
- в процессе приготовления блюд дверь открывалась как можно реже.
Аккуратность в использовании техники – гарантия бесперебойной работы, снижения расходов на ремонт и замену комплектующих.
Замена датчика температуры
Замена датчика температуры в пароконвектомате в любое время суток, оригинальные запчасти, низкие цены, профессиональная диагностика.
Предлагаем качественный ремонт пароконвектоматов по приемлемым ценам. На все виды работ предоставляем гарантию. Круглосуточный выезд по Москве и области.
Датчик температуры в пароконвектомате выполняет одну из важных функций. С помощью него обеспечивается качественное приготовление выпечки или блюд. Деталь отвечает за то, чтобы температура внутри пароконвектомата поддерживалась на заданном уровне. Чаще всего неисправности этого элемента появляются по причине неправильной эксплуатации. О том, что возникли проблемы в работе датчика температуры можно узнать 2 способами:
- Если у вас современная модель пароконвектомата с дисплеем, то сообщение о неисправности в виде кода ошибки появиться прямо на дисплее.
- Если в вашем пароконвектомате нет дисплея, то вы можете заметить изменения в приготовленных блюдах.
 Особенности замены датчика температуры
Основой датчика температуры является капиллярная трубка разной длины. Тип ее подключения к сети может быть однофазным или трёхфазным. Для того, чтобы заменить датчик температуры, нужно отсоединить фишку провода датчика на силовой плате. После этого откручиваем винты на креплении термодатчика внутри камеры печи и вытягиваем его. Новый элемент ставиться в обратном порядке.
После того, как замена датчика температуры была выполнена, нужно проверить работоспособность пароконвектомата. Для этого включаем оборудование в работу, задаем определенный температурный режим и ждем. Минут через 20-25 можем проверить, как датчик реагирует на температуру внутри пароконвектмомата.
Советы по эксплуатации и замены датчика температуры
Большинство поломок профессионального оборудования связано с некачественным или неправильным обслуживанием. Своевременная смазка нужных элементов, соблюдение времени эксплуатации и отдыха, протирание после каждого приготовления пищи являются основой долговечной работы вашей техники. Эти советы прописаны в инструкции для того, чтобы уберечь оборудование от частых поломок.
Мы так же рекомендуем не ждать пока появиться поломка и потребуется срочный ремонт, а обращаться к профессионалам за периодическим ТО. Наши специалисты смогут выявить неисправность намного раньше, чем появиться ее симптом, а значит, вы можете сэкономить на ремонте.
У НАС ВОЗМОЖЕН РЕМОНТ ТАКИХ БРЕНДОВ ПАРОКОНВЕКТОМАТОВ:
Ремонт пароконвектоматов различного уровня сложности
За дополнительной информацией или заказом услуг обращайтесь по телефону +7(495)799-00-71
Источник
Контроль температуры (термостаты, термощупы, датчики)

Код по схеме производителя:ALPENINOX 005924ELECTROLUX 005924, 101184, 5924, S4565C1033BFAGOR 1202718..

Код по схеме производителя:FAGOR 12029713, RT4000594LINCAT OTC07RATIONAL 40.00.395, 40.00.594, 40.01..

Код по схеме производителя теплового оборудования:MIWE 504146(Technodelo)..

Код по схеме производителя оборудования:Blue Seal 234434..

Код по схеме производителя оборудования:WIESHEU WIWA 34988..

Код по схеме производителя:FAGOR 12026815, RT4000298PLINCAT OPR10RATIONAL 40.00.298, 40.00.298P, 40.

Датчик расхода жидкости высокой точности, применим для пароконвектоматов, кофеварок и др.Код по схем..

Код по схеме производителя:FAGOR 12030579, RT30141020RATIONAL 3014.1017, 3014.1018, 3014.1019, 3014.

Код по схеме производителя оборудования:MKN 10013519..

Поставщик произвел замену на 100% аналог. Подробнее — введите код в поиск 379050Код по схеме произво..


Код по схеме производителя оборудования:CONVOTHERM 5056323..

Код по схеме производителя:ELOMA 570621, E0436, E316004, EL0570621, ELE316004, ELO570621FALCON 53057..

Код по схеме производителя:ELOMA E0433, E316003, ELE316003Датчик совместим с моделями оборудования:E..

Код по схеме производителя:FAGOR RT87201003FRIMA 30140160, 87201003KREFFT 87201003METOS 30140160, 87..

Код по схеме производителя:FAGOR 12038044, RT30141004RATIONAL 3014.1001, 3014.1002, 3014.1003, 3014.

Код по схеме производителя оборудования:FAGOR 12040500, RT4001094LINCAT OTC13RATIONAL 40.01.094..

Код по схеме производителя:GIERRE TER137..

Код по схеме производителя:FAGOR 12023901, T323024, T323024000VIRTUS 12023901Датчик совместим с моде..

Код по схеме производителя:FAGOR 12024642, T323011, T323011000VIRTUS 12024642Датчик совместим с моде..

Код по схеме производителя оборудования:UNOX KTR1110A..
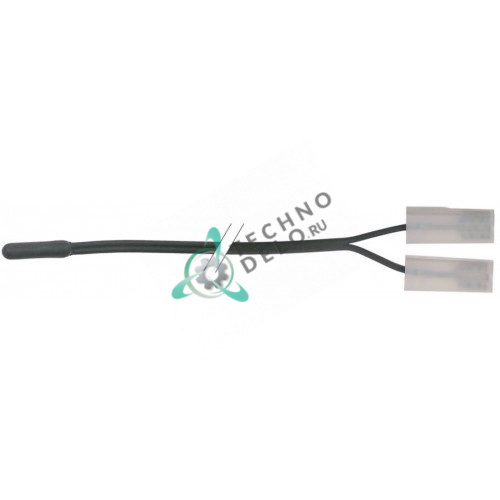
Код по схеме производителя:INOXTREND C8248, C8248-00, C8248-12WHIRLPOOL 483286002455Датчик совместим..

Код по схеме производителя:HOBART 00-737006-000, 737006(TechnoDelo)Датчик совместим с моделями обору..

Код по схеме производителя:BERTOS 24076500DIXELL Y6001BB001000ELIWELL SN200009ERRE 2A00317EVCO ECSND..

Код по схеме производителя оборудования:ELOMA E0431(Technodelo)..

Код по схеме производителя оборудования:TECNOEKA 00005790, 11950677000..

Код по схеме производителя:CONVOTHERM 5001022, 5001023, 59052(TechnoDelo)Датчик совместим с моделями..

Код по схеме производителя:RATIONAL 3014.0151 (для моделей пароконвектоматов CC101, CC201, CC6, CM10..

Код по схеме производителя:ELECTROLUX 058953ZANUSSI 058953(TechnoDelo)Датчик совместим с моделями те..

Код по схеме производителя:FRIMA 30140120, 30140150, 30140152, 30140159Küppersbusch 407334 (ECD106, ..

Код по схеме производителя:Küppersbusch 161608 (для печей: CBE106, CBE106-VAR091, CBE110, CBE11..


Код по схеме производителя оборудования:FOINOX 70401GIGA RX70401I-OVENS 70401MITO 70401..

Код по схеме производителя оборудования:ELECTROLUX 0H9845, 0K2997, 0K5047, 18025400, 70040101, 70040..

Код по схеме производителя:CONVOTHERM 2219137, 5002064Датчик совместим с моделями оборудования:CONVO..
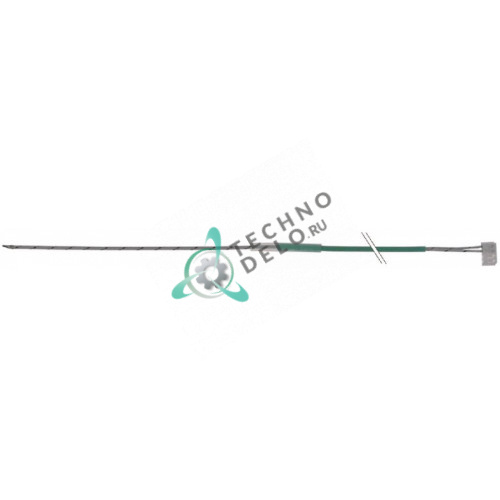
Код по схеме производителя:FAGOR 12040499, RT4001095FRIMA 4001095LINCAT OTC14METOS 4001095RATIONAL 4..

Код по схеме производителя:MORETTI FORNI 66081910Датчик совместим с моделями оборудования:MORETTI FO..

Код по схеме производителя:FAGOR 12031482, RT4000291FRIMA 4000291LINCAT OTC10METOS 1003414, 4000291R..

Код термопары по схеме :Rational 40.03.528(Technodelo)..

Код по схеме производителя:RATIONAL 3014.0161, 3014.1006, 3014.1007, 3014.1008, 3014.1009, 3014.1010..

Код по схеме производителя:FAGOR 12029187, 12029188, 12036625, RT4000287, RT4000398, RT8700058LINCAT..

Код по схеме производителя оборудования:FAGOR 12018718, R663090, R663090000Датчик для моделей конвек..

Код по схеме производителя:ALPENINOX 0K5058ELECTROLUX 002171, 0H9847, 0K5052, 0K5058, 0M2152, 14T06.

Код по схеме производителя:FAGOR 12028357, 12028358, RT30171050, RT4400211FRIMA 30171050, 4001311, 4..

Электронный аналоговый контроллер температуры, с круглой ручкой регулировки и цифровым дисплеем.&nbs..
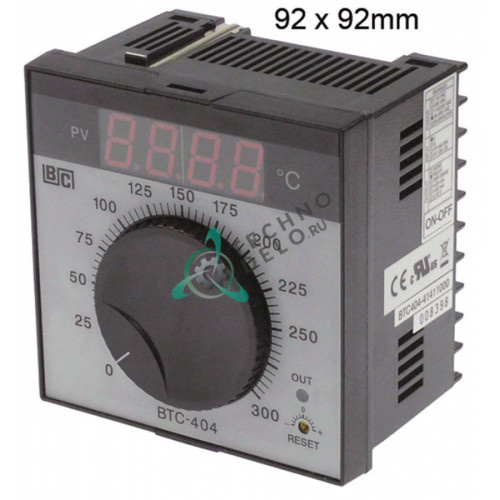
Электронный аналоговый контроллер температуры с цифровым дисплеем. Technodelo..

Электронный аналоговый контроллер температуры с цифровым дисплеем. Technodelo..

Электронный аналоговый контроллер температуры, с круглой регулировочной ручкой и цифровым дисплеем, ..

Контроллер Brainchild с цифровым дисплеем и круглой ручкой регулировки.Technodelo..

Электронный аналоговый контроллер температуры с цифровым дисплеем. TechnoDelo..

Электронный аналоговый контроллер температуры с цифровым дисплеем. TechnoDelo..

Контроллер (электронный термостат) с ручкой регулировки и с цифровым дисплеем.TechnoDelo..
Источник
Конвектомат. Устройство, схема и ремонт
Пароконвектомат ПКА-6 Абат
Частенько ремонтирую различные электрические устройства, и на основе этих ремонтов пишу статьи в свой блог. Так и на этот раз – я публикую отчет, как провел капитальный ремонт пароконвектомата.
При этом, как всегда, добыл много фотографий, схему, понял устройство и предназначение. Всем этим добром и спешу поделиться со своими читателями, то есть с вами.
Пароконвектомат, или просто конвектомат – это такая большая печка, незаменимая в кафе и столовых, где происходит приготовление пищи в больших количествах. Можно жарить, парить, выпекать, разогревать любые блюда меню. Можно делать это с помощью горячего пара, так блюда готовятся быстрее, качественнее, и вкус получается насыщенный, сочный!
Слюнки потекли, переходим к делу!
Мне довелось ремонтировать пароконвектомат ПКА производства Абат (Россия, Чувашия, г.Чебоксары). Полное название – ПКА6-1/1 ПМ, произведен в 2007 году. Фото в начале статьи.
Аппарат сделан качественно, но как и любой технике, нужен уход, профилактика и ремонт. А всего этого давно не было. Проблемы касались и электрики, и конструкции, и общего состояния. Годы берут своё. Но по неисправностям и ремонту конвектомата чуть позже, а для начала – как обычно, немного теории.
Устройство конвектомата Абат
Исходя из названия, в этом устройстве главное – пар и его конвекция, то есть циркуляция. Пар добывается из воды посредством парогенератора. Вода поступает из водопровода и должна быть очищена, что достигается применением фильтров для воды.
В принципе устройство похоже на проточный водонагреватель, только там вода нагревается не до такой степени.
Уровень воды в парогенераторе тщательно контролируется, для этого служит бачок с тремя щупами, каждый настроен на свой уровень:
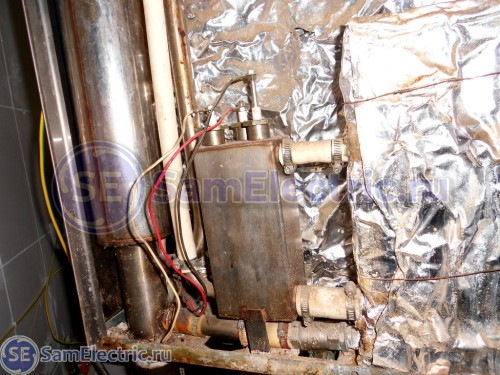
бачок контроля уровня воды конвектомата Абат
При минимальном уровне нагрев отключается, чтобы ТЭНы парогенератора не работали “всухую”, ибо это приведёт к их неминуемому перегреву.
Когда активен средний или верхний щуп, генератор работает нормально. На верхнем щупе перекрывается клапан подачи воды. Следит за этим контроллер уровня воды.
В парогенераторе вода нагревается до состояния пара с помощью мощного трехфазного тена. Про этот ТЭН можно сказать, что это сердце пароконвектомата. Пар подается в камеру приготовления пищи, и тщательно перемешивается там с помощью вентилятора.
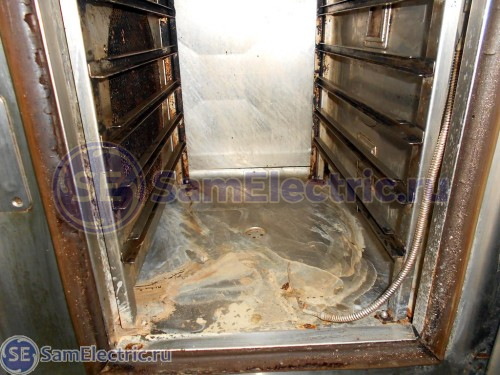
камера приготовления конвектомата Абат
В камеру вставлены полочки, на которые устанавливаются… нет, не кастрюли, а гастроёмкости!
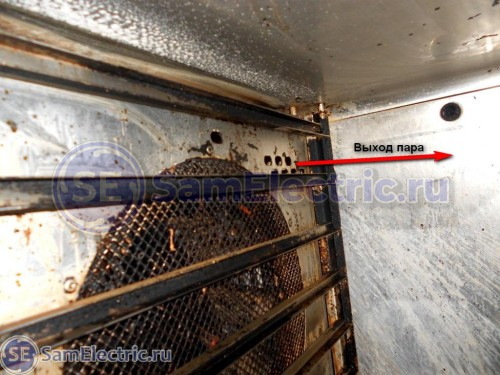
Отверстия для выхода пара
Извиняюсь за грязь внутри, что есть, то есть…
В камере также есть обычные (сухие) ТЭНы, для сухой готовки без пара.
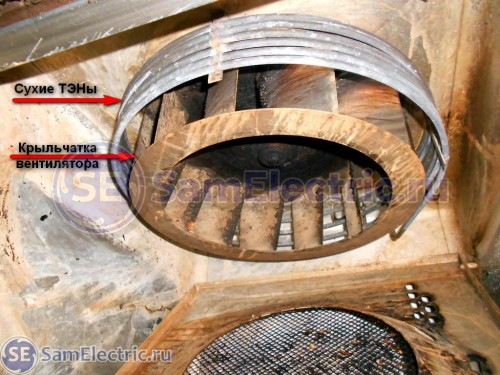
Вентилятор крутится постоянно и перемешивает воздух. Сухой или влажный – не важно.
Система распределения пара показана на фото ниже:
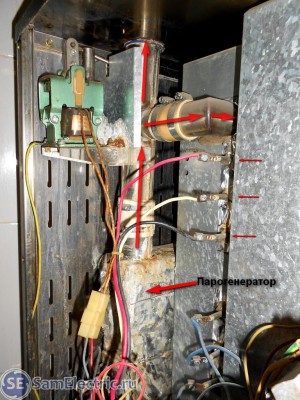
Система распределения пара
Три тоненькие стрелки справа на фото – это фазные клеммы сухого ТЭНа, ниже – нулевые клеммы того же ТЭНа.
Пар перераспределяется с помощью соленоида сброса пара, который сбрасывает лишний пар в атмосферу:
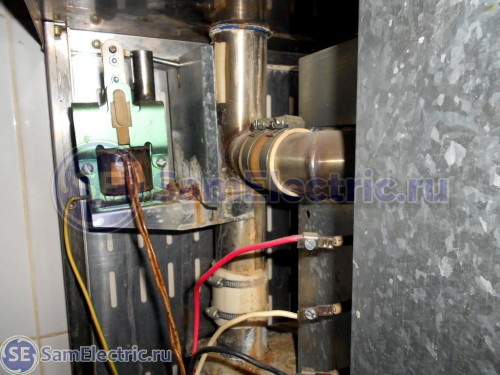
Пар выходит через трубу, крышка на которой приводится в действие этим соленоидом. Также есть труба потоньше для аварийного сброса пара.
Температурой управляет специальная плата, которую я назвал контроллером температуры:
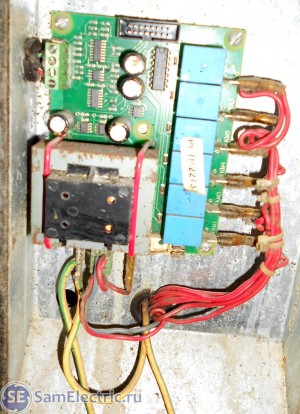
На контроллер приходят сигналы с датчиков температуры и с главного контроллера, а выдает он сигналы через контакты реле (зелёные, справа) на контакторы, которые включают ТЭНы.
Вот главный контроллер, с другой стороны этой платы – кнопки управления и индикация, которые показаны на первой фотографии статьи:
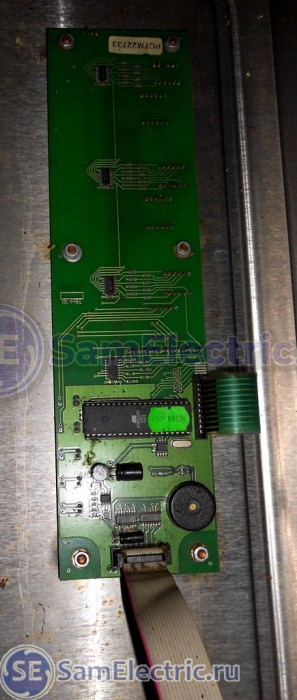
Вот общий вид внутренней электрики печки:
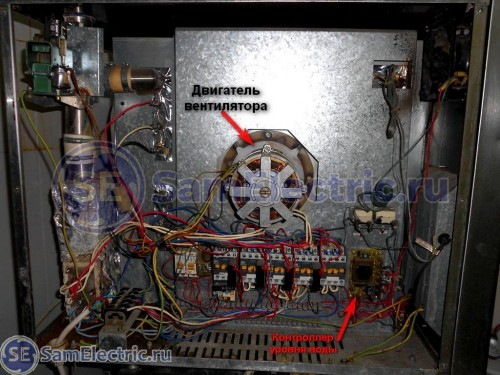
Поближе – контакторы, включающие сухие ТЭНы и ТЭНы парогенератора:
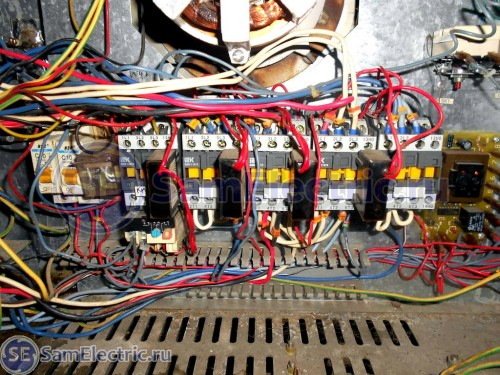
Контакторы включения нагрева
Подробнее о устройстве и правилах работы – в инструкции, которую можно будет скачать в конце статьи. Там же приведена и схема, и коды ошибок.
Ремонт пароконвектоматов ПКА Абат
Теперь рассмотрим вопросы ремонта печки Абат.
Сразу приведу электрическую схему пароконвектоавтомата:
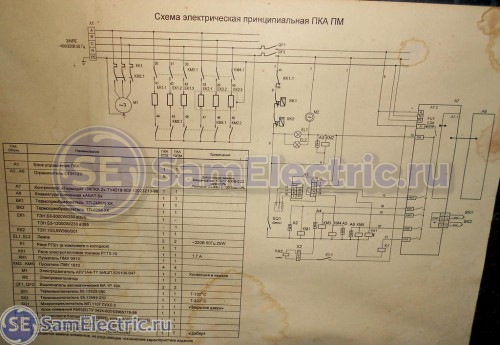
Схема конвектомата ПКА ПМ
Читатель прислал схему более современного пароконвектомата, ПКА-6 и ПКА-10 ВМ:
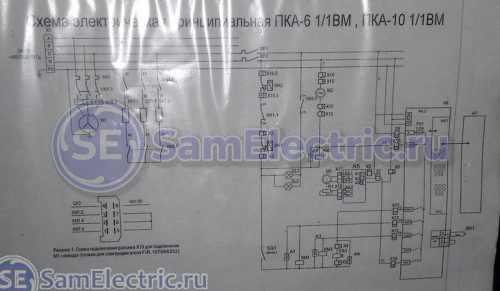
Электрическая схема более современного пароконвектомата, ПКА-6 и ПКА-10 ВМ
При наличии желания и опыта в схеме пароконвектомата разобраться можно, если появятся вопросы – спрашивайте в комментариях.
Началось всё с того, что при включении пара выбивал трехполюсный защитный автомат 25А, через который был подключен конвектомат.
Сразу подозрение пало на ТЭН, и правда – его сопротивление гуляло самым непотребным образом, в том числе и на массу.
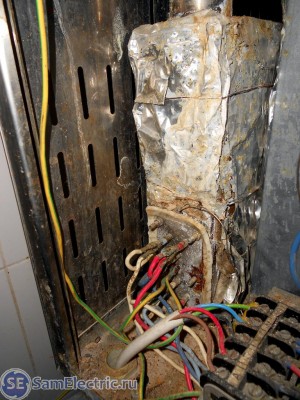
Место установки ТЭНа в парогенератор
Достаем ТЭН – и вот какую картину я вижу:
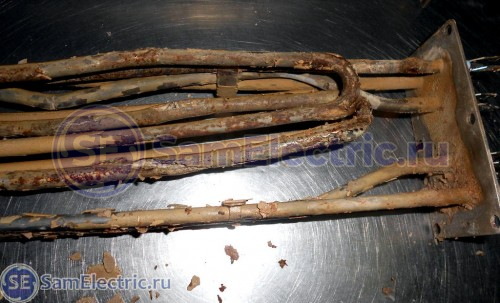
Старый тен-лопнули нагреватели
При этом парогенератор был до отказа забит накипью, и работать нормально, конечно, не мог:
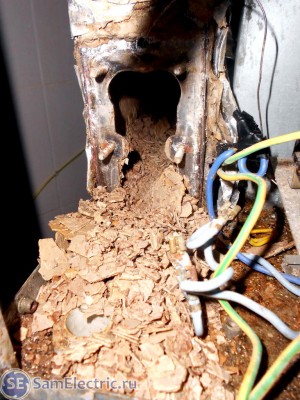
Ремонт пароконвектомата Абат – Чистка от накипи
У представителей производителя Абат был куплен такой ТЭН, вот он:
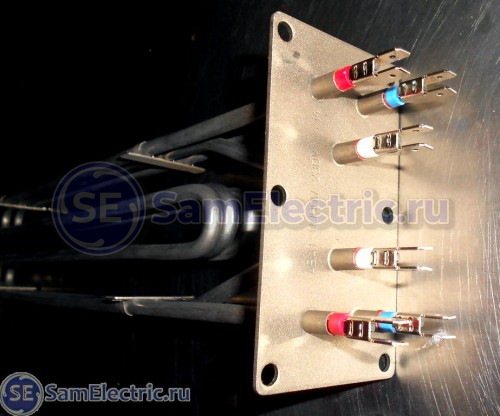
Всё познаётся в сравнении:
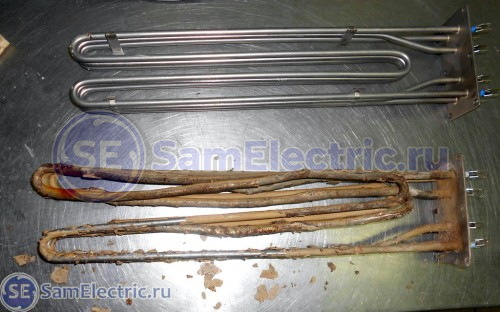
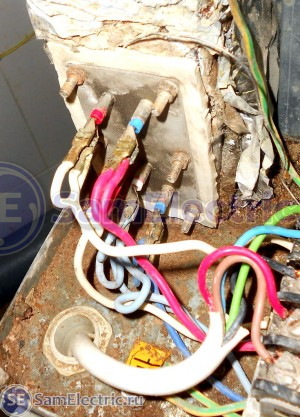
Замена ТЭНа. Новый тен установлен
После этого печь Абат заработала нормально.
Рекомендую мою новую статью по замене ТЭНа в бойлере (накопительном водонагревателе) Оазис.
Кроме того, я заменил контакторы, половина которых была закорочена (контакты нулевых проводов), остальные работали через пень-колоду – заклинивали, сильно искрили.
Стоит сказать, что для нормальной работы этого конвектомата конечно нужно поменять не только электрику. Надо менять прокладки, двигатель (подшипники тарахтят и могут в любое время рассыпаться). Не было в наличии крышки трубы сброса пара, из-за этого парогенератор работал постоянно и был значительный расход воды.
В основном задача выполнена, конвектомат работает, клиенты столовой довольны!
Будете в Таганроге в ТРЦ “Мармелад” – Заходите в “Хорошую Столовую”, передавайте привет!
Инструкция к пароконвектоматам Абат
Abat-Manual-Samelectric.ru.pdf – Инструкция, содержащая принцип подключения и работы, схему и коды ошибок конвектоматов Абат.
Видео по ремонту Абат
В заключение – несколько видео в тему:
Источник