MoniMax 5600
G. ERROR CODE TABLE
1) Journal Printer (Option)
Error Code
1910000
Undefined error
1910400
The error of head right position
1910800
The error of Paper charger sub assembly
1912000
Failed to print due to shortage of CR/LF
Paper out when checked status of
1912100
initializing
1914000
Head overheat
1914100
Paper jam error
9721010
Failed to connect communication
Failed
9721012
electronics
Failed to receive data from control
9721016
electronics
9721040
Failed to produce Thread
9721080
Failed to produce Event
9721122
Failed to response of first initialization
9721123
Failed to response of second initialization
9721124
Failed to download thd font data
9721125
Failed to try to print in case of Paper out
Cause
to
deliver
data
to
1.Reinitialized Journal printer and check again
1.After checking the head right position, try to
reinitialized Journal printer and check again
1.Check the Paper charger and status of supplied
paper
1.Check if FFC cable is properly connected or short
1.Check if supplied paper is running out of or
occurred jam in return path
1.Turn off the power for a moment to slow down
overheat of head and turn on the power
1.Remove the jammed paper and initialize
1.Check
if
communication
connected or right status by test machine
control
1.Check
if
communication
connected or right status by test machine
1.Check
if
communication
connected or right status by test machine
6 — 20
6. Appendix
Handling
cable
is
properly
cable
is
properly
cable
is
properly
5600T Диспенсер ошибка кассет
Хелп. Банкомат пишет про ошибку кассет диспенсера (ЕГПО Tell me). (2я и 3я-видит как пустые, 1я 4я и реджект-видит как не установлены). Сброс диспенсера не делает (начинает крутить ролики но выпадает в ошибку).В стандартной утилите бывают ошибки 400EE 400FF По датчикам все норм ! Но! -есть один момент: На фото- красный датчик Position sensor. PS (Под системником (закрыта железкой на защелке) находится какая то плата — без признаков жизни -кто знает что это ?)
Последний раз редактировалось Fabri 21 ноя 2013, 22:22, всего редактировалось 2 раз(а).
-

Fabri - Прохожий
- Сообщения: 2
- Зарегистрирован: 21 ноя 2013, 01:44
- Откуда: МО
Re: 5600T Диспенсер ошибка кассет 
 Andrushok » 21 ноя 2013, 03:57
Красный-это интерлок, он не влияет на тестирование, но можешь его найти сзади справа и включить.
Плата под системником-это плата PNC, и никаких признаков она тебе не подаст, если вдруг она выйдет из строя, то ЕРР, монитор, бегущая строка не будут работать.
Попробуй провести инициализацию кассет в ЕГПО, проверь магниты в кассетах, проверь отрабатывают ли датчики при перекрытии.
- Andrushok
- Сбербанк

- Сообщения: 61
- Зарегистрирован: 20 дек 2011, 04:02
- Откуда: Московская область
- Авто: Рено
Re: 5600T Диспенсер ошибка кассет
Fabri » 21 ноя 2013, 04:07
Есть фото диспенсера-где конкретно этот интерлок ? Сегодня всё облазили -не нашли. В сейфе на двери- только геркон — система на него не реагирует и белая кнопка двери сейфа. Инициализацию кассет делали. Проблема проявляется именно в ЕГПО (открытие опердня пишет 1, 4 и реджект кассета не установлены-хотя в других пунктах меню с кассетами всё норм). С кассетами порядок с датчиками кассет тоже(брали кассеты из 2 комплекта).
-
Fabri - Прохожий
- Сообщения: 2
- Зарегистрирован: 21 ноя 2013, 01:44
- Откуда: МО
Re: 5600T Диспенсер ошибка кассет
Tivman » 20 дек 2018, 23:17
Здрвия! сегодня аналогичная проблема возникла. Кто знает решение, помогите. Кассета вставлена, банкомат шуршит, но выдачи не делает, падает в ошибку
П.С, С датчиками все норм
Интерлок зажат, 4 DIP дернут
- Tivman
- Новичок
- Сообщения: 28
- Зарегистрирован: 12 окт 2018, 16:23
Re: 5600T Диспенсер ошибка кассет
Tivman » 24 дек 2018, 02:08
BREST писал(а):ПО не переставляли?
Нет. УС работал, не чихал, не кашлил, замена бумаги и только. И тут бац! Это…
- Tivman
- Новичок
- Сообщения: 28
- Зарегистрирован: 12 окт 2018, 16:23
Re: 5600T Диспенсер ошибка кассет
Tivman » 18 янв 2019, 03:37
BRadmir02 писал(а):Что за ошибка? Что меняли? Презентор?
Сегодня поменяли презентора диспенсера наутилус 5600т. Вышла также ошибка Fail PNC GetDeviceStatus
Через ноут 4 и 7 свич вниз тесты ок.
Через ншвдм инициализации проходит, а на выдачу пишет Fail PNC GetDeviceStatus
лышал что то про несовместимые версии Ep and SP..
Какие мысли есть?
- Tivman
- Новичок
- Сообщения: 28
- Зарегистрирован: 12 окт 2018, 16:23
Re: 5600T Диспенсер ошибка кассет
BREST » 18 янв 2019, 10:17
Тоже столкнулись с такой проблемой.Проблема в нижнем уровне ПО.С HWDM.Это 100% переустановка ПО.
- BREST
- Специалист
- Сообщения: 306
- Зарегистрирован: 26 сен 2012, 21:24
- Авто: TOYOTA
Re: 5600T Диспенсер ошибка кассет
Bartez » 20 янв 2019, 03:22
Tivman писал(а):Через ншвдм инициализации проходит, а на выдачу пишет Fail PNC GetDeviceStatus
лышал что то про несовместимые версии Ep and SP..
Какие мысли есть?
Проблема в ПО 100%. Тестировал железо ПО с загрузочной Флешки все в норме, при тестировании с HDD УС такая ошибка. Иногда решается заменой NHVDM иногда полной переустановкой ПО со 2-3 раза.
- Bartez
- Новичок
- Сообщения: 22
- Зарегистрирован: 31 авг 2016, 22:57
Re: 5600T Диспенсер ошибка кассет
Kostroma8640 » 21 янв 2019, 18:20
Всем привет,если я правильно понимаю это проблема аунтификации. EP-SP не закончен.Проблема нижнего уровня,но есть ещё подозрение на проказни Kess.Точного решения я сам не определил, бывает помогает остановка Kess, перезагрузка контроллера по питанию и далее запуск NHVDM,но это не всегда помогает .
- Kostroma8640
- Сбербанк
- Сообщения: 13
- Зарегистрирован: 20 янв 2018, 05:50
Вернуться в Nautilus Hyosung
Кто сейчас на конференции
Сейчас этот форум просматривают: нет зарегистрированных пользователей и гости: 1
| Error Code | Description | Resolution |
| 1106910 | LOST SLIP, DEV_SPR | |
| 2001000 | Receipt paper jam | Remove any jammed paper from the printer. |
| 2001200 | Receipt printer feed plate open | Close the feed plate. |
| 2001300 | Out of receipt (Receipt paper empty) | Replenish the receipt paper. |
| 2010100 | Receipt printer lever opened | Close the lever of print head completely. |
| 2010200 | Receipt printer head overheated | Wait the time until the temperature of head adequately slow down and try to initialize. |
| 2010300 | Receipt paper jam | Remove jammed paper between printer head and rollers. |
| 2010400 | Receipt paper empty | 1. Replenish receipt paper.2. Check the status of sensor and its connector. |
| 2010500 | Receipt paper is empty | 1. Check the status of setting paper.2. Check the status of sensor and its connector. |
| 2010600 | Thermal printer is overheated | After terminating self-test and initialize receipt printer. |
| 2010600 | Command is received while doing self-test | After terminating self-test and initialize receipt printer. |
| 2010700 | No receipt paper | 1. Replenish receipt paper in paper charger. 2. Check the status of Near End sensor and its connector. |
| 2010800 | Receipt paper cutting error | 1. Check the Cutter module. 2. Check if printer head lever is properly close. |
| 2010900 | No sensing black mark (dark sensor) | 1. Check the status of Black mark sensor.2. Check if Dip switch #6 is correctly set (Dip switch #6 is set by On in case of not using Black mark). |
| 2010A00 | The size of image print data is abnormal | Check the AP version and initialize. |
| 2080100 | Receipt printer lever opened | Close the lever of print head completely. |
| 2080200 | Receipt printer head overheated | Wait the time until the temperature of head adequately slow down and try to initialize. |
| 2080300 | Receipt paper jam | Remove jammed paper between printer head and rollers. |
| 2080400 | Receipt Paper Jam | 1. Replenish receipt paper. 2. Check the status of sensor and its connector. |
| 2080500 | Receipt paper setting error | 1. Check the status of setting paper. 2. Check the status of sensor and its connector. |
| 2080600 | Command is received while doing self-test | After terminating self-test and initialize receipt printer. |
| 2080700 | No receipt paper | 1. Replenish receipt paper in paper charger. 2. Check the status of Near End sensor and its connector. |
| 2080800 | Receipt paper cutting error | 1. Check the Cutter module. 2. Check if printer head lever is properly close. |
| 2080900 | No sensing black mark (dark sensor) | 1. Check the status of Black mark sensor. 2. Check if Dip switch #6 is correctly set (Dip switch #6 is set by On in case of not using Black mark). |
| 2080A00 | The size of image print data is abnormal | Check the AP version and initialize. |
| 9720000 | Receipt printer communication error during SP opening | Check if communication cable or COM port is not connected. |
| 9722010 | Receipt Printer communication failure during COM port open | 1. Do RESET at Operator Function. 2. Reboot ATM. |
| 9722DN0 | Receipt Printer communication failure during sending command to Receipt Printer | 1. Do RESET at Operator Function. 2. Reboot ATM. |
| 97912XX | DEV_SPR Time Over Error | 1. Reboot ATM. 2. Call your attendant. |
| 97922XX | DEV_SPR FATAL ERROR (WARNING) | 1. Reboot ATM. 2. Call your attendant. |
| A010100 | Detecting the lever opened before executing command | Close the feed lever. |
| A010200 | Printer thermal head overheated while executing command | Check the thermal printer head and change if necessary |
| A010300 | Paper jam detected before executing command | Remove any jammed paper from the printer. |
| A010400 | Paper setting error detected before executing command | Remove and re-install the receipt paper. |
| A010500 | Paper check error detected before executing command | Remove and re-install the receipt paper. |
| A010800 | Paper cutter software check error detected before executing command | Check for and remove any jammed paper. |
| A080100 | Open lever detected while executing command | Remove any jammed paper. |
| A080200 | Receipt printer head overheated while printing | Check the thermal printer head and change if necessary. |
| A080300 | Paper jam detected while executing command | Remove and re-install the receipt paper. |
| A080400 | Paper setting error detected before executing command | Remove and re-install the receipt paper. |
| A080500 | Paper check error in doing command | Remove any jammed paper. |
| A080800 | Paper cutter software check error detected while executing command | Check for and remove any jammed paper. |
| ADN0100 | No response detected for 30 seconds after sending command | Check cable and connection between the CE and printer. |
| ADN0F00 | No response detected for 30 seconds after sending command | Check cable and connection between the CE and printer. |
| ADN1100 | No response detected after 3 retries | Check for notes in the Cash Dispenser. If no bills are present try using compressed air to clean the dispenser (a sensor may be blocked by dust). Otherwise the dispenser may require service. |
| ADN1200 | No response detected between ENQ-ACK after 5 retries of ENQ | Check cable and connection between the CE and printer. |
| ADN1300 | No response detected after 5 retries because of timeout between STX-BCC interval | Check cable and connection between the CE and printer. |
| HYOSUNG CE – E.2 CARD READER ERROR CODES | ||
| 8217091 | Card in card reader | Remove Card. |
| 1101910 | LOST CARD”, DEV_MCU | |
| 9723010 | Failed to open device | Failed to open device |
| 9723016 | Time out to receive data | Check the serial port or cable. |
| 9723019 | Polling down | Check the serial port or cable. |
| 9730100 | IC CARD DENIAL | |
| 9730200 | IC CARD ONLINE DATA ERROR | |
| 9730300 | IC CARD ERROR | |
| 97913XX | DEV_MCU Time-over Error Code | 1. Reboot ATM. 2. Call your attendant. |
| 97923XX | DEV_MCU FATAL ERROR (WARNING) | 1. Reboot ATM. 2. Call your attendant. |
| HYOSUNG CE – E.3 JOURNAL PRINTER ERROR CODES | ||
| 9721111 | Off line status | 1. Check communication cable connected properly. 2. Check power cable connected properly. |
| 9721112 | On busy | Check printer’s working status. |
| 9721121 | Mechanics Error | 1. Recover printer’s mechanical Error. 2. Reboot ATM. |
| 9721122 | Recoverable Error | 1. Recover printer’s Error. 2. Reboot ATM. |
| 9721123 | Unrecoverable Error | Reboot ATM. |
| 9721124 | Paper jammed | Remove jammed paper. |
| 97911XX | DEV_JPR Time-over Error Code | 1. Reboot ATM. 2. Call your attendant. |
| 97921XX | DEV_JPR FATAL ERROR (WARNING) | 1. Reboot ATM. 2. Call your attendant. |
| HYOSUNG CE – E.4 CASH DISPENSER ERROR CODES | ||
| 1102910 | LOST WITHDRAW CASH”, DEV_CSH | |
| 1102920 | LOST DEPOSIT CASH”, DEV_CSH | |
| 1103910 | LOST CARD & SLIP”, DEV_MCU | DEV_SPR | |
| 2000100 | No cassette | Insert or re-insert the cassette(s). Check cassette sensor. |
| 2000200 | Note shortage | Replenish the cassette. |
| 2000300 | Reject bin full | Remove notes from the reject bin and try the Cassette Total function again. |
| 2000500 | Cash Dispenser Unit data setting error | Check Cash Dispenser Unit information. (Currency, Denomination, etc.) |
| 2001600 | Note detected in stacker (shutter or presenter type) | Clear any notes from the stacker. |
| 2021500 | Sensor detects note in delivery path before CDU dispenses | Remove note from the CDU delivery path. |
| 2131500 | CS4 sensor detects note in delivery path before CDU dispenses. Sensor is located along the delivery path right before the reject bin. | Remove note from the CDU delivery path. |
| 21A1500 | CS1A sensor detects note in delivery path before CDU dispenses. Sensor is located along the delivery path right after where the note exits the 1st cassette. | Remove note from the CDU delivery path. |
| 21B1500 | CS1A sensor detects note in delivery path before CDU dispenses. Sensor is located along the delivery path right after where the note exits the 1st cassette. | Remove note from the CDU delivery path. |
| 21B1500 | CSB sensor detects note in delivery path before CDU dispenses. Sensor is located along the delivery path right after where the note exits the 1st cassette. |
Remove note from the CDU delivery path. |
| 24A1500 | CS3A sensor detects note in delivery path before CDU dispenses. Sensor is located along the delivery path right after where the note exits the 3rd cassette. |
Remove note from the CDU delivery path. |
| 24B1500 | CS3B sensor detects note in delivery path before CDU dispenses. Sensor is located along the delivery path right after where the note exits the 3rd cassette. |
Remove note from the CDU delivery path. |
| 4000000 | Cash Dispenser(CDU) received the undefined command from AP software | 1. Get the trace file and log files in D:trace 2. Call your attendant |
| HYOSUNG CE ERROR CODES | ||
| 4001100 | Detecting CS2 Dark (Front Access Type: Reject box is opened.) | 1. Remove notes on CS2 sensor. 2. Clean CS2. |
| 4001400 | CS4A sensor detects note in delivery path before/after CDU dispenses | 1. Remove note from the CDU delivery path. 2. Clean CS4A. |
| 4001500 | CS2 or CS4A sensor detects note in delivery path before/after CDU dispenses | 1. Remove note from the CDU delivery path. 2. Clean CS2 and CS4A. |
| 4001800 | CS4B sensor detects note in delivery path before/after CDU dispenses | 1. Remove note from the CDU delivery path. 2. Clean CS4B. |
| 4001900 | CS2 or CS4B sensor detects note in delivery path before/after CDU dispenses | 1. Remove note from the CDU delivery path. 2. Clean CS2 and CS4B. |
| 4001C00 | CS4A or CS4B sensor detects note in delivery path before/after CDU dispenses | 1. Remove note from the CDU delivery path. 2. Clean CS4A and CS4B. |
| 4001D00 | CS2, CS4A or CS4B sensor detects note in delivery path before/after CDU dispenses | 1. Remove note from the CDU delivery path. 2. Clean CS2, CS4A and CS4B. |
| 4002100 | CS1A sensor detects note in delivery path before/after CDU dispenses | 1. Remove note from the CDU delivery path. 2. Clean CS1A. |
| 4002200 | CS1B sensor detects note in delivery path before/after CDU dispenses | 1. Remove note from the CDU delivery path. 2. Clean CS1B. |
| 4002300 | CS1A or CS1B sensor detects note in delivery path before/after CDU dispenses | 1. Remove note from the CDU delivery path. 2. Clean CS1A and CS1B. |
| 4002800 | CS13 sensor detects note in delivery path before/after CDU dispenses | 1. Remove note from the CDU delivery path. 2. Clean CS13. |
| 4002900 | CS1A or CS13 sensor detects note in delivery path before/after CDU dispenses | 1. Remove note from the CDU delivery path 2. Clean CS1A and CS13. |
| 4002A00 | CS1B or CS13 sensor detects note in delivery path before/after CDU dispenses | 1. Remove note from the CDU delivery path. 2. Clean CS1B and CS13. |
| 4002B00 | CS1A, CS1B or CS13 sensor detects note in delivery path before/after CDU dispenses | 1. Remove note from the CDU delivery path. 2. Clean CS1A, CS1B and CS13. |
| 4003000 | Failed in checking the main motor echo | 1. Initialize. 2. Check Main Motor Encoder Slit. 3. Initialize after Power On/Off. 4. Check Encoder Sensor CS8 BRKT. 5. Check CS8 Sensor Cable. 6. Change Main Motor Encoder Slit Sensor CS8. |
| 4003100 | Failed in checking the reject gate solenoid echo |
|
| 4003200 | Failed in checking the present gate solenoid echo | |
| 4003300 | Check sum error (No information is set) | 1. Check Cash Dispenser Information after reading Cash Dispenser version. 2. Initialize. 3. Initialize after executing Cash Dispenser Information Set(‘P’) Command. 4. Change Cash Dispenser B/D. |
| 4003400 | Error of two sheets detecting sensor(CS5_1) for initializing | 1. Check CS5_1 Sensor Cable. sensor(CS5_1) for initializing 2. Check second Dip Switch in Cash Dispenser B/D. 3. Change CS5_1 Sensor. |
| 4003600 | Error of CS 2, CS13 sensor during initialization | |
| 4003700 | Error of 2 sheets detecting sensor (CS5_1 / CS5_2) for dispensing | 1. Check Cash Dispenser Board Segment. 2. Initialize. 3. Read data of ‘Read Double Sensor’ Command. |
| 4003800 | Error in checking SRAM | |
| 4003900 | Gate operation sensor (CS3) error before initial recovery | 1. Initialize after removing notes or dust over Gate. 2. Check CS3 Sensor BKRT. 3. Check CS3 Sensor Cable. 4. Exchange Sensor after abnormal operating CS3 Gate detecting Sensor. 5. Replace Reject Solenoid 1. |
| 4003A00 | When more than 5 sheets of cash dispensing is required during a test | 1. Check command that Cash Dispenser is received. 2. Check Cash Dispenser EP ROM Version or specification. |
| 4003B00 | When CS15A or CS 15B sensor is detected as dark after initial recovery | 1. Remove notes or dust on CS15A Sensor. 2. Check CS15A Sensor Cable. 3. Exchange Sensor after abnormal operating CS15A Sensor. |
| 4004000 | Cassette is removed during dispensing | 1. Check the cassette catcher 2. Set the cassette properly |
| 4004100 | Error if re-driving is over 5 times during separated rejection | 1. Check notes in Reject Box 2. Rearrange notes in Cassette 3. Remove dust in CS15AB, CS31AB, CS41AB, CS1AB Sensor 4. Check dust existing in CS5 Sensor Guide 5. Check dust existing in Main Motor Encoder Slit 6. Check index value of notes each cassette |
| 4004200 | In case the number of notes detected outlet sensor(CS13) is less than the number of required notes | 1. Check notes dispensed and rejected. 2. Remove notes jammed in CDU.3. Remove dust in CS13 Sensor. 4. Exchange sensor after abnormal operating CS13 Sensor. |
| 4004300 | Error if total reject is more than 20 sheets | 1. Check notes in Reject Box. 2. Rearrange notes in Cassette. 3. Remove dust in CS1AB, CS15AB, CS31AB, CS41AB Sensor. 4. Check dust in existence CS5 Sensor Guide. 5. Check notes index value. |
| 4004400 | Error if continuous 5 times are rejected | 1. Check notes in Reject Box. 2. Rearrange notes in Cassette. 3. Check dust in Main Motor Encoder Slit. 4. Remove dust in CS15AB, CS31AB, CS1AB Sensor. 5. Exchange CS8 Encoder Slit Sensor. |
| 4004500 | In case the number of notes detected outlet sensor (CS13) is more than required notes | 1. Check notes dispensed and rejected. 2. Remove dust in CS13 Sensor. 3. Exchange sensor after abnormal operating CS13 Sensor. |
| 4004600 | Program error(Separated rejection) | 1. Check notes in 1 Cassette. 2. Check Sensor(CS6) Poll. 3. Check jam in 1 cassette and reload. 4. Remove dust in CS1A, CS1B Sensor. 5. Exchange 1 cassette box when there are many error. |
| 4004700 | 1 cassette mis-feed error (Separated rejection) | 1. Check notes in 1 Cassette. 2. Check Sensor(CS6) Poll. 3. Check jam in 1 cassette and reload. 4. Remove dust in CS1A, CS1B Sensor. 5. Exchange 1 cassette box when there are many error. |
| 4004800 | Error if the number of dispensed notes is not matched to the requested | 1. Check CS13 sensor (note jam and dust). 2. Replace CS13 sensor. |
| 4004900 | Error to dispense 0 sheets to be required (Separated rejection) | 1. Check received command. 2. Check communication cable. 3. Check Cash Dispenser Firmware Version. |
| 4004A00 | Error of note jam (Separated rejection) | 1. Remove jammed notes on Cash Dispenser return path. 2. Remove dust in CS1~CS4 sensor. 3. Install after rearranging notes in cassette. |
| 4004B00 | Continuous 3 times error if note is long (once tried, twice retried)>Separated rejection | 1. Check state of notes in reject box. 2. Rearrange notes in cassette. 3. Check Index of notes. 4. Check foreign objects in the main motor encoder slit. 5. Replace the CS8 encoder slit sensor. |
| 4004C00 | In case the number of notes detected outlet sensor (CS13) is more than that of notes detected on CS1A,B sensor | 1. Check CS1 sensor. 2. Reconnect CS1 sensor. |
| 4004E00 | Error of being removed 2nd cassette before separate rejection | 1. Set cassette #2 correctly. 2. Check the catcher inside cassette #2 guide. |
| 4005100 | Received a request for over 150 notes dispensing on the Cash Dispenser from the upper unit. | 1. Check the Cash Dispenser received command. 2. Check the abnormal communication cable. 3. Check the Cash Dispenser firmware version and refer to specifications. |
| 4005200 | The remaining notes at the sensor in front of the CST after dispense operation (CS1A, CS1B) | 1. Remove the remaining notes at a sensor in front of the CST. 2. Realign notes in the cassette. 3. Check abnormal clutch. 4. Check abrasion of the cassette box pick unit. |
| 4005300 | Error for the double note detection during separation. |
|
| 4005400 | Cash Dispenser EP Program Error during dispense operation (failed table search) | 1. Initialize after resetting the power. 2. Upgrade the Cash Dispenser firmware or download software again. 3. Replace the Cash Dispenser B/D. |
| 4005500 | Timeout due to note’s length error passed through the CS13 during dispense operation | 1. Remove a jammed note between the tray and Cash Dispenser. 2. Remove a jammed note at the position of the CS13 sensor. 3. Remove a dust on the CS13 sensor. |
| 4005600 | Abnormal operation of the gate solenoid during dispense operation | 1. Remove a jammed note on the gate. 2. Remove notes in the reject box and remount the reject box. 3. Check if the CS3 sensor bracket is bent. 4. Check if the CS3 sensor cable is disconnected (CN10 #9~10). 5. Exchange a sensor after abnormal operating CS3 Gate detecting sensor. 6. Replace the reject solenoid 1. |
| 4005700 | Cash dispenser configuration error | 1. Replace cash dispenser PCB. 2. Reconfigure cash dispenser setup data |
| 4005800 | Retract box position error during command reserved operation | 1. Mount the retract box or open the box cover. 2. Check if CS62 sensor poll is abnormal. 3. Check if the CS62 sensor cable is disconnected . (Cash Dispenser Board CN10 #5~2). |
| 4005900 | Initial jam time error | 1. Remove jammed notes. 2. Clean the sensors (CS1~CS15) in cash dispenser. |
| 4005B00 | 2 Cassette Miss Feed Error (Fail to reject bill separately) |
|
| 4005D00 | Continuously detected 2 notes for three times or more during dispense operation | 1. Check notes’ status in the reject box. 2. Realign notes in the cassette. 3. Check foreign objects at the position of the CS5 Sensor Guide. 4. Check if the CS5 cable is disconnected (CS5_1:Cash Dispenser B/D CN10 #11~12, 25~28/ CS5_2:CN12). |
| 4006000 | Something is detected in C31AB sensor before dispensing bills from 3rd cassette |
|
| 4006100 | Something is detected in C31AB sensor before dispensing bills. |
|
| 4006200 | Bills are remained in CS1AB sensor after dispensing bills. |
|
| 4006300 | Bills are remained in CS31AB sensor after dispensing bills |
|
| 4006A00 | CS15AB ~ CS13 Time out(Jam) during dispensing bills from second cassette |
|
| 4006B00 | Something is detected on CS31A, CS31B sensor during initialization |
|
| 4007000 | Something is detected on CS41AB sensor before dispensing bills from fourth cassette |
|
| 4007200 | Something is detected on CS41AB sensor during dispensing bills |
|
| 4007300 | Bills is remained in CS41AB sensor after dispensing bills |
|
| 4007A00 | CS31AB ~ CS13 Time out (Jam) during dispensing bills from fourth cassette |
|
| 4007B00 | Something is detected on CS41A, CS41B sensor in initialization |
|
| 4007C00 | Missfeed error in 4th cassette | |
| 4007D00 | Trying to dispense bills from 4th cassette but the 4th cassette doesn’t installed |
|
| 4008000 | Something is detected on CS15AB sensor before dispensing operation |
|
| 4008100 | Something is detected in C15AB sensor during dispensing operation |
|
| 4008200 | Bill is remained in CS15AB sensor after dispensing operation |
|
| 4008F00 | CS13 sensor detects a bill with hole during dispensing |
|
| 4009A00 | CS31AB~CS13 Time out(Jam) during dispensing from 3rd cassette. |
|
| 4009D00 | Trying to dispense bills from 3rd cassette but the 3rd cassette doesn’t installed. |
|
| 4009F00 | 3 cassette miss feed error | |
| 400AC00 | Something is detected on CS2 sensor after dispense operation |
|
| 400BC00 | Communication error – Command Length doesn’t match |
|
| 400BE00 | Bill pickup sensor(CS1, CS15) recognized has a hole and CS4 sensor detects it or CS4 sensor detects the gap too close |
|
| 400C700 | Something is detected on CS12 sensor during dispensing bills or initialization.-MB TTW |
|
| 400C800 | Something is detected on CS14 sensor during dispensing bills or initialization.-MB TTW |
|
| 400C900 | Something is detected on CS14 sensor after dispense operation |
|
| 400CC00 | Bill is remained on the sensor in front of cassette during resetting |
|
| 400D000 | Bills are passed on CS13~CS12 sensor – Timeout[Jam], MB TTW |
|
| 400D100 | Cash Dispenser communication failure during sending command to cash dispenser | 1. Do RESET at Operator Function. 2. Reboot ATM. |
| 4DN0100 | Cash Dispenser communication failure during receiving command to cash dispenser | 1. Do RESET at Operator Function. 2. Reboot ATM. |
| 4DN8100 | Communication error of Shutter | |
| 8216091 | Cash jammed on Cash Dispenser | 1. Remove jammed notes on Cash Dispenser return path. 2. Remove dust in CS1~CS4 sensor. |
| 9712000 | Failed to create file | 1. Reboot ATM. 2. Reinstall software. 3. Replace hard disk drive. |
| 9712100 | Failed to read file | 1. Reboot ATM. 2. Reinstall software. 3. Replace hard disk drive. |
| 9712200 | Failed to write file | 1. Reboot ATM. 2. Reinstall software. 3. Replace hard disk drive. |
| 9712300 | Failed to close file | 1. Reboot ATM. 2. Reinstall software. 3. Replace hard disk drive. |
| 9712400 | Failed to close file | 1. Reboot ATM. 2. Reinstall software. 3. Replace hard disk drive. |
| 9712500 | Failed to close file | 1. Reboot ATM. 2. Reinstall software. 3. Replace hard disk drive. |
| 9712600 | Failed to close file | 1. Reboot ATM. 2. Reinstall software. 3. Replace hard disk drive. |
| 9719000 | Failed to execute an extra command in the status of Cash Unit Exchange | 1. Reboot ATM. 2. Reinstall software. 3. Replace hard disk drive. |
| 9719100 | In case of not being the status of Cash Unit Exchange out of End Exchange | 1. Reboot ATM. 2. Reinstall software. 3. Replace hard disk drive. |
| 9719200 | In case of carrying out Cash In Start command at two times | 1. Reboot ATM. 2. Reinstall software. 3. Replace hard disk drive. |
| 9719300 | In case of not being the status of Cash In out of End Cash In | 1. Reboot ATM. 2. Reinstall software. 3. Replace hard disk drive. |
| 9719400 | Invalid Cash Unit ID | Reconfigure cash dispenser setup data. |
| 9719500 | Invalid Cash Unit number | Reconfigure cash dispenser setup data. |
| 9719600 | The abnormal of the number of Cash Unit | Reconfigure cash dispenser setup data. |
| 9719700 | No. of dispensed notes that software counts is not matched to it cash dispenser responded | 1. Initialize after resetting the power. 2. Upgrade the Cash Dispenser firmware or download software again. 3. Replace the Cash Dispenser B/D. |
| 971A000 | Invalid denomination | Reconfigure denomination at supervisor mode. |
| 971A100 | Invalid currency | Reconfigure currency at supervisor mode. |
| 971A200 | “CASSETTE OFF POSITION” Not dispensable | 1. Reconfigure denomination. 2. Reconfigure currency. |
| 971A300 | In case the number of bills dispensed exceeds the maximum dispensing bill | 1. Check cash dispenser driver (CDM SP) version. 2. Reconfigure the maximum dispensable count. |
| 971A400 | In case the number of coins dispensed exceeds the maximum dispensing coin | 1. Check coin dispenser driver version. 2. Reconfigure the maximum dispensable count. |
| 971A500 | Invalid mix number | Reconfigure cash dispenser at supervisor mode. |
| 971A500 | Invalid mix number | Reconfigure cash dispenser at supervisor mode. |
| 971A600 | In case automatic Retry of SP fails 3 times | |
| 971A700 | There is no setting information about automatic Retry standard | |
| 971B000 | In case of being executed Reject or Retract command without being the bills in stacker | 1. Check a dust in stacker. 2. Reconfigure the maximum dispensable count. |
| 971C000 | Not supported command Reinstall software | |
| 971D100 | Partial dispense | 1. Check the replenished amount and replenish. 2. Check the notes in cassette #1. |
| 971D200 | Partial dispense from cassette #2 | 1. Check the replenished amount and replenish. 2. Check the notes in cassette #2. |
| 971D300 | Partial dispense from cassette #3 | 1. Check the replenished amount and replenish. 2. Check the notes in cassette #3. |
| 971DX00 | In case partial bills dispensed by dispensing demand when Partial Dispense option is on. “X” means cassette number |
|
| 9740000 | Cash Dispenser communication failure during COM port open | 1. Do RESET at Operator Function. 2. Reboot ATM. |
| 9740102 | In case nonexistent Note Index is set | |
| 9741100 | When sensing CS2 Dark (Error code, 400FF00 is subdivided by location of sensor.) |
|
| 9741400 | When sensing CS4A Dark (Error code, 400FF00 is subdivided by location of sensor.) |
|
| 9741800 | When sensing CS4B Dark (Error code, 400FF00 is subdivided by location of sensor.) |
|
| 9742100 | When sensing CS21A,B Dark (Error code, 400FF00 is subdivided by location of sensor.) |
|
| 9742800 | When sensing CS13 Dark (Error code, 400FF00 is subdivided by location of sensor.) |
|
| 9743B00 | When sensing CS15A,B Dark (Error code, 400FF00 is subdivided by location of sensor.) |
|
| 9744700 | Cash picking-up fail while cash in cassette #1 is enough | 1. Check bill jam or no note in cassette #1. Check cash dispenser. |
| 9745B00 | Cash picking-up fail while cash in cassette #2 is enough | 1. Check bill jam or no note in cassette #2. 2. Check cash dispenser. |
| 9746B00 | When sensing CS31A,B Dark (Error code, 400FF00 is subdivided by location of sensor.) |
|
| 9747C00 | Cash picking-up fail while cash in cassette #4 is enough | 1. Check bill jam or no note in cassette #2. 2. Check cash dispenser. |
| 974FF00 | When sensing bills in the Stacker (Error code, 400FF00 is subdivided by location of sensor.) |
|
| 97914XX | DEV_Cash Dispenser Time-over Error Code | 1. Reboot ATM. 2. Call your attendant. |
| 97924XX | DEV_Cash Dispenser FATAL ERROR (WARNING) | 1. Reboot ATM. 2. Call your attendant. |
| 9799499 | DISPENSER COUNT ERROR | Check the sensor on cash dispenser. |
| HYOSUNG CE – E.5 MODEM ERROR CODES | ||
| D030000 | Modem is not responding | Check the modem controller. |
| D030100 | The target call address has call blocking enabled | 1. Check modem cable. 2. Contact to technician support team. |
| D030200 | The specified terminal identifier is invalid | 1. Check modem cable. 2. Contact to technician support team. |
| D030300 | All call appearances on the specified address are currently in use | 1. Check modem cable 2. Contact to technician support team. |
| D030400 | The disable address parameter contains dialing control characters that are not processed by the service provider | 1. Check modem cable. 2. Contact to technician support team. |
| D030500 | The specified country/region code is invalid | 1. Check modem cable. 2. Contact to host and phone company. |
| D030600 | The operation failed for an unspecified or unknown reason | Contact to technician support team. |
| D030700 | Insufficient resources to complete the operation | Contact to technician support team. |
| HYOSUNG CE – E.6 MISCELLANEOUS ERROR CODES | ||
| 1030100 | DEV_PIN (Key data error from host) | Contact to host. |
| 2000400 | Vault door open | Close the vault door. Check door switch. |
| 9701010 | Failed to connect communication between SP of PIN and EP of one | Check if communication cable or COM port is not connected. |
| 9701016 | Received data time out of EPP | Check if communication cable or COM port is not connected. |
| 9701017 | Delivered data time out of EPP | Check if communication cable or COM port is not connected. |
| 9701031 | Failed to produce Thread of EPP | Reboot ATM. |
| 9701040 | Failed to produce Thread of EPP | Reboot ATM. |
| 9701060 | Failed to create buffer | Reboot ATM. |
| 9701111 | BCC error of EPP | Check BCC logic of EPP. |
| 9701151 | EPP is down when it receives an ‘Get Status’ command | 1. Reboot ATM. 2. Replace pin pad. |
| 9701152 | EPP is down when it receives an ‘Clear Func Key’ command | 1. Reboot ATM. 2. Replace pin pad. |
| 9722020 | File Open Error | 1. Reboot ATM. 2. Call your attendant. |
| 9722060 | Memory Allocate Error (Print Form Allocate Index Buffer Fail) | 1. Reboot ATM. 2. Call your attendant. |
| 9722068 | Invalid Media Name | 1. Reboot ATM. 2. Call your attendant. |
| 97221A2 | Invalid Unit | 1. Reboot ATM. 2. Call your attendant. |
| 97221C1 | Form is not Found | 1. Reboot ATM. 2. Call your attendant. |
| 97221C4 | Form Name is NULL | 1. Reboot ATM. 2. Call your attendant. |
| 97221C5 | Invalid Form | 1. Reboot ATM. 2. Call your attendant. |
| 97221C6 | Print Form() offset is Invalid | 1. Reboot ATM. 2. Call your attendant. |
| 97221C7 | Invalid Form (Too many Fields in the form) | 1. Reboot ATM. 2. Call your attendant. |
| 97221D1 | Media is not Found | 1. Reboot ATM. 2. Call your attendant. |
| 97221D3 | Media Overflow when form size is larger than media size | 1. Reboot ATM. 2. Call your attendant. |
| 97221D4 | Media Name is NULL | 1. Reboot ATM. 2. Call your attendant. |
| 97221D5 | Invalid Media (Attribute for Media definition is not proper) | 1. Reboot ATM. 2. Call your attendant. |
| 97221D6 | Invalid Media (Area size is larger than media size) | 1. Reboot ATM. 2. Call your attendant. |
| 97221D7 | Invalid Media (Size of Media Name is exceeded to 2048 bytes totally) | 1. Reboot ATM. 2. Call your attendant. |
| 97221E1 | Field is not Found | 1. Reboot ATM. 2. Call your attendant. |
| 97221E2 | Field Error (This Field must have initial value) | 1. Reboot ATM. 2. Call your attendant. |
| 97221E3 | Non-Indexed value for Indexed Field | 1. Reboot ATM. 2. Call your attendant. |
| 97221E4 | Invalid Field | 1. Reboot ATM. 2. Call your attendant. |
| 97221E5 | Invalid Field (This Field’s width is 0) | 1. Reboot ATM. 2. Call your attendant. |
| 9740020 | Failed to create file | 1. Reboot ATM. 2. Call your attendant. |
| 9740025 | Failed to copy file | 1. Reboot ATM. 2. Call your attendant. |
| 9745500 | System power off while dispensing | |
| 97915XX | DEV_BRM Time-over Error Code | 1. Reboot ATM. 2. Call your attendant. |
| 97916XX | DEV_PBM Time-over Error Code | 1. Reboot ATM. 2. Call your attendant. |
| 97918XX | DEV_PIN Time-over Error Code | 1. Reboot ATM. 2. Call your attendant. |
| 9791AXX | DEV_FNG Time-over Error Code | 1. Reboot ATM. 2. Call your attendant. |
| 9791BXX | DEV_VFD Time over Error Code | 1. Reboot ATM. 2. Call your attendant. |
| 97925XX | DEV_BRM FATAL ERROR (WARNING) | 1. Reboot ATM. 2. Call your attendant. |
| 97926XX | DEV_PBM FATAL ERROR (WARNING) | 1. Reboot ATM. 2. Call your attendant. |
| 97928XX | DEV_PIN FATAL ERROR (WARNING) | 1. Reboot ATM. 2. Call your attendant. |
| 9792AXX | DEV_FNG FATAL ERROR (WARNING) | 1. Reboot ATM. 2. Call your attendant. |
| 9792BXX | DEV_VFD FATAL ERROR (WARNING) | 1. Reboot ATM. 2. Call your attendant. |
| 9799901 | DOOR CHECK | 1. Reboot ATM. 2. Call your attendant. |
| 9799902 | LIGHT ERROR | 1. Reboot ATM. 2. Call your attendant. |
| 9799903 | SPL ERROR | 1. Reboot ATM. 2. Call your attendant. |
| 9799904 | PIN ERROR | 1. Reboot ATM. 2. Call your attendant. |
| 9799905 | SENSOR CHECK | 1. Reboot ATM. 2. Call your attendant. |
| 9799907 | UPS ERROR | 1. Reboot ATM. 2. Call your attendant. |
| 9799908 | SCREEN ERROR | 1. Reboot ATM. 2. Call your attendant. |
| 991@@91 | ON TRANSACTION POWER OFF | 1. 1. Check power supply. 2. Check backup battery. |
| D000100 | Error while modem initializing | Check the modem connection and the modem test. |
| D000200 | Reversal transaction failure | Check for any CDU error codes and the number of notes dispensed to customer. |
| D000300 | PIN ERROR | Transaction was denied by host. |
| D000400 | INVALID PIN | Reboot ATM. |
| D000500 | BANK UNAVAILABLE | Transaction was denied by host. |
| D000600 | CARD NOT SUPPORTED | Transaction was denied by host. |
| D000700 | INSUFFICIENT FUNDS | Transaction was denied by host. |
| D000800 | INELIGIBLE TRANSACTION | Transaction was denied by host. |
| D000900 | INELIGIBLE ACCOUNT | Transaction was denied by host. |
| D001000 | DAILY LIMIT EXCEEDED | Transaction was denied by host. |
| D001100 | UNABLE TO PROCESS | Transaction was denied by host. |
| D001200 | Invalid transaction | Check the transaction from the host and try again. |
| D001300 | Invalid amount | Check the transaction from the host and try again. |
| D001400 | Invalid card number | Check the transaction from the host and try again. |
| D001400 | Invalid card number | Check the transaction from the host and try again. |
| D001500 | UNABLE TO PROCESS | Transaction was denied by host. |
| D001600 | WITHDRAWAL LIMIT ALREADY REACHED | Transaction was denied by host. |
| D001700 | INVALID AMOUNT | Transaction was denied by host. |
| D001800 | EXTERNAL DECLINE | Transaction was denied by host. |
| D001900 | SYSTEM ERROR | Transaction was denied by host |
| D002000 | Surcharge screen should have been displayed | Check the transaction from the host and try again. Check BIN List. |
| D002100 | ROUTING LOOKUP PROBLEM | Transaction was denied by host. |
| D002200 | UNABLE TO PROCESS | Transaction was denied by host. |
| D002300 | TRANSACTION NOT SUPPORTED | Transaction was denied by host. |
| D002400 | Exceeds Issuer Withdrawal Limit | Check the transaction from the host and try again. |
| D003900 | No Credit Account | Check the transaction from the host and try again. |
| D005100 | Insufficient Funds | Check the transaction from the host and try again. |
| D005200 | No Checking Account | Check the transaction from the host and try again. |
| D005300 | No Savings Account | Check the transaction from the host and try again. |
| D005400 | Expire Card | Check the transaction from the host and try again. |
| D005500 | Incorrect Pin | Check the transaction from the host and try again. |
| D005700 | Transaction not Permitted – Card | Check the transaction from the host and try again. |
| D005800 | Transaction not Permitted – Terminal | Check the transaction from the host and try again. |
| D006100 | Exceeds Withdrawal Limit | Check the transaction from the host and try again. |
| D007500 | PIN Tries Exceeded | Check the transaction from the host and try again. |
| D007800 | No Account | xxxx |
| D008000 | Invalid Date | xxxx |
| D008300 | Can not Verify PIN | Check the transaction from the host and try again. Try different cards. |
| D008600 | Can not Verify PIN | Check the transaction from the host and try again. Try different cards. |
| D009100 | Bank Unavailable | Check the transaction from the host and try again. |
| D009200 | System Unavailable | Check the transaction from the host and try again. |
| D009300 | Transaction Serial Number mismatch | Check the transaction from the host. |
| D009400 | Record format mismatch | Check the transaction from the host. |
| D009500 | Routing ID mismatch | Check the transaction from the host. |
| D009600 | Terminal ID mismatch | Check the transaction from the host. |
| D009700 | Response Type mismatch (Reversal) | Check the transaction from the host. |
| D009800 | Response Type mismatch (Day Close) | Check the transaction from the host. |
| D009900 | Response Type mismatch (Config.) | Check the transaction from the host. |
| D009A00 | Response Type mismatch (Withdrawal/Balance/Transfer) | Check the transaction from the host. |
| D009B00 | STX error | Check the transaction from the host. |
| D009C00 | ETX error | Check the transaction from the host. |
| D009D00 | FS out (after response code) | Check the transaction from the host. |
| D009E00 | FS out (after retrieval reference number) | Check the transaction from the host. |
| D009F00 | FS out (after system trace audit number) | Check the transaction from the host. |
| D00A000 | FS out (after account balance) | Check the transaction from the host. |
| D00A100 | FS out (after available balance) | Check the transaction from the host. |
| D00A200 | FS out (after surcharge amount) | Check the transaction from the host. |
| D00A300 | FS out (after authorization response text) | Check the transaction from the host. |
| D00A400 | ETX wrong position | Check the transaction from the host. |
| D00A500 | FS out (after total cash dispense amount) | Check the transaction from the host. |
| D00A600 | FS out (after total non-cash dispense amount) | Check the transaction from the host. |
| D00A700 | FS out (after total surcharge amount) | Check the transaction from the host. |
| D00A800 | FS out (after config surcharge amount) | Check the transaction from the host. |
| D00A900 | ETX out (config) | Check the transaction from the host. |
| D00AC00 | Invalid data received from the host (MAC data mismatch) | Check the transaction from the host. |
| D00B000 | TERMINAL ID MISMATCHED | |
| D00B100 | TRANSACTION CODE MISMATCHED | . |
| D00B200 | SECOND FIELD ID CODE MISMATCHED | |
| D00B300 | FIRST DES KEY WRONG SIZE | |
| D00B400 | SURCHARGE AMOUNT WRONG SIZE | |
| D00B500 | Sequence Number MISMATCHED | |
| D00B600 | INVALID RESPONSE CODE ERROR | |
| D00B700 | Authorization Number Error | |
| D00B800 | BUSINESS DATE Error | |
| D00B900 | Transaction time Number Error | |
| D00BA00 | BUSINESS DATE Error | |
| D00BB00 | Balance amount Error | |
| D00BC00 | Actual Surcharge Error | |
| D00BD00 | Sequence Number MISMATCHED | |
| D00BF00 | BUSINESS DATE Error | |
| D00C000 | Settlement Error | |
| D00C100 | Host Mac result error | Check the key mode and MAC value. |
| D00C200 | ATM Mac result error | Check the key mode and MAC value. |
| D011100 | REVERSAL DECLINED | |
| D022200 | PIN CHANGE DECLINED | |
| D100000 | No connection | 1. Check phone number. 2. Check modem cable. 3. Contact phone company. |
| D110000 | Cannot receive ENQ from the host | 1. Check phone number. 2. Check modem cable. 3. Contact telephone company. |
| D120000 | Transmission error : Failed to receive requesting the modem to send the data. |
1. Check modem and modem cable connection. 2. Contact telephone company. |
| D130000 | Receiving NAK more than 3 times | 1. Check modem and modem cable connection. 2. Contact telephone company. |
| D140100 | Disconnected by Unknown Reason | 1. Check modem and modem cable connection. 2. Contact telephone company. |
| D140200 | Disconnected by rejected call from remote party | Try again later. |
| D140300 | Disconnected because the local phone was picked up | Try again later. |
| D140400 | Disconnected by Forwarded | 1. Check modem and modem cable connection. 2. Contact telephone company. |
| D140500 | Disconnected by Unreachable | 1. Check modem and modem cable connection. 2. Contact telephone company. |
| D140600 | Disconnected by Congestion | 1. Check modem and modem cable connection. 2. Contact telephone company. |
| D140700 | Disconnected by Incompatible | 1. Check modem and modem cable connection. 2. Contact telephone company. |
| D140800 | Disconnected by unknown reason | 1. Check modem and modem cable connection. 2. Contact telephone company. |
| D140900 | Disconnected by Bad Address | 1. Check modem and modem cable connection. 2. Contact telephone company. |
| D141000 | Disconnected by Unavailable | 1. Check modem and modem cable connection. 2. Contact telephone company. |
| D150000 | 1. Modem dial connection time-out (while dialing the modem) 2. No response from host for 60 seconds | 1. Check modem and modem cable connection. 2. Contact telephone company. |
| D160100 | Disconnected by Bad Address | 1. Check modem and modem cable connection. 2. Contact telephone company. |
| D160200 | Disconnected by Unavailable | 1. Check modem and modem cable connection. 2. Contact telephone company. |
| D160300 | Disconnected by Out of Order | 1. Check modem and modem cable connection. 2. Contact telephone company. |
| D170000 | No carrier (while sending/receiving data after dial connection) | Check host. |
| D170100 | No Carrier during ENQ data receive from host | Check host. |
| D170200 | No Carrier before sending data send to host | Check host. |
| D170300 | No Carrier during sending data send to host | Check host. |
| D170400 | No Carrier during ACK/NAK data send to host | Check host. |
| D170500 | No Carrier during ACK/NAK data receive from host | Check host. |
| D170600 | No Carrier during receiving data | Check host. |
| D170700 | NAK retry error. | |
| D170800 | Send retry error | |
| D170900 | Modem initialize fail | |
| D171000 | Modem Comport Failed | |
| D180000 | No Dial Tone(in Modem dial connection) | |
| D190000 | No Answer | |
| D200000 | Dial(Line) busy Try again later. | |
| D210000 | Time out(30sec.) for initializing modem before Modem Dial connecting | Check telephone line connection. Test Modem. |
| D220000 | not receiving EOT from HOST | |
| D230000 | No response from Host – Dialing time out to Host | Check telephone line connection. Test Modem. Check phone number. |
| D250000 | Cannot connect to the host | Check telephone line connection. |
| D251000 | Timeout while Sending | Check telephone line connection. |
| D251100 | Communication error while Sending | Check telephone line connection. |
| D251200 | Socket error while Sending | Check telephone line connection. |
| D251300 | Timeout while Receiving | Check telephone line connection. |
| D251400 | Communication error while Receiving | Check telephone line connection. |
| D251500 | Socket Error while Receiving | Check telephone line connection. |
| D320000 | No response from Host/Dialing time out to Host | Check telephone line connection. |
| D320100 | Outbound call is aborted | Check telephone line connection. |
| D320200 | Fail to dial out | Check telephone line connection. Test Modem. |
| D320300 | No Line Reply | |
| D320400 | Get Line ID Failed | |
| D320500 | Modem Comport Failed | |
| D320600 | Call Failed | |
| D320700 | No Answer | |
| D320800 | Modem Call Other Error | |
| D410000 | CRC Mismatch | Check telephone line connection. |
| D410100 | No CRC Received | Make sure that the host is using CRC. |
| DA0xxx0 | Host Denial Error Refer to E7. | Description for error code organization. |
| F000100 | Number of Bill is not inputted | Enter number of bill. (required) |
| F000200 | Parameter is not properly set (Surcharge Owner) | Enter surcharge owner. (required) |
| F000300 | Parameter is not properly set (Surcharge Amount) | Enter surcharge owner. (required) |
| F000400 | Parameter is not properly set (Adver. Text refreshing timer) | Enter Ad text refresh timer. |
| F000500 | Parameter is not properly set (Advertisement text) | Enter Ad text. |
| F000600 | Parameter is not properly set (Dispense limit) | Enter Dispense limit. |
| F000700 | Parameter is not properly set (Denomination) | Enter Denomination. (required) |
| F000800 | Parameter is not properly set (Fast Cash) | Enter Fast Cash amount. |
| F000900 | Master Key Index invalid | Check Master key index. |
| F000A00 | Master Key empty | Enter Master key. (required) |
| F000B00 | Host Phone Number is not inputted | Enter Host phone number. (required) |
| F000C00 | Error Retry Timer is not inputted | Enter Retry timer. |
| F000D00 | RMS Password is not inputted in RMS Enable | Enter RMS password. |
| F000E00 | RMS Phone Number is not inputted in RMS Enable | Enter RMS phone number. |
| F000F00 | Terminal Number is not inputted | Enter Terminal number. (required) |
| F001000 | Routing ID is not inputted | Enter Routing ID. (required) |
| F001000 | Master Key Serial Number is not inputted | Enter Master key serial number. |
| F001100 | Master Key Serial Number is not inputted | Enter Master key serial number. |
| F001200 | Non-Cash Type text is not inputted | Enter Non-cash type text. |
| F001300 | Parameter is not properly set | Check proper parameters in setting. |
| F001400 | NVRAM Failure | Try to clear NVRAM. |
| F001500 | ATM Serial No. Empty | Enter ATM serial number. (required) |
| F001600 | Default master password was not changed | |
| F001F00 | Machine serial number is not set | 1. Check serial number. 2. Set serial number. |
| F002F00 | Host type is not set | 1. Check host type. 2. Set host type. |
| F003F00 | Communication ID invalid (only triton) | Contact to technician support team. |
| F004F00 | EPP(Pin pad) key mode is invalid | 1. Check modem cable 2. Contact to technician support team |
| F005F00 | Denomination is invalid | 1. Check modem cable 2. Contact to technician support team |
| F006F00 | Failed Host Connection! | 1. Check Host Connection. 2. Contact to technician support team. |
| FFFFFFF | NVRAM is broken 2. Clear NVRAM | 1. Reset Master Password |
| POWERAB | UPS ABNORMAL | Check UPS |
| POWERAC | POWER OUT OR AC OFF | 1. Check AC power status and environment. 2. Check AC power status and environment. |
| POWERBA | BATTERY LOW | 1. Check AC power status and environment. 2. Check UPS. |
| SDN0100 | Service Panel (SPL) communication error | Check the cables and connections. |
Предложите, как улучшить StudyLib
(Для жалоб на нарушения авторских прав, используйте
другую форму
)
Ваш е-мэйл
Заполните, если хотите получить ответ
Оцените наш проект
1
2
3
4
5
КОД
ПРИЧИНА ОШИБКИ И СПОСОБ УСТРАНЕНИЯ
40000
Причина
Получена команда от верхнего блока, которой нет в CDU.
Устранение
1. Проверьте команду, полученную CDU.
2. Проверьте версию ПО CDU и обратитесь к спецификациям.
40011
Причина
Сработал датчик CS2 во время инициализации или зарезервированной операции выдачи банкноты (монтаж/демонтаж ящика для отбракованных банкнот).
Устранение
1.Проведите инициализацию после монтажа ящика для отбракованных банкнот.
2. Проверьте, подключен ли кабель датчика CS2.
3. Замените датчик CS2 в случае его неисправности.
40012
Причина
Сработал датчик CS3 во время инициализации или зарезервированной операции выдачи банкноты.
Устранение
1. Удалите оставшиеся банкноты или посторонние предметы во входе.
2. Проверьте, не изогнута ли скоба датчика CS3.
3. Проверьте, подключен ли кабель датчика CS3.
4. Замените датчик входа CS3 в случае его неисправности.
40013
Причина
Сработали датчики CS2 и CS3 во время инициализации или зарезервированной операции выдачи банкноты.
Устранение
Те же способы устранения, что и для ошибок 40011 и 40012.
40014
Причина
Сработал датчик CS4A во время инициализации или зарезервированной операции выдачи банкноты.
Устранение
1. Удалите оставшиеся банкноты или посторонние предметы, находящиеся в позиции датчика CS4A.
2. Проверьте, подключен ли кабель датчика CS4A.
3. Замените датчик CS4A в случае его неисправности.
40015
Причина
Сработали датчики CS2 и CS4A во время инициализации или зарезервированной операции выдачи банкноты.
Устранение
Те же способы устранения, что и для ошибок 40011 и 40014.
40016
Причина
Сработали датчики CS3 и CS4A во время инициализации или зарезервированной операции выдачи банкноты.
Устранение
Те же способы устранения, что и для ошибок 40011 и 40012.
40017
Причина
Сработали датчики CS2, CS3 и CS4A во время инициализации или зарезервированной операции выдачи банкноты.
Устранение
Те же способы устранения, что и для ошибок 40011, 40012 и 40014.
40021
Причина
Сработал датчик CS11A во время инициализации или зарезервированной операции выдачи банкноты.
Устранение
1. Удалите оставшиеся банкноты или посторонние предметы, находящиеся в позиции датчика CS11A.
2. Проверьте, подключен ли кабель датчика CS11A.
3. Замените датчик CS11A в случае его неисправности.
40022
Причина
Сработал датчик CS11B во время инициализации или зарезервированной операции выдачи банкноты.
Устранение
1. Удалите оставшиеся банкноты или посторонние предметы, находящиеся в позиции датчика CS11B.
2. Проверьте, подключен ли кабель датчика CS11B.
3. Замените датчик CS11B в случае его неисправности.
40023
Причина
Сработали датчики CS11A и CS11B во время инициализации или зарезервированной операции выдачи банкноты.
Устранение
Те же способы устранения, что и для ошибок 40021 и 40022.
40028
Причина
Сработал датчик CS13 во время инициализации или зарезервированной операции выдачи банкноты.
Устранение
1. Удалите оставшиеся банкноты или посторонние предметы, находящиеся в позиции датчика CS13.
2. Проверьте, подключен ли кабель датчика CS13.
3. Замените датчик CS13 в случае его неисправности.
40029
Причина
Сработали датчики CS11A и CS13 во время инициализации или зарезервированной операции выдачи банкноты.
Устранение
Те же способы устранения, что и для ошибок 40021 и 40028.
4002A
Причина
Сработали датчики CS11B и CS13 во время инициализации или зарезервированной операции выдачи банкноты.
Устранение
Те же способы устранения, что и для ошибок 40022 и 40028.
4002B
Причина
Сработали датчики CS11A, CS11B и CS13 во время инициализации или зарезервированной операции выдачи банкноты.
Устранение
Те же способы устранения, что и для ошибок 40021, 40022 и 40028.
40030
Причина
Эхоконтроль основного двигателя (первоначальное восстановление)
Устранение
1. Выполните инициализацию
2. Проверьте прорезь датчика положения основного двигателя
3. Выполните инициализацию после отключения/включения питания
4. Проверьте датчик положения CS8 BRKT
5. Проверьте кабель датчика CS8 BRKT
6. Замените щелевой датчик положения CS8
40033
Причина
Ошибка контрольной суммы (нет заданной информации) (первоначальное восстановление)
Устранение
1. Проверьте информацию CDU после прочтения версии CDU.
2. Выполните инициализацию
3. Выполните инициализацию после выполнения команды задания информации CDU (‘P’).
4. Замените плату CDU.
40034
Причина
Ошибка датчика обнаружения сдвоенных банкнот (CS5_1) при инициализации.
Устранение
1. Проверьте кабель датчика CS5_1.
2. Проверьте второй DIP-переключатель на плате CDU.
3. Замените датчик CS5_1.
40035
Причина
Ошибка датчика обнаружения сдвоенных банкнот (CS5_2) при инициализации.
Устранение
1. Проверьте кабель датчика CS5_2.
2. Проверьте второй DIP-переключатель на плате CDU.
3. Замените датчик CS5_2.
40037
Причина
Ошибка датчиков обнаружения сдвоенных банкнот (CS5_1/CS5_2) при выдаче банкнот.
Устранение
1. Проверьте сегмент платы CDU.
2. Выполните инициализацию.
3. Прочтите данные команды ‘Read Double Sensor’ (чтение сдвоенного датчика).
40038
Причина
Блок выдачи банкнот вышел из положения состыковки.
Устранение
1. Втолкните модуль CDU внутрь полностью, рока он не защелкнется.
40039
Причина
Ошибка сенсора работы входа перед первоначальным восстановлением.
Устранение
1. Выполните инициализацию после удаления банкнот или пыли из входа.
2. Проверьте датчик CS3 BKRT
3. Проверьте кабель датчика CS3
4. Замените датчик CS3 в случае его неисправности
5. Замените соленоид 1 отбраковки банкнот
4003A
Причина
Если во время тестирования требуется выдача более 5 банкнот.
Устранение
1. Проверьте команду, которую получил CDU
2. Проверьте EPROM-версию или спецификацию CDU
4003B
Причина
Обнаружено срабатывание датчика CS21A (первоначальное восстановление, отдельная отбраковка)
Устранение
1. Удалите банкноты или пыль в датчике CS21A
2. Проверьте кабель датчика CS21A
3. Замените датчик CS21A в случае его неисправности
4003C
Причина
Кассета отсутствует, во время отбраковки в отдельную кассету (отдельная отбраковка)
Устранение
1. Установите Кассету 1.
2. Проверьте кабель датчика CS7
3. Замените датчик CS7 в случае его неисправности
4003D
Причина
Демонтаж устройства во время отбраковки в отдельную кассету (отдельная отбраковка)
Устранение
1. Проверьте банкноты в Кассете 1.
2. Проверьте спецификации Кассеты 1.
3. Проверьте кабель датчика CS7.
4. Замените датчик CS7 в случае его неисправности.
4003E
Причина
Обнаружено срабатывание датчика CS21B (первоначальное восстановление, отдельная отбраковка)
Устранение
1. Удалите банкноты или пыль в датчике CS21B
2. Проверьте кабель датчика CS21B
3. Замените датчик CS21B в случае его неисправности
4003F
Причина
Обнаружено срабатывание датчика CS21A, CS21B (первоначальное восстановление, отдельная отбраковка)
Устранение
1. Удалите банкноты или пыль в датчиках CS21A, CS21B
2. Проверьте кабель датчиков CS21A, CS21B
3. Замените датчики CS21A, CS21B в случае их неисправности
40041
Причина
Ошибка: сделано более 5 попыток повторной подачи (отдельная отбраковка)
Устранение
1. Проверьте банкноты в ящике для отбраковки.
2. Переуложите банкноты в кассете.
3. Удалите пыль с датчиков CS21AB, CS31AB, CS41AB CS11AB.
4. Проверьте наличие пыли в направляющей датчика CS5.
5. Проверьте наличие пыли в прорези датчика положения основного двигателя.
6. Проверьте значение индекса банкнот в каждой кассете.
40042
Причина
CS13 < требуемого количества банкнот (отдельная отбраковка)
Устранение
1. Проверьте выданные и отбракованные банкноты.
2. Удалите банкноты, замятые в CDU.
3. Удалите пыль с датчика CS13.
4. Замените датчик CS13 в случае его неисправности.
40043
Причина
Ошибка при отбраковке более 20 банкнот (отдельная отбраковка)
Устранение
1. Проверьте банкноты в ящике для отбраковки.
2. Переуложите банкноты в кассете.
3. Удалите пыль с датчиков CS11AB, CS21AB, CS31AB, CS41AB.
4. Проверьте наличие пыли в направляющей датчика CS5.
5. Проверьте значение индекса банкнот.
40044
Причина
Ошибка отбраковки в случае 5 последовательных отбраковок (отдельная отбраковка)
Устранение
1. Проверьте банкноты в ящике для отбраковки.
2. Переуложите банкноты в кассете.
3. Проверьте наличие пыли в прорези датчика положения основного двигателя.
4. Удалите пыль с датчиков CS21AB, CS31AB, CS11AB.
5. Замените датчик положения основного двигателя CS8 в случае его неисправности.
40045
Причина
CS13 > требуемого количества банкнот (отдельная отбраковка)
Устранение
1. Проверьте выданные и отбракованные банкноты.
2. Удалите пыль с датчика CS13.
3. Замените датчик CS13 в случае его неисправности.
40046
Причина
Программная ошибка (отдельная отбраковка)
Устранение
1. Выполните инициализацию после перезапуска питания
2. Обновите или повторно загрузите встроенное ПО CDU.
3. Замените плату CDU.
40047
40048
Причина
Ошибка подачи в кассете 1 (отдельная отбраковка)
Устранение
1. Проверьте банкноты в Кассете 1.
2. Проверьте опрос датчика CS6
3. Проверьте, нет ли замятия банкнот в кассете 1, и загрузите ее повторно.
4. Удалите пыль в датчиках CS11A, CS11B.
5. Замените ящик кассеты 1, если происходит много ошибок.
40049
Причина
Ошибка затребована выдача 0 банкнот (отдельная отбраковка)
Устранение
1. Проверьте полученную команду.
2. Проверьте соединительный кабель.
3. Проверьте версию встроенного ПО CDU.
4004A
Причина
Превышение времени ожидания (Замятие) (отдельная отбраковка)
Устранение
1. Удалите замятые банкноты в возвратном пути CDU
2. Удалите пыль в датчиках CS11AB, CS21AB, CS31AB, CS41AB, CS4AB, CS13
3. Установите кассету обратно после переукладки банкнот в кассете.
4004B
Причина
Ошибка в течение 3 последовательных раз, если банкнота длинная (одна попытка, два повтора) (отдельная отбраковка)
Устранение
1. Проверьте состояние банкнот в ящике для отбраковки.
2. Переуложите банкноты в кассете.
3. Проверьте значение индекса банкнот.
4. Проверьте наличие посторонних объектов в прорези датчика положения основного двигателя
5. Замените датчик положения основного двигателя CS8 в случае его неисправности.
4004E
Причина
Обнаружены оставшиеся банкноты во время зарезервированной операции выдачи.
Устранение
1. Выполните инициализацию после удаления банкнот в возвратном пути.
2. Выполните очистку датчиков в возвратном пути (датчик CS13).
40051
Причина
Получен запрос на выдачу более 120 банкнот от вышестоящего устройства.
Устранение
1. Проверьте команду, полученную CDU.
2. Проверьте соединительный кабель.
3. Проверьте версию встроенного ПО CDU и обратитесь к спецификациям.
40052
Причина
Обнаружены оставшиеся банкноты в датчике перед CST после операции выдачи (датчики CS11AB, CS21AB, CS31AB, CS41AB)
Устранение
1. Удалите оставшиеся банкноты в датчике перед CST
2. Перегруппируйте банкноты в кассете.
3. Проверьте муфту
4. Проверьте абразивный износ в ящике кассеты.
40054
Причина
Программная ошибка CDU EPROM во время операции выдачи (неудачный поиск таблицы).
Устранение
1. Выполните инициализацию после перезапуска питания
2. Обновите или повторно загрузите встроенное ПО CDU.
3. Замените плату CDU.
40055
Причина
Превышение времени ожидания из-за неверной длины банкноты, прошедшей через датчик CS13 во время операции выдачи
Устранение
1. Удалите замятую банкноту между лотком и CDU.
2. Удалите замятую банкноту в позиции датчика CS13.
3. Удалите пыль с датчика CS13.
40056
Причина
Ненормальная работа соленоида 1 на выходе во время операции выдачи.
Устранение
1. Удалите замятую банкноту на выходе.
2. Удалите банкноты в ящике для отбраковки и установите ящик обратно.
3. Проверьте, не изогнута ли скоба датчика CS3.
4. Проверьте, не отключен ли кабель датчика CS3.
5. Замените датчик CS3 в случае его неисправности
6. Замените соленоид отбраковки 1.
40057
Причина
Ошибка контрольной суммы индекса банкнот в EEPROM CDU CST во время инициализации.
Устранение
1. Прочтите версию CDU для проверки индекса банкнот CDU CST
2. Выполните повторную инициализацию.
3. Выполните инициализацию после команды задания информации CDU (‘P’).
4. Замените плату CDU.
40059
Причина
Кассета 2 недоступна во время выполнения зарезервированной операции выдачи.
Устранение
1. Установите кассету 2.
2. Проверьте, подключен ли кабель датчика CS17.
3. Замените датчик CS17 в случае его неисправности.
4005A
Причина
Установка/снятие кассеты 2 во время выполнения зарезервированной операции выдачи.
Устранение
1. Проверьте состояние банкнот в кассете 2.
2. Проверьте спецификации кассеты 2.
3. Проверьте, подключен ли кабель датчика CS17.
4. Замените датчик CS17 в случае его неисправности.
4005B
Причина
Ошибка подачи в кассете 2 во время выполнения зарезервированной операции выдачи.
Устранение
1. Проверьте оставшиеся банкноты в Кассете 2.
2. Проверьте состояние датчика оставшихся банкнот (CS26).
3. Проверьте, нет ли замятия банкнот в Кассете 2, и установите ее обратно.
4. Удалите пыль в датчиках CS21A, CS21B.
5. Замените ящик Кассеты 2, если происходит много ошибок.
4005C
Причина
Затемнение датчика перед CST, кроме случаев выдачи при выполнении операции выдачи.
Устранение
1. Удалите пыль и посторонние предметы с датчиков CS11AB, CS21AB, CS31AB и CS41AB.
2. Проверьте работу муфты (команда life test — испытание на долговечность).
3. Проверьте спецификации DIP-переключателя FM-платы кассеты 3.
4. Проверьте спецификации DIP-переключателя FM-платы кассеты 4.
4005D
Причина
Последовательное обнаружение 2 банкнот 3 или боле раза во время операции выдачи.
Устранение
1. Проверьте состояние банкнот в ящике отбраковки.
2. Перегруппируйте банкноты в кассете.
3. Проверьте наличие посторонних предметов в позиции направляющей датчика CS5.
4. Проверьте, подключен ли кабель датчика CS5.
40081
Причина
Получена ложная команда для затвора от вышестоящего устройства.
Устранение
1. Проверьте команду, полученную CDU.
2. Проверьте соединительный кабель.
3. Проверьте версию встроенного ПО CDU и обратитесь к спецификациям.
40082
Причина
Не удалось открыть затвор CDU (после 10 попыток)
Устранение
1. Проверьте посторонние предметы в блоке затвора.
2. Проверьте соединительный кабель двигателя затвора.
3. Проверьте состояние соединения датчиков TS004 и TS005.
4. Проверьте работу камеры затвора.
40084
Причина
Не удалось закрыть затвор CDU (после 10 попыток)
Устранение
1. Проверьте посторонние предметы в блоке затвора.
2. Проверьте соединительный кабель двигателя затвора.
3. Проверьте состояние соединения датчиков TS004 и TS005.
4. Проверьте работу поворота камеры затвора.
40085
Причина
Получена команда открытия или закрытия затвора CDU, в то время как банкомат не оснащен затвором CDU.
Устранение
40087
Причина
Ошибка связи с затвором CDU
Устранение
40088
Причина
Ошибка: кассета с идентификатором не установлена.
Устранение
40089
Причина
Ошибка: количество банкнот, выданных из кассеты, не соответствует количеству банкнот, обнаруженных датчиком.
Устранение
4008A
Причина
Обнаружено срабатывание датчика CS11AB в транспортном пути до операции выдачи.
Устранение
1. Удалите оставшиеся банкноты и посторонние объекты в позиции датчика CS11AB.
2. Проверьте, подключен ли кабель датчика CS11AB.
3. Замените датчик CS11AB в случае его неисправности.
4008B
Причина
Обнаружено срабатывание датчика CS21AB в транспортном пути до операции выдачи.
Устранение
1. Удалите оставшиеся банкноты и посторонние объекты в позиции датчика CS21AB.
2. Проверьте, подключен ли кабель датчика CS21AB.
3. Замените датчик CS21AB в случае его неисправности.
4008C
Причина
Обнаружено срабатывание датчика CS31AB в транспортном пути до операции выдачи.
Устранение
1. Удалите оставшиеся банкноты и посторонние объекты в позиции датчика CS31AB.
2. Проверьте, подключен ли кабель датчика CS31AB.
3. Замените датчик CS31AB в случае его неисправности.
4008D
Причина
Обнаружено срабатывание датчика CS41AB в транспортном пути до операции выдачи.
Устранение
1. Удалите оставшиеся банкноты и посторонние объекты в позиции датчика CS41AB.
2. Проверьте, подключен ли кабель датчика CS41AB.
3. Замените датчик CS41AB в случае его неисправности.
4008E
Причина
Устранение
-
Обнаружено срабатывание датчика CS4 в транспортном пути до операции выдачи.
-
Удалите оставшиеся банкноты и посторонние объекты в позиции датчика CS4.
-
Проверьте, подключен ли кабель датчика CS4.
-
Замените датчик CS4 в случае его неисправности.
40099
Причина
Устранение
Ошибка: Превышение времени ожидания ответа соединения во время зарезервированной проверочной операции выдачи или инициализации
1. Выполните реинициализацию
2. Проверьте, подключен ли последовательный кабель соединительный CIU.
4009B
Причина
Обнаружено срабатывание датчиков CS31A и CS31B во время зарезервированной проверочной операции выдачи
Устранение
1. Удалите оставшиеся банкноты и посторонние предметы в положении датчиков CS31A и CS31B.
2. Проверьте установки DIP-переключателей (№2, 4 и 6 должны быть в позиции On) на FM-плате 3 кассеты.
3. Проверьте, подключены ли кабеля датчиков CS31A и CS31B.
4. Замените датчик CS31A или CS31B в случае его неисправности.
4009C
Причина
Обнаружено срабатывание датчика CS31B во время зарезервированной проверочной операции выдачи
Устранение
1. Удалите оставшиеся банкноты и посторонние предметы в положении датчика CS31B.
2. Проверьте установки DIP-переключателя на FM-плате 3 кассеты.
3. Проверьте, подключен ли кабель датчика CS31B.
4. Замените датчик CS31B в случае его неисправности.
4009D
Причина
Кассета 3 недоступна во время выполнения зарезервированной операции выдачи.
Устранение
1. Установите кассету 3.
2. Проверьте, подключены ли плата CDU CN6 и FM-плата CN1.
3. Проверьте установки DIP-переключателя на FM-плате 3 кассеты.
4. Проверьте, подключен ли кабель датчика CS37.
5. Замените датчик CS37 в случае его неисправности.
4009E
Причина
Установка/снятие кассеты 3 во время выполнения зарезервированной операции выдачи.
Устранение
1. Проверьте состояние банкнот в кассете 3.
2. Проверьте спецификации кассеты 3.
3. Проверьте установки DIP-переключателя на FM-плате 3 кассеты.
4. Проверьте, подключен ли кабель датчика CS37.
5. Замените датчик CS37 в случае его неисправности.
4009F
Причина
Ошибка подачи в кассете 3 во время выполнения зарезервированной операции выдачи.
Устранение
1. Проверьте оставшиеся банкноты в Кассете 3.
2. Проверьте состояние датчика оставшихся банкнот (CS36).
3. Проверьте, нет ли замятия банкнот в Кассете 3, или установите ее заново.
4. Удалите пыль в датчиках CS31A, CS31B.
5. Замените ящик Кассеты 3, если происходит много ошибок.
400A1
Причина
Обнаружено срабатывание датчика CS9 в ящике отбраковки (обратного изъятия) во время инициализации.
Устранение
1. Откройте крышку ящика отбраковки/обратного изъятия.
2. Проверьте, подключен ли кабель датчика CS9.
3. Замените датчик CS9 в случае его неисправности
400A2
Причина
Банкнота не попадает из лотка к горловине выхода (датчики CS10AB~CS14) (Замятие во время транспортировки).
Устранение
1. Удалите замятую банкноту или посторонние предметы между горловиной выхода и лотком.
2. Проверьте, подключены ли кабеля датчиков CS10AB и CS14.
3. Проверьте работу двигателя в блоке горловины.
4. Замените датчик CS14 в случае его неисправности
400A7
Причина
Камера не достигла позиции выдачи в течение заданного времени (ошибка камеры).
Устранение
400A8
Причина
Камера не достигла позиции подачи в течение заданного времени (ошибка камеры).
Устранение
400AA
Причина
Ошибка во время записи данных EEPROM/
Устранение
1. Повторите попытку после инициализации.
2. Замените плату CDU.
400AB
Причина
Привод отключен из-за банкнот, оставшихся в лотке во время инициализации или зарезервированной операции выдачи (срабатывание датчика CS10A и CS10B).
Устранение
1. Удалите замятую банкноту или посторонние предметы в лотке.
2. Проверьте, не изогнуты ли держатели датчиков CS10A и CS10B.
3. Если ошибка повторится после отключения и проверки датчиков CS10A и CS10B, замените датчики.
400AD
Причина
Отключилось обнаружение банкнот в датчике CS15 во время транспортировки.
Устранение
. Удалите банкноты, оставшиеся в горловине.
2. Если ошибка повторится после отключения и проверки датчика CS15, замените датчик.
400AE
Причина
Нет банкнот в лотке перед доставкой или изъятием банкноты.
Устранение
1. Если ошибка повторится после отключения и проверки датчика CS13, замените датчик.
2. Проверьте положение лотка во время операции доставки.
400AF
Причина
Получена ошибочная команда life test (испытания на долговечность) от вышестоящего блока.
Устранение
1. Проверьте команду, полученную CDU.
2. Проверьте состояние соединительного кабеля.
3. Проверьте версию встроенного ПО CDU и обратитесь к спецификациям.
400B0
Причина
Открытие затвора во время операции выдачи.
Устранение
1. Проверьте вращение кулачка затвора.
2. Если ошибка повторится после отключения и проверки датчика TS004, замените датчик.
400BA
Причина
Обнаружено срабатывание датчика CS1 входа ящика для отбракованных банкнот во время инициализации или перед операцией выдачи.
Устранение
400BB
Причина
Замятие банкноты в датчике CS1 входа ящика для отбракованных банкнот во время инициализации или перед операцией выдачи.
Устранение
400C1
Причина
Замятие банкноты в Кассете 1 во время операции выдачи (Ошибка кодировщика CST).
Устранение
1. Удалите замятую банкноту из Кассеты 1.
2. Установите ящик кассеты 1 после перегруппировки банкнот в ящике кассеты.
3. Удалите посторонние предметы в муфте кодировщика кассеты 1.
4. Замените ящик кассеты 1 при повторении множества ошибок.
400C2
Причина
Замятие банкноты в Кассете 2 во время операции выдачи (Ошибка кодировщика CST).
Устранение
1. Удалите замятую банкноту из Кассеты 2.
2. Установите ящик кассеты 2 после перегруппировки банкнот в ящике кассеты.
3. Удалите посторонние предметы в муфте кодировщика кассеты 2.
4. Замените ящик кассеты 2 при повторении множества ошибок.
400C3
Причина
Замятие банкноты в Кассете 3 во время операции выдачи (Ошибка кодировщика CST).
Устранение
1. Удалите замятую банкноту из Кассеты 3.
2. Установите ящик кассеты 3 после перегруппировки банкнот в ящике кассеты.
3. Удалите посторонние предметы в муфте кодировщика кассеты 3.
4. Замените ящик кассеты 3 при повторении множества ошибок.
400C4
Причина
Замятие банкноты в Кассете 4 во время операции выдачи (Ошибка кодировщика CST).
Устранение
1. Удалите замятую банкноту из Кассеты 4.
2. Установите ящик кассеты 4 после перегруппировки банкнот в ящике кассеты.
3. Удалите посторонние предметы в муфте кодировщика кассеты 4.
4. Замените ящик кассеты 4 при повторении множества ошибок.
400C7
Причина
Обнаружено срабатывание датчика CS14 во время инициализации или зарезервированной операции выдачи.
Устранение
1. Удалите оставшиеся банкноты и посторонние предметы в позиции датчика CS14.
2. Если ошибка повторится после отключения и проверки датчика CS14, замените датчик.
400C8
Причина
Обнаружено срабатывание датчика CS15 во время инициализации или зарезервированной операции выдачи.
Устранение
1. Удалите оставшиеся банкноты и посторонние предметы в позиции датчика CS15.
2. Если ошибка повторится после отключения и проверки датчика CS15, замените датчик.
400CA
Причина
Обнаружено срабатывание датчика CS14 во время зарезервированной операции подачи.
Устранение
Те же способы устранения, что и в ошибке № 400C7.
400CB
Причина
Обнаружено срабатывание датчика CS15 во время зарезервированной операции подачи.
Устранение
Те же способы устранения, что и в ошибке № 400C8.
400D0
Причина
Превышение времени ожидания из-за замятия банкноты в блоке горловины (датчик CS14) во время операции подачи.
Устранение
1. Удалите замятую банкноту или посторонние предметы между горловиной и лотком.
2. Проверьте подключение кабеля датчика CS14.
3. Проверьте работу подающего двигателя в блоке горловины.
4. Замените датчик CS14 в случае его неисправности.
400D1
Причина
Превышение времени ожидания из-за замятия банкноты в блоке горловины (датчик CS14-15) во время операции подачи.
Устранение
1. Удалите замятую банкноту или посторонние предметы в горловине.
2. Проверьте внешний источник света датчика CS15.
3. Проверьте работу подающего двигателя в блоке горловины.
4. Если ошибка повторится после проверки датчиков CS14 и CS15, замените датчик.
400D2
Причина
Превышение времени ожидания из-за замятия банкноты в блоке горловины (датчик CS10AB) во время операции подачи.
Устранение
1. Удалите замятую банкноту в горловине.
2. Проверьте внешний источник света датчика CS10AB.
3. Проверьте работу подающего двигателя в блоке горловины.
4. Если ошибка повторится после проверки датчика CS10AB, замените датчик.
400D3
Причина
Имеются оставшиеся банкноты в лотке во время операции подачи (несколько банкнот остались в позиции датчика CS10AB).
Устранение
Те же способы устранения, что и в ошибке № 400D2.
400D4
Причина
Имеются оставшиеся банкноты в лотке во время операции подачи (несколько банкнот остались в позиции датчика CS14).
Устранение
1. Удалите замятую банкноту в лотке.
2. Проверьте внешний источник света датчика CS14.
3. Если ошибка повторится после проверки датчика CS14, замените датчик.
400D5
Причина
Имеются оставшиеся банкноты в лотке во время операции подачи (несколько банкнот остались в позиции датчика CS10AB).
Устранение
Те же способы устранения, что и в ошибке № 400D2.
400D8
Причина
Обнаружено срабатывание датчиков CS41A и CS41B во время инициализации или зарезервированной операции выдачи.
Устранение
1. Проверьте спецификации Кассеты 4 для версии CDU.
2. Удалите замятые банкноты или посторонние предметы в позиции датчиков CS41A и CS41B.
3. Проверьте подключение FM-платы CN2 Кассеты 3 и FM-платы CN1 Кассеты 4
4. Проверьте установки DIP-переключателя на FM-плате Кассеты 4.
5. Проверьте подключение кабелей датчиков CS41A и CS41B.
6. Замените датчики CS41A и CS41B в случае их неисправности.
400D9
Причина
Обнаружено одновременное срабатывание датчиков в лотке (CS10) и горловине (CS14/CS15).
Устранение
1. Удалите оставшиеся банкноты и посторонние предметы в лотке и горловине.
2. Проверьте каждый из датчиков (обратитесь к вышеприведенному описанию).
400DB
Причина
Обнаружено срабатывание датчика CS41A во время инициализации или зарезервированной операции выдачи.
Устранение
1. Проверьте спецификации Кассеты 4 для версии CDU.
2. Удалите оставшиеся банкноты или посторонние предметы в позиции датчика CS41A.
3.Проверьте подключение FM-платы CN2 Кассеты 3 и FM-платы CN1 Кассеты 4
4. Проверьте установки DIP-переключателя на FM-плате Кассеты 4.
5. Проверьте подключение кабелей датчика CS41A.
6. Замените датчик CS41A в случае его неисправности.
400DC
Причина
Обнаружено срабатывание датчика CS41B во время инициализации или зарезервированной операции выдачи.
Устранение
1. Проверьте спецификации Кассеты 4 для версии CDU.
2. Удалите оставшиеся банкноты или посторонние предметы в позиции датчика CS41B.
3.Проверьте подключение FM-платы CN2 Кассеты 3 и FM-платы CN1 Кассеты 4
4. Проверьте установки DIP-переключателя на FM-плате Кассеты 4.
5. Проверьте подключение кабелей датчика CS41B (FM-плата CN3 4-й кассеты).
6. Замените датчик CS41B в случае его неисправности.
400DD
Причина
Кассета 4 недоступна во время выполнения зарезервированной операции выдачи.
Устранение
1. Установите кассету 4.
2. Проверьте подключение FM-платы CDU CN2 Кассеты 3 и FM-платы CN1 Кассеты 4.
3. Проверьте установки DIP-переключателя на FM-плате Кассеты 4.
4. Проверьте, подключен ли кабель датчика CS37.
5. Замените датчик CS37 в случае его неисправности.
400DE
Причина
Установка/снятие кассеты 4 во время выполнения операции выдачи.
Устранение
1. Проверьте состояние банкнот в кассете 4.
2. Проверьте спецификации кассеты 4.
3. Проверьте подключение FM-платы CDU CN2 Кассеты 3 и FM-платы CN1 Кассеты 4.
4. Проверьте установки DIP-переключателя на FM-плате кассеты 4.
5. Замените датчик CS47 в случае его неисправности.
400DF
Причина
Ошибка подачи в кассете 4 во время выполнения зарезервированной операции выдачи.
Устранение
1. Проверьте оставшиеся банкноты в Кассете 4.
2. Проверьте состояние датчика оставшихся банкнот (CS46) в Кассете 4.
3. Проверьте, нет ли замятия банкнот в Кассете 4, или установите ее заново.
4. Удалите пыль в датчиках CS41A, CS41B.
5. Замените ящик Кассеты 4, если происходит множество ошибок.
400E0
Причина
Ошибка при тестировании оптических датчиков (CS11A, CS11B, CS4A, CS4B)
во время инициализации.
Устранение
1. Проверьте, установлен ли каждый из этих датчиков.
2. Если обнаружится ошибка при проверке кабеля CS11A, замените датчик.
3. Если обнаружится ошибка при проверке кабеля CS11B, замените датчик.
4. Если обнаружится ошибка при проверке кабеля CS4A, замените датчик.
5. Если обнаружится ошибка при проверке кабеля CS4B, замените датчик.
400E1
Причина
Ошибка при тестировании оптического датчика (CS13) во время инициализации.
Устранение
1. Проверьте, установлен ли этот датчик
2. Если обнаружится ошибка при проверке кабеля CS13, замените датчик.
400E2
Причина
Ошибка при тестировании оптических датчиков (CS21A, CS21B) во время инициализации.
Устранение
1. Проверьте, установлен ли каждый из этих датчиков.
2. Если обнаружится ошибка при проверке кабеля CS21A, замените датчик.
3. Если обнаружится ошибка при проверке кабеля CS21B, замените датчик.
400E3
Причина
Ошибка при тестировании оптических датчиков (CS31A, CS31B) во время инициализации.
Устранение
1. Проверьте, установлен ли каждый из этих датчиков.
2. Если обнаружится ошибка при проверке CS31A, замените датчик.
3. Если обнаружится ошибка при проверке CS31B, замените датчик.
4. Проверьте подключение платы CDU CN6 и FM-платы CN1 Кассеты 3.
5. Проверьте установки DIP-переключателя на FM-плате Кассеты 3.
400E6
Причина
Ошибка при тестировании оптических датчиков (CS41A, CS41B) во время инициализации.
Устранение
1. Проверьте установки информации по CDU (4 кассеты).
2. Проверьте, установлен ли каждый из этих датчиков.
3. Если обнаружится ошибка при проверке CS31B, замените датчик.
4.Проверьте подключение FM-платы CN2 Кассеты 3 и FM-платы CN1 Кассеты 4
5. Проверьте установки DIP-переключателя на FM-плате Кассеты 4.
6. Если обнаружится ошибка при проверке CS31A, замените датчик.
400E7
Причина
Ошибка при тестировании оптических датчиков (CS10, CS9) во время инициализации.
Устранение
1. Проверьте, установлен ли каждый из этих датчиков.
2. Если обнаружится ошибка при проверке CS10, замените датчик.
3. Если обнаружится ошибка при проверке CS9, замените датчик.
400E8
Причина
Превышение времени ожидания из-за замятия банкноты (датчик CS14, CS10) во время инициализации или обратного изъятия.
Устранение
1. Проверьте, установлен ли каждый из этих датчиков.
2. Если обнаружится ошибка при проверке CS14, замените датчик.
400EB00
Причина
Не поддерживает команду автоматического сенсора
400EC00
Причина
CS4 Ошибка сенсора автодимминга
400ED00
Причина
CS10A/CS10B Ошибка сенсора автодимминга
400EE00
Причина
CS13 Ошибка сенсора автодимминга
400EF00
Причина
CS14 Ошибка сенсора автодимминга
400F000
Причина
Устранение
Невозможно продвижение из-за замятия в процессе принудительной инициализации
Удалите оставшиеся банкноты и посторонние предметы из отсека.
400F200
Причина
The dark detection of CS 15 sensor when bills go back to the retract box during retract mode
400F3
Причина
Превышение времени ожидания из-за замятия банкноты (датчик CS15)
во время инициализации или обратного изъятия.
Устранение
Те же способы устранения, что и при ошибке 400F3
400F4
Причина
Привод отключен из-за продолжительного срабатывания оптических датчиков CS14~CS10AB во время принудительной инициализации или операции или обратного изъятия (замятие).
Устранение
Те же способы устранения, что и при ошибке 400F3.
400F5
Причина
Привод отключен из-за продолжительного срабатывания оптического датчика CS10 во время принудительной инициализации или операции или обратного изъятия (замятие).
Устранение
Те же способы устранения, что и при ошибке 400F3.
400F6
Причина
Банкноты не могут упасть вниз во время принудительной инициализации или операции обратного изъятия.
Устранение
1. Удалите оставшиеся банкноты и посторонние предметы в блоке горловины
2. Если ошибка повторится после проверки датчика, замените его.
400F7
Причина
Датчик CS15 показывает постоянное обнаружение банкноты во время операции обратного изъятия.
Устранение
Те же способы устранения, что и при ошибке 400F3.
400F8
Причина
Превышение времени ожидания из-за замятия банкноты (датчик CS14) во время инициализации или обратного изъятия.
Устранение
1. Удалите замятые банкноты или посторонние предметы в блоке горловины.
400F9
Причина
Некоторые банкноты были изъяты во время транспортировки.
9712000
Причина
Устранение
Не удается создать файл
1. Перезапустить АТМ
2. Переустановить ПО
3. Заменить жесткий диск
9712100
Причина
Устранение
Не удается прочитать файл
1. Перезапустить АТМ
2. Переустановить ПО
3. Заменить жесткий диск
9712200
Причина
Устранение
Не удается записать файл
1. Перезапустить АТМ
2. Переустановить ПО
3. Заменить жесткий диск
97123
Причина
Невозможно закрыть файл
97124
Причина
Невозможно удалить файл
97125
Причина
Невозможно произвести копирование файла
97126
Причина
Невозможно создать директорию
97190
Причина
Ошибка: появляется в случае выполнения другой команды при обмене блока наличных
97191
Причина
Ошибка: появляется в случае невыполнения команды при обмене блока наличных
97192
Причина
Служба выдачи банкнот уже находится в состоянии Cash In.
97193
Причина
В случае, если она не находится в состоянии Cash In.
97194
Причина
Идентификационный код (ID) кассеты не совпадает.
97195
Причина
Показания счетчика кассеты не верны.
97196
Причина
Номер кассеты неверный
97197
Причина
Выданные банкноты отличаются от запрошенных.
97198
Причина
Два одинаковых ID кассеты.
971A0
Причина
Номиналы выданных банкнот отличаются от запрошенных
971A1
Причина
Валюта выданных банкнот отличается от запрошенной
971A2
Причина
Невозможно произвести выдачу наличных.
971A3
Причина
Запрошенные счетчики банкнот превысили максимальное показание
971A4
Причина
Запрошенные счетчики монет превысили максимальное показание
971A5
Причина
Невозможно определить метод MIX.
971A600
Причина
Если 3 раза неверно введено SP
971A700
Причина
Нет информации о стандарте автоматического повторного ввода
971B000
Причина
Устранение
При выполнении команды reject и retract с отсутствием банкнот в стакере
1. Проверьте налет на стакере
2. Смените максимальное количество банкнот
971C000
Причина
Устранение
Не поддерживаемая команда
1. Переустановите ПО
9740010
Причина
Не удается открыть порт
97400FF
Причина
Если в транспортном отсеке остались банкноты
9740020
Причина
Не удается создать файл
9740025
Причина
Не удается копировать файл
9740030
Причина
Не действительный регистрационный ключ доступа к информации
9740031
Причина
Неверная информация для печати чека.
9740101
Причина
Выдача с выбранной кассеты не произведена
9740102
Причина
Не найден индекс выбранной кассеты
9741400
Причина
Ошибка оптического датчика (CS4) в состоянии незанятости раздатчика наличных.
9742300
Причина
Ошибка оптического датчика (CS11A, CS11B) в состоянии незанятости раздатчика наличных.
9742800
Причина
Ошибка оптического датчика (CS13) в состоянии незанятости раздатчика наличных.
9743F00
Причина
Ошибка оптического датчика (CS21A, CS21B) в состоянии незанятости раздатчика наличных.
9749B00
Причина
Ошибка оптического датчика (CS31)
974BA00
Причина
Ошибка оптического датчика (CS1) в состоянии незанятости раздатчика наличных.
974D800
Причина
Ошибка оптического датчика (CS41) в состоянии незанятости раздатчика наличных.
974AA00
Причина
Не удается установить ПО
9744600
Причина
Не найден файл для установки в ЕР даже если ЕР находится в режиме DL
4DN0000
Причина
Ненормальное соединение
4DN0100
Причина
Ненормальный ответ от EP
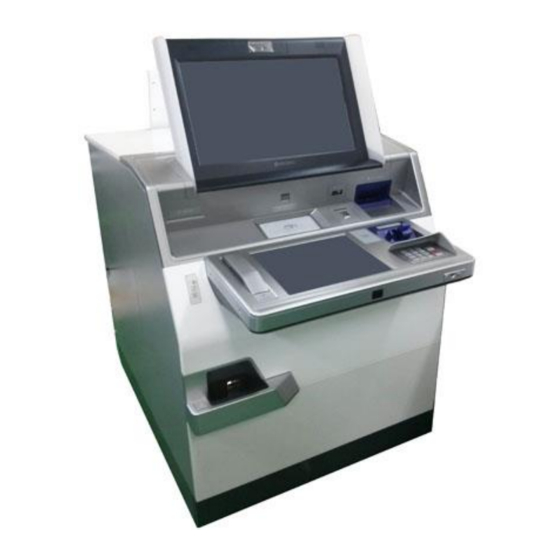
-
Contents
-
Table of Contents
-
Bookmarks
Quick Links
Operator Manual
MX8800 System
V01.00.01 (2013.11.4)
© 2012 Nautilus Hyosung Inc. All Rights Reserved.
Related Manuals for Nautilus Hyosung MX8800
Summary of Contents for Nautilus Hyosung MX8800
-
Page 1
Operator Manual MX8800 System V01.00.01 (2013.11.4) © 2012 Nautilus Hyosung Inc. All Rights Reserved. -
Page 2
Add the note about the handset in the section of Video Chapter2 Banking Device. © 2012 Nautilus Hyosung All Rights Reserved. The content of this specification is protected by copyright laws. 2014. 5. 21. 2nd Release © 2012 Nautilus Hyosung Inc. All Rights Reserved. -
Page 3: Table Of Contents
Remove jam from the B2 Upper Transport Path of BM2 ························································· 4-13 Remove jam from the B2 Upper Transport Path of BM2 ························································· 4-14 Remove jam from B2 Reject Transport Section ···································································· 4-15 © 2012 Nautilus Hyosung Inc. All Rights Reserved.
-
Page 4
How to load the receipt paper……………………6-2 How to clear receipt jam from the Printer ………………..6-6 Chapter7. Coin Dispenser ………………….7-1 Replenishing the Coin Dispenser ………………….7-1 Clearing a coin jam ……………………..7-3 Index ……………………….Index-1 Memo ……………………….Memo-1 © 2012 Nautilus Hyosung Inc. All Rights Reserved. -
Page 5: Chapter1. Preface
This manual details how the customers replenish the notes, paper and coins and how they remove the jam at the MX8800. Audience ▶ Customers and staffs of Nautilus Hyosung who use and operate the MX8800 in each branches of bank. Support Information ▶…
-
Page 6: Conventions
Body Module-Up (Upper Body of the Module) BUNDLE Bulk Note Separation Module Bill Recycling Machine Camera Unit CASSETTE Cash & Check Cassette CCIM Cash & Check In Module Contactless Card Reader Control Electronics Coin Hopper Coin Dispenser © 2012 Nautilus Hyosung Inc. All Rights Reserved.
-
Page 7
RT/A6 Retract & A6 Cassette Switch Separator Control Module Sensor and Indications Unit Service Provider Slip Printer (Receipt Printer) Tape Escrow Text Terminal Unit (OPL or SPL) Utility Cassette Vacuum Fluorescent Display © 2012 Nautilus Hyosung Inc. All Rights Reserved. -
Page 8: Safety Precautions
4. The equipment is to be secured to the building structure before operation 5. A security container shall be permitted to optionally be provided with a secondary lock, but improper use of the secondary lock feature will reduce the security level of the ATM. © 2012 Nautilus Hyosung Inc. All Rights Reserved.
-
Page 9
▪ If the above-mentioned abnormalities occur, immediately turn off the power, unplug the equipment and contact the service center. ▪ If you ignore these symptoms, the equipment may catch on fire or cause electric shock. © 2012 Nautilus Hyosung Inc. All Rights Reserved. -
Page 10: Related Document
▪ Installation Manual ▪ Service Manual ▪ MoniPlusVDM Manual (Diagnostic) For the contact of maintenance staffs of Nautilus Hyosung, see the E-mail addresses and telephone numbers provided separately. © 2012 Nautilus Hyosung Inc. All Rights Reserved.
-
Page 11: Chapter2. Introduction
Chapter2. Introduction Chapter2. Introduction About the MX8800 ▶ The MX8800 is a full service ATM. Customers deposit the cash/check, make the withdrawal and receive the transaction records through openings in the fascia with MX8800 ATM. The MX8800 is a versatile, easily maintained delivery system that can be modified to keep pace with the bank’s changing needs.
-
Page 12: The Exterior Overview
Chapter2. Introduction Operator Manual The Exterior Overview ▶ The following picture shows the front of MX8800 and key units. The fascia provides the interface between the customer and MX8800. The customer selects transactions and requests information at the fascia. Webcam…
-
Page 13: The Interior Overview
Operator Manual Chapter2. Introduction The Interior Overview ▶ The MX8800 consists of the safe where banknotes are stored and the side body where the CE and the power supply are installed. The interior and key units are as follows. Teller…
-
Page 14: Basic Features
Chapter2. Introduction Operator Manual Basic Features ▶ Important features of the MX8800 is highlighted in the following list: Main Controller Core2Duo E7400 (2.8GHz) Memory DDR Memory 4 GB Storage 500 GB Device DV -RW Operating System Windows 7 Expansion Slots…
-
Page 15
Reject 50 Mixed Notes and Checks Cassette Article 6 10 Mixed Notes and Checks Cassette Escrow 50 Mixed Notes and Checks /1 transaction Deposit 50 Mixed Notes and Checks Reject /1 transaction © 2012 Nautilus Hyosung Inc. All Rights Reserved. -
Page 16
None Option Coin Hopper Denomination 4 sorts Dispensing Capacity 1cent 658ea, 5cent 449ea, 10cent 847ea, 25cent 355ea Journal Electronic Journal Supported DOT-JPR, Option Safety & Security Safety UL 291 Level-1 (Rear Access) © 2012 Nautilus Hyosung Inc. All Rights Reserved. -
Page 17
Proximity Sensor Infrared Type Distance: 30.0 ~ 360.0mm (1.18 ~ 14.17inch) Safety Door Open Direction LEFT TO RIGHT SWING Normal Swing (Front View) Installation Method Anchor Battery System Battery Alarm Battery Option © 2012 Nautilus Hyosung Inc. All Rights Reserved. -
Page 18: Devices Of Mx8800
Basic Specification of Customer Display ▪ 15 inch LCD ▪ XGA Resolution ▪ 250cd/m Brightness ▪ 15 inch Privacy Filter Supported Basic Specification of Keypad ▪ Polycarbonate Encryption PIN Pad (PCI Compliant) © 2012 Nautilus Hyosung Inc. All Rights Reserved.
-
Page 19: Teller Display
Operator Manual Chapter2. Introduction Teller display ▶ Basic Specification of Teller Display ▪ 15 inch TFT LCD, 250cd/m ▪ 15 inch Resistive Touch Screen ▪ Slide Drawer Type © 2012 Nautilus Hyosung Inc. All Rights Reserved.
-
Page 20: Video Banking Device
Chapter2. Introduction Operator Manual Video Banking Device ▶ Basic Specification of Device ▪ 24” LCD ▪ Webcam, Speaker, Handset supported <Note!> 1. The handset of MX8800 is for internal communication. Webcam Speaker Speaker Camera Display for Video Banking Handset 2-10…
-
Page 21: Card Reader
The dip card reader cannot retract, capture, or retain cards. Basic Specification of Card Reader ▪ Dip Type Card Reader ▪ ISO 1, 2, 3 Read ▪ IC Card Supported © 2012 Nautilus Hyosung Inc. All Rights Reserved. 2-11…
-
Page 22: Ce (Control Electronics, Pc)
▪ Windows 7 ▪ 5 Serial Ports ▪ 22 USB Ports (M/B 8EA, Hub 14EA) ▪ On-Board Dual VGA (DVI, RGB) • PCI_Ex x1 Dual VGA (DVI, RGB) ▪ 10/100/1000Mbps On-Board 2-12 © 2012 Nautilus Hyosung Inc. All Rights Reserved.
-
Page 23: Power Supply
▶ The power supply unit converts AC power to DC power and provides the voltage to various modules within the system. The power supply unit allows the user to turn on/off the system, enter power-failure mode, and perform other sequences. © 2012 Nautilus Hyosung Inc. All Rights Reserved. 2-13…
-
Page 24: Cash & Check In Module (Ccim)
▪ Bundle Capacity: 50 Checks/1 transaction ▪ Deposit Direction: 4 way • Image scanning: Double side scanning • MICR: CMC-7, E13-B • Endorsement Print: Double side printing, Ink jet • Shutter Type: Automatic Shutter 2-14 © 2012 Nautilus Hyosung Inc. All Rights Reserved.
-
Page 25: Brm (Bill Recycling Machine)
• Non-Reflux 16,400 bills installed max in the cassette (injection by human) • Reflux 2,850 per recycling cassette (when auto stack) • Non-Reflux 3,000 per recycling cassette (injection by human) *For 0.1mm (0.0039inch) thickness bill © 2012 Nautilus Hyosung Inc. All Rights Reserved. 2-15…
-
Page 26: Spr (Slip Printer/Receipt Printer)
▪ Setting roll paper semi-automatically ▪ Black Mark Paper Optionally Supported Basic Specification of Paper ▪ Thermal Roll Paper ▪ Paper Roll Capacity of 1,000 Transactions / Roll (Depending on Format) 2-16 © 2012 Nautilus Hyosung Inc. All Rights Reserved.
-
Page 27: Coin Dispenser
ATM transactions to a precise amount. Basic Specification of Coin Dispenser ▪ 4 sorts of denomination supported ▪ Dispensing Capacity: ∙ 1cent: 658ea ∙ 5cent: 449ea ∙ 10cent: 847ea ∙ 25cent: 355ea © 2012 Nautilus Hyosung Inc. All Rights Reserved. 2-17…
-
Page 28: Bar Code Reader (Bcr)
▶ This bar code reader provides a built-in object detection sensor (IR) that instantly turns on the scanner when an object is presented within the scanner’s field of view. 2D Bar Code 2-18 © 2012 Nautilus Hyosung Inc. All Rights Reserved.
-
Page 29: Contactless Card Reader (Ccr)
Basic Specification of Contactless Card Reader ▪ Audio Guidance by Beeper ▪ 13.56MHz ISO14443 Type A,B, NFC and MiFare ▪ Payment Applications: American Express-Express Pay Discover Zip, JCB J/speedy Mastercard PayPass Mstripe Visa payWave MSD © 2012 Nautilus Hyosung Inc. All Rights Reserved. 2-19…
-
Page 30: Seismic Sensor And Heat Detector
Heat detector is thermistor based design to provide temperature sensing that quickly, accurately, and consistently identifies when fixed temperature are exceeded. And also it can detect rate-of-rise by comparing two thermistor responses. 2-20 © 2012 Nautilus Hyosung Inc. All Rights Reserved.
-
Page 31: Chapter3. For The Beginning Operator
1. Insert the system key in the side body door as picture below. 2. Turn the key (Clockwise) and hold the key to open the lock. 3. Pull the key and swing the door to the right side © 2012 Nautilus Hyosung Inc. All Rights Reserved.
-
Page 32: Side Body Closing
Operator Manual Side Body Closing ▶ Close the side body as follows 1. Swing the door until the doors are fully closed. 2. Turn the Key (Counter Clockwise). 3. Remove the key © 2012 Nautilus Hyosung Inc. All Rights Reserved.
-
Page 33: Security Enclosure Opening
1. Open the main body door with key. 2. Unlock the security door, refer to the relevant instructions detailed under “Opening/ Closing The Security Enclosure (Security Door)” for the configuration of MX8800 3. Turn and pull the Handle. © 2012 Nautilus Hyosung Inc. All Rights Reserved.
-
Page 34: Security Enclosure Closing
1. Swing the door until the doors are fully closed and turn the handle. 2. Turn the dial Key (Counter Clockwise). 3. Close the outer door with key. 3. Remove the key. © 2012 Nautilus Hyosung Inc. All Rights Reserved.
-
Page 35: Switching Power On/Off
1. Open the side body door 2. Check that Main Switch is on the position of “-“. 3. Press the power switch at the left side (“ON”). 4. The system will be turn on automatically © 2012 Nautilus Hyosung Inc. All Rights Reserved.
-
Page 36: Switching Power Off
4. The operating system will shut down then power will turn off. WARNING: Do NOT operate Main Switch on power supply when you would like to turn off the power. It may cause damage to operate system or destabilize control electronics in ATM. © 2012 Nautilus Hyosung Inc. All Rights Reserved.
-
Page 37: Power Supply Status
<System Off> procedure starts and only [AC IN] LED is turned on. ▪ In case power failure occurs during normal system operation, the system will enter <Power Failure Mode> and only [DC OUT] will be turned off. © 2012 Nautilus Hyosung Inc. All Rights Reserved.
-
Page 38: Entering Teller Service Mode
1. Insert the key hole and turn it clockwise. 2. Pull back the SPL handle, lift the handle upward, and then rotate the handle. You can adjust the angle of the handle as you want. © 2012 Nautilus Hyosung Inc. All Rights Reserved.
-
Page 39: How To Fold And Store In Case Of Unused
▶ Pull down the SPL handle and rotate it. When the handle is positioned horizontally, push it into the body. Do not excessively press the handle when you pull down and rotate the handle. Otherwise, it may cause failure of the handle. © 2012 Nautilus Hyosung Inc. All Rights Reserved.
-
Page 40: Opening/Closing The Security Enclosure (Security Door)
Chapter3. For the beginning operator Operator Manual Opening/Closing the Security Enclosure (Security Door) ▶ The MX8800 has locks for the Vault. Security Door with Cencon The Cencon lock is highly-secured, advanced-design lock. Even though the lock is electromechanical, they require no wiring or batteries for opening the lock because they are self-powered.
-
Page 41
5. Turn the handle to the left (CCW) and open the security door. 6. Turn the dial a minimum of one complete rotation to the left (CCW) to extent the bolt. © 2012 Nautilus Hyosung Inc. All Rights Reserved. 3-11… -
Page 42
The best thing to do in analyzing the lock level is to write down the entire string and then pick out the portions of it that are significant to you, or if you are experiencing a problem with the lock, report the entire string to the Tech Support group. 3-12 © 2012 Nautilus Hyosung Inc. All Rights Reserved. -
Page 43
Select and enter the new combination. “CnF” (confirm new Factory combination) will be displayed 11. Cnf Enter New Combination POC Enter new combination again to confirm. POC (Pull Out Change key) will be © 2012 Nautilus Hyosung Inc. All Rights Reserved. 3-13… -
Page 44
15. OPr Retract Bolt Turn the Dial to the right (CW) to retract the bolt. 16. Close Door 17. Extend Bolt Turn the Dial to the left (CCW) to extend the bolt. 3-14 © 2012 Nautilus Hyosung Inc. All Rights Reserved. -
Page 45: Chapter4. Cash & Check In Module (Ccim)
In case of the transaction cancellation, cash and check in reject section is ejected to the customer in a lump by the command of higher rank. BC (Bill Checker) This section verifies the image data on both sides of cash for identification © 2012 Nautilus Hyosung Inc. All Rights Reserved.
-
Page 46
Cash and check received are stored in the cassette by sheets. The cassettes can be mounted or demounted from the unit with the key. And also cassette’s door can be opened using the key. © 2012 Nautilus Hyosung Inc. All Rights Reserved. -
Page 47: Basic Specification Of Cash & Check In Module
20.0 mm (0.79inch) Retract (Max.50 with New Notes) RT/A6 Cassette 7.0 mm (0.28inch) (Max.10 with New Notes) It is the reference value when the thickness of bill used is 0.1mm (0.0039inch). © 2012 Nautilus Hyosung Inc. All Rights Reserved.
-
Page 48: Specification Of External Appearance
Width: 274.0 ± 2 mm (10.79 ± 0.08inch) Dimensions Length: 169.0 ± 2 mm (6.65 ± 0.08inch) RT/A6 Height: 62.0 ± 2mm (2.44 ± 0.08inch) Cassette 1.0Kg (2.20 lb) Weight (except Cash & Check weight) © 2012 Nautilus Hyosung Inc. All Rights Reserved.
-
Page 49: Cash & Check Conditions
Operator Manual Chapter4. Cash & Check In Module (CCIM) Cash & Check Conditions ▶ Please refer to “Bill Conditions” in the chapter5. © 2012 Nautilus Hyosung Inc. All Rights Reserved.
-
Page 50: How To Remove Jam From Each Section
BOTTOM Module includes CASH CASSETTE Module and CHECK CASSETTE Module. Zone Abbreviation Description ① BUNDLE Bulk Note Separation Module ② Separator Control Module ③ Bill Checker ④ Alignment Module ⑤ RECOG Recognition Module © 2012 Nautilus Hyosung Inc. All Rights Reserved.
-
Page 51
B4 GUIDE B4 Guide of Body Module1 ⑫ ESCROW Escrow Module ⑬ RT/A6 Retract & A6 Cassette ⑭ CASSETTE1 Cash Cassette ⑮ CASSETTE2 Check Cassette ► Open Status of Unit Transport Path © 2012 Nautilus Hyosung Inc. All Rights Reserved. -
Page 52: Remove Jam From Bundle Module
1. After opening the Bundle Module and SCM, remove a jammed note. If necessary, turn the green Knob 1 to move the note to easily remove the jammed note. Removing jam from Bundle Module. Removing jam from Bundle Module. © 2012 Nautilus Hyosung Inc. All Rights Reserved.
-
Page 53: Remove Jam From The First Transport Path
3. After checking if the jammed bill is removed, completely close the First Transport Path pushing the lock lever in the yellow arrow direction as shown in the picture. Opening SCM to remove jam. Closing SCM after removing jam. © 2012 Nautilus Hyosung Inc. All Rights Reserved.
-
Page 54: Remove Jam From Bc
3. After checking if the jammed Note is removed, completely close the BC section by pushing the lock lever in the yellow arrow direction as shown in the picture. Opening BC (Zone ③) to remove jam. Closing BC after removing jam. 4-10 © 2012 Nautilus Hyosung Inc. All Rights Reserved.
-
Page 55: Remove Jam From Alg
Note as shown in the picture below. 3. After checking if the jammed Note is removed, completely close the ALG section. Opening Zone ④ to remove jam. Turning the green knob to remove jam. © 2012 Nautilus Hyosung Inc. All Rights Reserved. 4-11…
-
Page 56: Remove Jam From Recog Transport Section
Note as shown in the picture below. 3. After checking if the jammed Note is removed, completely close the Recog Transport Section. Pushing the lock lever to open Zone ⑤. Opening or Closing Zone ⑤. 4-12 © 2012 Nautilus Hyosung Inc. All Rights Reserved.
-
Page 57: Remove Jam From The B2 Upper Transport Path Of Bm2
3. After checking if the jammed Note is removed, completely close Zone ⑥ as shown in the picture. Pushing the lock lever to open Zone ⑥. Opening or Closing Zone ⑥. © 2012 Nautilus Hyosung Inc. All Rights Reserved. 4-13…
-
Page 58
3. After checking if the jammed Note is removed, completely close Zone ⑥ as shown in the picture. Pushing the lock lever to open Zone ⑥. Opening or Closing Zone ⑥. 4-14 © 2012 Nautilus Hyosung Inc. All Rights Reserved. -
Page 59: Remove Jam From B2 Reject Transport Section
Section as shown in the picture. 4. If it is necessary to remove the inside jam of ALG, open the ALG guide as shown in the picture. Pushing the lock lever. Opening Zone ⑦-1, ⑦-2. © 2012 Nautilus Hyosung Inc. All Rights Reserved. 4-15…
-
Page 60: Remove Jam From B3 Transport Section
Note as shown in the picture below. 3. After checking if the jammed Note is removed, completely close Zone ⑧ as shown in the picture. Opening Zone ⑧ Closing Zone ⑧ 4-16 © 2012 Nautilus Hyosung Inc. All Rights Reserved.
-
Page 61: Remove Jam From Reject Section
Note as shown in the picture below. 3. After checking if the jammed Note is removed, completely close the door. Removing jam from Reject Section. © 2012 Nautilus Hyosung Inc. All Rights Reserved. 4-17…
-
Page 62: Remove Jam From B3 Escrow Transport Section
3. After checking if the jammed Note is removed, push the green button and completely close Zone ⑩ as shown in the picture. Opening Zone ⑩ Closing Zone ⑩ 4-18 © 2012 Nautilus Hyosung Inc. All Rights Reserved.
-
Page 63: Remove Jam From B4 Transport Section
3. After checking if the jammed Note is removed, push the green button and completely close Zone ⑪ as shown in the picture. Opening Zone ⑪ Closing Zone ⑪ © 2012 Nautilus Hyosung Inc. All Rights Reserved. 4-19…
-
Page 64: Remove Jam From Escrow
5. And then come out one note from the escrow module. And remove the note as shown in lower figure. If necessary, repeat it to end. Finally turn the Lock Lever8 to “CLOSED” position. Removing jam from Escrow Removing note from Escrow 4-20 © 2012 Nautilus Hyosung Inc. All Rights Reserved.
-
Page 65: Remove Jam From Rt/A6 Cassette
4. After removing jam, close the door and turn the key to the left. And then it is locked. 5. To mount RT/A6 Cassette, turn the key to the left and remove it. Then mount the RT/A6 Cassette. (Auto-locking mounting) Moving BM3 Separating Retract BOX Removing jam from Retract © 2012 Nautilus Hyosung Inc. All Rights Reserved. 4-21…
-
Page 66
Chapter4. Cash & Check In Module (CCIM) Operator Manual Opening or closing the door of Retract BOX Removing jam from Retract Section 4-22 © 2012 Nautilus Hyosung Inc. All Rights Reserved. -
Page 67: Remove Jam From Cassette
3. After removing jam, close the door and turn the key to the left. And then it is locked. 4. To mount the Cassette, turn the key to the left and remove it. Then it is mounted automatically. Front View of Cassette Section. Separating the Cassette. © 2012 Nautilus Hyosung Inc. All Rights Reserved. 4-23…
-
Page 68
Turning the key to the right to open the door and turning the key to the left to close the door. Pressing the green lever to drop down the Push Plate. 4-24 © 2012 Nautilus Hyosung Inc. All Rights Reserved. -
Page 69: How To Change Prt Maintenance Module
※ After replacing Ink Cartridge, you have to reset «PRT Cartridge Count». And you may need to replace Ink Head Cleaner Felt if necessary Installing Ink Cartridge © 2012 Nautilus Hyosung Inc. All Rights Reserved. 4-25…
-
Page 70: How To Reset Prt Cartridge Count
3. Press the green button on PRT capping module installed BM3 for 3 seconds as shows the picture (Pressing the green button). 4. Push down DIP Switch 1 DIP Switch 1 Pressing the green button 4-26 © 2012 Nautilus Hyosung Inc. All Rights Reserved.
-
Page 71
4.5 million, it will be displayed in red. And you have to replace the Ink Cartridge. < Note! > Ink Count Clear is Available since V01.00.54 of VDM and V02.00.35 of firmware. © 2012 Nautilus Hyosung Inc. All Rights Reserved. 4-27… -
Page 72: How To Replace Ink Head Cleaner Felt
3. After replacing the new one by removing the tape, assemble the felt unit in the reverse process Dissembling the Felt Unit Replacing Ink Head Cleaner Felt 4-28 © 2012 Nautilus Hyosung Inc. All Rights Reserved.
-
Page 73: Chapter5. Bill Recycling Machine (Brm)
▶ The idea of recycling is to make the cash that is paid in during deposit transactions available again for dispensing. This considerably lengthens the replenishment or emptying cycles on cash-in/cash-out systems and, at the same time, the cash holding per system can be reduced. © 2012 Nautilus Hyosung Inc. All Rights Reserved.
-
Page 74: Basic Specification Of Bill Recycling Machine
Unclaimed Cassette 45.0mm During Stack 300bills (UTC1) (1.77inch) Reject Cassette 2 41.5mm During Stack 300bills (UTC2) (1.63inch) It is the reference value when the thickness of bill used is 0.1 mm (0.0039inch). © 2012 Nautilus Hyosung Inc. All Rights Reserved.
-
Page 75: Specification Of External Appearance
Width: 217.0 ± 3.0 (mm) (8.54 ± 0.12inch) Length: 140.0 ± 3.0 (mm) Utility Dimensions (5.51 ± 0.12inch) Cassette Height: 117.0 ± 3.0 (mm) (UTC) (4.61 ± 0.12inch) Weight 1.3 Kg (2.87ib, except bill weight) © 2012 Nautilus Hyosung Inc. All Rights Reserved.
-
Page 76: Bill Conditions
2. Bill has sufficient life or sizing to be handled easily 3. Bill which can be manually held straightly when one end is held by a hand and the bill is slightly curved vertically. © 2012 Nautilus Hyosung Inc. All Rights Reserved.
-
Page 77: Unacceptable Condition
Chapter5. Bill Recycling Machine (BRM) Unacceptable condition ▶ 1. Bill with serious wrinkles, torn or broken section wherein paper fiber is broken and separation begins. ▪ Wrinkle Wrinkle ▪ Torn Torn ▪ Broken section Broken Section © 2012 Nautilus Hyosung Inc. All Rights Reserved.
-
Page 78
4. Bill ragged and cannot be held straightly when one end is supported by a hand 20.0mm (0.79inch) 35.0mm (1.38inch) When the bill is held by 20.0mm (0.79inch) and the straightness of the bill is 35.0mm (1.38inch) or less, it cannot be used © 2012 Nautilus Hyosung Inc. All Rights Reserved. -
Page 79
5. Bill with cellophane tape, scotch tape, etc Tape 6. Bill with folds Fold 7. Gradually curved bill (bills tied by hand seal, etc) Band seal 8. Bill with folded lines Case 1 Case 2 © 2012 Nautilus Hyosung Inc. All Rights Reserved. -
Page 80
Chapter5. Bill Recycling Machine (BRM) Operator Manual Case 3 <Note!> Bill distortion should not exceed 10.0 mm (0.39inch). © 2012 Nautilus Hyosung Inc. All Rights Reserved. -
Page 81: How To Open And Close The Lower Unit
1. To release the lock from system, press the lever A as shown in pictured below. Then, pull the lower unit pressing lever A until the lower unit is completely taken out. 2. Lift up the Mid Transport Path pressing its handle B until it fixes. © 2012 Nautilus Hyosung Inc. All Rights Reserved.
-
Page 82
2 steps, so you have to close it once again pressing the lever 2. Push the lower unit into the system until it locks into its position with a click as shown in pictured below. 5-10 © 2012 Nautilus Hyosung Inc. All Rights Reserved. -
Page 83: How To Replenish The Cassette With Bills
2. Separate the cassette from the set guide holding the handle C. 3. Unfold the holder of the cassette and lay it on the flat surface as shown in below picture. © 2012 Nautilus Hyosung Inc. All Rights Reserved. 5-11…
-
Page 84
5. Press the green lever D and pull the Push-Plate to the end in the arrow direction. <Note!> If pressing the lever using one finger, entire cassette can move. So please use both the thumb and forefinger. 5-12 © 2012 Nautilus Hyosung Inc. All Rights Reserved. -
Page 85
7. Replenish the cassette with the bill to the position of the label and push the Push- Plate to the end in the arrow direction pressing the green lever D. Label © 2012 Nautilus Hyosung Inc. All Rights Reserved. 5-13… -
Page 86
Fan the notes so that the notes are not sticking together. b. Remove all notes with holes or notes that are torn. c. Unfold the folded notes. d. Place the notes correctly. 5-14 © 2012 Nautilus Hyosung Inc. All Rights Reserved. -
Page 87
8. Close the door with the key. After closing the door, remove the key from the cassette. 9. Fold the holder of the cassette and mount the cassette into the set guide. 10. Mount the lower unit into the system. © 2012 Nautilus Hyosung Inc. All Rights Reserved. 5-15… -
Page 88: How To Remove The Bills From Reject Cassette
2. Separate the Reject Cassette from the set guide holding the handle A. 3. Put the Reject Cassette on the flat surface and open the door by turning the key clockwise. 5-16 © 2012 Nautilus Hyosung Inc. All Rights Reserved.
-
Page 89
Reject Cassette until the space is created enough to remove the bills. Then remove the bills from the Reject Cassette. 5. Close the door of the Reject Cassette with the key. After closing the door, remove the key from the reject cassette. © 2012 Nautilus Hyosung Inc. All Rights Reserved. 5-17… -
Page 90
Chapter5. Bill Recycling Machine (BRM) Operator Manual 6. After closing the door, mount the Reject Cassette into the set guide. 7. Mount the lower unit into system. 5-18 © 2012 Nautilus Hyosung Inc. All Rights Reserved. -
Page 91: How To Remove The Bills From Utility Cassette
▶ This section describes how to remove the bills from utility cassette. 1. Turn the key clockwise to separate the Utility Cassette. 2. Pull the Utility Cassette holding the handle A to completely separate the Utility Cassette. © 2012 Nautilus Hyosung Inc. All Rights Reserved. 5-19…
-
Page 92
Remove the key after closing the door. 5. Mount the Utility Cassette and turn the key counterclockwise. Then completely inset the Utility Cassette into BRM20 as shown in picture below. 5-20 © 2012 Nautilus Hyosung Inc. All Rights Reserved. -
Page 93: How To Open And Close The Upper Unit
1. Hold the handle B with one hand and pull the safety lock C in the arrow direction with another hand to release the lock. 2. Slowly push the Customer Service Module in the arrow direction to completely close © 2012 Nautilus Hyosung Inc. All Rights Reserved. 5-21…
-
Page 94
1. Hold the handle B with one hand and push the safety lock C in the arrow direction with another hand to release the lock. 2. Slowly push the Tape Escrow in the arrow direction to completely close it. 5-22 © 2012 Nautilus Hyosung Inc. All Rights Reserved. -
Page 95
▶ Caution take your hands off the handle until the upper unit is completely closed because the safety lock is released! And also, do hold the other places except the handle! © 2012 Nautilus Hyosung Inc. All Rights Reserved. 5-23… -
Page 96: How To Open And Close The Upper Body Of The Module
2. Pull the upper unit in the arrow direction by pulling the lever A forward. ▶Close the upper body of BRM as follows 1. Push the upper unit into the system until it is locked. 5-24 © 2012 Nautilus Hyosung Inc. All Rights Reserved.
-
Page 97: How To Remove The Jam
1. Turn the green knob A counterclockwise and open the door. 2. Move the Push-Plate in the arrow direction by turning the green knob B clockwise for the jammed bill to be shown. © 2012 Nautilus Hyosung Inc. All Rights Reserved. 5-25…
-
Page 98
Chapter5. Bill Recycling Machine (BRM) Operator Manual 3. Turn the knob C clockwise and completely remove the jammed bill. 4. After removing the jammed bill, turn the knob A clockwise and close the door. 5-26 © 2012 Nautilus Hyosung Inc. All Rights Reserved. -
Page 99
3. Turn the green knob C clockwise for the bill to be shown and remove the jammed bill with another hand. 4. After removing the jammed bill, close the upper unit. (Refer to “Upper Unit Closing” ) © 2012 Nautilus Hyosung Inc. All Rights Reserved. 5-27… -
Page 100
The lift up BC (Bill Checker). 3. While still holding the lever, turn the green knob B clockwise and the jammed bill inside BC appears along the transport path. At this time, remove the jammed bill. 5-28 © 2012 Nautilus Hyosung Inc. All Rights Reserved. -
Page 101
Operator Manual Chapter5. Bill Recycling Machine (BRM) 4. After removing the jammed bill, completely close BC by pressing it. 5. Close Tape Escrow and Customer Service Module. © 2012 Nautilus Hyosung Inc. All Rights Reserved. 5-29… -
Page 102
2. Turn the green knob A clockwise for the jammed bill to be shown and remove the jammed bill while holding the transport guide B. 3. After removing jam, close Customer Service Module and Tape Escrow. 5-30 © 2012 Nautilus Hyosung Inc. All Rights Reserved. -
Page 103
4. Do not remove a normal bill wound around the drum because it is returned during BRM initialization. 5. After removing jam, close Customer Service Module and Tape Escrow. © 2012 Nautilus Hyosung Inc. All Rights Reserved. 5-31… -
Page 104
3. Turn the green knob A clockwise until the jammed bill occurred during entering into the cassette shows and then remove the jammed bill as shown in below picture. 4. Mount the lower unit into system. 5-32 © 2012 Nautilus Hyosung Inc. All Rights Reserved. -
Page 105
2. Pull the Push-Plate in the arrow direction of the below picture to remove the jammed bill. 3. Find the green knob A in the upper part of the internal of the cassette. © 2012 Nautilus Hyosung Inc. All Rights Reserved. 5-33… -
Page 106
After removing the jammed bill, return the Push-Plate to the original position as shown in below picture. 5. Close the cassette door and mount the cassette into the set guide. 6. Mount the lower unit into system. 5-34 © 2012 Nautilus Hyosung Inc. All Rights Reserved. -
Page 107
3. After removing the jammed bills from Reject Cassette, close the door of Reject Cassette and mount Reject Cassette into the set guide. 4. Mount the lower unit into system. © 2012 Nautilus Hyosung Inc. All Rights Reserved. 5-35… -
Page 108
2. Turn the green knob A counterclockwise and the jammed bill appears. At this time, put the hand into Utility Cassette and remove the jammed bills. 3. Close the door of Utility Cassette with key. Then remove the key from the cassette. 5-36 © 2012 Nautilus Hyosung Inc. All Rights Reserved. -
Page 109: Chapter6. Receipt Printer
8. Make sure the paper is rolled evenly. 9. Miscellaneous: If the paper comes in contact with carbon copy paper or if the paper surface is scratched with a metallic object, de-coloring may occur. © 2012 Nautilus Hyosung Inc. All Rights Reserved.
-
Page 110: How To Load The Receipt Paper
▪ Load a paper roll into the unit with the shape of the roll kept intact. (Deformed roll may cause jamming.) Correct shape of the paper roll ▪ The leading edge of the roll shall neatly be cut prior to loading the roll. © 2012 Nautilus Hyosung Inc. All Rights Reserved.
-
Page 111
2. Retract printer assembly from the rail assembly. This can be accomplished by pressing the green button and then pull out the printer towards you. 3. Insert the paper axis into the center of receipt roll and mount it onto the charger. © 2012 Nautilus Hyosung Inc. All Rights Reserved. -
Page 112
<Note!> 1. Be sure to remove the test sheet printed after feeding the paper and take the printer into the system. Then close the side door using key. © 2012 Nautilus Hyosung Inc. All Rights Reserved. -
Page 113
Operator Manual Chapter6. Receipt Printer 2. Refer to diagram stickers placed on either side of the center section of the thermal printer. © 2012 Nautilus Hyosung Inc. All Rights Reserved. -
Page 114: How To Clear Receipt Jam From The Printer
3. Open the print head assembly by pushing down green lever of print head assembly. 4. To take out a jammed paper in front of transport path, lift up the transparent window guide and remove the jamming receipt carefully. © 2012 Nautilus Hyosung Inc. All Rights Reserved.
-
Page 115
Thermal Print Head (TPH) is closed. When finished loading paper, close the rear Panel and remove the key. <Note!> After all paper jams have been cleared, reload the paper and test the printer using Diagnostics. © 2012 Nautilus Hyosung Inc. All Rights Reserved. -
Page 116: Chapter7. Coin Dispenser
Be sure to check the denomination label on the coin hopper when replenishing coins. CAUTION: ▪ If cloth coin bags are used to transport or to load coins into the coin dispenser, it is © 2012 Nautilus Hyosung Inc. All Rights Reserved.
-
Page 117
▪ If coin dust accumulates in the hopper during use, it may cover the outlet sensor, and causes the malfunction. 3. Repeat the procedure for the other three coin hoppers in the coin dispenser. 4. Push the coin dispenser’s servicing tray back to its docked position. © 2012 Nautilus Hyosung Inc. All Rights Reserved. -
Page 118: Clearing A Coin Jam
3. Clear the jammed coin by either: ▪ Rotate the disk manually, first counter clock wise, and then clock wise to free the coin or ▪ Push the coin back in using another coin. © 2012 Nautilus Hyosung Inc. All Rights Reserved.
-
Page 119
Operator Manual 4. Remove any debris from the disk bed assembly. 5. Clean the exit window opto with a clean dry cloth. 6. Re-assemble, as described. 7. Refill and test the hopper. © 2012 Nautilus Hyosung Inc. All Rights Reserved. -
Page 120: Index
Operator Manual Index Index © 2012 Nautilus Hyosung Inc. All Rights Reserved. Index-1…
-
Page 121: Memo
Operator Manual Memo Memo © 2012 Nautilus Hyosung Inc. All Rights Reserved. Memo-1…