При использовании любой техники время от времени могут возникать неполадки. Так, например, при использовании копиров, принтеров и МФУ Sharpмогут появляться различные ошибки, вызванные различными причинами. Об их возникновении пользователь информируется с помощью кода, которые выводится на дисплее принтера или другого используемого устройства. Коды ошибок Sharp вы можете идентифицировать с помощью приведенной ниже таблицы. Выяснив причину сбоя в работе устройства, вы сможете устранить ее самостоятельно (например, если произошло замятие бумаги, отсутствует бумага в лотке) либо обратиться в сервисный центр по обслуживанию и ремонту Sharp, если код ошибки сообщает о серьезной поломке.
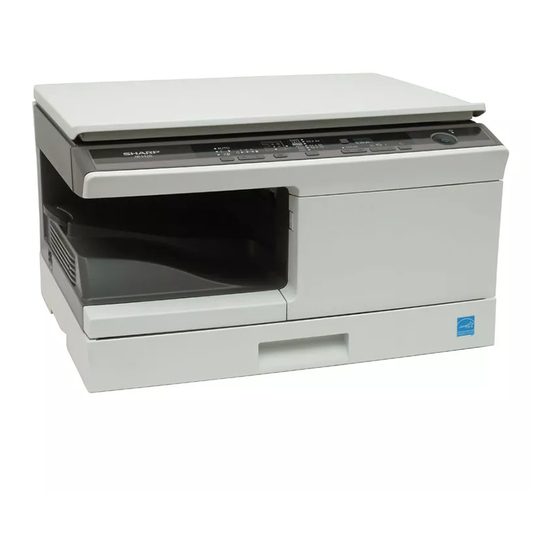
Sharp AL-840
| Код ошибки | Подкод | Описание |
|---|---|---|
| L1 | 00 | Неисправность при движении сканирующего устройства |
| L3 | 00 | Неисправность сканирующего устройства при возвращении в начальное положение |
| Е7 | 03 | Неисправность, связанная с яркостью свечения лазера |
| 04 | Ошибка при определении уровня белого при выполнении штриховки | |
| 05 | Ошибка при определении уровня черного при выполнении штриховки | |
| 12 | Ошибка уровня выходного сигнала при выполнении штриховки | |
| 14 | Сбой ASIC (MCU PWB) | |
| 15 | Неисправность копировальной лампы | |
| H2 | 00 | Неисправность термодатчика |
| H3 | 00 | Температура вала узла закрепления превысила норму |
| H4 | 00 | Температура вала узла закрепления опустилась ниже положенного уровня |
| U2 | 01 | Неисправность EEPROM (MCU PWB) (ошибка данных счетчика) |
| 04 | Неисправность EEPROM (MCU PWB) (ошибка записи/чтения) | |
| 05 | Неисправность EEPROM (MCU PWB) | |
| 06 | Неисправность ROM (MCU PWB) | |
| C1 | Неисправность, обнаруженная выключателем передней панели (блока питания) | |
| CH | Отсутствует тонер-картридж | |
| E1 | Замятие бумаги при подаче из лотка | |
| E2 | Замятие бумаги | |
| E3 | Замятие бумаги на выходе узла закрепления | |
| P | Отсутствие бумаги в лотке |
Sharp AL-1000
| Код ошибки | Подкод | Описание |
|---|---|---|
| E7 | 03 | Неисправность блока лазера, связанная с излучающим диодом и его цепями |
| 04 | Ошибка при определении уровня белого при выполнении штриховки | |
| 05 | Ошибка при определении уровня черного при выполнении штриховки | |
| 12 | Ошибка уровня выходного сигнала при выполнении штриховки | |
| 14 | Сбой ASIC (MCU PWB) | |
| 15 | Неисправность копировальной лампы | |
| L1 | 00 | Неисправность при движении сканирующего устройства (датчик начального положения сканирующего устройства не видит движения зеркал) |
| L3 | 00 | Неисправность сканирующего устройства при возвращении в начальное положение (сканер не успел вернутся в начальное положение за определенное время) |
| L4 | 01 | Main motor drive overloaded |
| L6 | 10 | Неисправность двигателя многогранника блока лазера (полигон-мотор) |
| H2 | 00 | Неисправность термодатчика |
| H3 | 00 | Температура вала узла закрепления превысила норму |
| H4 | 00 | Температура вала узла закрепления опустилась ниже положенного уровня |
| U2 | 01 | Неисправность EEPROM (MCU PWB) (ошибка данных счетчика) |
| 04 | Неисправность EEPROM (MCU PWB) (ошибка записи/чтения) | |
| CH | Отсутствует тонер-картридж |
Sharp AL-1010
| Код ошибки | Подкод | Описание |
|---|---|---|
| E7 | 03 | Scanner position error |
| 04 | Exposure lamp blown | |
| 05 | CCD calibration error | |
| 12 | White level calibration error | |
| 14 | Main board malfunction | |
| 15 | Exposure lamp blown | |
| L1 | 00 | Scanner position error |
| L3 | 00 | Scanner position error |
| L4 | 01 | Main motor drive overloaded |
| L6 | 10 | Polygon mirror motor not up to speed |
| H2 | 00 | Fusing unit temperature error |
| H3 | 00 | Overheated fusing unit |
| H4 | 00 | The fusing unit doesn’t heat up |
| U2 | 01 | Counter error |
| 04 | EPROM error | |
| CH blinking | Dev unit is not properly installed |
Sharp AR-160 / 161
| Код ошибки | Подкод | Описание |
|---|---|---|
| CC | Original not detected | |
| E1 | 00 | Lost communication with the Sorter |
| 10 | Lost communication with the Sorter | |
| 11 | ASIC error | |
| 12 | Image Processing Unit error | |
| 13 | ROM error | |
| 14 | NVRAM error | |
| 15 | Page memory fault | |
| 16 | SIMM not present or installed incorectly | |
| 17 | Page rotation error in RAM | |
| 80 | Electronic sort board error | |
| 81 | ||
| 82 | ||
| 84 | ||
| 88 | ||
| E7 | 03 | Lens position error |
| 04 | White level calibration error | |
| 05 | Black level calibration error | |
| 12 | CCD calibration error | |
| F1 | 06 | Shift sort motor overloaded |
| F5 | 02 | Exposure lamp blown |
| F6 | 00 | Fax board problems |
| 10 | ||
| 80 | ||
| 81 | ||
| 82 | ||
| 84 | ||
| 88 | ||
| F9 | 00 | Printer board problems |
| 10 | ||
| 80 | ||
| 81 | ||
| 82 | ||
| 84 | ||
| 88 | ||
| H2 | 00 | Fusing unit temperature error |
| H3 | 00 | Overheated fusing unit |
| H4 | 00 | The fusing unit doesn’t heat up |
| L1 | 00 | Scanner position error |
| L3 | 00 | Scanner position error |
| L4 | 01 | Main motor drive overloaded |
| 10 | Separation motor overloaded | |
| L6 | 10 | Polygon mirror motor not up to speed |
| L8 | 01 | Zero cross signal error |
| U2 | 04 | EPROM error |
| 11 | Main counter error | |
| 12 | EPROM error | |
| U3 | 29 | Mirror position error |
| U9 | 00 | Op panel problem |
| 81 | ||
| 82 | ||
| 84 | ||
| 88 | ||
| U95 | Firmware error |
Sharp AR-163 / 201 / 206 / 5015 / 5020
| Код ошибки | Подкод | Описание |
|---|---|---|
| E1 | 00 | Неисправность связи с платой электронного сортировщика |
| 10 | Неисправность платы электронного сортировщика | |
| 11 | Ошибка ASIC электронного сортировщика | |
| 12 | Ошибка CODEC электронного сортировщика | |
| 13 | Ошибка очистки (сброса) ROM электронного сортировщика | |
| 14 | Ошибка RAM электронного сортировщика | |
| 15 | Ошибка сохранения страницы в памяти электронного сортировщика | |
| 16 | Ошибка SIMM электронного сортировщика | |
| 17 | Ошибка RAM | |
| 80 | Неисправность связи с платой электронного сортировщика (PROTOCOL) | |
| 81 | Неисправность связи с платой электронного сортировщика (PARITY) | |
| 82 | Неисправность связи с платой электронного сортировщика (OVERRUN) | |
| 84 | Неисправность связи с платой электронного сортировщика (FRAMING) | |
| 88 | Неисправность связи с платой электронного сортировщика (TIME-OUT) | |
| E7 | 03 | Неисправность блока лазера |
| 04 | Ошибка определения уровня белого CCD | |
| 05 | Ошибка при определении уровня черного CCD | |
| F1 | 06 | Неисправность Shifter (двигателя сдвига копии) |
| F2 | 04 | Ошибка чтения данных CRUM (чипа тонер-картриджа) |
| F5 | 02 | Неисправность копировальной лампы |
| F6 | 00 | Ошибка связи с платой факса |
| 10 | Неисправность платы факса | |
| 80 | Ошибка связи с платой факса (PROTOCOL) | |
| 81 | Ошибка связи с платой факса (PARITY) | |
| 82 | Ошибка связи с платой факса (OVERRUN) | |
| 84 | Ошибка связи с платой факса (FRAMING) | |
| 88 | Ошибка связи с платой факса (TIME-OUT) | |
| F9 | 00 | Ошибка связи с платой принтера |
| 10 | Неисправность платы принтера | |
| 80 | Ошибка связи с платой принтера (PROTOCOL) | |
| 81 | Ошибка связи с платой принтера (PARITY) | |
| 82 | Ошибка связи с платой принтера (OVERRUN) | |
| 84 | Ошибка связи с платой принтера (FRAMING) | |
| 88 | Ошибка связи с платой принтера (TIME-OUT) | |
| H2 | 00 | Неисправность термодатчика |
| H3 | 00 | Температура вала узла закрепления превысила норму |
| H4 | 00 | Температура вала узла закрепления опустилась ниже положенного уровня |
| L1 | 00 | Обнаружена неисправность при определении начального положения сканирующей каретки |
| L3 | 00 | Обнаружена неисправность при обратном ходе сканирующей каретки |
| L4 | 01 | Неисправность главного двигателя |
| 10 | Неисправность двигателя сепаратора | |
| L6 | 10 | Неисправность двигателя многогранника блока лазера (полигон-мотор) |
| L8 | 01 | Ошибка сигнала пересечения нуля |
| U2 | 04 | EEPROM serial communication error |
| 11 | counter check sum error | |
| 12 | adjustment value check sum error(EEPROM) | |
| 40 | CRUM communication error | |
| U3 | 29 | Ошибка в определении начального положения зеркал |
| U9 | 00 | Ошибка связи с панелью управления (PROTOCOL) |
| 80 | Ошибка связи с панелью управления (PARITY) | |
| 82 | Ошибка связи с панелью управления (OVERRUN) | |
| 84 | Ошибка связи с панелью управления (FRAMING) | |
| 88 | Ошибка связи с панелью управления (TIME-OUT) | |
| U95 | Неисправность соединения платы управления | |
| U99 |
Sharp AR-405
| Код ошибки | Подкод | Описание |
|---|---|---|
| C1 | 00 | MC unit malfunction |
| C2 | 00 | TC unit malfunction |
| E7 | 00 | Image Processing Unit error |
| 01 | Memory back-up battery dead | |
| 02 | Laser unit problem | |
| 03 | HDD defective | |
| 10 | black level calibration error | |
| 11 | white level calibration error | |
| 13 | CCD calibration error | |
| 90 | Image Processing Unit error | |
| F1 | 00 | Lost communication with the Sorter |
| 01 | Sorter registration problem | |
| 02 | Paper transport motor overloaded in sorter | |
| 04 | Bin position error in sorter | |
| 05 | Bin position error in sorter | |
| 06 | Shift sort motor overloaded | |
| 08 | Stapler position error | |
| 08 | Stapler overloaded | |
| 11 | Sorter problems | |
| 14 | Second shift tray jammed | |
| 15 | Sorter drive problems | |
| 50 | Sorter not installed properly | |
| 80 | No powerin sorter | |
| F2 | 00 | ID pattern reading error |
| 02 | Toner add mechanism malfunction | |
| 31 | ID pattern reading error | |
| 32 | ID pattern reading error | |
| 39 | Drum thermistor error | |
| F3 | 12 | Paper does not lift in the tray |
| 22 | Paper does not lift in the tray | |
| F9 | 00 | Printer board problems |
| 01 | Printer board problems | |
| 02 | Printer board problems | |
| 03 | Network card error | |
| 04 | Firmware error | |
| 05 | Not enough memory | |
| 10 | Printer board problems | |
| 90 | Printer board problems | |
| H2 | 00 | Fusing unit temperature error |
| 01 | Fusing unit temperature error | |
| H3 | 00 | Overheated fusing unit |
| 01 | Overheated fusing unit | |
| H4 | 00 | The fusing unit doesn’t heat up |
| 01 | The fusing unit doesn’t heat up | |
| H5 | 01 | Papersensordefective in the fusing unit |
| 02 | Fusing unit temperature error | |
| L1 | 00 | Scanner position error |
| L3 | 00 | Scanner position error |
| L4 | 01 | Main motor drive overloaded |
| L6 | 10 | Polygon mirror motor not up to speed |
| L8 | 01 | Zero cross signal error |
| 02 | Zero cross signal error | |
| U2 | 00 | EPROM error |
| 11 | EPROM error | |
| U4 | 02 | Duplex not working properly |
| 03 | Duplex problems | |
| U5 | 00 | Communication with the ADF is lost |
| 01 | Registration sensor problem in ADF | |
| 02 | Exit sensor error in ADF | |
| 03 | Timing sensor problems in ADF | |
| 11 | Paper feed drive overloaded in ADF | |
| U6 | 01 | Paper lift problem in 1’st optional tray |
| 02 | Paper lift problem in 2’nd optional tray | |
| 08 | Paper feed unit without power | |
| 10 | PFU paper transport motor overloaded | |
| 22 | Paper feed unit without power | |
| 50 | Paper feed unit not installed properly | |
| 51 | LCT not installed properly | |
| U7 | 00 | Main board malfunction |
| U9 | 00 | Op panel problem |
| 90 | Op panel problem | |
| EE | EU | Low toner density in the developer |
| EE | EL | High toner density in the developer |
| FA | 01 | Memory back-up battery dead |
| PC | Key counter not installed |
When the following indicators light up or blink on the operation panel or the following
alphanumeric codes appear in the display, solve the problem immediately referring
to both the table below and the relevant page.
Be sure to use only genuine SHARP parts and supplies.
Developer
replacement
required indicator
Toner cartridge
replacement
required indicator
Misfeed indicator
Maintenance
indicator
Power save indicator is
steadily lit.
The paper tray indicator is
blinking.
«CH» is blinking in the
display.
«CH» is steadily lit in the
display.
«P» is blinking in the display.
A letter and a number appear
alternately.
A letter and a number appear
alternately.
A letter and a number appear
alternately.
28
Indication
Steadily
lit
Steadily
lit
Blinking
Blinking
Steadily
lit
Cause and remedy
Developer is required. contact your authorised
service representative.
Replacement of Toner cartridge will be needed
soon. Prepare a new cartridge. (AR-208T)
Toner cartridge must be replaced. Replace it
with a new one. (AR-208T)
A misfeed has occurred. Remove the misfed
paper referring to the description of «MISFEED
REMOVAL».
Service by an authorised SHARP service
technician is required.
The unit is in the preheat mode. Press any key to
cancel the preheat mode.
The unit is in the auto power shut-off mode.
Press the start (
) key to cancel the auto power
shut-off mode.
The paper tray is not installed properly. Push the
tray into the unit securely.
The toner cartridge is not installed. Check if the
cartridge is installed. If «CH» is blinking even if a
cartridge is installed properly, contact your
SHARP service centre immediately.
Side cover is open. Close the side cover
securely by pressing the round projections near
the side cover open button.
The paper tray or multi-bypass tray is empty.
Load paper.
A misfeed has occurred in the paper tray or in the
multi- bypass tray. Remove the misfed paper.
Paper tray is not securely installed. Push the tray
in securely.
The scan head locking switch is locked. Unlock
the scan head locking switch and turn the power
switch off/on.
The unit will not function. Turn the power switch
off and then switch it on, and if there is again an
error, remove the power cord from the outlet,
and contact your authorized service
representative.
The unit will not function. Turn the power switch
off and then switch it on, or when the side cover
is opened and then closed ; and if there is again
an error, check whether or not you forgot to
remove the bundling tape on the cartridge.
Page
32
22
22
29
32
19
19
–
22
–
8, 10
29
–
–
–
–
Sharp ar 5420 не победимая ошибка H4
Доброго времени суток. Волшебный принтер sharp AR 5420 встал в ошибку H4. Сбрасываю через сервис, он гудит минуты 3 и опять в эту же ошибку. В его жизни это второй раз. В первый раз прозвонил печку и термопредохранитель, все работало. Но ошибка не проходила (не нагревалась печка) Увез в ремонт. Сказали что из за скачка электричества залипла какая то релюшка. по ней типа стукнули и все заработало. Запчастей действительно не меняли. Может кто нибудь побеждал эту беду своими силами? Помогите плиз его одолеть.
- Kemermax
Re: Sharp ar 5420 не победимая ошибка H4
 Feniks » 18:52 — 12.05.11
Ну если верить словам мастеров, то в прошлый раз у тебя сработал термостат который размыкает цепь при достижении определенной температуры. Можно конечно его поменять , но можно и просто об стенку его уе..ть, и он должен заработать. Ты внимательно еще раз прозвони всю печку, Лампу и термостат. Возможно и термистор накрылся…. а потом пиши поможем 
- Feniks
- новичок
- Сообщения: 9
- Зарегистрирован: 21:17 — 26.04.11
- Баллы репутации: 0

Re: Sharp ar 5420 не победимая ошибка H4
Гость » 05:46 — 13.05.11
Так в предыдуий раз проблема была с предохранителем если не путаю таблетка под тефлоновым валом) он не прозванивался. Заморозил его в морозилке и стукнул об пол. Стал прозваниваться. Но при сборке принтера ошибка не пропала. Пришлось везти в сервис. Вот там после ремонта и сказали про какую то волшебную релюшку которая залипла из за скачка напряжения. Весь нет перекопал, ничего про это не нашел. Может на каких то платах управления печкой что то есть?
- Гость
Re: Sharp ar 5420 не победимая ошибка H4
Владимир А. » 17:21 — 09.02.15
HimiK писал(а):А где стукнуть?
Сначала надо прозвонить печку, если термопредохранитель не звонится, то вот его об пол и стукнуть.
Если термопред звонится, то искать управление печкой на плате , там должна стоять релюшка, вот в ней проблема.
- Владимир А.
- Помощник админа Консультант
- Сообщения: 6638
- Зарегистрирован: 14:47 — 09.02.06
- Откуда: г.Обнинск
- Баллы репутации: 1

-
- ICQ
Вернуться в SHARP
Кто сейчас на конференции
Сейчас этот форум просматривают: нет зарегистрированных пользователей и гости: 0
-
Contents
-
Table of Contents
-
Troubleshooting
-
Bookmarks
Quick Links
Related Manuals for Sharp AR-5420
Summary of Contents for Sharp AR-5420
-
Page 1
AR-5420… -
Page 2
Shielded interface cables must be used with this equipment to maintain compliance with EMC regulations. Do not make copies of anything which is prohibited from copying by law. The following items are normally prohibited from copying by national law. Other items may be prohibited by local law. -
Page 3
If the product is used for business purposes and you want to discard it: Please contact your SHARP dealer who will inform you about the take-back of the product. You might be charged for the costs arising from take-back and recycling. -
Page 5: Cautions On Using
CAUTIONS Cautions on using Follow the cautions below when using this unit. Warning: • The fusing area is hot. Exercise care in this area when removing misfed paper. • Do not look directly at the light source. Doing so may damage your eyes. •…
-
Page 6: Cautions On Handling
Cautions on handling Be careful in handling the unit as follows to maintain the performance of this unit. Do not drop the unit, subject it to shock or strike it against any object. Store spare toner cartridges in a cool dry place without removing from the package before use.
-
Page 7: Table Of Contents
CONTENTS INTRODUCTION MAINTENANCE USING THE MANUAL ….4 TONER CARTRIDGE PART NAMES ……. 5 REPLACEMENT ……22 OPERATION PANEL….. 6 TONER CARTRIDGE LIFE..24 CLEANING THE UNIT ….25 LOADING PAPER TROUBLESHOOTING THE UNIT PAPER……….. 7 LOADING THE PAPER TRAY..8 TROUBLESHOOTING ….27 BYPASS FEED (including special STATUS INDICATORS….28 paper) ……….
-
Page 8: Introduction
INTRODUCTION This chapter provides basic information for using the unit. USING THE MANUAL The operation manual contains explanations of how to operate the unit, important considerations, and maintenance procedures. To get the most out of the unit, please read the operation manual. Please keep the operation manuals in a suitable location that will allow for convenient future reference.
-
Page 9: Part Names
PART NAMES Original cover Multi-bypass tray Toner cartridge Photoconductive drum Power switch Original table Handle Operation panel Power cord socket Front cover Fusing unit release lever Paper tray Transfer charger Bypass paper guides Charger cleaner Side cover Side cover open button Paper output tray Paper output tray extension…
-
Page 10: Operation Panel
OPERATION PANEL A5 A4 A4 B5 A4 A5 Tray select key Exposure mode selector key and 11 9 Use to select a paper feed station indicators (paper tray or multi-bypass tray). (p.10) Use to sequentially select the exposure modes: AUTO, MANUAL or PHOTO. Paper feed location indicators 12 10 Selected mode is shown by a lit…
-
Page 11: Loading Paper
LOADING PAPER .Follow the steps below to load paper into the tray. PAPER For best results, use only paper recommended by SHARP. Type of paper Type of media Size Weight feeding Paper tray Standard paper 56g/m 80g/m Letter Legal Invoice…
-
Page 12: Loading The Paper Tray
LOADING THE PAPER TRAY Raise the handle of the paper tray and pull the paper tray out until it stops. Adjust the paper guides on the paper tray to the copy paper width and length. Squeeze the lever of paper guide and slide the guide to match with the width of the paper.
-
Page 13
Gently push the paper tray back into the unit. • After loading paper, to cancel the blinking without restarting copying, press the clear ( ) key. The in the display will go out and the start ( ) indicator will light up. •… -
Page 14: Bypass Feed (Including Special Paper)
BYPASS FEED (including special paper) The multi-bypass tray can be used to feed standard paper, transparency film, labels, envelopes, and other special purpose paper. Paper measuring from A6 to A4 and in the weight range of 56g/m to 128g/m can be used in this tray. (For paper weighing from 105g/m to 128g/m ), A4 is the maximum size.)
-
Page 15
Set the paper guides to the paper width. Insert the paper (print face down) all the way into the multi-bypass tray. Print face • Paper must be fed narrow side into the feed slot. • Special papers such as transparency film, labels, and envelopes must be fed one sheet at a time through the multi-bypass tray. -
Page 16: Making Copies
MAKING COPIES This chapter explains basic and other copying functions. The unit is equipped with a one-page memory buffer. This memory allows the unit to scan an original once only and make up to 99 copies. This feature improves workflow, reduces operation noise from the copier, and provides higher reliability by reducing wear and tear on the scanning mechanism.
-
Page 17: Connecting The Power Cord
CONNECTING THE POWER CORD If you use the unit in a country other than the country where the unit was purchased, you will need to make sure that your local power supply is compatible with your model. If you plug the unit into an incompatible power supply, irreparable damage to the unit will result.
-
Page 18
About the scan head The scan head lamp remains on constantly when the unit is in the ready condition (when the start ( ) indicator is illuminated). The unit adjusts the scan head lamp periodically to maintain copying quality. At this time, the scan head moves automatically. -
Page 19: Original Placement
ORIGINAL PLACEMENT • The original table can read up to A4 original. • Image loss 4mm can occur at the leading and trailing edges of the copies. Also image loss 4.5mm in total can occur along the other edges of the copies. •…
-
Page 20: Set The Copy Quantity
SET THE COPY QUANTITY Set the number of copies using the two copy quantity ( ) keys when copying from the original table. • Press the clear ( ) key to clear an entry if a mistake is made. • A single copy can be made with the initial setting, i.e., when «0» is displayed.
-
Page 21: Automatic Exposure Adjustment
Automatic exposure adjustment This automatic exposure level will remain in effect until you change it again by this procedure. The automatic exposure level can be adjusted to suit your copying needs. Press the exposure mode selector key to select the PHOTO ( ) mode.
-
Page 22: Reduction/Enlargement/Zoom
REDUCTION/ENLARGEMENT/ZOOM Three preset reduction ratios and two enlargement ratios can be selected. The zoom function enables copy ratio selection from 25% to 400% in 1% increments. Set the original and check the paper size. Use the copy ratio selector key and/or ZOOM ( ) keys to select the desired copy ratio.
-
Page 23: Special Functions
SPECIAL FUNCTIONS This chapter describes the special functions of this unit. Use these functions as needed. DESCRIPTION OF SPECIAL FUNCTIONS Toner save mode (page 19) Reduces toner consumption by approximately 10%. Power save modes (page 20) The unit has two power save modes of operation: preheat mode and auto power shut-off mode.
-
Page 24: User Programs
Press and hold down the exposure mode selector key for approximately 5 seconds. The MANUAL ( ) indicator will go out and the PHOTO ( ) indicator will begin to blink. The light and dark indicator marked «5» will light up, indicating the standard toner mode is active.
-
Page 25: Displaying Total Number Of Copies
Program Mode Parameters 10 sec., 2 30 sec., *3 60 sec., Auto clear time 90 sec., 5 120 sec., 6 30 sec., 2 60 sec., 3 5 min., Preheat mode 30 min., 5 60 min., 6 120 min., 240 min. Auto power shut- off ON, 2 mode…
-
Page 26: Maintenance
This chapter describes how to replace the toner cartridge and how to clean unit. Be sure to use only genuine SHARP parts and supplies. For best copying results, be sure to use only SHARP Genuine Supplies which are designed, engineered, and tested to maximise the life and performance of SHARP copiers.
-
Page 27
Gently pull the toner cartridge Toner cartridge lock out while pressing the lock release lever release lever. • After removing the toner cartridge, do not shake it or tap on it. Doing so may cause toner to leak from the cartridge. Put the old cartridge immediately in the bag contained in the box of the new cartridge. -
Page 28: Toner Cartridge Life
Close the front cover and then the side cover by pressing the round projections near the side cover open button. The indicator ( ) will go out and the start ( ) indicator will light up. When closing the covers, be sure to close the front cover securely and then close the side cover.
-
Page 29: Cleaning The Unit
CLEANING THE UNIT Proper care is essential in order to get clean, sharp copies. Be sure to take a few minutes to regularly clean the unit. Do not spray flammable cleaner gas. Gas from the spray may come in contact with the internal electrical components or high-temperature parts of the fusing unit, creating a risk of fire or electrical shock.
-
Page 30: Transfer Charger
Transfer charger If copies start becoming streaky or blotchy, the transfer charger may be dirty. Clean the charger using the following procedure. Turn the power switch off. (p.14) Ensure that the multi-bypass tray is open and then open the side cover while pressing the side cover open button. Take the charger cleaner out by holding the tab.
-
Page 31: Troubleshooting The Unit
TROUBLESHOOTING THE UNIT This chapter describes misfeed removal and troubleshooting. TROUBLESHOOTING If any problem occurs, check the list below before contacting your authorised service representative. Problem Possible cause Solution Page Unit plugged in? Plug the unit into a grounded outlet. Power switch on? Turn the power switch on.
-
Page 32: Status Indicators
When the following indicators light up or blink on the operation panel or the following alphanumeric codes appear in the display, solve the problem immediately referring to both the table below and the relevant page. Be sure to use only genuine SHARP parts and supplies. Indication Cause and remedy…
-
Page 33: Misfeed Removal
MISFEED REMOVAL When the misfeed ( ) indicator blinks or blinks in the display, the unit will stop because of a misfeed. Open the multi-bypass tray, and side cover, in that order. To open the multi-bypass tray, see «The multi-bypass tray» (p.10). To open the side cover, see «TONER CARTRIDGE REPLACEMENT»…
-
Page 34
A: Misfeed in the paper feed area Gently remove the misfed paper from the paper feed area as shown in the illustration. When the misfeed ( ) indicator blinks, and the misfed paper is not seen from the paper feed area, pull out the paper tray and remove the misfed paper. -
Page 35
Gently remove the misfed paper from under the fusing unit as shown in the illustration. If the paper cannot be removed, proceed to «C: Misfeed in the transport area». The fusing unit is hot. Do not touch the fusing unit when removing misfed paper. -
Page 36: Developer Required
When the developer replacement required ( ) indicator lights up, the developer should be replaced. DEVELOPER REPLACEMENT SHOULD ONLY BE DONE BY AN AUTORIZED SHARP SERVICE TECHNICIAN. Contact your service centre as soon as possible. MAINTENANCE REQUIRED When maintenance ( ) indicator lights up, service by an authorised SHARP service technician is required.
-
Page 37: Appendix
APPENDIX SPECIFICATIONS Model AR-5420 Type Digital laser copier, desk-top type Copy system Dry, electrostatic transfer Originals Sheets, bound documents Paper tray 250 sheets Multi-bypass tray 50 sheets Paper output tray 200 sheets Original sizes Max. A4 Original feed 1 sheet…
-
Page 38: About Supplies
Along the other edges in totals. Not includes toner and drum cartridges. As a part of our policy of continuous improvement, SHARP reserves the right to make design and specification changes for product improvement without prior notice. The performance specification figures indicated are nominal values of production units.
-
Page 39: Index
INDEX Display……….6 Displaying total number of copies ..21 About supplies ……..34 Alarm indicator — Developer replacement required indicator……6, 28, 32 Exposure adjustment……16 — Maintenance indicator ..6, 28, 32 Exposure mode indicator….6, 16 — Misfeed indicator ….6, 28, 29 Exposure mode selector key ..
-
Page 40
Operation panel ……..5 Side cover ……….. 5 Original placement ……15 Side cover open button ……. 5 Original table ……..5 Specifications ……..33 Start indicator ……..6 Start key ……..6, 12, 21 Status indicators…….. 28 Paper ……….. 7 Paper feed location indicator …. -
Page 41
INDEX BY PURPOSE Cleaning the unit Removing paper jams — Cabinet ……… 25 — Fusing area ……..30 — Original cover ……. 25 — Paper feed area……30 — Original table …….. 25 — Transport area……31 — Transfer changer ……26 Replacing the toner cartridge …. -
Page 42
CAUTION ADVARSEL CLASS 3B INVISIBLE LASER USYNLIG KLASSE 3B RADIATION WHEN OPEN AND LASERSTRÅLING NÅR DEKSEL INTERLOCKS DEFEATED. ÅPNES OG SIKKERHEDSLÅS AVOID EXPOSURE TO BEAM. BRYTES. UNNGÅ EKSPONERING FOR STRÅLEN. VORSICHT UNSICHTBARE VARNING LASERSTRAHLUNG DER OSYNLIG LASERSTRÅLNING KLASSE 3B, WENN KLASS 3B NÄR DENNA DEL ÄR ABDECKUNG GEÖFFNET UND ÖPPNAD OCH SPÄRRAR ÄR… -
Page 43
SHARP Manufacturing France S.A. Route de Bollwiller 68360 SOULTZ FRANCE… -
Page 44
PRINTED IN FRANCE TINSX1839TSZZ…
-
Contents
-
Table of Contents
-
Troubleshooting
-
Bookmarks
Quick Links
Related Manuals for Sharp AR-5420
Summary of Contents for Sharp AR-5420
-
Page 1
AR-5420… -
Page 2
Shielded interface cables must be used with this equipment to maintain compliance with EMC regulations. Do not make copies of anything which is prohibited from copying by law. The following items are normally prohibited from copying by national law. Other items may be prohibited by local law. -
Page 3
If the product is used for business purposes and you want to discard it: Please contact your SHARP dealer who will inform you about the take-back of the product. You might be charged for the costs arising from take-back and recycling. -
Page 5: Cautions On Using
CAUTIONS Cautions on using Follow the cautions below when using this unit. Warning: • The fusing area is hot. Exercise care in this area when removing misfed paper. • Do not look directly at the light source. Doing so may damage your eyes. •…
-
Page 6: Cautions On Handling
Cautions on handling Be careful in handling the unit as follows to maintain the performance of this unit. Do not drop the unit, subject it to shock or strike it against any object. Store spare toner cartridges in a cool dry place without removing from the package before use.
-
Page 7: Table Of Contents
CONTENTS INTRODUCTION MAINTENANCE USING THE MANUAL ….4 TONER CARTRIDGE PART NAMES ……. 5 REPLACEMENT ……22 OPERATION PANEL….. 6 TONER CARTRIDGE LIFE..24 CLEANING THE UNIT ….25 LOADING PAPER TROUBLESHOOTING THE UNIT PAPER……….. 7 LOADING THE PAPER TRAY..8 TROUBLESHOOTING ….27 BYPASS FEED (including special STATUS INDICATORS….28 paper) ……….
-
Page 8: Introduction
INTRODUCTION This chapter provides basic information for using the unit. USING THE MANUAL The operation manual contains explanations of how to operate the unit, important considerations, and maintenance procedures. To get the most out of the unit, please read the operation manual. Please keep the operation manuals in a suitable location that will allow for convenient future reference.
-
Page 9: Part Names
PART NAMES Original cover Multi-bypass tray Toner cartridge Photoconductive drum Power switch Original table Handle Operation panel Power cord socket Front cover Fusing unit release lever Paper tray Transfer charger Bypass paper guides Charger cleaner Side cover Side cover open button Paper output tray Paper output tray extension…
-
Page 10: Operation Panel
OPERATION PANEL A5 A4 A4 B5 A4 A5 Tray select key Exposure mode selector key and 11 9 Use to select a paper feed station indicators (paper tray or multi-bypass tray). (p.10) Use to sequentially select the exposure modes: AUTO, MANUAL or PHOTO. Paper feed location indicators 12 10 Selected mode is shown by a lit…
-
Page 11: Loading Paper
LOADING PAPER .Follow the steps below to load paper into the tray. PAPER For best results, use only paper recommended by SHARP. Type of paper Type of media Size Weight feeding Paper tray Standard paper 56g/m 80g/m Letter Legal Invoice…
-
Page 12: Loading The Paper Tray
LOADING THE PAPER TRAY Raise the handle of the paper tray and pull the paper tray out until it stops. Adjust the paper guides on the paper tray to the copy paper width and length. Squeeze the lever of paper guide and slide the guide to match with the width of the paper.
-
Page 13
Gently push the paper tray back into the unit. • After loading paper, to cancel the blinking without restarting copying, press the clear ( ) key. The in the display will go out and the start ( ) indicator will light up. •… -
Page 14: Bypass Feed (Including Special Paper)
BYPASS FEED (including special paper) The multi-bypass tray can be used to feed standard paper, transparency film, labels, envelopes, and other special purpose paper. Paper measuring from A6 to A4 and in the weight range of 56g/m to 128g/m can be used in this tray. (For paper weighing from 105g/m to 128g/m ), A4 is the maximum size.)
-
Page 15
Set the paper guides to the paper width. Insert the paper (print face down) all the way into the multi-bypass tray. Print face • Paper must be fed narrow side into the feed slot. • Special papers such as transparency film, labels, and envelopes must be fed one sheet at a time through the multi-bypass tray. -
Page 16: Making Copies
MAKING COPIES This chapter explains basic and other copying functions. The unit is equipped with a one-page memory buffer. This memory allows the unit to scan an original once only and make up to 99 copies. This feature improves workflow, reduces operation noise from the copier, and provides higher reliability by reducing wear and tear on the scanning mechanism.
-
Page 17: Connecting The Power Cord
CONNECTING THE POWER CORD If you use the unit in a country other than the country where the unit was purchased, you will need to make sure that your local power supply is compatible with your model. If you plug the unit into an incompatible power supply, irreparable damage to the unit will result.
-
Page 18
About the scan head The scan head lamp remains on constantly when the unit is in the ready condition (when the start ( ) indicator is illuminated). The unit adjusts the scan head lamp periodically to maintain copying quality. At this time, the scan head moves automatically. -
Page 19: Original Placement
ORIGINAL PLACEMENT • The original table can read up to A4 original. • Image loss 4mm can occur at the leading and trailing edges of the copies. Also image loss 4.5mm in total can occur along the other edges of the copies. •…
-
Page 20: Set The Copy Quantity
SET THE COPY QUANTITY Set the number of copies using the two copy quantity ( ) keys when copying from the original table. • Press the clear ( ) key to clear an entry if a mistake is made. • A single copy can be made with the initial setting, i.e., when «0» is displayed.
-
Page 21: Automatic Exposure Adjustment
Automatic exposure adjustment This automatic exposure level will remain in effect until you change it again by this procedure. The automatic exposure level can be adjusted to suit your copying needs. Press the exposure mode selector key to select the PHOTO ( ) mode.
-
Page 22: Reduction/Enlargement/Zoom
REDUCTION/ENLARGEMENT/ZOOM Three preset reduction ratios and two enlargement ratios can be selected. The zoom function enables copy ratio selection from 25% to 400% in 1% increments. Set the original and check the paper size. Use the copy ratio selector key and/or ZOOM ( ) keys to select the desired copy ratio.
-
Page 23: Special Functions
SPECIAL FUNCTIONS This chapter describes the special functions of this unit. Use these functions as needed. DESCRIPTION OF SPECIAL FUNCTIONS Toner save mode (page 19) Reduces toner consumption by approximately 10%. Power save modes (page 20) The unit has two power save modes of operation: preheat mode and auto power shut-off mode.
-
Page 24: User Programs
Press and hold down the exposure mode selector key for approximately 5 seconds. The MANUAL ( ) indicator will go out and the PHOTO ( ) indicator will begin to blink. The light and dark indicator marked «5» will light up, indicating the standard toner mode is active.
-
Page 25: Displaying Total Number Of Copies
Program Mode Parameters 10 sec., 2 30 sec., *3 60 sec., Auto clear time 90 sec., 5 120 sec., 6 30 sec., 2 60 sec., 3 5 min., Preheat mode 30 min., 5 60 min., 6 120 min., 240 min. Auto power shut- off ON, 2 mode…
-
Page 26: Maintenance
This chapter describes how to replace the toner cartridge and how to clean unit. Be sure to use only genuine SHARP parts and supplies. For best copying results, be sure to use only SHARP Genuine Supplies which are designed, engineered, and tested to maximise the life and performance of SHARP copiers.
-
Page 27
Gently pull the toner cartridge Toner cartridge lock out while pressing the lock release lever release lever. • After removing the toner cartridge, do not shake it or tap on it. Doing so may cause toner to leak from the cartridge. Put the old cartridge immediately in the bag contained in the box of the new cartridge. -
Page 28: Toner Cartridge Life
Close the front cover and then the side cover by pressing the round projections near the side cover open button. The indicator ( ) will go out and the start ( ) indicator will light up. When closing the covers, be sure to close the front cover securely and then close the side cover.
-
Page 29: Cleaning The Unit
CLEANING THE UNIT Proper care is essential in order to get clean, sharp copies. Be sure to take a few minutes to regularly clean the unit. Do not spray flammable cleaner gas. Gas from the spray may come in contact with the internal electrical components or high-temperature parts of the fusing unit, creating a risk of fire or electrical shock.
-
Page 30: Transfer Charger
Transfer charger If copies start becoming streaky or blotchy, the transfer charger may be dirty. Clean the charger using the following procedure. Turn the power switch off. (p.14) Ensure that the multi-bypass tray is open and then open the side cover while pressing the side cover open button. Take the charger cleaner out by holding the tab.
-
Page 31: Troubleshooting The Unit
TROUBLESHOOTING THE UNIT This chapter describes misfeed removal and troubleshooting. TROUBLESHOOTING If any problem occurs, check the list below before contacting your authorised service representative. Problem Possible cause Solution Page Unit plugged in? Plug the unit into a grounded outlet. Power switch on? Turn the power switch on.
-
Page 32: Status Indicators
When the following indicators light up or blink on the operation panel or the following alphanumeric codes appear in the display, solve the problem immediately referring to both the table below and the relevant page. Be sure to use only genuine SHARP parts and supplies. Indication Cause and remedy…
-
Page 33: Misfeed Removal
MISFEED REMOVAL When the misfeed ( ) indicator blinks or blinks in the display, the unit will stop because of a misfeed. Open the multi-bypass tray, and side cover, in that order. To open the multi-bypass tray, see «The multi-bypass tray» (p.10). To open the side cover, see «TONER CARTRIDGE REPLACEMENT»…
-
Page 34
A: Misfeed in the paper feed area Gently remove the misfed paper from the paper feed area as shown in the illustration. When the misfeed ( ) indicator blinks, and the misfed paper is not seen from the paper feed area, pull out the paper tray and remove the misfed paper. -
Page 35
Gently remove the misfed paper from under the fusing unit as shown in the illustration. If the paper cannot be removed, proceed to «C: Misfeed in the transport area». The fusing unit is hot. Do not touch the fusing unit when removing misfed paper. -
Page 36: Developer Required
When the developer replacement required ( ) indicator lights up, the developer should be replaced. DEVELOPER REPLACEMENT SHOULD ONLY BE DONE BY AN AUTORIZED SHARP SERVICE TECHNICIAN. Contact your service centre as soon as possible. MAINTENANCE REQUIRED When maintenance ( ) indicator lights up, service by an authorised SHARP service technician is required.
-
Page 37: Appendix
APPENDIX SPECIFICATIONS Model AR-5420 Type Digital laser copier, desk-top type Copy system Dry, electrostatic transfer Originals Sheets, bound documents Paper tray 250 sheets Multi-bypass tray 50 sheets Paper output tray 200 sheets Original sizes Max. A4 Original feed 1 sheet…
-
Page 38: About Supplies
Along the other edges in totals. Not includes toner and drum cartridges. As a part of our policy of continuous improvement, SHARP reserves the right to make design and specification changes for product improvement without prior notice. The performance specification figures indicated are nominal values of production units.
-
Page 39: Index
INDEX Display……….6 Displaying total number of copies ..21 About supplies ……..34 Alarm indicator — Developer replacement required indicator……6, 28, 32 Exposure adjustment……16 — Maintenance indicator ..6, 28, 32 Exposure mode indicator….6, 16 — Misfeed indicator ….6, 28, 29 Exposure mode selector key ..
-
Page 40
Operation panel ……..5 Side cover ……….. 5 Original placement ……15 Side cover open button ……. 5 Original table ……..5 Specifications ……..33 Start indicator ……..6 Start key ……..6, 12, 21 Status indicators…….. 28 Paper ……….. 7 Paper feed location indicator …. -
Page 41
INDEX BY PURPOSE Cleaning the unit Removing paper jams — Cabinet ……… 25 — Fusing area ……..30 — Original cover ……. 25 — Paper feed area……30 — Original table …….. 25 — Transport area……31 — Transfer changer ……26 Replacing the toner cartridge …. -
Page 42
CAUTION ADVARSEL CLASS 3B INVISIBLE LASER USYNLIG KLASSE 3B RADIATION WHEN OPEN AND LASERSTRÅLING NÅR DEKSEL INTERLOCKS DEFEATED. ÅPNES OG SIKKERHEDSLÅS AVOID EXPOSURE TO BEAM. BRYTES. UNNGÅ EKSPONERING FOR STRÅLEN. VORSICHT UNSICHTBARE VARNING LASERSTRAHLUNG DER OSYNLIG LASERSTRÅLNING KLASSE 3B, WENN KLASS 3B NÄR DENNA DEL ÄR ABDECKUNG GEÖFFNET UND ÖPPNAD OCH SPÄRRAR ÄR… -
Page 43
SHARP Manufacturing France S.A. Route de Bollwiller 68360 SOULTZ FRANCE… -
Page 44
PRINTED IN FRANCE TINSX1839TSZZ…
- Печать
Страницы: [1] Вниз

Тема: Sharp ar-5420 ошибка F2-04 (Прочитано 7290 раз)
Проблема такая: у данного девайса ошибка F2-04. Как с ней бороться? Может у кого есть дамп чипа?

Записан
Сейчас точно не вспомню, но была похожая проблема на старой работе года 2 назад, там шить ничего не надо, а какие-то манипуляции в сервисном режиме провести для сброса. Завтра поробую съездить к ребятам и запись ту по лечению откопать. Могу ошибаться но по моему пробле была такая-же. Если что-то узнаю здесь отпишусь.
Записан
Дорогу осилит идущий…
Попробуйте сделать сброс
You are not allowed to view links.
Register or Login
вход в сервисный режим # – Interrupt – Clear – Interrupt
набрать код 14 , нажать копиовать
Записан
Сейчас точно не вспомню, но была похожая проблема на старой работе года 2 назад, там шить ничего не надо, а какие-то манипуляции в сервисном режиме провести для сброса. Завтра поробую съездить к ребятам и запись ту по лечению откопать. Могу ошибаться но по моему пробле была такая-же. Если что-то узнаю здесь отпишусь.
А не проще просто поменять чип?
Записан
- Печать
Страницы: [1] Вверх