Обновлено 2023 января: перестаньте получать сообщения об ошибках и замедлите работу вашей системы с помощью нашего инструмента оптимизации. Получить сейчас в эту ссылку
- Скачайте и установите инструмент для ремонта здесь.
- Пусть он просканирует ваш компьютер.
- Затем инструмент почини свой компьютер.

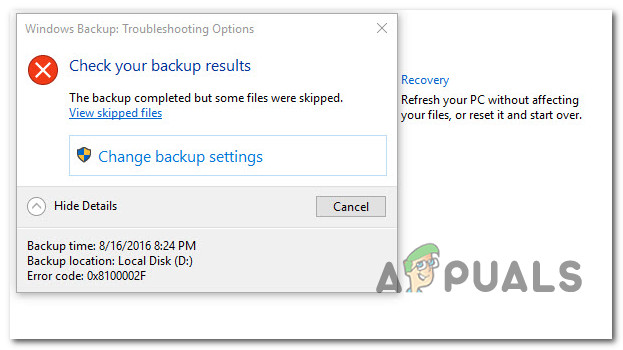
Если вы столкнулись с ошибкой резервного копирования 0x8100002F, когда резервное копирование файлов в Windows 10, эта статья может быть полезной. Эта ошибка резервного копирования Windows может возникнуть, когда вы пытаетесь скопировать системные файлы или создать образ системы, или когда Windows пытается выполнить резервное копирование файлов в Контакты, или когда система не может найти указанный файл. В этой статье описывается несколько простых исправлений, которые могут исправить эту ошибку.
Перемещение проблемной папки библиотеки
- Если появляется сообщение об ошибке, проверьте местоположение, отмеченное как недоступный путь. В нашем примере это C: Users Contacts.
- Как только вы обнаружите проблемную папку библиотеки, откройте проводник и перейдите в нужное место. Оказавшись там, щелкните правой кнопкой мыши нужную библиотеку и выберите «Вырезать» в появившемся контекстном меню.
- Затем переместите файл из области резервного копирования Windows. Если у вас есть внешний или отдельный диск, переместите его туда и создайте отдельную папку.
- После перемещения проблемной библиотеки повторите попытку резервного копирования Windows и посмотрите, решена ли проблема.
Обновление за январь 2023 года:
Теперь вы можете предотвратить проблемы с ПК с помощью этого инструмента, например, защитить вас от потери файлов и вредоносных программ. Кроме того, это отличный способ оптимизировать ваш компьютер для достижения максимальной производительности. Программа с легкостью исправляет типичные ошибки, которые могут возникнуть в системах Windows — нет необходимости часами искать и устранять неполадки, если у вас под рукой есть идеальное решение:
- Шаг 1: Скачать PC Repair & Optimizer Tool (Windows 10, 8, 7, XP, Vista — Microsoft Gold Certified).
- Шаг 2: Нажмите «Начать сканирование”, Чтобы найти проблемы реестра Windows, которые могут вызывать проблемы с ПК.
- Шаг 3: Нажмите «Починить все», Чтобы исправить все проблемы.

Запустите проверку системных файлов

- Загрузите компьютер с установочного носителя Windows.
- На экране «Языковые параметры» нажмите «Далее».
- Выберите Восстановить компьютер.
- Затем выберите Устранение неполадок> Дополнительные параметры> Командная строка.
- Введите BCDEDIT и нажмите Enter.
- Найдите букву диска, на которой установлена Windows.
- В командной строке введите следующую команду для сканирования и восстановления системных файлов. * *
sfc / scannow / offbootdir =: / offwindir =
- Замените «» буквой диска, на котором установлена Windows. ** **.
Используйте редактор реестра

Некоторые ключи профиля пользователя могут быть недоступны в редакторе реестра. Таким образом, удаление этих ключей может решить проблему с резервным копированием Windows. Перед тем, как попробовать этот вариант, рекомендуется создать резервную копию редактора реестра, чтобы вы могли восстановить его позже в случае ошибки. Теперь выполните следующие действия:
- Откройте редактор реестра.
- Перейдите в раздел реестра ProfileList. Путь такой:
- HKEY_LOCAL_MACHINE> ПРОГРАММНОЕ ОБЕСПЕЧЕНИЕ> Microsoft> Windows NT> Текущая версия> ProfileList
- Выберите папку под кнопкой ProfileList
- Справа найдите строковое значение ProfileImagePath.
- Если значение существует, с этой папкой профиля пользователя все в порядке.
- Если значение не существует, удалите всю папку
- Повторите вышеуказанные шаги для других папок в папке ProfileList.
Обновите или удалите чипсет NVIDIA USB EHCI
Если ошибка 0x8100002F возникает из-за конфликта между драйвером набора микросхем NVIDIA USB Enhanced Host Controller Interface (EHCI) и универсальным эквивалентом, обновление или удаление драйвера набора микросхем NVIDIA USB EHCI может решить проблему.
Несколько затронутых пользователей, столкнувшихся с той же проблемой, смогли решить проблему, обновив конкретный драйвер Nvidia или удалив его и позволив универсальному драйверу занять его место.
Чтобы упростить этот процесс, просто следуйте пошаговым инструкциям ниже:
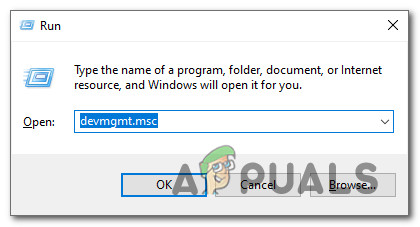
- Нажмите клавиши Windows +, R, чтобы открыть диалоговое окно «Выполнить». Затем введите «devmgmt.msc» в текстовое поле и нажмите Enter, чтобы открыть утилиту «Диспетчер устройств».
- В диспетчере устройств прокрутите список установленных устройств и разверните раскрывающееся меню диспетчера USB-коннекторов.
- В диспетчере USB-коннекторов щелкните правой кнопкой мыши запись набора микросхем NVIDIA USB EHCI и выберите «Обновить драйвер» в контекстном меню.
- На следующем экране нажмите «Автоматически проверять наличие обновлений драйверов». Если обнаружена новая версия, следуйте инструкциям на экране, чтобы завершить установку нового драйвера.
- Примечание. Если утилита не находит новую версию драйвера, просто щелкните ее правой кнопкой мыши и выберите «Удалить устройство» в контекстном меню. Это удалит выделенный диск, предоставленный NVIDIA, и заменит его общим эквивалентом.
- Перезагрузите компьютер и посмотрите, решена ли проблема.
Совет экспертов: Этот инструмент восстановления сканирует репозитории и заменяет поврежденные или отсутствующие файлы, если ни один из этих методов не сработал. Это хорошо работает в большинстве случаев, когда проблема связана с повреждением системы. Этот инструмент также оптимизирует вашу систему, чтобы максимизировать производительность. Его можно скачать по Щелчок Здесь

CCNA, веб-разработчик, ПК для устранения неполадок
Я компьютерный энтузиаст и практикующий ИТ-специалист. У меня за плечами многолетний опыт работы в области компьютерного программирования, устранения неисправностей и ремонта оборудования. Я специализируюсь на веб-разработке и дизайне баз данных. У меня также есть сертификат CCNA для проектирования сетей и устранения неполадок.
Сообщение Просмотров: 120
- Remove From My Forums
-
Question
-
Setup: Have Win7 RC1 on my c: drive and have changed the settings so that all my data ( documents/pics/videos/music etc ) are on a different physical drive ( E: drive ). I have formatted another drive and calle dits X drive and allocated it that number as well. X drive is an external hard drive connected via esata .
Now I have selected X drive as my backup drive but when it runs it comes up with a message about Backup Fails etc but when you close this message box the backup is running. When its finishs I get an error about some problem and files been skipped. Also the notification flag has a message «check your backup results » and fshows some files that were skipped :
Backup encountered a problem while backing up file C:UsersBillDocuments. Error:(The system cannot find the file specified. (0x80070002))
Backup encountered a problem while backing up file C:UsersBillPictures. Error:(The system cannot find the file specified. (0x80070002))
Backup encountered a problem while backing up file C:UsersBillVideos. Error:(The system cannot find the file specified. (0x80070002))So basically I think moving the Docs/Pics/Videos to another drive is causing these above errors but why does it say the backup will not be run and then runs.
Answers
-
Hi,
Thanks for trying Windows backup. Actually, what happened in your case is that the backup succeeded but ended up skipping some locations because it could not find them. We backup Documents, Pictures, Music and Videos through user libraries. Since you have changed the location of these folders, the libraries won’t recognize them unless you navigate to the corresponding library through the Explorer UI. For example, to navigate to the Documents library, click on the Windows icon and click on «Documents» to the top right. Can you make sure you navigate to each library atleast once? Once you do that, the right locations will be updated and backup will start backing up the new locations. Please try this out and let me know if it works for you.
Thanks,
Sneha [MSFT]-
Marked as answer by
Sunday, May 31, 2009 3:05 AM
-
Marked as answer by
Some Windows users are encountering the 0x8100002F error code after trying to back up their files using Windows Backup. This problem is confirmed to occur on both Windows 7 and Windows 10.
After investigating this issue, it turns out that there are several different causes that might end up causing this particular error. Here’s a shortlist of potential culprits that might be responsible for this issue:
- Backed up library contains custom folders – As it turns out, you might expect to see this error if you’re trying to back up a library that contains custom folders located under your user profile. If this scenario is applicable, you can fix this issue by moving the library folder from the user profile path to a location outside the user profile path or by forcing the backup to ignore this folder.
- Windows Backup fails to back up files in LocalLow, Contacts, and Searches folders – Another fairly common occurrence that will spawn this error is an instance in which Windows Backup is forced to back up files that are not actually present on the computer. In this case, you can either ignore the message or you can exclude the folders from the files and backup in the Backup settings menu.
- An issue with Nvidia USB Enhanced Host Controller Interface (EHCI) – IF your PC is currently using an NVIDIA USB Enhanced Host Controller Interface (EHCI) chipset, chances are it’s conflicting with a generic driver and triggering this error. If you find yourself in this scenario, you can fix this issue by uninstalling the Nvidia driver allowing the generic equivalent driver to take over fully.
- The process is interrupted by Hard Driver Errors – If the drive targeted by the Windows Backup utility is affected by bad sectors or blocks, this utility should be able to fix the majority of superficial issues that might cause this behavior.
Now that you are familiar with every potential culprit that might be responsible for this issue, here’s a list of methods that other affected users have successfully used to fix the 0x8100002F error code:
Method 1: Exclude or Move the Problematic Library File
If the issue is occurring if you attempt to back up a library that contains custom folders located under your user profile, you can simply ignore the 0x8100002F error code altogether.
However, if you want to do something about it to ensure that the next backup doesn’t return the same error, you have 2 options available to you:
- Move the library folder from the user profile path to a location outside the user profile path.
- Exclude the library from the list of files that Windows Backup backs up.
To accommodate both potential fixes, we have put together 2 separate sub-guides. Make sure to follow the one applicable to the type of fix that you want to implement.
A. Moving the problematic Library Folder
- When the error message pops up, look at the location that is being signaled as a path that is unable to be reached. In our example, that path is C:Users<User Name>Contacts.
- Once you are aware of the problematic Library folder, open File Explorer, and navigate to the location. When you are there, right-click on the library in question and choose Cut from the context menu that just appeared.
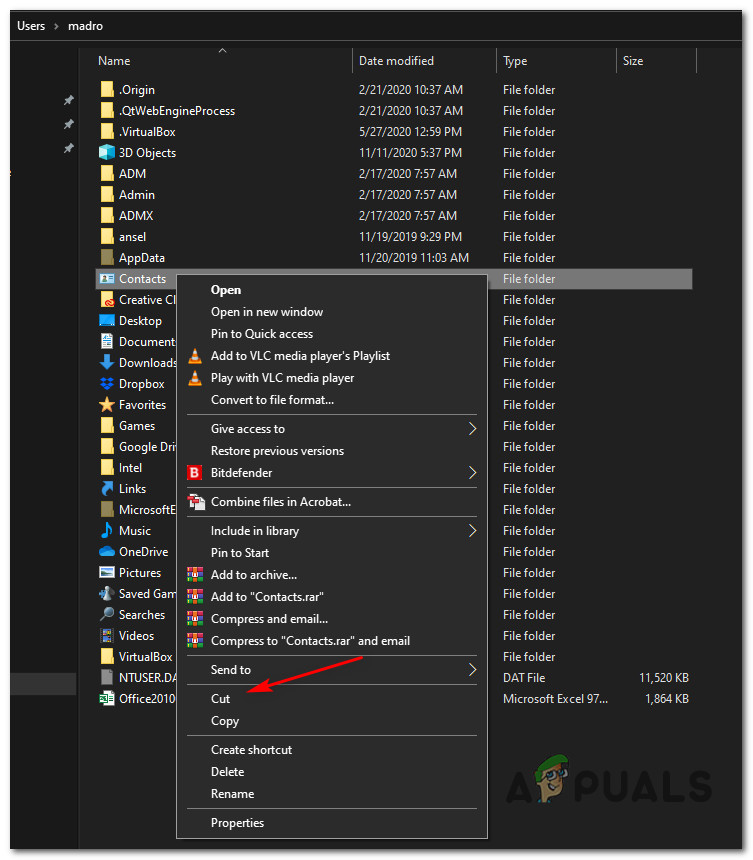
Moving the problematic Library file - Next, move the file outside of the scope of the Windows Backup operation. If you have an external or separate drive, move it there, and create a dedicated folder.
- Once the problematic library is moved, repeat the Windows Backup attempt and see if the issue is now fixed.
B. Excluding the Problematic Library Folder
Note: We’ve made the instructions below universal so you can follow them on Windows 7 and Windows 10.
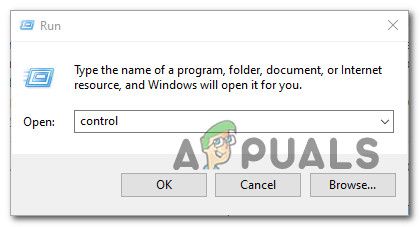
- Press Windows key + R to open up a Run dialog box. Inside the text box, type ‘control’ and press Enter to open up the Classic Control Panel interface.
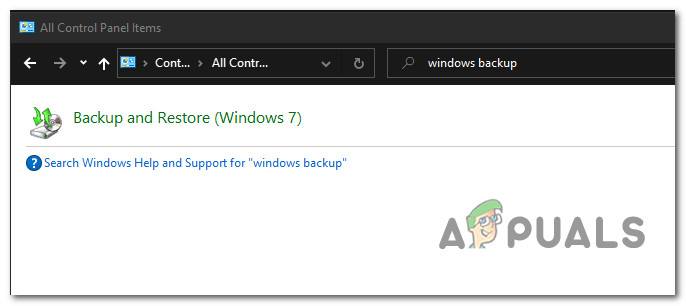
Opening Control Panel - Once you’re inside the Classic Control Panel interface, use the search function in the top-right section of the screen to search for ‘windows backup‘. Next, from the list of results, click on Backup and Restore.
Accessing the Windows Backup utility via Control Panel - Inside the Backup and Restore window, click on Set a Backup hyperlink on the right-hand section of the screen and click Yes when prompted by the UAC prompt.

Setting a Backup - Once you’re inside the utility, select a viable partition to create the backup or save it over the network by clicking on Save on a network.
- At the next screen, select the Let me choose toggle before clicking on the Next menu.
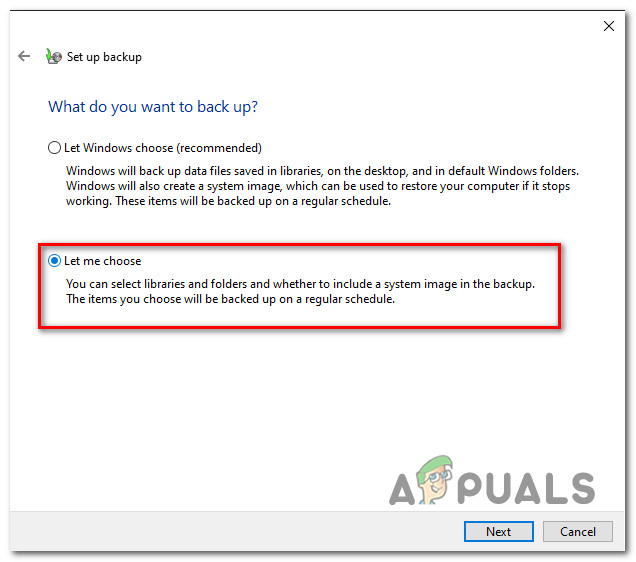
Choosing the features you want to exclude for Windows Backup - Next, from the next menu, go ahead and browse to the location of the library folder that was triggering the error and uncheck the toggle associated with it before clicking on Next.
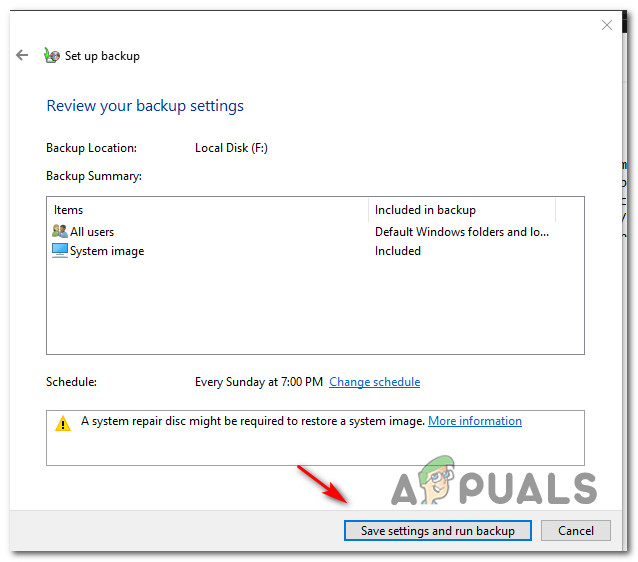
- Once you have excluded the library folder that was previously triggering the error, click on Save settings and run backup, and wait for the operation to complete.
Running the custom backup attempt
If the backup attempt ends with the same 0x8100002F error code even after you followed the instructions above, move down to the next potential fix below.
Method 2: Exclude LocalLow, Contacts, and Searches Folders
If the reason why you are seeing the 0x8100002F error is that Windows is unable to back up the LocalLow, Contacts, and Searches folders, you can avoid the error by modifying the Windows Backup to specifically avoid those locations.
Several affected users have confirmed that the instructions below have finally allowed them to complete the backup process without seeing the same 0x8100002F error.
Here are the step-by-step instructions that will show you how to exclude the LocalLow, Contacts, and Searches folders from the current Windows Backup attempt and future attempts:
- Press Windows key + R to open up a Run dialog box. Next, type ‘control’ inside the text box and press Enter to open up the Classic Control Panel interface.
- Inside Control Panel, use the search function (top-right section) to search for ‘windows backup‘. Then, from the list of results, click on Backup and Restore.
- Once you’re inside the Backup and Restore and click on Set up backup from the list of options.
Note: When prompted by the UAC (User Account Control), click Yes to grant admin access. - At the first prompt, select a viable option where you want to save the backup and click Next.
- At the next prompt, select the Let me choose toggle and click on Next once again.
- Next, expand the drop-down menu associated with Data files, then expand the ‘*Your UserName* Libraries‘ entry.
Note: *Your UserName* is simply a placeholder. Your screen will contain the actual name of your PC. - Expand the Additional Locations drop-down menu, then go ahead and deselect checkboxes associated with the AppData folder, Contacts, and Searches.
- Next, Expand Computer’s drop-down menu, expand the item for your system drive (for example Local Disk (C:)), then Users > *YourUsername* and then click to select the AppData, Contacts, and Searches checkboxes if they exist.
- Finally, click Next, then Save settings and run backup, then wait for the operation to be complete.
In case this method didn’t allow you to fix the 0x8100002F error code, move down to Method 3.
Method 3: Updating or Uninstalling the NVIDIA USB EHCI Chipset
If the reason why you are encountering the 0x8100002F error is a conflict between the NVIDIA USB Enhanced Host Controller Interface (EHCI) chipset driver and a generic equivalent, you can fix the issue by updating or uninstalling the NVIDIA USB EHCI chipset driver.
Several affected users that were dealing with the same issue have managed to fix the issue by updating the dedicated Nvidia driver or by uninstalling it and allowing the generic driver to take its place.
To make this process easier, follow the step-by-step instructions below:
- Press Windows key +, R to open up a Run dialog box. Next, type ‘devmgmt.msc’ inside the text box and press Enter to open up the Device Manager utility.
Opening Device Manager - Once you’re inside Device Manager, scroll down through the list of installed devices and expand the drop-down menu associated with USB Connector managers.
- Inside the USB Connector Managers, right-click on NVIDIA USB EHCI chipset entry and choose Update driver from the context menu.
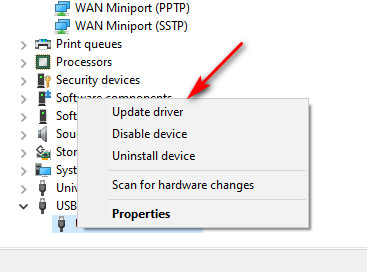
Updating the NVIDIA USB EHCI chipset driver - At the next screen, click on Search automatically for updated driver software, then follow the on-screen prompts to complete the installation of the new driver version in case a new version is found.
Note: in case the utility doesn’t find a new version of the driver, simply go-ahead and right-click it, and choose Uninstall device from the context menu. This will get rid of the dedicated drive supplied by NVIDIA and replace it with a generic equivalent. - Restart your computer and see if the issue is now fixed.
In case the same problem is still occurring, move down to the next potential fix below.
Method 4: Using a 3rd party Alternative
If none of the potential fixes above have been effective in your particular scenario, the only thing you can do at this point is to dump the built-in backup utility and go for a 3rd party alternative.
Since there are a lot of different 3rd party utilities that will help you do this, we’ve made a shortlist of the most efficient and robust solution that includes a free version:
- AOMEI Backupper Standard 4
- EaseUS Todo Backup
- Macrium Reflect
- Iperius Backup

Kevin Arrows
Kevin is a dynamic and self-motivated information technology professional, with a Thorough knowledge of all facets pertaining to network infrastructure design, implementation and administration. Superior record of delivering simultaneous large-scale mission critical projects on time and under budget.
- Remove From My Forums
-
Вопрос
-
Same as everyone else with the exception that my skiped files are from my local network.
Backup skipped backing up \Office-pcc as it is not on local machine.
Backup skipped backing up \Office-pcc as it is not on local machine.
Backup skipped backing up \Office-pce as it is not on local machine.
Backup skipped backing up \Office-pcf as it is not on local machine.
Backup skipped backing up \Office-pcg as it is not on local machine.
Backup skipped backing up \OFFICE-PCUsers as it is not on local machine.
Backup skipped backing up \Office-pcj as it is not on local machine.
Backup skipped backing up \Office-pci as it is not on local machine.
Backup skipped backing up \Office-pch as it is not on local machine.I have look everywhere for the setup file that the backup program uses to reset those drives without luck. So far I have tried , disconecting the laptop from the network, etc.
Any help?
OneCare tester
Ответы
-
-
Помечено в качестве ответа
3 января 2011 г. 4:59
-
Помечено в качестве ответа