![]()
Загрузить PDF
![]()
Загрузить PDF
Данная статья объясняет, как создать фейковое сообщение об ошибке (VBScript) в Windows, используя только Блокнот.
Шаги
-

1
Запустите Блокнот (NotePad). Нажмите сочетание клавиш [WIN-R] (Windows key + R) и введите «notepad.exe».
-

2
Скопируйте и вставьте следующий код: x=msgbox(«Здесь ваше сообщение», 4+16, «Здесь ваше название»). Другой код для ответов «да» или «нет» таков: onclick=msgbox («Здесь ваше сообщение»,20,»Здесь ваше название»).
-

3
Поменяйте надписи «Здесь ваше сообщение» и «Здесь ваше название» на текст по своему усмотрению. Кроме того, измените «4+16» на другую комбинацию, как показано в разделе «Советы» (это изменит тип сообщения об ошибке и кнопки).
-

4
Щелкните по вкладке «Файл» (File) и кликните «Сохранить» (Save). Укажите название вашего сообщения об ошибке и добавьте в конце расширение «.vbs».
-

5
Откройте VBS файл, и появится фейковое сообщение об ошибке!
Реклама
Советы
-
-
- 0 – только кнопка «OK»
- Кнопки (Первое число):
-
Реклама
Об этой статье
Эту страницу просматривали 53 113 раз.
Была ли эта статья полезной?
![]()
Download Article
![]()
Download Article
Do you want to create a custom Windows error message? Whether you’re an application developer or someone who wants to prank their coworker, knowing how to create a custom error message is an essential ability. To learn how to create a custom Windows error message, follow this guide.
-

1
Open the Notepad app.
- Press the ⊞ Win+R keys simultaneously.
- Type notepad into the Run dialog.
- Hit ↵ Enter or click OK.
-

2
Copy and paste the following code into Notepad:
- x=msgbox(«Your Message Here», Button+Icon, «Your Title Here»)
Advertisement
-

3
Customize the button(s) of your error message. Replace Button in the code you pasted into Notepad with one of the following:
- 0 — OK
- 1 — OK and Cancel
- 2 — Abort, Retry and Ignore
- 3 — Yes, No and Cancel
- 4 — Yes and No
- 5 — Retry and Cancel
-

4
Customize the icon of your error message. Replace Icon in the code that you pasted into Notepad with one of the following:
- 0 = No Icon
- 16 = Critical Icon (a.k.a. «X» icon)
- 32 = Question Icon (a.k.a. «?» icon)
- 48 = Warning Icon (a.k.a. «!» icon)
- 64 = Info Icon (a.k.a. «i» icon)
-

5
Customize the title of your error message. Replace Your Title Here in the code you pasted into Notepad with what you want the title of the error message to be.
-

6
Customize the contents of your error message. Replace Your Message Here in the code you pasted into Notepad with what you want the error message to say.
-

7
Open the Save As window. Press Ctrl+S on your keyboard.
-

8
Expand the combo box next to Save as type and select All Files.
-

9
Type a name for your file followed by a period and vbs.
-

10
Choose a location to save the file to.
-

11
Save the file. Click Save.
-
12
Display the error message. Double-click the file that was created.

Advertisement
Create a sequence of error messages. Messages will display one at a time, and closing a message will display the following one.
-
1
Open the Notepad app.
- Press the ⊞ Win+R keys simultaneously.
- Type notepad into the Run dialog.
- Hit ↵ Enter or click OK.
-
2
Copy and paste the following code into Notepad:
- x=msgbox(«Your Message Here», Button+Icon, «Your Title Here»)
-
3
Customize the button(s) of your error message. Replace Button in the code you pasted into Notepad with one of the following:
- 0 — OK
- 1 — OK and Cancel
- 2 — Abort, Retry and Ignore
- 3 — Yes, No and Cancel
- 4 — Yes and No
- 5 — Retry and Cancel
-
4
Customize the icon of your error message. Replace Icon in the code that you pasted into Notepad with one of the following:
- 0 — No Icon
- 16 — Critical Icon (a.k.a. «X» icon)
- 32 — Question Icon (a.k.a. «?» icon)
- 48 — Warning Icon (a.k.a. «!» icon)
- 64 — Info Icon (a.k.a. «i» icon)
-
5
Customize the title of your error message. Replace Your Title Here in the code you pasted into Notepad with what you want the title of the error message to be.
-
6
Customize the contents of your error message. Replace Your Message Here in the code you pasted into Notepad with what you want the error message to say.
-

7
Switch to a subsequent line position.
-

8
Create another error message (if desired). Repeat these steps, starting from Step 3.
- This error message will display after the previously created one has been closed.
-
9
Open the Save As window. Press Ctrl+S on your keyboard.
-
10
Expand the combo box next to Save as type and select All Files.
-
11
Type a name for your file followed by a period and vbs.
-
12
Choose a location to save the file to.
-
13
Save the file. Click Save.
-
14
Display the error message. Double-click the file that was created.
Advertisement
Add New Question
-
Question
Is there a way to make a custom icon for the error?

No, you can try using different numbers, but most likely a real error will pop up.
-
Question
How do I make it do actions to my computer?

You can’t do that. It’s a fake error, meaning it won’t do anything to your computer.
-
Question
How do I create an input text box in the message?
Do this: InputVariableName=InputBox(«Prompt»,»Title»,»Value which is optional»)
See more answers
Ask a Question
200 characters left
Include your email address to get a message when this question is answered.
Submit
Advertisement
Video
Thanks for submitting a tip for review!
About This Article
Thanks to all authors for creating a page that has been read 531,226 times.
Did this article help you?
![]()
Download Article
![]()
Download Article
Do you want to create a custom Windows error message? Whether you’re an application developer or someone who wants to prank their coworker, knowing how to create a custom error message is an essential ability. To learn how to create a custom Windows error message, follow this guide.
-
1
Open the Notepad app.
- Press the ⊞ Win+R keys simultaneously.
- Type notepad into the Run dialog.
- Hit ↵ Enter or click OK.
-
2
Copy and paste the following code into Notepad:
- x=msgbox(«Your Message Here», Button+Icon, «Your Title Here»)
Advertisement
-
3
Customize the button(s) of your error message. Replace Button in the code you pasted into Notepad with one of the following:
- 0 — OK
- 1 — OK and Cancel
- 2 — Abort, Retry and Ignore
- 3 — Yes, No and Cancel
- 4 — Yes and No
- 5 — Retry and Cancel
-
4
Customize the icon of your error message. Replace Icon in the code that you pasted into Notepad with one of the following:
- 0 = No Icon
- 16 = Critical Icon (a.k.a. «X» icon)
- 32 = Question Icon (a.k.a. «?» icon)
- 48 = Warning Icon (a.k.a. «!» icon)
- 64 = Info Icon (a.k.a. «i» icon)
-
5
Customize the title of your error message. Replace Your Title Here in the code you pasted into Notepad with what you want the title of the error message to be.
-
6
Customize the contents of your error message. Replace Your Message Here in the code you pasted into Notepad with what you want the error message to say.
-
7
Open the Save As window. Press Ctrl+S on your keyboard.
-
8
Expand the combo box next to Save as type and select All Files.
-
9
Type a name for your file followed by a period and vbs.
-
10
Choose a location to save the file to.
-
11
Save the file. Click Save.
-
12
Display the error message. Double-click the file that was created.
Advertisement
Create a sequence of error messages. Messages will display one at a time, and closing a message will display the following one.
-
1
Open the Notepad app.
- Press the ⊞ Win+R keys simultaneously.
- Type notepad into the Run dialog.
- Hit ↵ Enter or click OK.
-
2
Copy and paste the following code into Notepad:
- x=msgbox(«Your Message Here», Button+Icon, «Your Title Here»)
-
3
Customize the button(s) of your error message. Replace Button in the code you pasted into Notepad with one of the following:
- 0 — OK
- 1 — OK and Cancel
- 2 — Abort, Retry and Ignore
- 3 — Yes, No and Cancel
- 4 — Yes and No
- 5 — Retry and Cancel
-
4
Customize the icon of your error message. Replace Icon in the code that you pasted into Notepad with one of the following:
- 0 — No Icon
- 16 — Critical Icon (a.k.a. «X» icon)
- 32 — Question Icon (a.k.a. «?» icon)
- 48 — Warning Icon (a.k.a. «!» icon)
- 64 — Info Icon (a.k.a. «i» icon)
-
5
Customize the title of your error message. Replace Your Title Here in the code you pasted into Notepad with what you want the title of the error message to be.
-
6
Customize the contents of your error message. Replace Your Message Here in the code you pasted into Notepad with what you want the error message to say.
-
7
Switch to a subsequent line position.
-
8
Create another error message (if desired). Repeat these steps, starting from Step 3.
- This error message will display after the previously created one has been closed.
-
9
Open the Save As window. Press Ctrl+S on your keyboard.
-
10
Expand the combo box next to Save as type and select All Files.
-
11
Type a name for your file followed by a period and vbs.
-
12
Choose a location to save the file to.
-
13
Save the file. Click Save.
-
14
Display the error message. Double-click the file that was created.
Advertisement
Add New Question
-
Question
Is there a way to make a custom icon for the error?
No, you can try using different numbers, but most likely a real error will pop up.
-
Question
How do I make it do actions to my computer?
You can’t do that. It’s a fake error, meaning it won’t do anything to your computer.
-
Question
How do I create an input text box in the message?
Do this: InputVariableName=InputBox(«Prompt»,»Title»,»Value which is optional»)
See more answers
Ask a Question
200 characters left
Include your email address to get a message when this question is answered.
Submit
Advertisement
Video
Thanks for submitting a tip for review!
About This Article
Thanks to all authors for creating a page that has been read 531,226 times.
Did this article help you?
Windows, как известно, и сама в любой момент способна сгенерить какую угодно ошибку. Но ведь совершенно другое дело, когда ошибка появляется как раз, когда надо.
Зачем?
Ну мало ли. Шутка, пранк или просто надо, что называется, по работе, чтобы в нужной ситуации ни у кого не возникало никаких сомнений. И т.д.
Такой скилл, как показывает практика, может быть чрезвычайно полезным. При условии, что применяется он грамотно и своевременно, конечно.
В общем, сейчас о том, как сделать сообщение об ошибке в Windows. А поскольку способов сразу два, то далее — на выбор:
#1 — фейковая ошибка в Windows — спец. утилитка WEMC
Собственно, данное решение для обычного юзера по-прежнему является самым очевидным и простым в реализации (в чем и состоит основной его недостаток, и потому и нас есть еще вариант #2).
Прога называется Windows Error Message Creator — [ССЫЛКА] — она полностью бесплатная, легкая (124 KB), скачивается мгновенно и устанавливается очень быстро.
Не пропустите: ОШИБКА WINDOWS «ФАЙЛОВАЯ СИСТЕМА ТОМА НЕ РАСПОЗНАНА». ЧТО ДЕЛАТЬ?
Но самое главное эта утилита содержит весь набор опций, которые требуются для создания качественного и убедительного сообщения об ошибке Windows или даже «синего экрана смерти», если понадобиться. Процедура генерации фейковой ошибки простейшая:
- после загрузки распаковываем архив и запускаем Windows Error Message Creator;
- в основном меню приложения, в разделе Create A Standard Message Box сначала выбираем тип сообщения (Message Box Type);
- далее прописываем текст, который будет отображаться в первых двух строках описания ошибки (Message Line) и заголовок окошка сообщения (Message Box Title) — текст может быть любой (как «настоящий технический», так и поздравление с ДР или анекдот), русский язык поддерживается;
- жмем кнопку «Create«.
И тут же наблюдаем новосозданную фейковую ошибку. На экране окошко возникает с характерным звуком, так что всё по-настоящему. С виду.
Не пропустите: ОШИБКА CAA20001 В TEAMS: ЧТО ДЕЛАТЬ, КОГДА ПРОСТО ПЕРЕЗАПУСК НЕ ПОМОГАЕТ
Ну а если этого мало, то тогда либо редактируем обычное сообщение дальше, либо создаем «кастомное» (раздел «Create Customised Message Box» основном меню утилиты), где вручную прописать можно вообще всё — от текста описания до подписей на кнопках — еще и фирменные иконки Windows расставить.
Или же в меню сверху жмем «Create«, выбираем «BSOD«, выбираем код реальной ошибки (правильное её название подставляется автоматом) из списка и тут же организовываем «синий экран смерти«. Чтоб не мелочиться
К слову, чтобы отключить BSOD, надо переключиться на Рабочий стол (клавишами Alt+Tab) и потом закрыть процесс Windows Error Message Creator через Диспетчер задач Windows. Это так, на всякий случай.
Не пропустите: SOFTWARE REPORTER TOOL: ЧТО ЭТО И КАК ЕГО ЗАБЛОКИРОВАТЬ В WINDOWS-КОМПЕ [АРХИВЪ]
#2 — фейковая ошибка в Windows — VB Script
Реальный хацкер, разумеется, сваять такой может буквально двумя пальцами. Но если уровень пока не тот, то в данном случае тоже не беда.
Вот [ССЫЛКА] на онлайн-генератор скрипта сообщения об ошибке Windows (а точнее, универсальный генератор сценариев). Сервис работает примерно так же, как и утилита WEMC, то есть, ничего сложного:
- переходим по ссылке на страничку «Message Box Generator«;
- и по очереди прописываем заголовок окна сообщения (Title), текст описания ошибки (Body), названия кнопок (Button) и выделение для нужной и прочую «косметику», вставляем иконку (превьюшка сообщения отображается внизу страницы);
- после этого выбираем опции, контролирующие работу скрипта (к примеру, с «System Wide Modal» блокируется доступ к Windows, пока скрипт не будет закрыт);
- завершив процедуру создания скрипта, копируем весь код, который отображается в поле «Command (VBA/VB Script)» — это и есть готовый сценарий поддельного сообщения об ошибке Windows;
- на компе открываем «Блокнот«, вставляем в чистый файл скопированный из генератора код и сохраняем этот файл с расширением .vbs (Файл > Сохранить как > после названия (любого) прописываем вручную .vbs > жмем «Тип файла» > Все файлы > Сохранить);
- а затем, когда понадобиться, просто находим этот VBS-файл со скриптом и запускаем его двойным кликом.
Надо будет немного попрактиковаться с выбором опций для скрипта. Но в целом всё тоже очень просто. Вот как-то так…
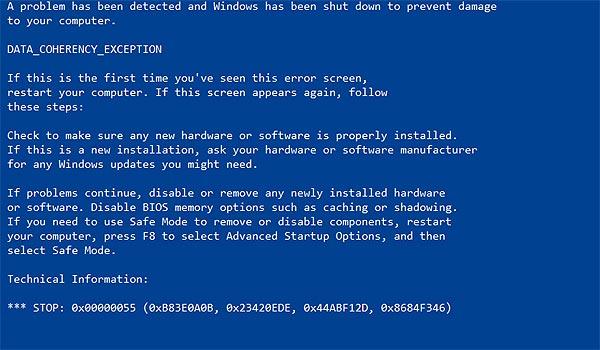
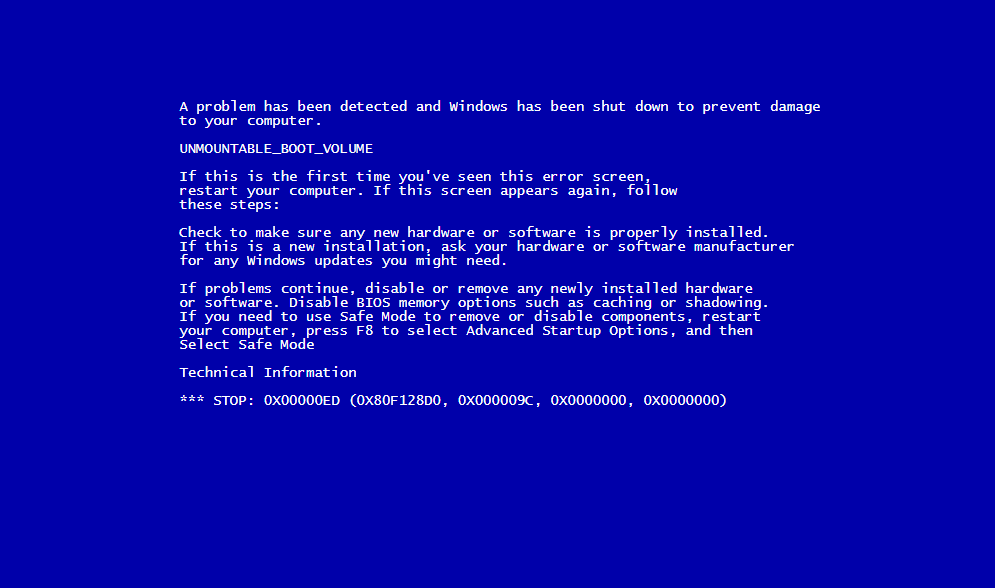
Появление BSOD всегда указывает на критический сбой в работе операционной системы, но это свидетельство об ошибке можно превратить в шутку, разыграв друга, коллегу или даже начальника. В ранних версиях Windows это можно было сделать, подправив один ключ в реестре, затем появилась утилита NotMyFault от самих же разработчиков Microsoft, вызывающая синий экран путем искусственного моделирования разных ошибок — сбоя драйверов ядра, переполнения буфера и тому подобное.
Называется она NotMyFault, скачать ее можно со страницы docs.microsoft.com/en-us/sysinternals/downloads/notmyfault, но дело в другом — похоже на то, что в последних сборках Windows 10 она перестала работать.
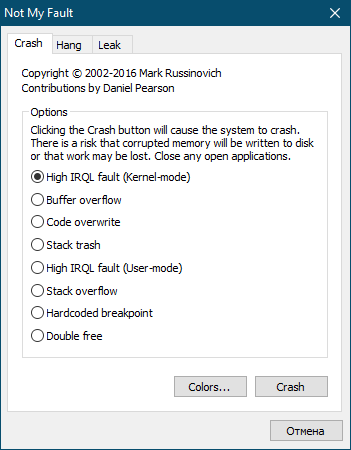
То есть она работает, но не так, как этого следовало бы ожидать.
Если в параметрах загрузки и восстановления системы у вас включена автоматическая перезагрузка, то после нажатия кнопки «Crash» система на несколько секунд зависнет, а затем уйдет на перезагрузку; если отключена, то перезагружать зависшую Windows придется вручную. Любопытно, что файл MEMORY.DMP в корневом каталоге Windows всё же создается, а значит его можно проанализировать. В свое время Microsoft предупреждала о рисках использования NotMyFault, а сейчас и вовсе прекратила его развитие. Возможно, это даже к лучшему, потому что существуют куда более безопасные, но ничуть не менее реалистичные способы подшутить над другом или коллегой, сымитировав BSOD с помощью обычного браузера.
Fakebsod.com
Первый — зайти в отсутствии владельца компьютера на страницу с говорящим названием Fakebsod.com, перейти в полноэкранный режим нажатием F11, а затем нажать кнопку «Click Here».
При этом на экране появится некое подобие старой версии BSOD, а мышь и значительная часть кнопок клавиатуры будет заблокирована.
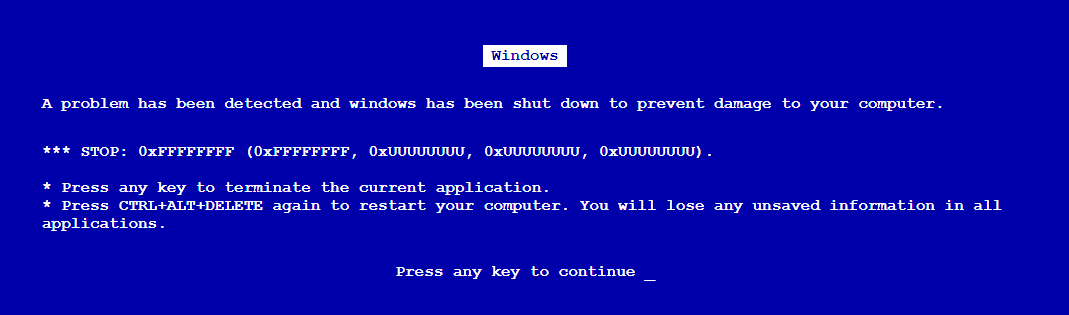
Чтобы вернуться в обычный режим, нужно нажать F11 или F1. В первом случае страница примет свой обычный вид, а во втором — откроется новая вкладка со справкой по использованию браузера. Впрочем, вскрыть подвох с фейковым BSOD можно и с помощью других браузерных комбинаций.
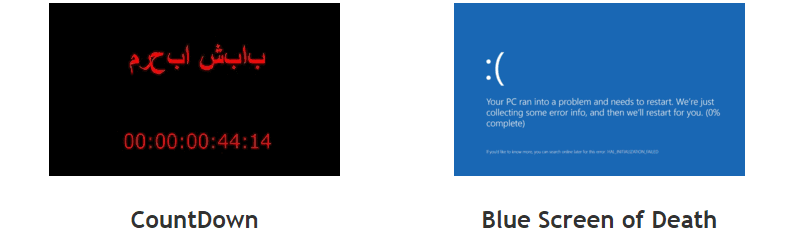
Screenprank
Шуточный ресурс, предлагающий несколько безобидных розыгрышей, в том числе и синий экран смерти Windows 8.1 и 10.
Зайдите на сайт www.screenprank.com, нажмите «Blue Screen of Death», а затем F11, чтобы перейти в полноэкранный режим. Для выхода жмем ту же F11 или F1 для открытия новой вкладки с браузерной справкой.
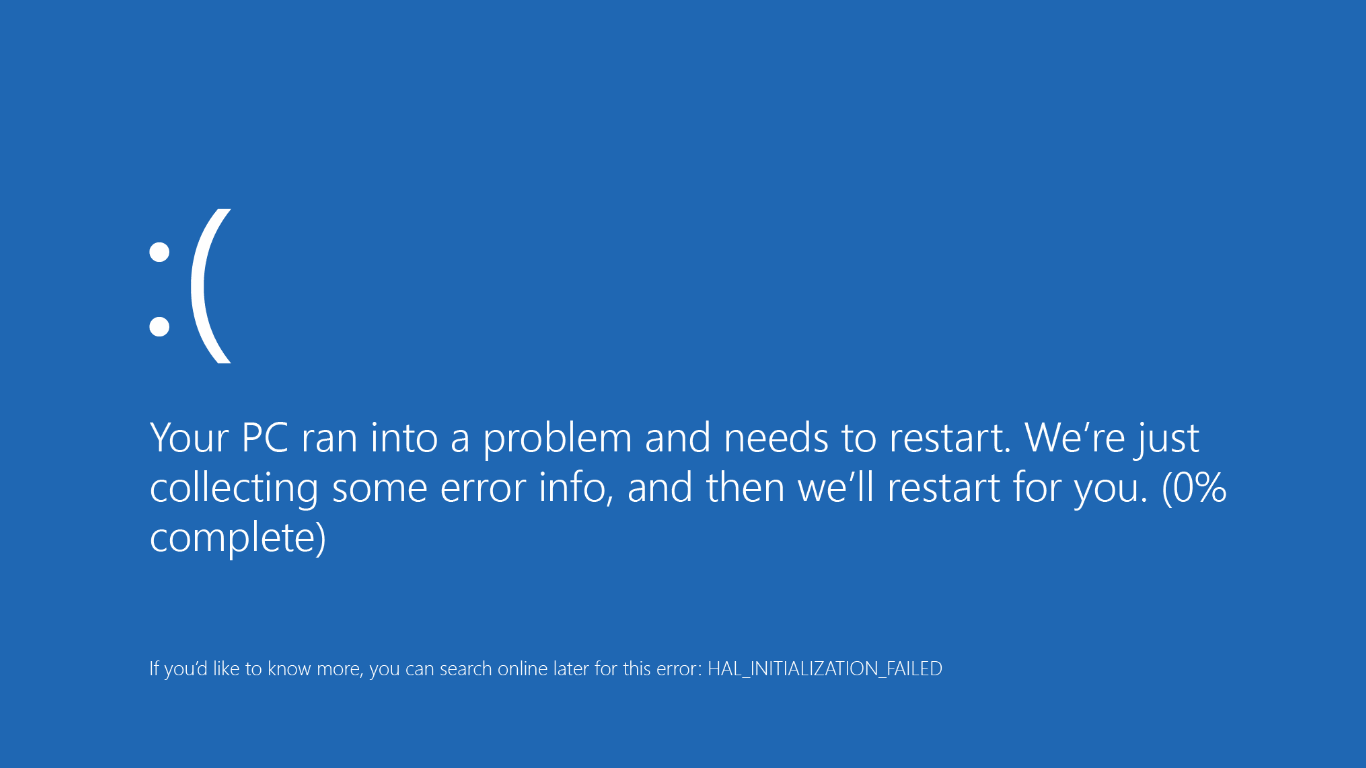
Как и в предыдущем розыгрыше, Screenprank моделирует реальный экран смерти с описанием HAL INSTALLATION FAILED, вызванный сбоем драйверов или аппаратными неполадками.
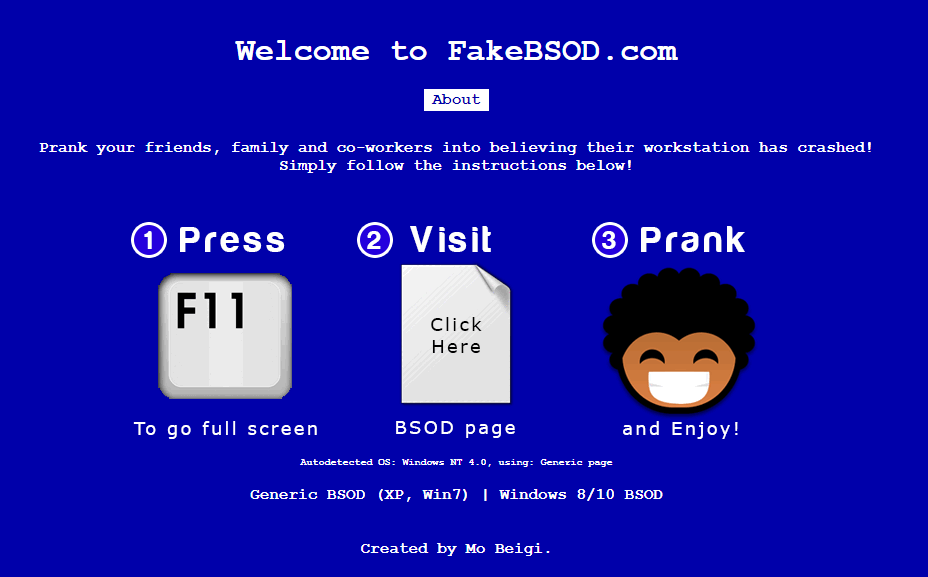
Geekprank.com
Еще один шуточный ресурс, имитирующий работу старушки Windows XP, но действующий куда более изощренно.
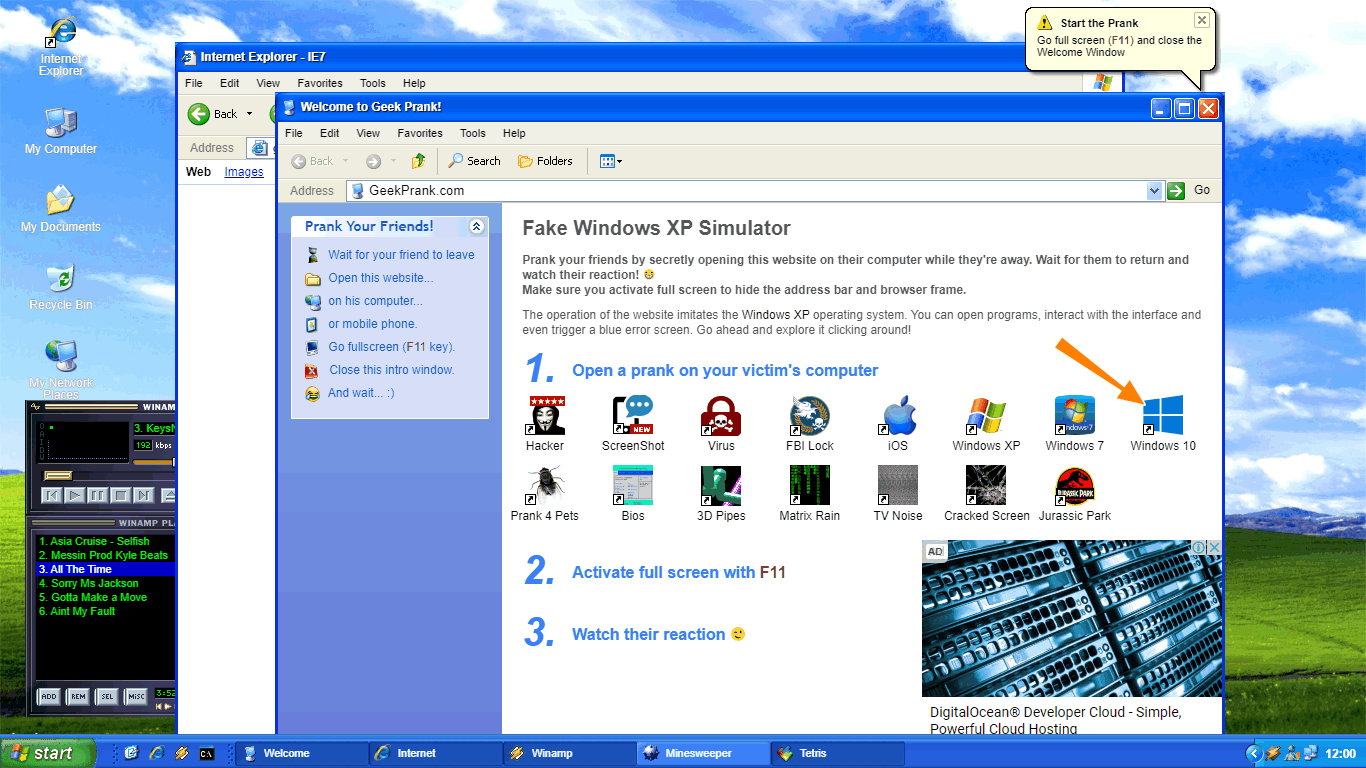
Вы переходите на указанной сайт, жмете F11, а затем жмете кнопку «Windows 10», после чего сайт начинает моделирование установки обновления системы.
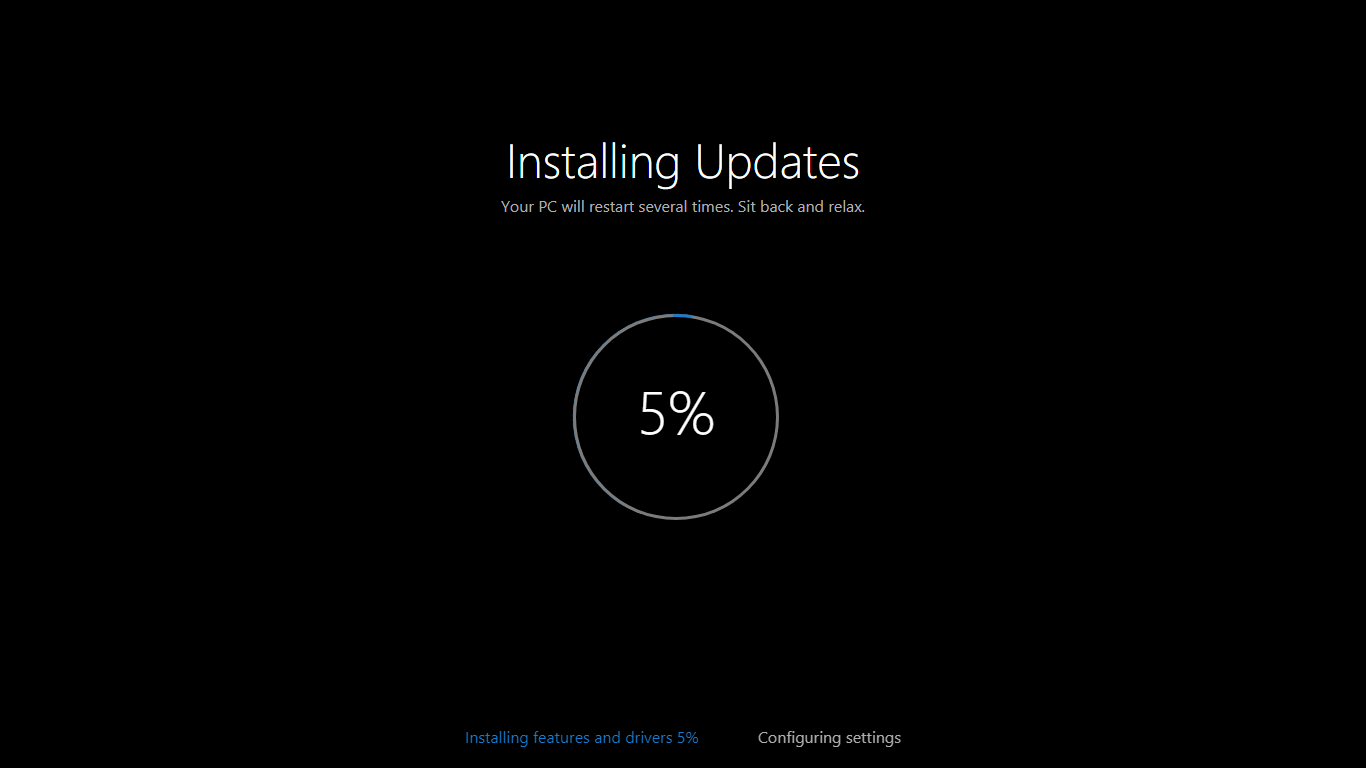
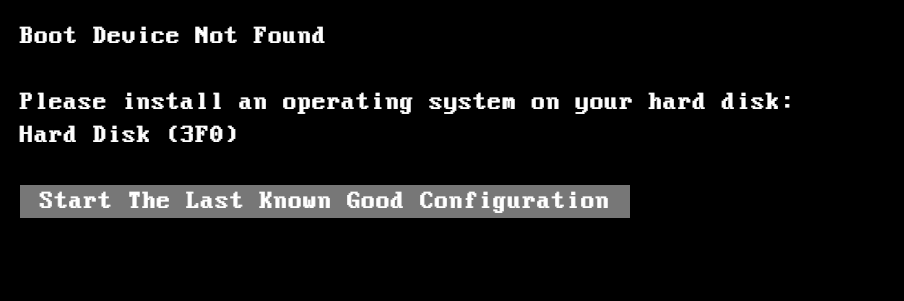
Если же, устав ждать, ваш незадачливый приятель нажмет Enter, на экран вылетит сообщение BSOD (почему-то в стиле XP),
а вслед за ним еще ряд угрожающих сообщений вроде «загрузочное устройство не найдено» и прочее.

Как и в остальных случаях, избавляемся от беды нажатием F11 и закрытием страницы.
Понятно, что все предложенные розыгрыши рассчитаны исключительно на новичков, чей уровень владения компьютером не ушел дальше умения использовать Ctrl + C и Ctrl + V, а еще вас может подвести интегрированный в браузер переводчик, который сразу покажет, что здесь что-то нечисто, и раз уж вы примите решение разыграть кого-то описанными способами, потрудитесь отключить его в настройках используемого браузера.
![]() Загрузка…
Загрузка…