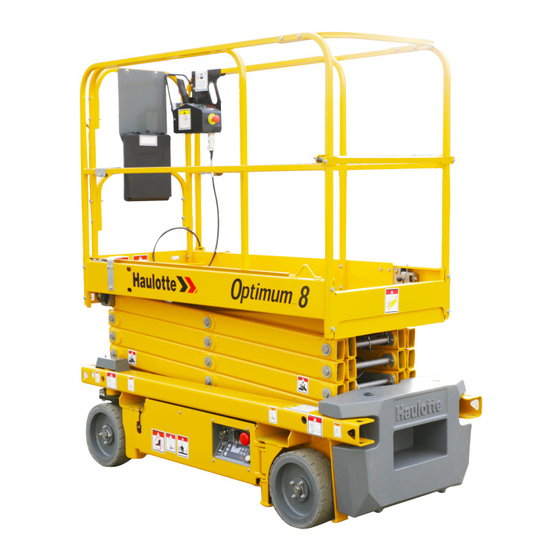
- Manuals
- Brands
- Haulotte Manuals
- Lifting Systems
- OPTIMUM 8
- Operator’s manual
-
Contents
-
Table of Contents
-
Bookmarks
Quick Links
Operator’s manual
Operator’s manual
OPTIMUM 8 — OPTIMUM 1931 E
OPTIMUM 8 — OPTIMUM 1931 E
USA
4000415480
E 01.18
USA / GB
Related Manuals for Haulotte optimum 8
Summary of Contents for Haulotte optimum 8
-
Page 1
Operator’s manual Operator’s manual OPTIMUM 8 — OPTIMUM 1931 E OPTIMUM 8 — OPTIMUM 1931 E 4000415480 E 01.18 USA / GB… -
Page 2
OPTIMUM 8 — OPTIMUM 1931 E 4000415480 E 01.18 USA / GB… -
Page 3: Table Of Contents
Layout ……….3.4.2 — HAULOTTE Activ’Screen ……3.4.2.1 — LCD screen .
-
Page 4
Operator’s manual PRE-OPERATION INSPECTION 1 — Recommendations ….. . 2 — Working area assessment ….3 — Inspection and Functional test . -
Page 5
Operator’s manual 5 — Transportation ……5.1 — Putting in transport position ……..5.2 — Machine layout. -
Page 6
Operator’s manual MAINTENANCE 1 — General ……2 — Maintenance Schedule ….3 — Inspection program . -
Page 7: Foreword
— Foreword Foreword You have just purchased a HAULOTTE® product and we would like to thank you for your business. The Aerial Work Platform is a mechanical device primarily designed and manufactured with the intent to position people with the necessary tools and material to overhead elevated temporary workplaces. All other uses or alterations/ modifications to the aerial work platform must be approved by HAULOTTE®.
-
Page 8: User Responsibility
• To establish a preventive maintenance program in accordance with the manufacturer’s recommendations, taking into account the environment and severity of use of the machine. • To perform periodic inspections in accordance with HAULOTTE® recommendations and local regulations. All malfunctions and problems identified during the inspection shall be corrected before the aerial work platform is returned to service.
-
Page 9: Operator’s Responsibility
• Read and understand the contents of this manual and familiarize himself with the decals affixed on the machine. • To inspect the machine before use according to HAULOTTE®’s recommendations.. • To inform the owner (or hirer) if the manual or any decals are missing or are not legible.
-
Page 10: Safety
OPTIMUM 8 — OPTIMUM 1931 E — Foreword 2 — Safety 2.1 — AFETY INSTRUCTIONS 2.1.1 — Misuse Hazards • Do not use the machine for any other purpose than to position people, their tools and material to the overhead/elevated temporary work places.
-
Page 11: Falling Hazards
OPTIMUM 8 — OPTIMUM 1931 E — Foreword 2.1.2 — Falling Hazards To enter or exit from the platform : • The machine must be completely stowed. • Face the machine to access the entry opening to the platform. • Keep 3 points of contact (both hands and a foot) on the steps and the guardrail.
-
Page 12: Overturning / Tip-Over Hazards
OPTIMUM 8 — OPTIMUM 1931 E — Foreword 2.1.3 — Overturning / Tip-over Hazards Before positioning and operating the machine : • Ensure that the surface is capable of supporting the machine weight including the rated capacity. • Do not exceed the maximum rated capacity that includes the weight of both material and allowed number of occupants.
-
Page 13
OPTIMUM 8 — OPTIMUM 1931 E — Foreword Using a machine on a slope Do not exceed the slope limit for each operation. Section B 4.1Technical specifications. Gradeability : • Driving UP or DOWN a slope in stowed position. Sideslope : •… -
Page 14
OPTIMUM 8 — OPTIMUM 1931 E — Foreword N.B.-:-T EAUFORT SCALE OF WIND FORCE IS ACCEPTED INTERNATIONALLY AND IS USED WHEN COMMUNICATING WEATHER CONDITIONS WIND SPEED RANGE AT ABOVE FLAT CLEAR LAND IS ASSOCIATED WITH EACH DEGREE Beaufort scale Meteorological… -
Page 15: Electrocution Hazards
OPTIMUM 8 — OPTIMUM 1931 E — Foreword 2.1.4 — Electrocution Hazards The machine is not electrically insulated and does not provide protection from contact or proximity to electrically charged conductors. Always position the lift at a safe distance from electrically charged conductors to ensure that no part of the machine is within an unsafe area.
-
Page 16: Explosion / Fire Hazards
OPTIMUM 8 — OPTIMUM 1931 E — Foreword 2.1.5 — Explosion / Fire Hazards Always wear protective clothing and eye wear when working with batteries and power sources/systems. N.B.-:-A CID IS NEUTRALIZED WITH SODIUM BICARBONATE AND WATER • Do not work on or operate a machine in an explosive or flammable atmosphere / environment.
-
Page 17
OPTIMUM 8 — OPTIMUM 1931 E — Foreword • Be aware of driving direction. • Check the driving direction with the help of the red or green arrow on the chassis relative to the red and green arrows on the platform control box. -
Page 18: Uncontrolled Movement Hazards
Each inquiry or request should include all relevant information; including contact name, telephone number, mailing address, email address, plus the machine model and serial number. The HAULOTTE® Product Safety department will evaluate each request/inquiry and will provide a written response.
-
Page 19: Incident Notification
OPTIMUM 8 — OPTIMUM 1931 E — Foreword 4 — Incident notification Notify HAULOTTE® immediately when a HAULOTTE® product has been involved in an incident/ accident leading to personal injury or death, or when there is a major property damage. HAULOTTE Group — EUROPE Product HAULOTTE Group — Australia, India and HAULOTTE Group — North &…
-
Page 20: Compliance
It is important and necessary to keep HAULOTTE Services® updated with current ownership of the machine. This way, HAULOTTE® will be able to provide the necessary support for the product. If you have sold or transferred this machine(s); it is your responsibility to notify HAULOTTE Services®.
-
Page 21: Owner Information Update Form
Company stamp is mandatory : Tick here if the machine has been permanently removed from service (scrapped). The manufacturer’s nameplate must be removed and returned to HAULOTTE Group when the unit is removed from service. Reason for removal : 4000415480 E 01.18…
-
Page 22: Product Specifications
5.2 — RODUCT SPECIFICATIONS HAULOTTE® cannot be held liable for any changes to the technical characteristics/ specifications contained in this manual. HAULOTTE® has a continuous improvement policy in place for its product range. Given this policy, the Company reserves the right to modify products technical characteristics / specifications without notice.
-
Page 23: Familiarization
OPTIMUM 8 — OPTIMUM 1931 E — Familiarization Familiarization 1 — General safety 1.1 — NTENDED USE Do not operate the product in the following situations : • On soft, unstable or cluttered ground. • With wind blowing faster than the permissible limit.
-
Page 24: Decal Content
Familiarize yourself with the decals and the hazard severity levels. Decals must be kept in good legible condition. Familiarize yourself with the decals and their respective color codes. Additional decals can be ordered from HAULOTTE Services®. CE and A S stand ard s DANGER…
-
Page 25: Symbols And Colors
OPTIMUM 8 — OPTIMUM 1931 E — Familiarization 1.3 — YMBOLS AND COLORS Symbols and colors are used to alert the operator of safety precautions and/or to highlight important safety information. The following safety symbols are used throughout this manual to indicate specific hazards and the hazard severity level when operating or maintaining the Aerial Work Platform.
-
Page 26: Symbols Legend And Definitions
OPTIMUM 8 — OPTIMUM 1931 E — Familiarization 1.5 — YMBOLS LEGEND AND DEFINITIONS Symbols are used throughout this manual to depict hazards, avoidance measures and indicate when information is required. Refer to the following table to familiarize yourself with these symbols.
-
Page 27: Models Description
OPTIMUM 8 — OPTIMUM 1931 E — Familiarization 2 — Models description Regulations Models ANSI and CSA standards OPTIMUM 1931 E CE, AS and EAC standards OPTIMUM 8 4000415480 E 01.18 USA / GB…
-
Page 28: Primary Machine Components
OPTIMUM 8 — OPTIMUM 1931 E — Familiarization 3 — Primary machine components 3.1 — AYOUT O P T IM U M 8 — O P T I M U M 1 9 3 1 E C142 C171 C168 C20 C2 C78 C58…
-
Page 29: Maintenance Support
OPTIMUM 8 — OPTIMUM 1931 E — Familiarization Marking Description Marking Description Chassis Platform access ladder Front drive wheels Compartment locking latch Platform Sliding guardrail Platform control box Extension deck lock pin Tie-down (and/or forklift loading) Scissors Ground control box + Universal plug…
-
Page 30: Extension Deck
OPTIMUM 8 — OPTIMUM 1931 E — Familiarization 3.3 — XTENSION DECK N.B.-:-D O NOT LOAD THE EXTENSION DECK FOR EASE OF MANOEUVRING Ensure that gate or sliding bar is in it’s proper closed position. Perform the extending and retracting operations of the extension deck on flat, horizontal ground.
-
Page 31: Ground Control Box
OPTIMUM 8 — OPTIMUM 1931 E — Familiarization 3.4 — ROUND CONTROL BOX 3.4.1 — Layout Ge nera l vie w ACTIV’ Screen Controls and indicators Marking Description Function Pulled out : Ground control box energized E-stop button Pushed in : De-energizes control system…
-
Page 32: Haulotte Activ’screen
OPTIMUM 8 — OPTIMUM 1931 E — Familiarization 3.4.2 — HAULOTTE Activ’Screen Upon starting and during operation of the machine, the LCD screen «Activ’Screen» located on the ground control box displays in real time the machine operating status. H AU L O T T E Ac t i v ‘ S c ree n…
-
Page 33: Lcd Screen
OPTIMUM 8 — OPTIMUM 1931 E — Familiarization 3.4.2.1 — LCD screen At startup : At startup with the ground or platform controls selected; system initiates a self check : • Bar gets filled up. • Home screen comes on with status icon of the machine — okay to proceed functioning the controls.
-
Page 34
OPTIMUM 8 — OPTIMUM 1931 E — Familiarization • After pressing on Symbol Description Software part number Software version + Screen software version + Screen version Screen identification + Screen software version Machine serial number displayed • After again pressing on •… -
Page 35
OPTIMUM 8 — OPTIMUM 1931 E — Familiarization Alarm status : Alarm status displayed as applicable — samples shown below Tilt : Overload : Low battery : 4000415480 E 01.18 USA / GB… -
Page 36
OPTIMUM 8 — OPTIMUM 1931 E — Familiarization Present fault : Platform control box E-stop button pressed in (de-energized) : 4000415480 E 01.18 USA / GB… -
Page 37: Platform Control Box
OPTIMUM 8 — OPTIMUM 1931 E — Familiarization 3.5 — LATFORM CONTROL BOX 3.5.1 — Layout Ge nera l vie w Controls and indicators Marking Item Description Function HL800 Tilt indicator Machine on excessive slope HL802 Overload indicator Platform overloaded…
-
Page 38
OPTIMUM 8 — OPTIMUM 1931 E — Familiarization Marking Item Description Function 100% Battery charged HL904 Battery charging indicator Flashing : Batteries have 40 % charge left Constantly on : Batteries have only 20 % charge left Move forward : Forward drive or platform raising… -
Page 39: Performance Specifications
OPTIMUM 8 — OPTIMUM 1931 E — Familiarization 4 — Performance Specifications 4.1 — ECHNICAL CHARACTERISTICS Use the table to select the right Haulotte machine for the job. CE, AS and EAC standards Machine OPTIMUM 8 Characteristics — Dimensions Imp.
-
Page 40
OPTIMUM 8 — OPTIMUM 1931 E — Familiarization ANSI and CSA standards Machine OPTIMUM 1931 E Characteristics — Dimensions Imp. Maximum working height 7,77 m 25 ft 6 in Maximum platform height 5,77 m 18 ft 11 in Total weight… -
Page 41: Working Area / Range Of Motion
OPTIMUM 8 — OPTIMUM 1931 E — Familiarization 4.2 — ORKING AREA ANGE OF MOTION O P T IM U M 8 — O P T I M U M 1 9 3 1 E 4000415480 E 01.18 USA / GB…
-
Page 42
OPTIMUM 8 — OPTIMUM 1931 E — Familiarization Notes 4000415480 E 01.18 USA / GB… -
Page 43: Decals And Markings Locations
OPTIMUM 8 — OPTIMUM 1931 E — Familiarization 5 — Decals and markings locations C E a n d AS s t a n d a r d s — O P T I M U M 8 — 1 / 2 4000415480 E 01.18…
-
Page 44
OPTIMUM 8 — OPTIMUM 1931 E — Familiarization C E a n d AS s t a n d a r d s — O P T I M U M 8 — 2 / 2 4000415480 E 01.18 USA / GB… -
Page 45
OPTIMUM 8 — OPTIMUM 1931 E — Familiarization CE and AS standards — OPTIMUM 8 Marking Color Description Quantity OPTIMUM 8 Height of the floor and load 4000422970 Maximum Pressure per Tire — Floor Blue 4000417260 Loading Other Commercial name — Bright machine… -
Page 46
OPTIMUM 8 — OPTIMUM 1931 E — Familiarization Marking Color Description Quantity OPTIMUM 8 Blue Anchorage point — Traction 4000027310 Risk of electrocution — Water 4000025130 projection Risk of crushing — Platform 4000244340 Green Emergency lowering location 4000227200 For CE standard only : 4000273940… -
Page 47
OPTIMUM 8 — OPTIMUM 1931 E — Familiarization EAC stan dard — OPTIMUM 8 — 1/2 4000415480 E 01.18 USA / GB… -
Page 48
OPTIMUM 8 — OPTIMUM 1931 E — Familiarization EAC stan dard — OPTIMUM 8 — 2/2 4000415480 E 01.18 USA / GB… -
Page 49
OPTIMUM 8 — OPTIMUM 1931 E — Familiarization EAC standard Marking Color Description Quantity OPTIMUM 8 Height of the floor and load 4000426450 Maximum Pressure per Tire — Floor Blue 4000417260 Loading Other Commercial name — Bright machine 3078146730 Other… -
Page 50
OPTIMUM 8 — OPTIMUM 1931 E — Familiarization Marking Color Description Quantity OPTIMUM 8 Yellow Fire Hazard 307P226800 Electrical danger 307P226810 Yellow Corrosion hazard 307P226830 Yellow Danger unstable side 307P226930 Other Tamper-proof 307P227450 Blue Caution helmet compulsory 307P226680 Blue Obligatory routing… -
Page 51
OPTIMUM 8 — OPTIMUM 1931 E — Familiarization A N SI an d C SA st a nda rd s — O P TI M U M 1 9 31 E — 1 /2 4000415480 E 01.18 USA / GB… -
Page 52
OPTIMUM 8 — OPTIMUM 1931 E — Familiarization A N SI an d C SA st a nda rd s — O P TI M U M 1 9 31 E — 2 /2 4000415480 E 01.18 USA / GB… -
Page 53
Other Commercial name — Dark machine 4000504020 Decal HAULOTTE® — 500 x 100 — Other 307P217080 Bright machine Decal HAULOTTE® — 500 x 100 — Dark Other 307P224740 machine Decal HAULOTTE® — 500 x 100 — Red Other 307P220360 machine… -
Page 54
OPTIMUM 8 — OPTIMUM 1931 E — Familiarization Marking Color Description Quantity OPTIMUM 1931 E In english : 4000025030 Orange Hand crushing hazard — Battery In french : 4000068120 In spanish : 4000086550 Other Transport height 4000417380 Other Folding guardrails… -
Page 55: Pre-Operation Inspection
OPTIMUM 8 — OPTIMUM 1931 E — Pre-operation inspection Pre-operation inspection 1 — Recommendations The owner, the site manager, the supervisor and the operator are all responsible to ensure the machine is fit for the work it is to perform; i.e. that the machine is suitable to carry out the work in complete safety and in compliance with this Operator’s Manual.
-
Page 56: Working Area Assessment
OPTIMUM 8 — OPTIMUM 1931 E — Pre-operation inspection 2 — Working area assessment To ensure safety during operation, the following should be considered : • Segregate other site traffic (delivery vehicles, dumpers, etc) from the work area. • Check the work area for localized features, e.g. manholes, service ducts, potholes, etc.
-
Page 57: Inspection And Functional Test
Tighten Check levels Systematic replacement Visual inspection with small disassembly or movement Proof tests : Need HAULOTTE Services® authorization. For countries where needed to reach the part. machines are not subject to controlled periodic maintenance. Replacement is necessary. 4000415480 E 01.18…
-
Page 58
OPTIMUM 8 — OPTIMUM 1931 E — Pre-operation inspection Daily inspection Visual inspection without disassembly Check level To check by test Corrected applicable Manuals and displays. Clean or replace if necessary. Presence, cleanliness and legibility of the manufacturer’s plate Presence, cleanliness and legibility of operator’s and maintenance… -
Page 59
OPTIMUM 8 — OPTIMUM 1931 E — Pre-operation inspection Entry bar/gate closes automatically and is not prevented from closing. Folding guard-rail (if fitted) is fixed securely in position Extending structure (scissors) Absence of cracks, broken parts, damaged paint No deterioration and visible damage… -
Page 60
OPTIMUM 8 — OPTIMUM 1931 E — Pre-operation inspection Energy storage : Batteries Battery electrolyte level No screws missing / loose parts Presence and good condition of the batteries: terminations and clamps, electrolyte level … Electric cables No torn or split wire sheaths… -
Page 61: Safety Functional Checks
OPTIMUM 8 — OPTIMUM 1931 E — Pre-operation inspection 4 — Safety functional checks To protect the user and the machine, safety systems prevent the movement of the machine beyond its operating limits. These safety systems when activated immobilize the machine and prevent further movement.
-
Page 62: Activation Of Controls
OPTIMUM 8 — OPTIMUM 1931 E — Pre-operation inspection 4.2 — CTIVATION OF CONTROLS The deadman foot pedal (enable switch) must be activated to allow any movement. The «Enable Switch» system depends on the machine configuration and will consist of one of the following : •…
-
Page 63: Slope Warning Device
OPTIMUM 8 — OPTIMUM 1931 E — Pre-operation inspection 4.5 — LOPE WARNING DEVICE From each control box, a buzzer alerts the operator that the machine is not folded/stowed and is positioned on a slope exceeding the slope allowed. N.B.-:-T…
-
Page 64: Operating Temperature (For Eac Standard Only)
OPTIMUM 8 — OPTIMUM 1931 E — Pre-operation inspection 4.8 — PERATING TEMPERATURE STANDARD ONLY Hydraulic energy to perform machine movements is provided by an electric motor driven hydraulic pump.The operating speed of the pump is governed by a speed regulator. If the temperature limits are reached, an audible alarm alerts the operator.
-
Page 65: On-Board Charger
OPTIMUM 8 — OPTIMUM 1931 E — Pre-operation inspection 4.12 — O BOARD CHARGER Battery charging starts as soon as an external supply is connected to the battery charger. When the battery pack is being charged with an external power supply, the machine’s electric system is automatically deactivated.
-
Page 66
OPTIMUM 8 — OPTIMUM 1931 E — Pre-operation inspection Notes 4000415480 E 01.18 USA / GB… -
Page 67: Operation Instructions
OPTIMUM 8 — OPTIMUM 1931 E — Operation instructions Operation instructions 1 — Operation 1.1 — NTRODUCTION Only trained and authorized personnel shall be permitted to operate this aerial work platform. Prior to operation : • Read, understand and obey all instructions and safety precautions in this manual and attached to the aerial work platform.
-
Page 68: Operation From The Ground Control Box
OPTIMUM 8 — OPTIMUM 1931 E — Operation instructions 1.2 — PERATION FROM THE GROUND CONTROL BOX • Turning «ON» and «OFF» of the machine is performed with selector key switch (92). • Activation of a desired control box is achieved by turning the control box energizing selector switch ( 92 ) to the desired position.
-
Page 69: Operation From The Platform Control Box
OPTIMUM 8 — OPTIMUM 1931 E — Operation instructions 1.3 — PERATION FROM THE PLATFORM CONTROL BOX • The platform control box can only be used if : • The E-stop buttons on both ground and platform control boxes are not pressed in (Energized).
-
Page 70: Ground Control Box
OPTIMUM 8 — OPTIMUM 1931 E — Operation instructions 2 — Ground control box 2.1 — O START AND STOP THE MACHINE • Ensure that the E-Stop buttons ( 15 ) and ( 46 ) at the ground and platform control boxes are pulled out.
-
Page 71: Additional Controls From The Ground Control Box
OPTIMUM 8 — OPTIMUM 1931 E — Operation instructions Pu l l T — h a n d le f o r em erge nc y l ow er in g N.B.-:-P ULLING ON TO THE ANDLE IMMEDIATELY ACTIVATES THE EMERGENCY LOWERING OF THE PLATFORM ALWAYS keep personnel and obstructions clear of the aerial work platform that might block the lowering.
-
Page 72: Platform Control Box
OPTIMUM 8 — OPTIMUM 1931 E — Operation instructions 3 — Platform control box 3.1 — O START AND STOP THE MACHINE To start the machine : At the ground control box : • The E-stop button on the ground control box must be in ON position (pulled out / activated).
-
Page 73: Drive And Steer Control
OPTIMUM 8 — OPTIMUM 1931 E — Operation instructions 3.2 — RIVE AND STEER CONTROL To control the direction and drive : • Move the 2-position selector ( 112 ) to the right. • The drive indicator ( 111 ) lights up.
-
Page 74: Movement Control
OPTIMUM 8 — OPTIMUM 1931 E — Operation instructions 3.3 — OVEMENT CONTROL To operate raising/lowering function, move 2 position selector switch ( 112 ) to the left. Activate raising/lowering selector ( 110 ). Simultaneously operate joystick ( 108 ) with joystick trigger (Enable switch ( 123 )) pressed in and maintained.
-
Page 75: Emergency Procedure
HAULOTTE® provides a ground control emergency system that should be used to safely bring the operator into such a position that appropriate medical attention could be provided.
-
Page 76: Transportation
OPTIMUM 8 — OPTIMUM 1931 E — Operation instructions 5 — Transportation 5.1 — UTTING IN TRANSPORT POSITION During loading, ensure that : • The loading ramp can support the machine weight. • The loading ramp is correctly attached to transport vehicle.
-
Page 77: Machine Layout
OPTIMUM 8 — OPTIMUM 1931 E — Operation instructions 5.2 — ACHINE LAYOUT 5.3 — NLOADING Before unloading, check that the machine is in good condition. • Remove the tie downs. • At ground control box turn control box activation switch ( 92 ) to the left to energize platform box.
-
Page 78: Towing
OPTIMUM 8 — OPTIMUM 1931 E — Operation instructions 5.4 — OWING In the event of a machine breakdown, the machine can be towed a short distance to load it onto a transport vehicle : • Ensure that no one is in the platform during towing.
-
Page 79: Free Wheel Mode
OPTIMUM 8 — OPTIMUM 1931 E — Operation instructions 5.4.1 — Free wheel mode To tow a broken-down machine, release brake. Perform these operations on flat, horizontal ground. Failing that, block the wheels to immobilize the machine. During brake release operation, the machine is in free wheel mode and the brake system no longer functions.
-
Page 80: Storage
OPTIMUM 8 — OPTIMUM 1931 E — Operation instructions 5.5 — TORAGE The machine can be stored in a designated area when not in use. If it has been stored for longer than 3 months without use then a periodic inspection must be conducted.
-
Page 81: Loading By Ramp
OPTIMUM 8 — OPTIMUM 1931 E — Operation instructions 5.6 — OADING BY RAMP To avoid any risk of sliding during loading, ensure that : • The loading ramp can bear the load. • The loading ramp is correctly attached.
-
Page 82: Lifting Operation
OPTIMUM 8 — OPTIMUM 1931 E — Operation instructions 5.8 — IFTING OPERATION During loading / unloading operation, if it becomes necessary to lift the machine using an overhead crane, it is important to respect the following : • Put the machine in stowed position (Extension retracted).
-
Page 83: Loading And Unloading With Forklift
OPTIMUM 8 — OPTIMUM 1931 E — Operation instructions 5.9 — OADING AND UNLOADING WITH FORKLIFT • Lower the platform. The machine must be in the fully stowed transport position. • Ensure that the machine controls are in the OFF position.
-
Page 84: Hydraulic Oil
OPTIMUM 8 — OPTIMUM 1931 E — Operation instructions 6 — Hydraulic oil External environmental conditions can reduce performance of the machine if the hydraulic oil temperature does not reach its optimum range. It is recommended to use the hydraulic oil according to weather condition. Refer to the table below.
-
Page 85: Battery Care And Maintenance
OPTIMUM 8 — OPTIMUM 1931 E — Operation instructions 7 — Battery care and maintenance 7.1 — ATTERY CHARGING Recharge aerial work platform batteries after each 8 hour work shift or as needed. When the aerial work platform is not in use, batteries should be recharged at least once per week. Under normal circumstances, battery recharge should take approximately 8-10 hours.
-
Page 86
• The charger settings are adjusted in the factory using its own cable. If the cable needs changing, the HAULOTTE® factory must be contacted to obtain authorisation. How to charge the batteries ? : Before charging the batteries, switch the machine off. -
Page 87
OPTIMUM 8 — OPTIMUM 1931 E — Operation instructions How to maintain battery autonomy ? : • Do not charge the batteries in cold temperatures. • The battery life is reduced when the machine is used in cold temperatures (< 0 °C(32 °F) ). -
Page 88
OPTIMUM 8 — OPTIMUM 1931 E — Operation instructions Do not disconnect any output leads or connectors between the batteries and the charger when the charger is on. To stop a charge in progress, always unplug the extension cord from the AC power source. -
Page 89
OPTIMUM 8 — OPTIMUM 1931 E — Operation instructions Notes 4000415480 E 01.18 USA / GB… -
Page 90: General Specifications
OPTIMUM 8 — OPTIMUM 1931 E — General Specifications General Specifications 1 — Machine dimensions S t o w e d / T r a n s p o r t p o s i t i o n : C o n f i g u r a ti o n t h a t t a k e s t h e m i n i m um f l o o r s p a c e n e c e s s a r y f o r s t o ra g e a n d / o r d e l i v e r y o f t h e m a c h i n e — A c c e s s p os i t i o n .
-
Page 91
OPTIMUM 8 — OPTIMUM 1931 E — General Specifications CE, AS and EAC standards Machine OPTIMUM 8 Marking Specifications — Dimensions Imp. Overall length of machine 1,89 m 6 ft 2 in Overall width of machine 0,79 m 2 ft 7 in… -
Page 92: Major Component Masses
OPTIMUM 8 — OPTIMUM 1931 E — General Specifications 2 — Major component masses OPTIMUM 8 OPTIMUM 1931 E Specifications Imp. Frame assembly mass 948 kg 2090 lbs Scissors assembly mass 430 kg 950 lbs Platform assembly mass 125 kg…
-
Page 93: Wheel/Tire Assembly
25% Tires and rims are critical components for the stability of the machine. For safety reasons : • Use only HAULOTTE® spare parts according to the technical characteristics of the machine. Refer to the spare parts catalog. • Do not replace factory-installed tires with tires of different specifications or ply rating.
-
Page 94: Procedure Of Replacement
OPTIMUM 8 — OPTIMUM 1931 E — General Specifications 4.2.1 — Procedure of replacement • Slightly lift the machine using the lifting points of the frame. • Place a wooden spacer under the frame to support the machine after lifting off the ground.
-
Page 95
OPTIMUM 8 — OPTIMUM 1931 E — General Specifications Rea ssembly of the wh eel Marking Description Wheel Motor shaft Washer • Use a new locking washer MB5 (4000505880). 4000415480 E 01.18 USA / GB… -
Page 96
OPTIMUM 8 — OPTIMUM 1931 E — General Specifications • Use a new nut KM5 (2454131050). Check that the shaft key is well positioned in the motor shaft. Mount the wheel on the motor shaft. Install the washer first then the nut. -
Page 97: Options
OPTIMUM 8 — OPTIMUM 1931 E — General Specifications 5 — Options 5.1 — LUMBER S KIT 5.1.1 — Description This attachment is an assembly designed to transport pipes and tubes. The assembly comprises of 2 cradles securely attached to the platform. The load (material) should be placed in both the cradles and secured with a strap (not supplied).
-
Page 98: Pre-Operation Inspection
OPTIMUM 8 — OPTIMUM 1931 E — General Specifications 5.1.4 — Pre-operation inspection • Check that the cradle has no cracks or other damage. • Check that the cradle is correctly installed and secured to the platform(Ensure fastening screws are tightened and pins correctly positioned).
-
Page 99: Disassembly — Assembly
OPTIMUM 8 — OPTIMUM 1931 E — General Specifications 5.1.6 — Disassembly — Assembly O P T I M U M 8 / 1 9 3 1 E Marking Description 1 — 1A — 1B — 1C Carrier Spring washer…
-
Page 100: Specific Decals
OPTIMUM 8 — OPTIMUM 1931 E — General Specifications 5.1.7 — Specific decals L o cat i on o f t h e d ec al s OPTIMUM 8 / 1931E Marking Description Quantity Part number In english — ANSI : 4000426070…
-
Page 101: Folding Guardrails
OPTIMUM 8 — OPTIMUM 1931 E — General Specifications 5.2 — OLDING GUARDRAILS 5.2.1 — Description Folding guardrails system is designed to allow guardrails to be lowered to reduce the overall height of the machine. This system facilitates moving the machine through low height doorways/passages.
-
Page 102
OPTIMUM 8 — OPTIMUM 1931 E — General Specifications Remove platform control box from its designated position and place it on platform floor Remove the 2 pins ( G2 ) from the platform front guardrails. Tip element ( 2 ) inwards onto the platform floor. -
Page 103
OPTIMUM 8 — OPTIMUM 1931 E — General Specifications Remove the 2 pins ( G5 ). Lift and tip inwards and down until it contacts the element ( 6 ). Remove the pin ( G6 ). Lift and tip left hand main railing inwards until it contacts the element ( 3 ). -
Page 104: Specific Decals
OPTIMUM 8 — OPTIMUM 1931 E — General Specifications 5.2.4 — Specific decals Marking Description Quantity Part number Explanation work and 4000557230 transport positions 5.2.5 — Raising guardrails to working position To raise the folded guardrails to the vertical working position : •…
-
Page 105: Panel Carrier
OPTIMUM 8 — OPTIMUM 1931 E — General Specifications 5.3 — ANEL CARRIER 5.3.1 — Description This attachment is an assembly designed to transport panels. The assembly comprises of a tray that extends along the length of the floor. The panel(s) should be placed in the tray and secured to the guard rail with a strap (not supplied).
-
Page 106: Pre-Operation Inspection
OPTIMUM 8 — OPTIMUM 1931 E — General Specifications 5.3.4 — Pre-operation inspection • Check that the cradle has no cracks or other damage. • Check that the cradle is correctly installed and secured to the platform (Ensure fastening screws are tightened and pins correctly positioned).
-
Page 107: Disassembly — Assembly
OPTIMUM 8 — OPTIMUM 1931 E — General Specifications 5.3.6 — Disassembly — Assembly O P T I M U M 8 — O P T I M U M 1 9 3 1 E 4000415480 E 01.18 USA / GB…
-
Page 108
OPTIMUM 8 — OPTIMUM 1931 E — General Specifications 4000415480 E 01.18 USA / GB… -
Page 109
OPTIMUM 8 — OPTIMUM 1931 E — General Specifications Marking Description Sheet metal support Sheet metal support Stop Screw Rivet Protection pad Screw Bumper Clamp Position the sheet metal support ( 2 ) against the sheet metal support ( 1 ). Tighten the screws ( 4 ) and the nuts ( 5 ) to the recommended torque. -
Page 110: Specific Decals
OPTIMUM 8 — OPTIMUM 1931 E — General Specifications 5.3.7 — Specific decals L o cat i on o f t h e d ec al s OPTIMUM 8 — OPTIMUM 1931E Marking Description Quantity Part number In french : 4000676050…
-
Page 111: Swing Gate
OPTIMUM 8 — OPTIMUM 1931 E — General Specifications 5.4 — WING GATE 5.4.1 — Description «SWING GATE» consists of a laterally mounted pivoting ½ gate with closing latch, which enables a better access to platform. Spring loaded hinges and a latching mechanism allows the gate to swing inwards only.
-
Page 112
OPTIMUM 8 — OPTIMUM 1931 E — General Specifications Notes 4000415480 E 01.18 USA / GB… -
Page 113: General
HAULOTTE Services® technicians are specially trained to carry out extensive repairs, interventions or adjustments on the safety systems or elements of HAULOTTE® machines. They carry genuine HAULOTTE spare parts and tools as required, and also provide fully documented reports on all work completed.
-
Page 114: Maintenance Schedule
OPTIMUM 8 — OPTIMUM 1931 E — Maintenance 2 — Maintenance Schedule This section provides the necessary information needed to place the machine in safe operation. According to the current regulations, this machine has been designed for a minimum service life of 10 years.
-
Page 115: Inspection Program
Local standards and regulations may require more frequent inspections. HAULOTTE® requires Reinforced and Major Inspections to be carried out on the product to extend its service life. Inspections must be carried out by a competent company or person.
-
Page 116: Periodic Inspection
This evaluation must occur at a frequency of 5000 hours or every 5 years. This inspection is the responsibility of the owner, and it must be conducted by a HAULOTTE Services® technician or by a competent company or person.
-
Page 117: Repairs And Adjustments
Any unauthorised repairs/modifications will void HAULOTTE® warranty. With the utmost care to ensure enhanced reliability and greater safety of the HAULOTTE® products, it is pertinent that when a «Service or Safety Bulletin» is issued, action is taken immediately. Once the bulletin has been addressed, make sure that the completed form is submitted to HAULOTTE®.
-
Page 118
OPTIMUM 8 — OPTIMUM 1931 E — Maintenance Notes 4000415480 E 01.18 USA / GB… -
Page 119: Other Information
The owner or rental company must ensure that the defect covered by the HAULOTTE® warranty is reported to and acknowledged by the HAULOTTE® subsidiary as rapidly as possible or must report the defect in writing.
-
Page 120: Conditions Of Warranty
• Use of spare parts that are not HAULOTTE® originals. • If elements or products other than those recommended by the manufacturer are used. • If the HAULOTTE® name, serial numbers or identification marks are removed or altered. • After an unreasonably long delay before reporting a manufacturing problem.
-
Page 121
• Hydraulic and fuel circuit contamination : Every possible precaution is taken to ensure that fuel and hydraulic liquid delivered is clean. HAULOTTE® will not accept any claims concerning cleaning of the fuel circuit, filter, injection pump or any other equipment in direct contact with fuel or lubricants. -
Page 122: Subsidiary Contact Information
OPTIMUM 8 — OPTIMUM 1931 E — Other information 2 — Subsidiary contact information HAULOTTE FRANCE HAULOTTE INDIA PARC DES LUMIERES HAULOTTE ITALIA Unit No. 1205, 12th foor,Bhumiraj Costarica, 601 RUE NICEPHORE NIEPCE VIA LOMBARDIA 15 Plot No. 1&2, Sector 18,…
-
Page 123: California Warning
OPTIMUM 8 — OPTIMUM 1931 E — Other information 2.1 — ALIFORNIA WARNING F o r elec t ri c ( b at t ery o pera te d) ma ch i ne s CALIFORNIA PROPOSITION 65 BATTERY WARNING Battery posts, terminals and related accessories…
-
Page 124
OPTIMUM 8 — OPTIMUM 1931 E — Other information Notes 4000415480 E 01.18 USA / GB…
- Manuals
- Brands
- Haulotte Manuals
- Lifting Systems
- OPTIMUM 8
- Operator’s manual
-
Contents
-
Table of Contents
-
Bookmarks
Quick Links
Operator’s manual
Operator’s manual
OPTIMUM 8 — OPTIMUM 1931 E
OPTIMUM 8 — OPTIMUM 1931 E
USA
4000415480
E 01.18
USA / GB
Related Manuals for Haulotte optimum 8
Summary of Contents for Haulotte optimum 8
-
Page 1
Operator’s manual Operator’s manual OPTIMUM 8 — OPTIMUM 1931 E OPTIMUM 8 — OPTIMUM 1931 E 4000415480 E 01.18 USA / GB… -
Page 2
OPTIMUM 8 — OPTIMUM 1931 E 4000415480 E 01.18 USA / GB… -
Page 3: Table Of Contents
Layout ……….3.4.2 — HAULOTTE Activ’Screen ……3.4.2.1 — LCD screen .
-
Page 4
Operator’s manual PRE-OPERATION INSPECTION 1 — Recommendations ….. . 2 — Working area assessment ….3 — Inspection and Functional test . -
Page 5
Operator’s manual 5 — Transportation ……5.1 — Putting in transport position ……..5.2 — Machine layout. -
Page 6
Operator’s manual MAINTENANCE 1 — General ……2 — Maintenance Schedule ….3 — Inspection program . -
Page 7: Foreword
— Foreword Foreword You have just purchased a HAULOTTE® product and we would like to thank you for your business. The Aerial Work Platform is a mechanical device primarily designed and manufactured with the intent to position people with the necessary tools and material to overhead elevated temporary workplaces. All other uses or alterations/ modifications to the aerial work platform must be approved by HAULOTTE®.
-
Page 8: User Responsibility
• To establish a preventive maintenance program in accordance with the manufacturer’s recommendations, taking into account the environment and severity of use of the machine. • To perform periodic inspections in accordance with HAULOTTE® recommendations and local regulations. All malfunctions and problems identified during the inspection shall be corrected before the aerial work platform is returned to service.
-
Page 9: Operator’s Responsibility
• Read and understand the contents of this manual and familiarize himself with the decals affixed on the machine. • To inspect the machine before use according to HAULOTTE®’s recommendations.. • To inform the owner (or hirer) if the manual or any decals are missing or are not legible.
-
Page 10: Safety
OPTIMUM 8 — OPTIMUM 1931 E — Foreword 2 — Safety 2.1 — AFETY INSTRUCTIONS 2.1.1 — Misuse Hazards • Do not use the machine for any other purpose than to position people, their tools and material to the overhead/elevated temporary work places.
-
Page 11: Falling Hazards
OPTIMUM 8 — OPTIMUM 1931 E — Foreword 2.1.2 — Falling Hazards To enter or exit from the platform : • The machine must be completely stowed. • Face the machine to access the entry opening to the platform. • Keep 3 points of contact (both hands and a foot) on the steps and the guardrail.
-
Page 12: Overturning / Tip-Over Hazards
OPTIMUM 8 — OPTIMUM 1931 E — Foreword 2.1.3 — Overturning / Tip-over Hazards Before positioning and operating the machine : • Ensure that the surface is capable of supporting the machine weight including the rated capacity. • Do not exceed the maximum rated capacity that includes the weight of both material and allowed number of occupants.
-
Page 13
OPTIMUM 8 — OPTIMUM 1931 E — Foreword Using a machine on a slope Do not exceed the slope limit for each operation. Section B 4.1Technical specifications. Gradeability : • Driving UP or DOWN a slope in stowed position. Sideslope : •… -
Page 14
OPTIMUM 8 — OPTIMUM 1931 E — Foreword N.B.-:-T EAUFORT SCALE OF WIND FORCE IS ACCEPTED INTERNATIONALLY AND IS USED WHEN COMMUNICATING WEATHER CONDITIONS WIND SPEED RANGE AT ABOVE FLAT CLEAR LAND IS ASSOCIATED WITH EACH DEGREE Beaufort scale Meteorological… -
Page 15: Electrocution Hazards
OPTIMUM 8 — OPTIMUM 1931 E — Foreword 2.1.4 — Electrocution Hazards The machine is not electrically insulated and does not provide protection from contact or proximity to electrically charged conductors. Always position the lift at a safe distance from electrically charged conductors to ensure that no part of the machine is within an unsafe area.
-
Page 16: Explosion / Fire Hazards
OPTIMUM 8 — OPTIMUM 1931 E — Foreword 2.1.5 — Explosion / Fire Hazards Always wear protective clothing and eye wear when working with batteries and power sources/systems. N.B.-:-A CID IS NEUTRALIZED WITH SODIUM BICARBONATE AND WATER • Do not work on or operate a machine in an explosive or flammable atmosphere / environment.
-
Page 17
OPTIMUM 8 — OPTIMUM 1931 E — Foreword • Be aware of driving direction. • Check the driving direction with the help of the red or green arrow on the chassis relative to the red and green arrows on the platform control box. -
Page 18: Uncontrolled Movement Hazards
Each inquiry or request should include all relevant information; including contact name, telephone number, mailing address, email address, plus the machine model and serial number. The HAULOTTE® Product Safety department will evaluate each request/inquiry and will provide a written response.
-
Page 19: Incident Notification
OPTIMUM 8 — OPTIMUM 1931 E — Foreword 4 — Incident notification Notify HAULOTTE® immediately when a HAULOTTE® product has been involved in an incident/ accident leading to personal injury or death, or when there is a major property damage. HAULOTTE Group — EUROPE Product HAULOTTE Group — Australia, India and HAULOTTE Group — North &…
-
Page 20: Compliance
It is important and necessary to keep HAULOTTE Services® updated with current ownership of the machine. This way, HAULOTTE® will be able to provide the necessary support for the product. If you have sold or transferred this machine(s); it is your responsibility to notify HAULOTTE Services®.
-
Page 21: Owner Information Update Form
Company stamp is mandatory : Tick here if the machine has been permanently removed from service (scrapped). The manufacturer’s nameplate must be removed and returned to HAULOTTE Group when the unit is removed from service. Reason for removal : 4000415480 E 01.18…
-
Page 22: Product Specifications
5.2 — RODUCT SPECIFICATIONS HAULOTTE® cannot be held liable for any changes to the technical characteristics/ specifications contained in this manual. HAULOTTE® has a continuous improvement policy in place for its product range. Given this policy, the Company reserves the right to modify products technical characteristics / specifications without notice.
-
Page 23: Familiarization
OPTIMUM 8 — OPTIMUM 1931 E — Familiarization Familiarization 1 — General safety 1.1 — NTENDED USE Do not operate the product in the following situations : • On soft, unstable or cluttered ground. • With wind blowing faster than the permissible limit.
-
Page 24: Decal Content
Familiarize yourself with the decals and the hazard severity levels. Decals must be kept in good legible condition. Familiarize yourself with the decals and their respective color codes. Additional decals can be ordered from HAULOTTE Services®. CE and A S stand ard s DANGER…
-
Page 25: Symbols And Colors
OPTIMUM 8 — OPTIMUM 1931 E — Familiarization 1.3 — YMBOLS AND COLORS Symbols and colors are used to alert the operator of safety precautions and/or to highlight important safety information. The following safety symbols are used throughout this manual to indicate specific hazards and the hazard severity level when operating or maintaining the Aerial Work Platform.
-
Page 26: Symbols Legend And Definitions
OPTIMUM 8 — OPTIMUM 1931 E — Familiarization 1.5 — YMBOLS LEGEND AND DEFINITIONS Symbols are used throughout this manual to depict hazards, avoidance measures and indicate when information is required. Refer to the following table to familiarize yourself with these symbols.
-
Page 27: Models Description
OPTIMUM 8 — OPTIMUM 1931 E — Familiarization 2 — Models description Regulations Models ANSI and CSA standards OPTIMUM 1931 E CE, AS and EAC standards OPTIMUM 8 4000415480 E 01.18 USA / GB…
-
Page 28: Primary Machine Components
OPTIMUM 8 — OPTIMUM 1931 E — Familiarization 3 — Primary machine components 3.1 — AYOUT O P T IM U M 8 — O P T I M U M 1 9 3 1 E C142 C171 C168 C20 C2 C78 C58…
-
Page 29: Maintenance Support
OPTIMUM 8 — OPTIMUM 1931 E — Familiarization Marking Description Marking Description Chassis Platform access ladder Front drive wheels Compartment locking latch Platform Sliding guardrail Platform control box Extension deck lock pin Tie-down (and/or forklift loading) Scissors Ground control box + Universal plug…
-
Page 30: Extension Deck
OPTIMUM 8 — OPTIMUM 1931 E — Familiarization 3.3 — XTENSION DECK N.B.-:-D O NOT LOAD THE EXTENSION DECK FOR EASE OF MANOEUVRING Ensure that gate or sliding bar is in it’s proper closed position. Perform the extending and retracting operations of the extension deck on flat, horizontal ground.
-
Page 31: Ground Control Box
OPTIMUM 8 — OPTIMUM 1931 E — Familiarization 3.4 — ROUND CONTROL BOX 3.4.1 — Layout Ge nera l vie w ACTIV’ Screen Controls and indicators Marking Description Function Pulled out : Ground control box energized E-stop button Pushed in : De-energizes control system…
-
Page 32: Haulotte Activ’screen
OPTIMUM 8 — OPTIMUM 1931 E — Familiarization 3.4.2 — HAULOTTE Activ’Screen Upon starting and during operation of the machine, the LCD screen «Activ’Screen» located on the ground control box displays in real time the machine operating status. H AU L O T T E Ac t i v ‘ S c ree n…
-
Page 33: Lcd Screen
OPTIMUM 8 — OPTIMUM 1931 E — Familiarization 3.4.2.1 — LCD screen At startup : At startup with the ground or platform controls selected; system initiates a self check : • Bar gets filled up. • Home screen comes on with status icon of the machine — okay to proceed functioning the controls.
-
Page 34
OPTIMUM 8 — OPTIMUM 1931 E — Familiarization • After pressing on Symbol Description Software part number Software version + Screen software version + Screen version Screen identification + Screen software version Machine serial number displayed • After again pressing on •… -
Page 35
OPTIMUM 8 — OPTIMUM 1931 E — Familiarization Alarm status : Alarm status displayed as applicable — samples shown below Tilt : Overload : Low battery : 4000415480 E 01.18 USA / GB… -
Page 36
OPTIMUM 8 — OPTIMUM 1931 E — Familiarization Present fault : Platform control box E-stop button pressed in (de-energized) : 4000415480 E 01.18 USA / GB… -
Page 37: Platform Control Box
OPTIMUM 8 — OPTIMUM 1931 E — Familiarization 3.5 — LATFORM CONTROL BOX 3.5.1 — Layout Ge nera l vie w Controls and indicators Marking Item Description Function HL800 Tilt indicator Machine on excessive slope HL802 Overload indicator Platform overloaded…
-
Page 38
OPTIMUM 8 — OPTIMUM 1931 E — Familiarization Marking Item Description Function 100% Battery charged HL904 Battery charging indicator Flashing : Batteries have 40 % charge left Constantly on : Batteries have only 20 % charge left Move forward : Forward drive or platform raising… -
Page 39: Performance Specifications
OPTIMUM 8 — OPTIMUM 1931 E — Familiarization 4 — Performance Specifications 4.1 — ECHNICAL CHARACTERISTICS Use the table to select the right Haulotte machine for the job. CE, AS and EAC standards Machine OPTIMUM 8 Characteristics — Dimensions Imp.
-
Page 40
OPTIMUM 8 — OPTIMUM 1931 E — Familiarization ANSI and CSA standards Machine OPTIMUM 1931 E Characteristics — Dimensions Imp. Maximum working height 7,77 m 25 ft 6 in Maximum platform height 5,77 m 18 ft 11 in Total weight… -
Page 41: Working Area / Range Of Motion
OPTIMUM 8 — OPTIMUM 1931 E — Familiarization 4.2 — ORKING AREA ANGE OF MOTION O P T IM U M 8 — O P T I M U M 1 9 3 1 E 4000415480 E 01.18 USA / GB…
-
Page 42
OPTIMUM 8 — OPTIMUM 1931 E — Familiarization Notes 4000415480 E 01.18 USA / GB… -
Page 43: Decals And Markings Locations
OPTIMUM 8 — OPTIMUM 1931 E — Familiarization 5 — Decals and markings locations C E a n d AS s t a n d a r d s — O P T I M U M 8 — 1 / 2 4000415480 E 01.18…
-
Page 44
OPTIMUM 8 — OPTIMUM 1931 E — Familiarization C E a n d AS s t a n d a r d s — O P T I M U M 8 — 2 / 2 4000415480 E 01.18 USA / GB… -
Page 45
OPTIMUM 8 — OPTIMUM 1931 E — Familiarization CE and AS standards — OPTIMUM 8 Marking Color Description Quantity OPTIMUM 8 Height of the floor and load 4000422970 Maximum Pressure per Tire — Floor Blue 4000417260 Loading Other Commercial name — Bright machine… -
Page 46
OPTIMUM 8 — OPTIMUM 1931 E — Familiarization Marking Color Description Quantity OPTIMUM 8 Blue Anchorage point — Traction 4000027310 Risk of electrocution — Water 4000025130 projection Risk of crushing — Platform 4000244340 Green Emergency lowering location 4000227200 For CE standard only : 4000273940… -
Page 47
OPTIMUM 8 — OPTIMUM 1931 E — Familiarization EAC stan dard — OPTIMUM 8 — 1/2 4000415480 E 01.18 USA / GB… -
Page 48
OPTIMUM 8 — OPTIMUM 1931 E — Familiarization EAC stan dard — OPTIMUM 8 — 2/2 4000415480 E 01.18 USA / GB… -
Page 49
OPTIMUM 8 — OPTIMUM 1931 E — Familiarization EAC standard Marking Color Description Quantity OPTIMUM 8 Height of the floor and load 4000426450 Maximum Pressure per Tire — Floor Blue 4000417260 Loading Other Commercial name — Bright machine 3078146730 Other… -
Page 50
OPTIMUM 8 — OPTIMUM 1931 E — Familiarization Marking Color Description Quantity OPTIMUM 8 Yellow Fire Hazard 307P226800 Electrical danger 307P226810 Yellow Corrosion hazard 307P226830 Yellow Danger unstable side 307P226930 Other Tamper-proof 307P227450 Blue Caution helmet compulsory 307P226680 Blue Obligatory routing… -
Page 51
OPTIMUM 8 — OPTIMUM 1931 E — Familiarization A N SI an d C SA st a nda rd s — O P TI M U M 1 9 31 E — 1 /2 4000415480 E 01.18 USA / GB… -
Page 52
OPTIMUM 8 — OPTIMUM 1931 E — Familiarization A N SI an d C SA st a nda rd s — O P TI M U M 1 9 31 E — 2 /2 4000415480 E 01.18 USA / GB… -
Page 53
Other Commercial name — Dark machine 4000504020 Decal HAULOTTE® — 500 x 100 — Other 307P217080 Bright machine Decal HAULOTTE® — 500 x 100 — Dark Other 307P224740 machine Decal HAULOTTE® — 500 x 100 — Red Other 307P220360 machine… -
Page 54
OPTIMUM 8 — OPTIMUM 1931 E — Familiarization Marking Color Description Quantity OPTIMUM 1931 E In english : 4000025030 Orange Hand crushing hazard — Battery In french : 4000068120 In spanish : 4000086550 Other Transport height 4000417380 Other Folding guardrails… -
Page 55: Pre-Operation Inspection
OPTIMUM 8 — OPTIMUM 1931 E — Pre-operation inspection Pre-operation inspection 1 — Recommendations The owner, the site manager, the supervisor and the operator are all responsible to ensure the machine is fit for the work it is to perform; i.e. that the machine is suitable to carry out the work in complete safety and in compliance with this Operator’s Manual.
-
Page 56: Working Area Assessment
OPTIMUM 8 — OPTIMUM 1931 E — Pre-operation inspection 2 — Working area assessment To ensure safety during operation, the following should be considered : • Segregate other site traffic (delivery vehicles, dumpers, etc) from the work area. • Check the work area for localized features, e.g. manholes, service ducts, potholes, etc.
-
Page 57: Inspection And Functional Test
Tighten Check levels Systematic replacement Visual inspection with small disassembly or movement Proof tests : Need HAULOTTE Services® authorization. For countries where needed to reach the part. machines are not subject to controlled periodic maintenance. Replacement is necessary. 4000415480 E 01.18…
-
Page 58
OPTIMUM 8 — OPTIMUM 1931 E — Pre-operation inspection Daily inspection Visual inspection without disassembly Check level To check by test Corrected applicable Manuals and displays. Clean or replace if necessary. Presence, cleanliness and legibility of the manufacturer’s plate Presence, cleanliness and legibility of operator’s and maintenance… -
Page 59
OPTIMUM 8 — OPTIMUM 1931 E — Pre-operation inspection Entry bar/gate closes automatically and is not prevented from closing. Folding guard-rail (if fitted) is fixed securely in position Extending structure (scissors) Absence of cracks, broken parts, damaged paint No deterioration and visible damage… -
Page 60
OPTIMUM 8 — OPTIMUM 1931 E — Pre-operation inspection Energy storage : Batteries Battery electrolyte level No screws missing / loose parts Presence and good condition of the batteries: terminations and clamps, electrolyte level … Electric cables No torn or split wire sheaths… -
Page 61: Safety Functional Checks
OPTIMUM 8 — OPTIMUM 1931 E — Pre-operation inspection 4 — Safety functional checks To protect the user and the machine, safety systems prevent the movement of the machine beyond its operating limits. These safety systems when activated immobilize the machine and prevent further movement.
-
Page 62: Activation Of Controls
OPTIMUM 8 — OPTIMUM 1931 E — Pre-operation inspection 4.2 — CTIVATION OF CONTROLS The deadman foot pedal (enable switch) must be activated to allow any movement. The «Enable Switch» system depends on the machine configuration and will consist of one of the following : •…
-
Page 63: Slope Warning Device
OPTIMUM 8 — OPTIMUM 1931 E — Pre-operation inspection 4.5 — LOPE WARNING DEVICE From each control box, a buzzer alerts the operator that the machine is not folded/stowed and is positioned on a slope exceeding the slope allowed. N.B.-:-T…
-
Page 64: Operating Temperature (For Eac Standard Only)
OPTIMUM 8 — OPTIMUM 1931 E — Pre-operation inspection 4.8 — PERATING TEMPERATURE STANDARD ONLY Hydraulic energy to perform machine movements is provided by an electric motor driven hydraulic pump.The operating speed of the pump is governed by a speed regulator. If the temperature limits are reached, an audible alarm alerts the operator.
-
Page 65: On-Board Charger
OPTIMUM 8 — OPTIMUM 1931 E — Pre-operation inspection 4.12 — O BOARD CHARGER Battery charging starts as soon as an external supply is connected to the battery charger. When the battery pack is being charged with an external power supply, the machine’s electric system is automatically deactivated.
-
Page 66
OPTIMUM 8 — OPTIMUM 1931 E — Pre-operation inspection Notes 4000415480 E 01.18 USA / GB… -
Page 67: Operation Instructions
OPTIMUM 8 — OPTIMUM 1931 E — Operation instructions Operation instructions 1 — Operation 1.1 — NTRODUCTION Only trained and authorized personnel shall be permitted to operate this aerial work platform. Prior to operation : • Read, understand and obey all instructions and safety precautions in this manual and attached to the aerial work platform.
-
Page 68: Operation From The Ground Control Box
OPTIMUM 8 — OPTIMUM 1931 E — Operation instructions 1.2 — PERATION FROM THE GROUND CONTROL BOX • Turning «ON» and «OFF» of the machine is performed with selector key switch (92). • Activation of a desired control box is achieved by turning the control box energizing selector switch ( 92 ) to the desired position.
-
Page 69: Operation From The Platform Control Box
OPTIMUM 8 — OPTIMUM 1931 E — Operation instructions 1.3 — PERATION FROM THE PLATFORM CONTROL BOX • The platform control box can only be used if : • The E-stop buttons on both ground and platform control boxes are not pressed in (Energized).
-
Page 70: Ground Control Box
OPTIMUM 8 — OPTIMUM 1931 E — Operation instructions 2 — Ground control box 2.1 — O START AND STOP THE MACHINE • Ensure that the E-Stop buttons ( 15 ) and ( 46 ) at the ground and platform control boxes are pulled out.
-
Page 71: Additional Controls From The Ground Control Box
OPTIMUM 8 — OPTIMUM 1931 E — Operation instructions Pu l l T — h a n d le f o r em erge nc y l ow er in g N.B.-:-P ULLING ON TO THE ANDLE IMMEDIATELY ACTIVATES THE EMERGENCY LOWERING OF THE PLATFORM ALWAYS keep personnel and obstructions clear of the aerial work platform that might block the lowering.
-
Page 72: Platform Control Box
OPTIMUM 8 — OPTIMUM 1931 E — Operation instructions 3 — Platform control box 3.1 — O START AND STOP THE MACHINE To start the machine : At the ground control box : • The E-stop button on the ground control box must be in ON position (pulled out / activated).
-
Page 73: Drive And Steer Control
OPTIMUM 8 — OPTIMUM 1931 E — Operation instructions 3.2 — RIVE AND STEER CONTROL To control the direction and drive : • Move the 2-position selector ( 112 ) to the right. • The drive indicator ( 111 ) lights up.
-
Page 74: Movement Control
OPTIMUM 8 — OPTIMUM 1931 E — Operation instructions 3.3 — OVEMENT CONTROL To operate raising/lowering function, move 2 position selector switch ( 112 ) to the left. Activate raising/lowering selector ( 110 ). Simultaneously operate joystick ( 108 ) with joystick trigger (Enable switch ( 123 )) pressed in and maintained.
-
Page 75: Emergency Procedure
HAULOTTE® provides a ground control emergency system that should be used to safely bring the operator into such a position that appropriate medical attention could be provided.
-
Page 76: Transportation
OPTIMUM 8 — OPTIMUM 1931 E — Operation instructions 5 — Transportation 5.1 — UTTING IN TRANSPORT POSITION During loading, ensure that : • The loading ramp can support the machine weight. • The loading ramp is correctly attached to transport vehicle.
-
Page 77: Machine Layout
OPTIMUM 8 — OPTIMUM 1931 E — Operation instructions 5.2 — ACHINE LAYOUT 5.3 — NLOADING Before unloading, check that the machine is in good condition. • Remove the tie downs. • At ground control box turn control box activation switch ( 92 ) to the left to energize platform box.
-
Page 78: Towing
OPTIMUM 8 — OPTIMUM 1931 E — Operation instructions 5.4 — OWING In the event of a machine breakdown, the machine can be towed a short distance to load it onto a transport vehicle : • Ensure that no one is in the platform during towing.
-
Page 79: Free Wheel Mode
OPTIMUM 8 — OPTIMUM 1931 E — Operation instructions 5.4.1 — Free wheel mode To tow a broken-down machine, release brake. Perform these operations on flat, horizontal ground. Failing that, block the wheels to immobilize the machine. During brake release operation, the machine is in free wheel mode and the brake system no longer functions.
-
Page 80: Storage
OPTIMUM 8 — OPTIMUM 1931 E — Operation instructions 5.5 — TORAGE The machine can be stored in a designated area when not in use. If it has been stored for longer than 3 months without use then a periodic inspection must be conducted.
-
Page 81: Loading By Ramp
OPTIMUM 8 — OPTIMUM 1931 E — Operation instructions 5.6 — OADING BY RAMP To avoid any risk of sliding during loading, ensure that : • The loading ramp can bear the load. • The loading ramp is correctly attached.
-
Page 82: Lifting Operation
OPTIMUM 8 — OPTIMUM 1931 E — Operation instructions 5.8 — IFTING OPERATION During loading / unloading operation, if it becomes necessary to lift the machine using an overhead crane, it is important to respect the following : • Put the machine in stowed position (Extension retracted).
-
Page 83: Loading And Unloading With Forklift
OPTIMUM 8 — OPTIMUM 1931 E — Operation instructions 5.9 — OADING AND UNLOADING WITH FORKLIFT • Lower the platform. The machine must be in the fully stowed transport position. • Ensure that the machine controls are in the OFF position.
-
Page 84: Hydraulic Oil
OPTIMUM 8 — OPTIMUM 1931 E — Operation instructions 6 — Hydraulic oil External environmental conditions can reduce performance of the machine if the hydraulic oil temperature does not reach its optimum range. It is recommended to use the hydraulic oil according to weather condition. Refer to the table below.
-
Page 85: Battery Care And Maintenance
OPTIMUM 8 — OPTIMUM 1931 E — Operation instructions 7 — Battery care and maintenance 7.1 — ATTERY CHARGING Recharge aerial work platform batteries after each 8 hour work shift or as needed. When the aerial work platform is not in use, batteries should be recharged at least once per week. Under normal circumstances, battery recharge should take approximately 8-10 hours.
-
Page 86
• The charger settings are adjusted in the factory using its own cable. If the cable needs changing, the HAULOTTE® factory must be contacted to obtain authorisation. How to charge the batteries ? : Before charging the batteries, switch the machine off. -
Page 87
OPTIMUM 8 — OPTIMUM 1931 E — Operation instructions How to maintain battery autonomy ? : • Do not charge the batteries in cold temperatures. • The battery life is reduced when the machine is used in cold temperatures (< 0 °C(32 °F) ). -
Page 88
OPTIMUM 8 — OPTIMUM 1931 E — Operation instructions Do not disconnect any output leads or connectors between the batteries and the charger when the charger is on. To stop a charge in progress, always unplug the extension cord from the AC power source. -
Page 89
OPTIMUM 8 — OPTIMUM 1931 E — Operation instructions Notes 4000415480 E 01.18 USA / GB… -
Page 90: General Specifications
OPTIMUM 8 — OPTIMUM 1931 E — General Specifications General Specifications 1 — Machine dimensions S t o w e d / T r a n s p o r t p o s i t i o n : C o n f i g u r a ti o n t h a t t a k e s t h e m i n i m um f l o o r s p a c e n e c e s s a r y f o r s t o ra g e a n d / o r d e l i v e r y o f t h e m a c h i n e — A c c e s s p os i t i o n .
-
Page 91
OPTIMUM 8 — OPTIMUM 1931 E — General Specifications CE, AS and EAC standards Machine OPTIMUM 8 Marking Specifications — Dimensions Imp. Overall length of machine 1,89 m 6 ft 2 in Overall width of machine 0,79 m 2 ft 7 in… -
Page 92: Major Component Masses
OPTIMUM 8 — OPTIMUM 1931 E — General Specifications 2 — Major component masses OPTIMUM 8 OPTIMUM 1931 E Specifications Imp. Frame assembly mass 948 kg 2090 lbs Scissors assembly mass 430 kg 950 lbs Platform assembly mass 125 kg…
-
Page 93: Wheel/Tire Assembly
25% Tires and rims are critical components for the stability of the machine. For safety reasons : • Use only HAULOTTE® spare parts according to the technical characteristics of the machine. Refer to the spare parts catalog. • Do not replace factory-installed tires with tires of different specifications or ply rating.
-
Page 94: Procedure Of Replacement
OPTIMUM 8 — OPTIMUM 1931 E — General Specifications 4.2.1 — Procedure of replacement • Slightly lift the machine using the lifting points of the frame. • Place a wooden spacer under the frame to support the machine after lifting off the ground.
-
Page 95
OPTIMUM 8 — OPTIMUM 1931 E — General Specifications Rea ssembly of the wh eel Marking Description Wheel Motor shaft Washer • Use a new locking washer MB5 (4000505880). 4000415480 E 01.18 USA / GB… -
Page 96
OPTIMUM 8 — OPTIMUM 1931 E — General Specifications • Use a new nut KM5 (2454131050). Check that the shaft key is well positioned in the motor shaft. Mount the wheel on the motor shaft. Install the washer first then the nut. -
Page 97: Options
OPTIMUM 8 — OPTIMUM 1931 E — General Specifications 5 — Options 5.1 — LUMBER S KIT 5.1.1 — Description This attachment is an assembly designed to transport pipes and tubes. The assembly comprises of 2 cradles securely attached to the platform. The load (material) should be placed in both the cradles and secured with a strap (not supplied).
-
Page 98: Pre-Operation Inspection
OPTIMUM 8 — OPTIMUM 1931 E — General Specifications 5.1.4 — Pre-operation inspection • Check that the cradle has no cracks or other damage. • Check that the cradle is correctly installed and secured to the platform(Ensure fastening screws are tightened and pins correctly positioned).
-
Page 99: Disassembly — Assembly
OPTIMUM 8 — OPTIMUM 1931 E — General Specifications 5.1.6 — Disassembly — Assembly O P T I M U M 8 / 1 9 3 1 E Marking Description 1 — 1A — 1B — 1C Carrier Spring washer…
-
Page 100: Specific Decals
OPTIMUM 8 — OPTIMUM 1931 E — General Specifications 5.1.7 — Specific decals L o cat i on o f t h e d ec al s OPTIMUM 8 / 1931E Marking Description Quantity Part number In english — ANSI : 4000426070…
-
Page 101: Folding Guardrails
OPTIMUM 8 — OPTIMUM 1931 E — General Specifications 5.2 — OLDING GUARDRAILS 5.2.1 — Description Folding guardrails system is designed to allow guardrails to be lowered to reduce the overall height of the machine. This system facilitates moving the machine through low height doorways/passages.
-
Page 102
OPTIMUM 8 — OPTIMUM 1931 E — General Specifications Remove platform control box from its designated position and place it on platform floor Remove the 2 pins ( G2 ) from the platform front guardrails. Tip element ( 2 ) inwards onto the platform floor. -
Page 103
OPTIMUM 8 — OPTIMUM 1931 E — General Specifications Remove the 2 pins ( G5 ). Lift and tip inwards and down until it contacts the element ( 6 ). Remove the pin ( G6 ). Lift and tip left hand main railing inwards until it contacts the element ( 3 ). -
Page 104: Specific Decals
OPTIMUM 8 — OPTIMUM 1931 E — General Specifications 5.2.4 — Specific decals Marking Description Quantity Part number Explanation work and 4000557230 transport positions 5.2.5 — Raising guardrails to working position To raise the folded guardrails to the vertical working position : •…
-
Page 105: Panel Carrier
OPTIMUM 8 — OPTIMUM 1931 E — General Specifications 5.3 — ANEL CARRIER 5.3.1 — Description This attachment is an assembly designed to transport panels. The assembly comprises of a tray that extends along the length of the floor. The panel(s) should be placed in the tray and secured to the guard rail with a strap (not supplied).
-
Page 106: Pre-Operation Inspection
OPTIMUM 8 — OPTIMUM 1931 E — General Specifications 5.3.4 — Pre-operation inspection • Check that the cradle has no cracks or other damage. • Check that the cradle is correctly installed and secured to the platform (Ensure fastening screws are tightened and pins correctly positioned).
-
Page 107: Disassembly — Assembly
OPTIMUM 8 — OPTIMUM 1931 E — General Specifications 5.3.6 — Disassembly — Assembly O P T I M U M 8 — O P T I M U M 1 9 3 1 E 4000415480 E 01.18 USA / GB…
-
Page 108
OPTIMUM 8 — OPTIMUM 1931 E — General Specifications 4000415480 E 01.18 USA / GB… -
Page 109
OPTIMUM 8 — OPTIMUM 1931 E — General Specifications Marking Description Sheet metal support Sheet metal support Stop Screw Rivet Protection pad Screw Bumper Clamp Position the sheet metal support ( 2 ) against the sheet metal support ( 1 ). Tighten the screws ( 4 ) and the nuts ( 5 ) to the recommended torque. -
Page 110: Specific Decals
OPTIMUM 8 — OPTIMUM 1931 E — General Specifications 5.3.7 — Specific decals L o cat i on o f t h e d ec al s OPTIMUM 8 — OPTIMUM 1931E Marking Description Quantity Part number In french : 4000676050…
-
Page 111: Swing Gate
OPTIMUM 8 — OPTIMUM 1931 E — General Specifications 5.4 — WING GATE 5.4.1 — Description «SWING GATE» consists of a laterally mounted pivoting ½ gate with closing latch, which enables a better access to platform. Spring loaded hinges and a latching mechanism allows the gate to swing inwards only.
-
Page 112
OPTIMUM 8 — OPTIMUM 1931 E — General Specifications Notes 4000415480 E 01.18 USA / GB… -
Page 113: General
HAULOTTE Services® technicians are specially trained to carry out extensive repairs, interventions or adjustments on the safety systems or elements of HAULOTTE® machines. They carry genuine HAULOTTE spare parts and tools as required, and also provide fully documented reports on all work completed.
-
Page 114: Maintenance Schedule
OPTIMUM 8 — OPTIMUM 1931 E — Maintenance 2 — Maintenance Schedule This section provides the necessary information needed to place the machine in safe operation. According to the current regulations, this machine has been designed for a minimum service life of 10 years.
-
Page 115: Inspection Program
Local standards and regulations may require more frequent inspections. HAULOTTE® requires Reinforced and Major Inspections to be carried out on the product to extend its service life. Inspections must be carried out by a competent company or person.
-
Page 116: Periodic Inspection
This evaluation must occur at a frequency of 5000 hours or every 5 years. This inspection is the responsibility of the owner, and it must be conducted by a HAULOTTE Services® technician or by a competent company or person.
-
Page 117: Repairs And Adjustments
Any unauthorised repairs/modifications will void HAULOTTE® warranty. With the utmost care to ensure enhanced reliability and greater safety of the HAULOTTE® products, it is pertinent that when a «Service or Safety Bulletin» is issued, action is taken immediately. Once the bulletin has been addressed, make sure that the completed form is submitted to HAULOTTE®.
-
Page 118
OPTIMUM 8 — OPTIMUM 1931 E — Maintenance Notes 4000415480 E 01.18 USA / GB… -
Page 119: Other Information
The owner or rental company must ensure that the defect covered by the HAULOTTE® warranty is reported to and acknowledged by the HAULOTTE® subsidiary as rapidly as possible or must report the defect in writing.
-
Page 120: Conditions Of Warranty
• Use of spare parts that are not HAULOTTE® originals. • If elements or products other than those recommended by the manufacturer are used. • If the HAULOTTE® name, serial numbers or identification marks are removed or altered. • After an unreasonably long delay before reporting a manufacturing problem.
-
Page 121
• Hydraulic and fuel circuit contamination : Every possible precaution is taken to ensure that fuel and hydraulic liquid delivered is clean. HAULOTTE® will not accept any claims concerning cleaning of the fuel circuit, filter, injection pump or any other equipment in direct contact with fuel or lubricants. -
Page 122: Subsidiary Contact Information
OPTIMUM 8 — OPTIMUM 1931 E — Other information 2 — Subsidiary contact information HAULOTTE FRANCE HAULOTTE INDIA PARC DES LUMIERES HAULOTTE ITALIA Unit No. 1205, 12th foor,Bhumiraj Costarica, 601 RUE NICEPHORE NIEPCE VIA LOMBARDIA 15 Plot No. 1&2, Sector 18,…
-
Page 123: California Warning
OPTIMUM 8 — OPTIMUM 1931 E — Other information 2.1 — ALIFORNIA WARNING F o r elec t ri c ( b at t ery o pera te d) ma ch i ne s CALIFORNIA PROPOSITION 65 BATTERY WARNING Battery posts, terminals and related accessories…
-
Page 124
OPTIMUM 8 — OPTIMUM 1931 E — Other information Notes 4000415480 E 01.18 USA / GB…
OPTIMUM 8 — OPTIMUM 1931 E
A
— Foreword
Section E : The adjustments
It will include the following elements :
• The way to use/connect the console of diagnostic.
• The list of main menus and its architecture.
• The list of alarms with their explanation.
• Any calibration/settings required for the model of the machine.
• The way to check/adjust the pressures for the model.
Section F : Repair guide
It will include the following elements :
• A summary of every function and items to be checked in case of breakdowns.
Section G : Summary of the versions
It will include the following elements :
• A summary of the different versions made per model.
• Any schematics (electric /hydraulic) linked to the models studied.
• Coloured schematics (electric/hydraulic) per function.
• List of main harnesses in the models studied.
REVISION EDITION
00
10.16
Creation
Add Failures codes, new
schematics, new load
01
05.17
management system
calibration process
8
4000595920
CREATED
SUBJECT
BY
ASA
ASA
E 05.17
VALIDATED
MODIFIED
BY
BY
MGD
ASA
MGD
ASA
TRANSLATED
LANGUAGE
BY
USA / EN
ITC
USA / EN
ITC
USA /
Operator's manual
OPTIMUM 8 - OPTIMUM 1931 E
 4000415480                   E 01.18                   USA / GB
Operator's manual
OPTIMUM 8 - OPTIMUM 1931 E
OPTIMUM 8 - OPTIMUM 1931 E
USA


2  4000415480  E 01.18  USA / GB
OPTIMUM 8 - OPTIMUM 1931 E


3
CONTENTS
Operator's manual
CONTENTS
A
FOREWORD
1 - User responsibility . . . . . . . . . . . . . . . . . . . . . . .
8
 1.1 -  Owner's responsibility. . . . . . . . . . . . . . . . . . . . . . . . . . . . . . . . . . . . . . . . . . . 8
 1.2 -  Employer's responsibility . . . . . . . . . . . . . . . . . . . . . . . . . . . . . . . . . . . . . . . . 8
 1.3 -  Trainer's responsibility. . . . . . . . . . . . . . . . . . . . . . . . . . . . . . . . . . . . . . . . . . . 8
 1.4 -  Operator's responsibility. . . . . . . . . . . . . . . . . . . . . . . . . . . . . . . . . . . . . . . . . 9
2 - Safety. . . . . . . . . . . . . . . . . . . . . . . . . . . . . . . . .
10
 2.1 -  Safety instructions . . . . . . . . . . . . . . . . . . . . . . . . . . . . . . . . . . . . . . . . . . . . . 10
 2.1.1 -  Misuse Hazards . . . . . . . . . . . . . . . . . . . . . . . . . . . . . . . . . . . . .  10
 2.1.2 -  Falling Hazards  . . . . . . . . . . . . . . . . . . . . . . . . . . . . . . . . . . . . .  11
 2.1.3 -  Overturning / Tip-over Hazards  . . . . . . . . . . . . . . . . . . . . . . . . .  12
 2.1.4 -  Electrocution Hazards  . . . . . . . . . . . . . . . . . . . . . . . . . . . . . . . .  15
 2.1.5 -  Explosion / Fire Hazards  . . . . . . . . . . . . . . . . . . . . . . . . . . . . . .  16
 2.1.6 -  Crushing / Collision Hazards  . . . . . . . . . . . . . . . . . . . . . . . . . . .  16
 2.1.7 -  Uncontrolled movement Hazards . . . . . . . . . . . . . . . . . . . . . . . .  18
3 - Safety inquiries. . . . . . . . . . . . . . . . . . . . . . . . .
18
4 - Incident notification . . . . . . . . . . . . . . . . . . . . .
19
5 - Compliance . . . . . . . . . . . . . . . . . . . . . . . . . . . .
20
 5.1 -  Product information. . . . . . . . . . . . . . . . . . . . . . . . . . . . . . . . . . . . . . . . . . . . 20
 5.1.1 -  Change of Ownership Notification . . . . . . . . . . . . . . . . . . . . . . .  20
 5.1.2 -  Owner information update form . . . . . . . . . . . . . . . . . . . . . . . . .  21
 5.2 -  Product specifications. . . . . . . . . . . . . . . . . . . . . . . . . . . . . . . . . . . . . . . . . . 22
B
FAMILIARIZATION
1 - General safety. . . . . . . . . . . . . . . . . . . . . . . . . .
23
 1.1 -  Intended use. . . . . . . . . . . . . . . . . . . . . . . . . . . . . . . . . . . . . . . . . . . . . . . . . . 23
 1.2 -  Decal content . . . . . . . . . . . . . . . . . . . . . . . . . . . . . . . . . . . . . . . . . . . . . . . . . 24
 1.3 -  Symbols and colors  . . . . . . . . . . . . . . . . . . . . . . . . . . . . . . . . . . . . . . . . . . . 25
 1.4 -  Level of severity . . . . . . . . . . . . . . . . . . . . . . . . . . . . . . . . . . . . . . . . . . . . . . . 25
 1.5 -  Symbols legend and definitions . . . . . . . . . . . . . . . . . . . . . . . . . . . . . . . . . 26
2 - Models description. . . . . . . . . . . . . . . . . . . . . .
27
3 - Primary machine components  . . . . . . . . . . . .
28
 3.1 -  Layout. . . . . . . . . . . . . . . . . . . . . . . . . . . . . . . . . . . . . . . . . . . . . . . . . . . . . . . . 28
 3.2 -  Maintenance support . . . . . . . . . . . . . . . . . . . . . . . . . . . . . . . . . . . . . . . . . . 29
 3.3 -  Extension deck. . . . . . . . . . . . . . . . . . . . . . . . . . . . . . . . . . . . . . . . . . . . . . . . 30
 3.4 -  Ground control box . . . . . . . . . . . . . . . . . . . . . . . . . . . . . . . . . . . . . . . . . . . . 31
 3.4.1 -  Layout  . . . . . . . . . . . . . . . . . . . . . . . . . . . . . . . . . . . . . . . . . . . .  31
 3.4.2 -  HAULOTTE Activ'Screen   . . . . . . . . . . . . . . . . . . . . . . . . . . . . .  32
 3.4.2.1 -  LCD screen  . . . . . . . . . . . . . . . . . . . . . . . . . . . . . . . . . . . . . . . .  33
 3.5 -  Platform control box  . . . . . . . . . . . . . . . . . . . . . . . . . . . . . . . . . . . . . . . . . . . 37
 3.5.1 -  Layout  . . . . . . . . . . . . . . . . . . . . . . . . . . . . . . . . . . . . . . . . . . . .  37
4 - Performance Specifications  . . . . . . . . . . . . . .
39
 4.1 -  Technical characteristics . . . . . . . . . . . . . . . . . . . . . . . . . . . . . . . . . . . . . . . 39
 4.2 -  Working area / Range of motion . . . . . . . . . . . . . . . . . . . . . . . . . . . . . . . . 41
5 - Decals and markings locations. . . . . . . . . . . .
43


4
Operator's manual
C
PRE-OPERATION INSPECTION
1 - Recommendations . . . . . . . . . . . . . . . . . . . . . .
55
2 - Working area assessment . . . . . . . . . . . . . . . .
56
3 - Inspection and Functional test . . . . . . . . . . . .
57
 3.1 -  Daily inspection . . . . . . . . . . . . . . . . . . . . . . . . . . . . . . . . . . . . . . . . . . . . . . . 57
4 - Safety functional checks . . . . . . . . . . . . . . . . .
61
 4.1 -  E-Stop button check . . . . . . . . . . . . . . . . . . . . . . . . . . . . . . . . . . . . . . . . . . . 61
 4.2 -  Activation of controls . . . . . . . . . . . . . . . . . . . . . . . . . . . . . . . . . . . . . . . . . . . 62
 4.3 -  Fault detector . . . . . . . . . . . . . . . . . . . . . . . . . . . . . . . . . . . . . . . . . . . . . . . . . 62
 4.3.1 -  Buzzers test . . . . . . . . . . . . . . . . . . . . . . . . . . . . . . . . . . . . . . . .  62
 4.4 -  Overload sensing system (if fitted). . . . . . . . . . . . . . . . . . . . . . . . . . . . . . . 62
 4.5 -  Slope warning device . . . . . . . . . . . . . . . . . . . . . . . . . . . . . . . . . . . . . . . . . . 63
 4.6 -  Travel speed limitation . . . . . . . . . . . . . . . . . . . . . . . . . . . . . . . . . . . . . . . . . 63
 4.7 -  Electronic variable speed drive. . . . . . . . . . . . . . . . . . . . . . . . . . . . . . . . . . 63
 4.8 -  Operating temperature (For  EAC standard only) . . . . . . . . . . . . . . . . . 64
 4.9 -  Machine braking . . . . . . . . . . . . . . . . . . . . . . . . . . . . . . . . . . . . . . . . . . . . . . 64
 4.10 -  Wheel motor brake release. . . . . . . . . . . . . . . . . . . . . . . . . . . . . . . . . . . . . 64
 4.11 -  Pothole protection system. . . . . . . . . . . . . . . . . . . . . . . . . . . . . . . . . . . . . . 64
 4.12 -  On-board charger . . . . . . . . . . . . . . . . . . . . . . . . . . . . . . . . . . . . . . . . . . . . . 65
 4.12.1 -  Battery charge level . . . . . . . . . . . . . . . . . . . . . . . . . . . . . . . . . .  65
 4.13 -  Anti-crush system when lowering . . . . . . . . . . . . . . . . . . . . . . . . . . . . . . . 65
D
OPERATION INSTRUCTIONS
1 - Operation. . . . . . . . . . . . . . . . . . . . . . . . . . . . . .
67
 1.1 -  Introduction . . . . . . . . . . . . . . . . . . . . . . . . . . . . . . . . . . . . . . . . . . . . . . . . . . . 67
 1.2 -  Operation from the ground control box. . . . . . . . . . . . . . . . . . . . . . . . . . . 68
 1.3 -  Operation from the platform control box. . . . . . . . . . . . . . . . . . . . . . . . . . 69
2 - Ground control box  . . . . . . . . . . . . . . . . . . . . .
70
 2.1 -  To start and stop the machine . . . . . . . . . . . . . . . . . . . . . . . . . . . . . . . . . . 70
 2.2 -  Movement control . . . . . . . . . . . . . . . . . . . . . . . . . . . . . . . . . . . . . . . . . . . . . 70
 2.3 -  Additional controls from the ground control box . . . . . . . . . . . . . . . . . . . 71
3 - Platform control box  . . . . . . . . . . . . . . . . . . . .
72
 3.1 -  To start and stop the machine . . . . . . . . . . . . . . . . . . . . . . . . . . . . . . . . . . 72
 3.2 -  Drive and steer control . . . . . . . . . . . . . . . . . . . . . . . . . . . . . . . . . . . . . . . . . 73
 3.3 -  Movement control . . . . . . . . . . . . . . . . . . . . . . . . . . . . . . . . . . . . . . . . . . . . . 74
4 - Emergency procedure . . . . . . . . . . . . . . . . . . .
75
 4.1 -  In case of power loss . . . . . . . . . . . . . . . . . . . . . . . . . . . . . . . . . . . . . . . . . . 75
 4.2 -  To rescue operator in platform . . . . . . . . . . . . . . . . . . . . . . . . . . . . . . . . . . 75


5
CONTENTS
Operator's manual
5 - Transportation  . . . . . . . . . . . . . . . . . . . . . . . . .
76
 5.1 -  Putting in transport position . . . . . . . . . . . . . . . . . . . . . . . . . . . . . . . . . . . . . 76
 5.2 -  Machine layout. . . . . . . . . . . . . . . . . . . . . . . . . . . . . . . . . . . . . . . . . . . . . . . . 77
 5.3 -  Unloading . . . . . . . . . . . . . . . . . . . . . . . . . . . . . . . . . . . . . . . . . . . . . . . . . . . . 77
 5.4 -  Towing. . . . . . . . . . . . . . . . . . . . . . . . . . . . . . . . . . . . . . . . . . . . . . . . . . . . . . . 78
 5.4.1 -  Free wheel mode . . . . . . . . . . . . . . . . . . . . . . . . . . . . . . . . . . . .  79
 5.5 -  Storage . . . . . . . . . . . . . . . . . . . . . . . . . . . . . . . . . . . . . . . . . . . . . . . . . . . . . . 80
 5.6 -  Loading by ramp . . . . . . . . . . . . . . . . . . . . . . . . . . . . . . . . . . . . . . . . . . . . . . 81
 5.7 -  Unloading by ramp . . . . . . . . . . . . . . . . . . . . . . . . . . . . . . . . . . . . . . . . . . . . 81
 5.8 -  Lifting operation . . . . . . . . . . . . . . . . . . . . . . . . . . . . . . . . . . . . . . . . . . . . . . . 82
 5.9 -  Loading and unloading with forklift. . . . . . . . . . . . . . . . . . . . . . . . . . . . . . . 83
6 - Hydraulic oil  . . . . . . . . . . . . . . . . . . . . . . . . . . .
84
7 - Battery care and maintenance  . . . . . . . . . . . .
85
 7.1 -  Battery charging. . . . . . . . . . . . . . . . . . . . . . . . . . . . . . . . . . . . . . . . . . . . . . . 85
E
GENERAL SPECIFICATIONS
1 - Machine dimensions  . . . . . . . . . . . . . . . . . . . .
90
2 - Major component masses . . . . . . . . . . . . . . . .
92
3 - Acoustics and vibrations. . . . . . . . . . . . . . . . .
92
4 - Wheel/Tire assembly  . . . . . . . . . . . . . . . . . . . .
93
 4.1 -  Technical specifications . . . . . . . . . . . . . . . . . . . . . . . . . . . . . . . . . . . . . . . . 93
 4.2 -  Inspection and maintenance. . . . . . . . . . . . . . . . . . . . . . . . . . . . . . . . . . . . 93
 4.2.1 -  Procedure of replacement  . . . . . . . . . . . . . . . . . . . . . . . . . . . . .  94
5 - Options  . . . . . . . . . . . . . . . . . . . . . . . . . . . . . . .
97
 5.1 -  Plumber's kit . . . . . . . . . . . . . . . . . . . . . . . . . . . . . . . . . . . . . . . . . . . . . . . . . . 97
 5.1.1 -  Description . . . . . . . . . . . . . . . . . . . . . . . . . . . . . . . . . . . . . . . . .  97
 5.1.2 -  Characteristics . . . . . . . . . . . . . . . . . . . . . . . . . . . . . . . . . . . . . .  97
 5.1.3 -  Safety precautions . . . . . . . . . . . . . . . . . . . . . . . . . . . . . . . . . . .  97
 5.1.4 -  Pre-operation inspection  . . . . . . . . . . . . . . . . . . . . . . . . . . . . . .  98
 5.1.5 -  Operation . . . . . . . . . . . . . . . . . . . . . . . . . . . . . . . . . . . . . . . . . .  98
 5.1.6 -  Disassembly - Assembly  . . . . . . . . . . . . . . . . . . . . . . . . . . . . . .  99
 5.1.7 -  Specific decals  . . . . . . . . . . . . . . . . . . . . . . . . . . . . . . . . . . . . 100
 5.2 -  Folding guardrails  . . . . . . . . . . . . . . . . . . . . . . . . . . . . . . . . . . . . . . . . . . . . 101
 5.2.1 -  Description . . . . . . . . . . . . . . . . . . . . . . . . . . . . . . . . . . . . . . . . 101
 5.2.2 -  Safety precautions . . . . . . . . . . . . . . . . . . . . . . . . . . . . . . . . . . 101
 5.2.3 -  Fold down operation. . . . . . . . . . . . . . . . . . . . . . . . . . . . . . . . . 101
 5.2.4 -  Specific decals  . . . . . . . . . . . . . . . . . . . . . . . . . . . . . . . . . . . . 104
 5.2.5 -  Raising guardrails to working position . . . . . . . . . . . . . . . . . . . 104
 5.3 -  Panel carrier . . . . . . . . . . . . . . . . . . . . . . . . . . . . . . . . . . . . . . . . . . . . . . . . . 105
 5.3.1 -  Description . . . . . . . . . . . . . . . . . . . . . . . . . . . . . . . . . . . . . . . . 105
 5.3.2 -  Characteristics . . . . . . . . . . . . . . . . . . . . . . . . . . . . . . . . . . . . .  105
 5.3.3 -  Safety precautions . . . . . . . . . . . . . . . . . . . . . . . . . . . . . . . . . . 105
 5.3.4 -  Pre-operation inspection  . . . . . . . . . . . . . . . . . . . . . . . . . . . . . 106
 5.3.5 -  Operation . . . . . . . . . . . . . . . . . . . . . . . . . . . . . . . . . . . . . . . . . 106
 5.3.6 -  Disassembly - Assembly  . . . . . . . . . . . . . . . . . . . . . . . . . . . . .  107
 5.3.7 -  Specific decals  . . . . . . . . . . . . . . . . . . . . . . . . . . . . . . . . . . . . 110
 5.4 -  Swing gate . . . . . . . . . . . . . . . . . . . . . . . . . . . . . . . . . . . . . . . . . . . . . . . . . . 111
 5.4.1 -  Description . . . . . . . . . . . . . . . . . . . . . . . . . . . . . . . . . . . . . . . . 111
 5.4.2 -  Characteristics . . . . . . . . . . . . . . . . . . . . . . . . . . . . . . . . . . . . .  111
 5.4.3 -  Safety precautions . . . . . . . . . . . . . . . . . . . . . . . . . . . . . . . . . . 111
 5.4.4 -  Pre-operation instructions  . . . . . . . . . . . . . . . . . . . . . . . . . . . . 111


6
Operator's manual
F
MAINTENANCE
1 - General  . . . . . . . . . . . . . . . . . . . . . . . . . . . . . .
113
2 - Maintenance Schedule. . . . . . . . . . . . . . . . . .
114
3 - Inspection program  . . . . . . . . . . . . . . . . . . . .
115
 3.1 -  General program. . . . . . . . . . . . . . . . . . . . . . . . . . . . . . . . . . . . . . . . . . . . . 115
 3.2 -  Daily inspection . . . . . . . . . . . . . . . . . . . . . . . . . . . . . . . . . . . . . . . . . . . . . . 115
 3.3 -  Periodic inspection. . . . . . . . . . . . . . . . . . . . . . . . . . . . . . . . . . . . . . . . . . . . 116
 3.4 -  Reinforced inspection. . . . . . . . . . . . . . . . . . . . . . . . . . . . . . . . . . . . . . . . . 116
 3.5 -  Major inspection. . . . . . . . . . . . . . . . . . . . . . . . . . . . . . . . . . . . . . . . . . . . . . 116
4 - Repairs and adjustments. . . . . . . . . . . . . . . .
117
G
OTHER INFORMATION
1 - Warranty disclosure . . . . . . . . . . . . . . . . . . . .
119
 1.1 -  After Sales Service . . . . . . . . . . . . . . . . . . . . . . . . . . . . . . . . . . . . . . . . . . . 119
 1.2 -  Manufacturer's warranty. . . . . . . . . . . . . . . . . . . . . . . . . . . . . . . . . . . . . . . 119
 1.2.1 -  Warranty acceptance . . . . . . . . . . . . . . . . . . . . . . . . . . . . . . . . 119
 1.2.2 -  Warranty period . . . . . . . . . . . . . . . . . . . . . . . . . . . . . . . . . . . . 119
 1.2.3 -  Procedure conditions . . . . . . . . . . . . . . . . . . . . . . . . . . . . . . . . 119
 1.2.4 -  Conditions of warranty . . . . . . . . . . . . . . . . . . . . . . . . . . . . . . . 120
2 - Subsidiary contact information. . . . . . . . . . .
122
 2.1 -  California warning . . . . . . . . . . . . . . . . . . . . . . . . . . . . . . . . . . . . . . . . . . . . 123


A
B
C
D
E
F
G
H
I

7 4000415480  E 01.18   USA / GB
OPTIMUM 8 - OPTIMUM 1931 E
A
- Foreword
Foreword
You have just purchased a HAULOTTE® product and we would like to thank you for your business.
The Aerial Work Platform is a mechanical device primarily designed and manufactured with the intent to position people
with the necessary tools and material to overhead elevated temporary workplaces.  All other uses or alterations/
modifications to the aerial work platform must be approved by HAULOTTE®.
This manual shall be considered a permanent component of the machine and shall be kept with the aerial work platform
in the designated Manual Holder, at all times.
Safe operation of this product can only be assured if you follow the operating instructions contained in this manual.  To
ensure proper and safe use of this equipment, it is strongly recommended that only trained and authorized personnel
operate and maintain the aerial work platform.
We would particularly like to draw your attention to  2 essential points :
Comply with safety instructions.
Use the equipment within the specified/published performance limits.
With regard to the designation of our equipment, we stress that this is purely for commercial purposes and not to be
confused with the technical specifications.  Only the specifications in this manual should be used to study the suitability
of the equipment for the intended use.
This operator's manual is specific to the HAULOTTE® products listed on the cover page of this manual.
The operator's manual does not replace the basic training required for equipment operators.  HAULOTTE® has compiled
this manual to assist in safe and efficient operation of the products covered in the manual.
The manual must be available to all operators and must be kept in a legible condition.  Additional copies can be ordered
from HAULOTTE Services®.
Stay Safe and keep working with HAULOTTE® !
Original language and version :
Manuals in English and French are the original instructions.  Manuals in other languages are translations
of the original instructions.


8  4000415480  E 01.18   USA / GB
OPTIMUM 8 - OPTIMUM 1931 E
A
- Foreword
1 -  User responsibility
 1.1 -  OWNER'S RESPONSIBILITY
The owner (or hirer) has the obligation :
•  To inform operators of the instructions contained in the Operator's Manual.
•  For applying the local regulations regarding operation of the machine.
•  To replace all manuals or decals that are either missing or not legible.  Additional copies can
be ordered from HAULOTTE Services®.
• To establish a preventive maintenance program in accordance with the manufacturer's
recommendations, taking into account the environment and severity of use of the machine.
• To perform periodic inspections in accordance with HAULOTTE® recommendations and
local regulations.
All malfunctions and problems identified during the inspection shall be corrected before the
aerial work platform is returned to service.
 1.2 -  EMPLOYER'S RESPONSIBILITY
The employer has the obligation :
•  To authorize the operator to use the machine.
•  To inform and familiarize the operator with the local regulations.
Forbid anyone from operating the machine if :
•  Under the influence of drugs, alcohol, etc.
•  Subject to fits, loss of motor skills, dizziness, etc.
 1.3 -  TRAINER'S RESPONSIBILITY
The trainer must be qualified to provide training to operators in accordance with applicable
local regulations.  The training must be given in an obstacle-free area until the trainee is
considered competent as defined by the training program undertaken.


A
B
C
D
E
F
G
H
I

9 4000415480  E 01.18   USA / GB
OPTIMUM 8 - OPTIMUM 1931 E
A
- Foreword
 1.4 -  OPERATOR'S RESPONSIBILITY
The operator has the obligation to :
• Read and understand the contents of this manual and familiarize himself with the decals
affixed on the machine.
•  To inspect the machine before use according to HAULOTTE®'s recommendations..
•  To inform the owner (or hirer) if the manual or any decals are missing or are not legible.
•  To inform of any malfunctioning of the machine.
The operator shall ensure that frequent inspections were conducted by the owners and the
operator may only operate the machine for the purpose intended by the manufacturer.
Only authorized and qualified operators may operate HAULOTTE® machines.
All operators must become familiar with and fully understand the emergency controls and be
able to operate the machine in an emergency.
The operator has the obligation to stop using the machine in the event of malfunction or safety
problems on the machine or in the work area and report the problem immediately to his/her
supervisor.


10  4000415480  E 01.18   USA / GB
OPTIMUM 8 - OPTIMUM 1931 E
A
- Foreword
2 -  Safety
 2.1 -  SAFETY INSTRUCTIONS
 2.1.1 - Misuse Hazards
•  Do not attach overhanging loads when raising or lowering the platform.
•  Do not tie the platform to an adjacent fixed or mobile structure.
•  Do not use/operate the machine when alone. A survey person or immediate Supervisor must
be present on the ground in case of emergency.
• Do not use a faulty or poorly maintained machine.  Remove defective/damaged machine
from service.
•  Do not climb onto the compartment covers of the machine.
•  Do not replace items critical to machine stability with items of different weight or specification.
•  Do not replace factory-installed tires with tires of different specifications or ply rating.
•  Do not alter or disable machine components that in any way affect safety and stability.
•  Do not disable the safety devices.
•  Do not deface, modify or obscure any decals or markings on the aerial work platform.
• Do not use the machine for any other purpose than to position
people, their tools and material to the overhead/elevated
temporary work places.
•  Do not use the machine as a crane, material lift or elevator.  Only
use the machine as it was intended.


A
B
C
D
E
F
G
H
I

11 4000415480  E 01.18   USA / GB
OPTIMUM 8 - OPTIMUM 1931 E
A
- Foreword
 2.1.2 - Falling Hazards
To enter or exit from the platform :
•  The machine must be completely stowed.
•  Face the machine to access the entry opening to the platform.
•  Keep  3 points of contact (both hands and a foot) on the steps and
the guardrail.
Before commencing operation :
•  Ensure that guard rails are correctly installed and secured.
•  Ensure that gate or sliding bar is in it’s proper closed position.
• Remove oil or grease from the steps, floor, handrail and the
guardrails.
•  Clear the platform floor free of debris.
When in the platform :
• Occupants must wear a fall restraint harness with lanyard and
energy absorber, in accordance with applicable governmental
regulations. Attach the lanyard to the designated fall restraint
anchor provided in the platform.
• The correct use of the harness requires the lanyard to be
connected to an anchorage point designated by the decals. Refer
to this decal located on the platform.
•  Hold on securely to the guardrails.
•  Always keep your feet firmly on the floor of the platform.
•  Do not sit, stand, or climb on the platform guard rails.
•  Work only within the platform guardrails area and do not lean over
guardrails to perform work.
•  Do not exit the platform until it is in the completely stowed position.
•  Do not use the guardrail as a means of access to climb in or out
of the platform.

307P216290 b
x 1


12  4000415480  E 01.18   USA / GB
OPTIMUM 8 - OPTIMUM 1931 E
A
- Foreword
 2.1.3 - Overturning / Tip-over Hazards
Before positioning and operating the machine :
• Ensure that the surface is capable of supporting the machine
weight including the rated capacity.
• Do not exceed the maximum rated capacity that includes the
weight of both material and allowed number of occupants. Do not
exceed the allowable number of occupants.
•  Place the loads uniformly distributed on the platform floor.
• Do not increase the working height (using extensions, ladder,
etc.).
• Do not place ladders or scaffolds in the platform or against any
part of this machine.
•  Do not use the machine in winds exceeding the permissible limit.
•  Do not increase the surface area of the platform exposed to wind.
This includes adding panels, mesh, banners.  Be aware when
working with materials with a large surface area. This will add to
the wind load on the machine.
• Do not raise the platform or drive with platform elevated on an
incline exceeding the rated slope for the machine.
• Do not drive the machine on slopes or grades exceeding the
specified limits.
•  Do not replace components critical to stability with components of
different weight or specification.
•  Never use the machine with material or objects suspended from
the guard-rail.
•  Do not pull or push towards any object outside of the platform. Do
not exceed the maximum allowable side force stated in the
performance specifications.
•  Do not use the machine to support any external structure.
• Do not use the machine to tow other machines or to drag
materials.


A
B
C
D
E
F
G
H
I

13 4000415480  E 01.18   USA / GB
OPTIMUM 8 - OPTIMUM 1931 E
A
- Foreword
Using a machine on a slope
•  If the tilt alarm sounds with the platform uphill : Stow the machine completely.
•  If the tilt alarm sounds with the platform facing downhill : Stow the machine completely.
•  While driving on a slope:
 • Always orientate the machine in the direction of the slope.
 • Stow the machine completely.
 • Do not travel down slopes in high speed.
 • Do not drive fast in narrow or cluttered areas. Keep speed under control while making turns or sharp bends.
WIND : The aerial work platform can operate up to a maximum wind speed as indicated in the
specifications. To identify the local wind speed, use the Beaufort scale below, use a wind
gauge or an anemometer.
Do not exceed the slope limit for each operation. Section B 4.1Technical specifications.
Gradeability :
•  Driving  UP or  DOWN a slope in stowed position.
Sideslope :
•  Driving in stowed position across a slope.
Rated slope :
•  Operating with platform elevated.


14  4000415480  E 01.18   USA / GB
OPTIMUM 8 - OPTIMUM 1931 E
A
- Foreword
N.B.-:-THE  BEAUFORT SCALE OF WIND FORCE IS ACCEPTED INTERNATIONALLY AND IS USED WHEN
COMMUNICATING
 WEATHER CONDITIONS.  A WIND SPEED RANGE AT  10 M (32 FT 9 IN) ABOVE FLAT,
CLEAR LAND IS ASSOCIATED WITH EACH DEGREE.
 Beaufort scale
Force
Meteorological
description
Observed effects m/s km/h mph
0 Calm Smoke rises vertically.  0 - 0,2 0 - 1 0 - 0,62
1 Very light breeze Smoke indicates the wind direction.  0,3 - 1,5 1 - 5 0,62 - 3,11
2 Light breeze
Wind felt on the face. Leaves rustle. Weather
vanes turn.
1,6 - 3,3 6 - 11 3,72 - 6,84
3 Slight breeze
Leaves and small twigs in constant motion. Flags
move slightly.
3,4 - 5,4 12 - 19 7,46 - 11,8
4 Nice breeze
Raised dust and loose papers. Small branches
are moved.
5,5 - 7,9 20 - 28 12,43 - 17,4
5 Nice breeze
Small trees in leaf to sway. Crested wavelets
form on inland waterways.
8,0 - 10,7 29 - 38 18,02 - 23,6
6 Cool wind
Large branches in motion. Power lines and
chimneys 'sing'. Umbrellas used with difficulty.
10,8 - 13,8 39 - 49 24,23 - 30,45
7 Near gale
Whole trees in motion. Inconvenience felt when
walking against wind.
13,9 - 17,1 50 - 61 31 - 37,9
8 Gale
Some branches break. Generally we cannot walk
against the wind.
17,2 - 20,7 62 - 74 38,53 - 45,98
9 Strong gale
The wind causes slight damage to buildings.
Tiles and chimney stacks are blown off.
20,8 - 24,4 75 - 88 46,60 - 54,68


A
B
C
D
E
F
G
H
I

15 4000415480  E 01.18   USA / GB
OPTIMUM 8 - OPTIMUM 1931 E
A
- Foreword
 2.1.4 - Electrocution Hazards
The machine is not electrically insulated and does not provide protection from contact or
proximity to electrically charged conductors.
Always position the lift at a safe distance from electrically charged conductors to ensure that
no part of the machine is within an unsafe area.
Respect the local rules and the minimum safety distance from power lines.
Minimum safe approach distances
N.B.-:-U
SE THIS TABLE EXCEPT WHERE LOCAL REGULATIONS INDICATE OTHERWISE.
Electric voltage Minimum safety distance
Mètre Feet
0 - 300 V Avoid contact
300 V - 50 kV 3 10
50 - 200 kV 5 15
200 - 350 kV 6 20
350 - 500 kV 8 25
500 - 750 kV 11 35
750 - 1000 kV 14 45
• Do not operate the machine when close to live power lines,
consider the movement of the machine and the sway of the
electric power lines particularly in windy conditions.
• Do not operate the machine during lightning, thunderstorms,
snow/ice or any weather condition that could compromise
operator safety.
•  Do not use the machine as a ground for welding.
•  Do not weld on the machine without first disconnecting the battery
terminals.
•  Always disconnect ground cable first.
•  The machine must not be used while charging the batteries.
•  When using the platform AC power supply, ensure it is protected
with a circuit breaker and residual current device.
Keep away from the machine if it contacts energized power lines.
Personnel on the ground or in the platform must not touch or
operate the machine until energized power lines are shut off.


16  4000415480  E 01.18   USA / GB
OPTIMUM 8 - OPTIMUM 1931 E
A
- Foreword
 2.1.5 - Explosion / Fire Hazards
 2.1.6 - Crushing / Collision Hazards
• Always cordon off the area around the base of the machine to keep personnel and other
equipment away from the machine while in use.
•  Warn personnel not to work, stand, or walk under a raised boom/platform.
•  Do not drive in reverse direction (opposite the field of vision).
• Always ensure that the chassis is never driven any closer than  1 m (3 ft 3 in) to holes,
bumps, slopes, obstructions, debris and ground coverings that may hide holes and other
dangers.
•  Keep non-operating personnel at least  5 m (16 ft 5 in) away from the machine when driving.
Always wear protective clothing and eye wear when working with
batteries and power sources/systems.
N.B.-:-A
CID IS NEUTRALIZED WITH SODIUM BICARBONATE AND WATER.
•  Do not work on or operate a machine in an explosive or flammable
atmosphere / environment.
•  Do not touch hot components.
•  Do not bridge the battery terminals with metallic objects.
• Do not service the battery in proximity of spark, open flame, lit
cigarettes.
• ALWAYS avoid contact with battery acid. Battery acid causes
serious burns and should be kept away from skin or eyes. If
contact occurs, flush with water and consult a physician
immediately.
When in the platform :
• Check the work area for overhead clearance, for any obstacles
besides and below the platform when raising/lowering the
platform and or before driving.
• During movement, keep all the parts of the body inside the
platform. Hold onto the guardrails on the opposite side to any
surrounding structures. Take care to avoid trapping hands whilst
holding the guardrails.
• To position machine close to a building/structure, use extension
deck feature, instead of driving machine closer to structure.


A
B
C
D
E
F
G
H
I

17 4000415480  E 01.18   USA / GB
OPTIMUM 8 - OPTIMUM 1931 E
A
- Foreword
•  Be aware of driving direction.
 • Check the driving direction with the help of the red or green arrow on the chassis relative to the red and green
arrows on the platform control box.
 • Also note that when changing the driving direction (Forward <> Reverse) the joysticks or switches must return
to the neutral position before reversing the drive direction and for movement to occur.
•  When driving, position the platform so as to provide the best possible visibility and to avoid
any blind spots.
•  Hold on securely to the guardrails.
• Occupants must wear a fall restraint harness with lanyard and energy absorber, in
accordance with applicable governmental regulations. Attach the lanyard to the designated
fall restraint anchor provided in the platform.
•  Lanyard must be attached to the designated anchorage point.
•  Avoid contact with fixed or mobile obstacles (other machines).
•  Other machines (crane, aerial work platform, etc.) operating in the work area increase the
risk of crushing or collision. Restrict the operation of machines moving within the aerial work
platform work area.
• Take into consideration the stopping distance, reduced visibility and blind spots of the
machine.
• Limit travel speed to suit the ground surface condition, slope (incline), and people in the
vicinity.


18  4000415480  E 01.18   USA / GB
OPTIMUM 8 - OPTIMUM 1931 E
A
- Foreword
 2.1.7 - Uncontrolled movement Hazards
Do not use a damaged or malfunctioning machine.
Be aware of uncontrolled movement and always respect the following :
•  Maintain clearance from high voltage lines.
•  Maintain clearance from generators, radar, electromagnetic fields.
•  Never expose the batteries or electrical components to water (high pressure washer, rain).
•  Never tow the machine over extended distances.
•  In case of a machine breakdown, it is possible to tow short distance to load it onto a trailer.
•  Never leave the hydraulic cylinders fully extended before switching off the machine, or when
stationary for an extended period of time.
•  Lower the arms to the stowed position.
•  Select a safe parking location, on a firm level surface, clear of obstruction and traffic.
•  Ensure all compartments are closed and secured.
•  Chock the wheels.
• Operator must remove the foot from the footswitch when any movement has ceased (For
Japan only).
3 -  Safety inquiries
Inquiries relating to design criteria/specifications of a product, standards compliance, or overall
machine safety should be sent to the HAULOTTE®   PRODUCT SAFETY department.
Each inquiry or request should include all relevant information; including contact name, telephone
number, mailing address, email address, plus the machine model and serial number.
The   HAULOTTE® Product Safety department will evaluate each request/inquiry and will provide a
written response.


A
B
C
D
E
F
G
H
I

19 4000415480  E 01.18   USA / GB
OPTIMUM 8 - OPTIMUM 1931 E
A
- Foreword
4 -  Incident notification
Notify HAULOTTE® immediately when a HAULOTTE® product has been involved in an incident/
accident leading to personal injury or death, or when there is a major property damage.
 HAULOTTE Group - EUROPE Product
Safety Department
Address :  La Péronnière - BP 9 - 42152
L'Horme - France
Tel :  +33 (0)4 77 29 24 24
Email : [email protected]
 HAULOTTE Group - Australia, India and
Asia Product Safety Department
Address :  No.26 Changi North Way -
Singapore 498812 - Singapore
Tel :  +65 6546 0123
Email : [email protected]
 HAULOTTE Group - North & South
America Product Safety Department
Address :  3409 Chandler Creek Rd. -
Virginia Beach, VA 23453 - United States
Tel :  +1 757 689 2146
Email : [email protected]


20  4000415480  E 01.18   USA / GB
OPTIMUM 8 - OPTIMUM 1931 E
A
- Foreword
5 -  Compliance
 5.1 -  PRODUCT INFORMATION
Without the written permission from Haulotte, modifying a HAULOTTE® product is a Safety
concern.  Any modification may violate Haulotte design parameters, government regulations
and industry standards.
If you desire a modification to the product, submit a request in writing to HAULOTTE®.
With the utmost care to ensure enhanced reliability and greater safety of the HAULOTTE®
products, it is pertinent that when a "Service or Safety Bulletin" is issued, action is taken
immediately.  Once the bulletin has been addressed, make sure that the completed form is
submitted to HAULOTTE®.
Do not hesitate to contact HAULOTTE Services®, should you have any questions relating to
the issued bulletin(s) or with questions on the policy itself.
 5.1.1 - Change of Ownership Notification
It is important and necessary to keep HAULOTTE Services® updated with current ownership
of the machine.  This way, HAULOTTE® will be able to provide the necessary support for the
product.  If you have sold or transferred this machine(s); it is your responsibility to
notify HAULOTTE Services®.  It is not required to include Lessees/Renters of Leased/Rented
machines on this form.
Use the HAULOTTE® Product Status Notification form to report scrapped, stolen, missing or
recovered machine(s).


A
B
C
D
E
F
G
H
I

21 4000415480  E 01.18   USA / GB
OPTIMUM 8 - OPTIMUM 1931 E
A
- Foreword
 5.1.2 - Owner information update form
Owner information update form
Complete this form and mail or fax it to :
HAULOTTE® subsidiary Name :  Address 1  :
Fax :  Address 2  :
e.mail address :  Address 3  :
Product information :
Model :  Machine serial number :
Owner / Servicing information :
Do not include leased or rented units in this form
Current product owner 1  :  Current product owner 2  :
Name :  Name :
Company :  Company :
Address 1  :  Address 1  :
Address 2  :  Address 2  :
Country :  Country :
Phone :  Phone :
Date of ownership :  Date of ownership :
Signature :  Signature :
Date :  Date :
Company stamp is mandatory :  Company stamp is mandatory :
Tick here if the machine has been permanently removed from service (scrapped).  The manufacturer's
nameplate must be removed and returned to  HAULOTTE Group when the unit is removed from service.
Reason for removal :


22  4000415480  E 01.18   USA / GB
OPTIMUM 8 - OPTIMUM 1931 E
A
- Foreword
 5.2 -  PRODUCT SPECIFICATIONS
HAULOTTE® cannot be held liable for any changes to the technical characteristics/
specifications contained in this manual.  HAULOTTE® has a continuous improvement policy
in place for its product range. Given this policy, the Company reserves the right to modify
products technical characteristics / specifications without notice.
Certain options can modify the machine's operating characteristics and its' associated safety.
If your machine was originally delivered with options fitted, replacing a safety component
associated with a particular option does not require any particular precaution other than those
associated with the installation itself (static test).
Otherwise, it is essential to follow the manufacturer's recommendations as stated below :
•  Installation by authorised HAULOTTE® personnel only.
•  Update the manufacturer's identification plate.
•  Have stability tests carried out by a certified agency/competent person.
•  Ensure decals are updated.


A
B
C
D
E
F
G
H
I

23 4000415480  E 01.18    USA / GB
OPTIMUM 8 - OPTIMUM 1931 E
B
- Familiarization
Familiarization
1 -  General safety
 1.1 -  INTENDED USE
Do not operate the product in the following situations :
•  On soft, unstable or cluttered ground.
•  With wind blowing faster than the permissible limit.
 • Check the allowable wind speed specified in the performace specifications tabulation.
 • Consult the Beaufort scale.
•  Close to power lines.  Keep a safe distance.
•  Outside of the temperature range -20°C / + 50°C (-4°F / +122°F).
•  In an explosive atmosphere / environment.
• During storms.
•  In the presence of strong electromagnetic fields.
N.B.-:-U
SE THE MACHINE UNDER "NORMAL" CLIMATIC CONDITIONS.  IF YOU NEED TO USE THE
MACHINE
 IN CLIMATIC CONDITIONS LIKELY TO CAUSE DETERIORATION (EXTREME : HUMIDITY,
TEMPERATURES, SALINITY, CORROSIVENESS, ATMOSPHERIC PRESSURE), CONTACT HAULOTTE
S
ERVICES®.  REDUCE INTERVALS BETWEEN SERVICING.
N.B.-:-W
HILE THE MACHINE IS NOT IN USE, CARE MUST BE TAKEN TO BRING THE MACHINE TO THE
FULLY
 STOWED POSITION.  ENSURE THAT THE MACHINE IS LOCKED IN A SECURE LOCATION, AND THE
CONTROL
 KEY IS REMOVED TO PREVENT UNAUTHORISED USE OF THE MACHINE.


24  4000415480  E 01.18   USA / GB
OPTIMUM 8 - OPTIMUM 1931 E
B
- Familiarization
 1.2 -  DECAL CONTENT
Decals are provided to alert the user of hazards inherent with the Aerial Work Platforms.
Decals provide the following information :
•  The level of severity.
•  The specific hazard.
•  A method to avoid, suppress or reduce the hazard.
•  Descriptive text (where required).
Familiarize yourself with the decals and the hazard severity levels.
Decals must be kept in good legible condition.
Familiarize yourself with the decals and their respective color codes.
Additional decals can be ordered from HAULOTTE Services®.
CE and AS standards
ANSI and CSA standards
Marking Description
1 Hazard symbol
2 Level of severity
3 Avoidance symbol pictorial
4 Avoidance text
DANGER
1
2
3

DANGER
CRUSH HAZARD
Do not stand or walk behind or in front
of the machine while in use.
Stay clear from the path of boom
rotation and platform lowering.
Failure to comply will result in death
or in serious injury
1
3
2
4


A
B
C
D
E
F
G
H
I

25 4000415480  E 01.18    USA / GB
OPTIMUM 8 - OPTIMUM 1931 E
B
- Familiarization
 1.3 -  SYMBOLS AND COLORS
Symbols and colors are used to alert the operator of safety precautions and/or to highlight
important safety information.
The following safety symbols are used throughout this manual to indicate specific hazards and
the hazard severity level when operating or maintaining the Aerial Work Platform.
 1.4 -  LEVEL OF SEVERITY
Symbol Description
Danger : Risk of injury or death
Caution : Risk of material damage
Prohibited action
Reminder to use good practice or follow pre-operation checks
Cross-reference to another part of the manual
Cross-reference to another manual
Cross-reference to repair (contact HAULOTTE Services®)
N.B. :  Additional technical information
Color Title Description
Danger : Indicates a hazardous situation which if not avoided,
WILL result in death or serious injury.
Warning : Indicates a hazardous situation which if not avoided,
COULD result in death or serious injury.
Caution : Failure to comply could result in minor or moderate
injury.
Notice : Indicates recommended practices if not followed, may
result in a malfunction or damage the machine or its
components.
Procedure : Indicates a maintenance operation.


26  4000415480  E 01.18   USA / GB
OPTIMUM 8 - OPTIMUM 1931 E
B
- Familiarization
 1.5 -  SYMBOLS LEGEND AND DEFINITIONS
Symbols are used throughout this manual to depict hazards, avoidance measures and indicate
when information is required.
Refer to the following table to familiarize yourself with these symbols.
Symbol Description Symbol Description Symbol Description
Body crushing hazard
Foot crushing hazard
High pressure fluid ejection
hazard
Hand crushing hazard Entanglement hazard
Health/safety hazards related
to chemicals
Health-damaging effects from
hot work environment
Electrical contact or
lightning strike
Burns and scalds from contact
with flames, explosion or
radiation from heat sources
Injury from Electric arcs -
Energy supply disconnecting
devices - Batteries fire,
emissions, etc
Risk of operator(s)
falling
Tip over due to excessive
loading / wind load and
excessive ground slope
Relate and coordinate
directional arrows on the
chassis with those on the
control box
Do not put foot in this
area
Do not put your hand in this
area
Keep away from product
working area
Never expose batteries
and electrical
component to high
pressure washer
Ensure entry drop rail is down
Flames prohibited
Maintain safe clearance from
high voltage electrically
charged conductors as
described in manual - Do not
use in thunderstorms
Overload
Refer to operator
manual
Safety belt
Use appropriate lanyard
attached to dedicated anchor
point.
Wheel pressure Enable switch
Use safety prop before
attempting any maintenance
work
Tow point Tie down point Lift point
Keep away from hot
surfaces
Wear protective equipment
x 1


A
B
C
D
E
F
G
H
I

27 4000415480  E 01.18    USA / GB
OPTIMUM 8 - OPTIMUM 1931 E
B
- Familiarization
2 -  Models description
Regulations Models
ANSI and CSA standards OPTIMUM 1931 E
CE, AS and  EAC standards OPTIMUM 8


28  4000415480  E 01.18   USA / GB
OPTIMUM 8 - OPTIMUM 1931 E
B
- Familiarization
3 -  Primary machine components
 3.1 -  LAYOUT
OPTIMUM 8 - OPTIMUM 1931 E

C35
C171
C77
C168
C141
C7
C75
C78
C20
C2
C78
C58
C30
C42
C76
C81
C82
C6
C85
C1
C64
C20
C27
C20
C90
C107
C142


A
B
C
D
E
F
G
H
I

29 4000415480  E 01.18    USA / GB
OPTIMUM 8 - OPTIMUM 1931 E
B
- Familiarization
Universal plug
 3.2 -  MAINTENANCE SUPPORT
Marking Description Marking Description
C1 Chassis C77 Platform access ladder
C2 Front drive wheels C78 Compartment locking latch
C6 Platform C81 Sliding guardrail
C7 Platform control box C82 Extension deck lock pin
C20 Tie-down (and/or forklift loading) C85 Scissors
C27 Ground control box + Universal plug C90 Battery bay (block)
C30 Hydraulic oil tank C107 Pull T-handle for emergency lowering
C35 Document holder C141 Rear wheel
C42 Foot pedal switch (For Japan only) C142 Lanyard attachment points
C58 Pothole protection C168 Maintenance support
C64 Tilt sensor C169
Folding guardrails / Swing gate
(Optional - Not shown)
C75 Extension deck C171 Scissors lifting cylinder
C76 Guardrail
The maintenance stand must be in place before any
maintenance operation is begun.
Placing the machine in maintenance configuration :
• Lift scissor arms to a sufficient height (floor of the
platform at around  2,5 m / 8 ft 2 in from the ground).
•  Pull the plastic handle and put the stand in the vertical
position.
• Release the handle. The stand should remain in the
vertical position.
•  Lower the scissor arms.
•  Scissor arm pivoting rod should rest on the  V groove
of the stand.
Putting in use position :
• To put back the machine into its normal operation,
reverse the steps used above.


30  4000415480  E 01.18   USA / GB
OPTIMUM 8 - OPTIMUM 1931 E
B
- Familiarization
 3.3 -  EXTENSION DECK
N.B.-:-DO NOT LOAD THE EXTENSION DECK, FOR EASE OF MANOEUVRING.
Ensure that gate or sliding bar is in it’s proper closed position.
Perform the extending and retracting operations of the extension deck on flat, horizontal
ground.
To retract the extension deck :
•  Press pedal ( 1 ) and pull the extension deck rails ( 2 ) inwards to the locked position
•  Release the pedal.
To extend the extension deck :
• Press the pedal ( 1 ) to release the extension deck
lock pin.
• With pedal ( 1 ) pressed, push the extension deck
guard rails ( 2 ) to the extended position.
•  Keep hands clear of pinch points.
Make sure that the extension deck is in locked position. Be aware of the extended platform position when
moving the machine.


A
B
C
D
E
F
G
H
I

31 4000415480  E 01.18    USA / GB
OPTIMUM 8 - OPTIMUM 1931 E
B
- Familiarization
 3.4 -  GROUND CONTROL BOX
 3.4.1 - Layout
General view
Controls and indicators
Marking Description Function
15 E-stop button
Pulled out : Ground control box energized
Pushed in : De-energizes control system
43 Horn button Not used
92
Control box activation key switch
()
Right : Ground control box energized
Center : De-energizes control system
Left : Platform control box energized
93
Battery charging indicator
()
Battery charger status
105 Beacon light (Optional)
Move upwards : Flashing light turn ON
Move downwards : Flashing light turn OFF
253 Diagnostic tool socket Connection to the diagnostic tool  (HaulotteDiag)

92
253 ACTIV’ Screen
15
43
105
93


32  4000415480  E 01.18   USA / GB
OPTIMUM 8 - OPTIMUM 1931 E
B
- Familiarization
 3.4.2 - HAULOTTE Activ'Screen
Upon starting and during operation of the machine, the LCD screen  "Activ'Screen" located on
the ground control box displays in real time the machine operating status.
HAULOTTE Activ'Screen
Controls and indicators
Marking Description Function
1 Platform raising control Platform raises
2 LCD screen Display status of operation of the machine
3 Navigation button Navigation of menu to select function - Scroll up
4 Confirmation button Confirmation of the selected function
5 Cancellation button Go back
6 Platform overload indicator Platform overload indicator
7 Machine fault indicator Constantly lit in the event of an operation malfunction
8 Navigation button Navigation of menu to select function - Scroll down
9 'Enable Switch' selector Press in and hold : Enable switch
10 Platform lowering control Platform lowers


A
B
C
D
E
F
G
H
I

33 4000415480  E 01.18    USA / GB
OPTIMUM 8 - OPTIMUM 1931 E
B
- Familiarization
 3.4.2.1 - LCD screen
At startup :
At startup with the ground or platform controls selected; system initiates a self check :
•  Bar gets filled up.

• Home screen comes on with status icon of the machine - okay to proceed functioning the
controls.

Symbol Description
1 Information icons
2 Information text
3 Status icon of the machine
Symbol Description
Battery status
Maintenance use
Fault /  alarms
Hour meter


34  4000415480  E 01.18   USA / GB
OPTIMUM 8 - OPTIMUM 1931 E
B
- Familiarization
•  After pressing on  :

•  After again pressing on
•  Access code screen comes on - refer to maintenance manual for entering the access code

• Validation by pressing on is active only if access code is known and entered - refer to
maintenance manual for the procedure for the different level code useage
Symbol Description
1 Software part number
2 Software version + Screen software version + Screen version
3 Screen identification + Screen software version
4 Machine serial number displayed


A
B
C
D
E
F
G
H
I

35 4000415480  E 01.18    USA / GB
OPTIMUM 8 - OPTIMUM 1931 E
B
- Familiarization
Alarm status :
Alarm status displayed as applicable - samples shown below
 Tilt :

Overload :

Low battery :


36  4000415480  E 01.18   USA / GB
OPTIMUM 8 - OPTIMUM 1931 E
B
- Familiarization
Present fault :

Platform control box E-stop button pressed in (de-energized) :


A
B
C
D
E
F
G
H
I

37 4000415480  E 01.18    USA / GB
OPTIMUM 8 - OPTIMUM 1931 E
B
- Familiarization
 3.5 -  PLATFORM CONTROL BOX
 3.5.1 - Layout
General view
Controls and indicators
Marking Item Description Function
27 HL800 Tilt indicator Machine on excessive slope
30 HL802 Overload indicator Platform overloaded
43 SA907 Horn button Move upwards and hold to activate horn
46 SB802 E-stop button
Pulled out : Platform control box power supply
energized
Pushed in : De-energizes control system
85 HL903 Fault indicator
Fault indicator Faulty or tilting or overloaded
machine


38  4000415480  E 01.18   USA / GB
OPTIMUM 8 - OPTIMUM 1931 E
B
- Familiarization
91 HL904 Battery charging indicator
Battery charged
Flashing : Batteries have 40 % charge left
Constantly on : Batteries have only 20 % charge
left
108 SM901
Movement joystick
Move forward : Forward drive or platform raising
Move backwards : Reverse drive or platform
lowering
Front axle steering selector
Press right side of button : Right-hand steering
Press left side of button : Left-hand steering
110 HL420 Raising / lowering selector
On : Raising / Lowering selection activated
Off : Raising / Lowering movement is not selected
111 HL100 Driving selection indicator
On : Driving function activated
Off : Driving movement is not selected
112 SA908 2-position selector
Move to the left : Platform raising / lowering
Move to the right : Drive movements
123 SA905 'Enable Switch' selector
Press in and hold : Associated command is
validated
Press in and hold : Enable switch
Press in and hold : Enable switch
Release : Associated command movement is
halted
245 SB800
Foot pedal switch (For
Japan only)
Press in and hold : Enable switch
Marking Item Description Function
100%
40%
20%


A
B
C
D
E
F
G
H
I

39 4000415480  E 01.18    USA / GB
OPTIMUM 8 - OPTIMUM 1931 E
B
- Familiarization
4 -  Performance Specifications
 4.1 -  TECHNICAL CHARACTERISTICS
Use the table to select the right Haulotte machine for the job.
CE, AS and  EAC standards
Machine OPTIMUM 8
Characteristics - Dimensions SI Imp.
Maximum working height 7,77 m 25 ft 6 in
Maximum platform height 5,77 m 18 ft 11 in
Total weight 1520 kg 3350 lbs
Maximum platform capacity 230 kg 500 lbs
Maximum number of occupants allowed
Indoor use : 2
Outdoor use : 1
Maximum wind speed allowed
Indoor use : 0 km/h
Outdoor use : 45 km/h
Indoor use : 0 mph
Outdoor use : 28 mph
Manual force - CE - AS
Indoor use : 400 N (90 lbf)
Outdoor use : 200 N (45 lbf)
Gradeability 25 %
Maximum side rated slope allowed - CE - AS 1,5°
Maximum longitudinal rated slope allowed - CE - AS 3°
Maximum load on wheel 963 kg 2,125 lbs
Maximum ground pressure of wheel on paved ground 14 kgf/ cm2 200 lbf/in2
Drive speed :
• Folded machine maximum speed
• Unfolded machine maximum speed
4,5 km/h
0,5 km/h
2.79 mph
0.3 mph
Maximum freewheel speed during towed operation 4,5 km/h 2.79 mph
Outside turning radius 1,5 m 4 ft 11 in
Inside turning radius 1 m 3 ft 3 in
Power source - Electric
HAULOTTE® code Standard Option Quantity System voltage Capacity
2440207960 X 4 6V 180Ah (C5)
2901011640 X 4 6V 195Ah (C5)
4000564910 X 4 6V 182Ah (C5)
2901012540 X 4 6V 154Ah (C5)
For Japan only
4000558700  X 4 6V 170Ah (C5)
4000090820 X 2 12V 115Ah (C5)
Hydraulic tank capacity 6 l 1.6 gal US


40  4000415480  E 01.18   USA / GB
OPTIMUM 8 - OPTIMUM 1931 E
B
- Familiarization
ANSI and CSA standards
Machine OPTIMUM 1931 E
Characteristics - Dimensions SI Imp.
Maximum working height 7,77 m 25 ft 6 in
Maximum platform height 5,77 m 18 ft 11 in
Total weight 1440 kg 3,175 lbs
Maximum platform capacity 230 kg 500 lbs
Maximum number of occupants allowed
Indoor use : 2
Outdoor use : 2
Maximum wind speed allowed
Indoor use : 0 km/h
Outdoor use : 45 km/h
Indoor use : 0 mph
Outdoor use : 28 mph
Manual force - ANSI - CSA 445 N 100 lbf
Gradeability 25 %
Rated slope - ANSI - CSA 0°
Maximum load on wheel 963 kg 2,125 lbs
Maximum ground pressure of wheel on paved ground 15 kgf/cm2 208 lbf/cm2
Drive speed :
• Folded machine maximum speed
• Unfolded machine maximum speed
4,5 km/h
0,5 km/h
2.79 mph
0.3 mph
Maximum freewheel speed during towed operation 4,5 km/h 2.79 mph
Outside turning radius 1,5 m 4 ft 11 in
Inside turning radius 1 m 3 ft 3 in
Power source - Electric
HAULOTTE® code Standard Option Quantity System voltage Capacity
2440207960 X 4 6V 180Ah (C5)
2901011640 X 4 6V 195Ah (C5)
4000564910 X 4 6V 182Ah (C5)
2901012540 X 4 6V 154Ah (C5)
For Japan only
4000558700  X 4 6V 170Ah (C5)
4000090820 X 2 12V 115Ah (C5)
Hydraulic tank capacity 6 l 1.6 gal US


A
B
C
D
E
F
G
H
I

41 4000415480  E 01.18    USA / GB
OPTIMUM 8 - OPTIMUM 1931 E
B
- Familiarization
 4.2 -  WORKING AREA / RANGE OF MOTION
OPTIMUM 8 - OPTIMUM 1931 E


42  4000415480  E 01.18   USA / GB
OPTIMUM 8 - OPTIMUM 1931 E
B
- Familiarization

Notes


A
B
C
D
E
F
G
H
I

43 4000415480  E 01.18    USA / GB
OPTIMUM 8 - OPTIMUM 1931 E
B
- Familiarization
5 -  Decals and markings locations
CE and AS standards - OPTIMUM 8 - 1/2


44  4000415480  E 01.18   USA / GB
OPTIMUM 8 - OPTIMUM 1931 E
B
- Familiarization
CE and AS standards - OPTIMUM 8 - 2/2


A
B
C
D
E
F
G
H
I

45 4000415480  E 01.18    USA / GB
OPTIMUM 8 - OPTIMUM 1931 E
B
- Familiarization
CE and AS standards - OPTIMUM 8
Marking Color Description Quantity OPTIMUM 8
1 Red Height of the floor and load 2 4000422970
2Blue
Maximum Pressure per Tire - Floor
Loading
4 4000417260
3 Other Commercial name - Bright machine 2 3078146730
3 Other Commercial name - Dark machine 2 307P222270
4 Other
Decal HAULOTTE® - 500 x 100 -
Bright machine
2 307P217080
4 Other
Decal HAULOTTE® - 500 x 100 -
Dark machine
2 307P224740
4 Other
Decal HAULOTTE® - 500 x 100 - Red
machine
2 307P220360
6 Other Identification plate 1 3078146180
7 Other Rivet 4 2421803570
11 Other Lanyard attachment points 3 307P216290
12 Other
Material risk - Yellow and black
adhesive tape
1 2421808660
16 Other Max and min oil level 1 307P221060
17 Red Risk of crushing 2 4000244370
18 Orange
Hand crushing hazard - Risk of
crushed hands
4 4000024890
19 Red Operation instructions 1 4000025140
20 Red Operation instructions 1
In german ( CE standard) : 307P222730
In english ( CE and  AS standards) : 307P222740
In chineese ( CE standard) : 4000698920In korean (
CE standard) : 4000618590
In croatian ( CE standard) : 4000360810
In danish ( CE standard) : 307P222760
In spanish ( CE standard) : 307P222770
In estonian ( CE standard) : 4000360870
In finish ( CE standard) : 307P222780
In french ( CE standard) : 3078149030
In greek ( CE standard) : 4000561810
In dutch ( CE standard) : 307P222790
In hungarian ( CE standard) : 4000360890
In italian ( CE standard) : 307P222800
In japanese ( CE standard) : 4000359830
In latvian ( CE standard) : 4000359840
In lithuanian ( CE standard) : 4000359850
In norwegian ( CE standard) : 4000359900
In polish ( CE standard) : 4000359860
In portuguese ( CE standard) : 307P222810
In romanian ( CE standard) : 4000359870
In slovakian ( CE standard) : 4000359880
In slovenian ( CE standard) : 4000359890
In swedish ( CE standard) : 307P222820
22 Orange Wound foot - Do not place foot 2 4000027090
23 Red Risk of crushing - Driving direction 1 3078145100
24 Red Danger of electrocution 2
For  CE standard only : 4000244350
For  AS standard only : 4000227500
25 Red Risk of crushing - Closing drop rail 1 4000025080
26 Red
Danger of electrocution - Ground for
welding
2 4000027100
27 Red Verification of tilt operation 1 4000244380
28 Red Do not interchange 1 4000504670
31 Red Brake release 1 4000361570


46  4000415480  E 01.18   USA / GB
OPTIMUM 8 - OPTIMUM 1931 E
B
- Familiarization
32 Blue Anchorage point - Traction 4 4000027310
34 Red
Risk of electrocution - Water
projection
1 4000025130
36 Red Risk of crushing - Platform 1 4000244340
53 Green Emergency lowering location 1 4000227200
55 Yellow Risk of electrocution - Charger - 240 V 1
For  CE standard only : 4000273940
For  AS standard only : 4000307410
57 Other Position of the lift truck forks 4 3078143830
58 Other Battery compartment locking 2 4000310170
59 Red Scissors safety 1 4000027550
61 Blue Risk of crushing 2 4000025060
62 Red Stop time during descent 1 4000271010
64 Green Battery verification 1 4000274040
65 Orange Hand crushing hazard - Battery 1 4000027440
68 Other Transport height 1 4000417380
69 Other Battery isolation switch 1 4000420660
70 Other Electric traction  AC 2 4000425350
200 Other "Made in Europe" 1 For  CE standard only : 4000137690
201 Red
Wearing of a safety harness is
essential
1  AS standard only : 4000275670
Marking Color Description Quantity OPTIMUM 8


A
B
C
D
E
F
G
H
I

47 4000415480  E 01.18    USA / GB
OPTIMUM 8 - OPTIMUM 1931 E
B
- Familiarization
 EAC standard - OPTIMUM 8 - 1/2


48  4000415480  E 01.18   USA / GB
OPTIMUM 8 - OPTIMUM 1931 E
B
- Familiarization
 EAC standard - OPTIMUM 8 - 2/2


A
B
C
D
E
F
G
H
I

49 4000415480  E 01.18    USA / GB
OPTIMUM 8 - OPTIMUM 1931 E
B
- Familiarization
 EAC standard
Marking Color Description Quantity OPTIMUM 8
1 Red Height of the floor and load 2 4000426450
2Blue
Maximum Pressure per Tire - Floor
Loading
4 4000417260
3 Other Commercial name - Bright machine 2 3078146730
3 Other Commercial name - Dark machine 2 307P222270
6 Other Identification plate 1
For Russia : 4000388680
For Ukraine : 4000054150
7 Other Rivet 4 2421803570
11 Other Lanyard attachment points 3 307P226710
12 Other
Material risk - Yellow and black
adhesive tape
1 2421808660
16 Other Max and min oil level 1 307P221060
18 Orange
Hand crushing hazard - Risk of
crushed hands
4 307P227660
19 Red Operation instructions 1
For Russia : 307P227190
For Ukraine : 307P227840
20 Blue Operation instructions 1
For Russia : 4000359920
For Ukraine : 4000359910
22 Orange Wound foot - Do not place foot 2 307P227010
23 Red Risk of crushing - Driving direction 1
For Russia : 4000010890
For Ukraine : 4000011390
24 Red Danger of electrocution 2 4000010920
25 Red Risk of crushing - Closing drop rail 1 307P226950
26 Red
Danger of electrocution - Ground for
welding
2 307P226970
27 Red Verification of tilt operation 1
For Russia : 307P227060
For Ukraine : 307P227870
28 Red Do not interchange 1 4000504670
31 Red Brake release 1 4000361570
32 Blue Anchorage point - Traction 4 4000135970
34 Red
Risk of electrocution - Water
projection
1 307P226780
36 Red Risk of crushing - Platform 1 4000244340
53 Green Emergency lowering location 1 4000227200
55 Yellow Risk of electrocution - Charger - 240 V 1 307P227520
57 Other Position of the lift truck forks 4 4000013830
58 Other Battery compartment locking 2 4000310170
59 Red Scissors safety 1 4000270960
61 Blue Risk of crushing 2 4000270970
62 Other Stop time during descent 1
For Russia : 4000011400
For Ukraine : 4000011430
64 Green Battery verification 1
For Russia : 307P227180
For Ukraine : 307P227860
65 Orange Hand crushing hazard - Battery 1 4000027440
68 Other Transport height 1 4000417380
69 Other Folding guardrails 1 4000420660
70 Other Electric traction  AC 2 4000425350
204 Red Lubrication point 2 307P219370
207 Red Smoking forbidden 1 307P226760
209 Yellow Battery danger 1 307P226790


50  4000415480  E 01.18   USA / GB
OPTIMUM 8 - OPTIMUM 1931 E
B
- Familiarization
210 Yellow Fire Hazard 1 307P226800
211 Red Electrical danger 2 307P226810
213 Yellow Corrosion hazard 1 307P226830
214 Yellow Danger unstable side 1 307P226930
216 Other Tamper-proof 6 307P227450
218 Blue Caution helmet compulsory 1 307P226680
221 Blue Obligatory routing 1 307P227510
229 Red
Do not travel down the ramp at a fast
speed
1 307P226990
230 Red
No admittance to unauthorized
persons
2 307P227560
231 Red Do not park in the work area 2 4000010910
235 Yellow Vertical crushing of the body 2 4000014270
236 Blue Wearing eye protection mandatory 1 307P226670
237 Yellow Risk of crushing 2 307P227670
Marking Color Description Quantity OPTIMUM 8


A
B
C
D
E
F
G
H
I

51 4000415480  E 01.18    USA / GB
OPTIMUM 8 - OPTIMUM 1931 E
B
- Familiarization
ANSI and CSA standards - OPTIMUM 1931 E - 1/2


52  4000415480  E 01.18   USA / GB
OPTIMUM 8 - OPTIMUM 1931 E
B
- Familiarization
ANSI and CSA standards - OPTIMUM 1931 E - 2/2


A
B
C
D
E
F
G
H
I

53 4000415480  E 01.18    USA / GB
OPTIMUM 8 - OPTIMUM 1931 E
B
- Familiarization
ANSI and CSA standards
Marking Color Description Quantity OPTIMUM 1931 E
1 Red Height of the floor and load 3
In english : 4000427710
In french : 4000427720
In spanish : 4000427730
2Blue
Maximum Pressure per Tire - Floor
Loading
4 4000417260
3 Other Commercial name - Bright machine 2 4000504010
3 Other Commercial name - Dark machine 2 4000504020
4Other
Decal HAULOTTE® - 500 x 100 -
Bright machine
2 307P217080
4Other
Decal HAULOTTE® - 500 x 100 - Dark
machine
2 307P224740
4Other
Decal HAULOTTE® - 500 x 100 - Red
machine
2 307P220360
6 Other Identification plate 1 307P218930
7 Other Rivet 4 2421803570
11 Other Lanyard attachment points 3 307P216290
12 Other
Material risk - Yellow and black
adhesive tape
1 2421808660
16 Other Max and min oil level 1 307P221060
17 Red Risk of crushing 2
In english : 4000130190
In french : 4000130200
In spanish : 4000130210
18 Orange
Hand crushing hazard - Risk of
crushed hands
4
In english : 4000024770
In french : 4000067710
In spanish : 4000086490
19 Red Operation instructions 1 4000025140
20 Red Operation instructions 2
In english : 4000243670
In french : 4000243680
In spanish : 4000243690
22 Orange Wound foot - Do not place foot 2
In english : 4000024840
In french : 4000068180
In spanish : 4000086610
27 Red Verification of tilt operation 1
In english : 4000130300
In french : 4000130310
In spanish : 4000130320
28 Red Do not interchange 1 4000504670
31 Red Brake release 1 4000361570
32 Blue Anchorage point - Traction 4 4000027310
36 Red Risk of crushing - Platform 1 4000244340
53 Green Emergency lowering 1 4000227200
56 Yellow Risk of electrocution - Charger - 110 V 1 4000419150
57 Other Position of the lift truck forks 4 3078143830
58 Other Battery compartment locking 2 4000310170
59 Red Scissors safety 1
In english : 4000024850
In french : 4000068070
In spanish : 4000086500
61 Blue Risk of crushing 2
In english : 4000024780
In french : 4000067700
In spanish : 4000086480
64 Green Battery verification 1 4000274040


54  4000415480  E 01.18   USA / GB
OPTIMUM 8 - OPTIMUM 1931 E
B
- Familiarization
65 Orange Hand crushing hazard - Battery 1
In english : 4000025030
In french : 4000068120
In spanish : 4000086550
68 Other Transport height 1 4000417380
69 Other Folding guardrails 1 4000420660
70 Other Electric traction  AC 2 4000425350
Marking Color Description Quantity OPTIMUM 1931 E


A
B
C
D
E
F
G
H
I

55 4000415480  E 01.18  USA / GB
C
- Pre-operation inspection
OPTIMUM 8 - OPTIMUM 1931 E
Pre-operation inspection
1 -  Recommendations
The owner, the site manager, the supervisor and the operator are all responsible to ensure the machine
is fit for the work it is to perform; i.e. that the machine is suitable to carry out the work in complete safety
and in compliance with this Operator's Manual. All managers who are responsible for persons
operating the machine must be familiar with the local regulations currently applicable in the country of
use and ensure that they are adhered to.
Before using the machine, read the previous chapters in this manual. Ensure that you have understood
the following points :
• Safety precautions.
• Operator's responsibilities.
• Conditions and the operating principles of the machine.


56  4000415480  E 01.18   USA / GB
OPTIMUM 8 - OPTIMUM 1931 E
C
- Pre-operation inspection
2 -  Working area assessment
To ensure safety during operation, the following should be considered :
• Segregate other site traffic (delivery vehicles, dumpers, etc) from the work area.
• Check the work area for localized features, e.g. manholes, service ducts, potholes, etc.
• Check ground covers (temporary and permanent) are strong enough to withstand the applied
pressure.
• Check ground covers are secured and monitor them. Take similar action for permanent covers.
• Check the load bearing capacity (distributed load and point loading) when working inside a building,
or on a structure.
• Check the load bearing capacity (distributed load and point loading) of the supporting ground.
• Provide supervision to ensure safe systems of work are appropriate and being used.
• Check for overhead crushing and contact hazards.
• Check weather conditions have not altered ground conditions (e.g. heavy or prolonged rain).
• Establish limits for safe operation (e.g. maximum wind speed). Remember conditions can change
internally (e.g. if roller doors are opened).
• Comply with permit to work systems where sites have them (e.g. chemical plants).
• Provide a rescue plan for all risks, including falls and crush hazards. Ensure personnel understand
and are appropriately trained in the rescuing procedures. Site based personnel trained in operation
of functions and in the emergency lowering systems from the ground control box should be present.
Ensure that access to the ground controls is available.
• Assess other alternative work methods or equipment before operating near a steep slope. If the
machine must be placed near an edge or steep slope, ensure barriers are available to support the
weight of the machine. Take into consideration the machine's stopping distance. If this is not
possible, evaluate and establish the placement of machine and sequence of operations so that the
aerial work platform can operate in a safe manner (e.g. machine is in line with the edge rather than
towards the edge).
Extra care must be taken if aerial work platforms are used to manoeuvre up through several levels of
steelwork. There is a risk of the operator being trapped should the basket strike the steelwork.
This risk increases with the number of steelwork levels and if material is piled up on lower level reducing
the spacing between levels.


A
B
C
D
E
F
G
H
I

57 4000415480  E 01.18  USA / GB
C
- Pre-operation inspection
OPTIMUM 8 - OPTIMUM 1931 E
3 -  Inspection and Functional test
 3.1 -  DAILY INSPECTION
Each day before the beginning of a new work session and with each change of operator, the machine
must be subjected to a visual inspection and a complete functional test.
In case of loose fasteners, refer to torque table value in maintenance book.
In case of leaks, replace the damaged part before use.
In case of structural part deformation, cracks, broken weld, paint chips, replace the part before use.
Sample of broken welds
Inspection Forms are provided to assist your inspection process.
We recommend these forms to be completed daily and stored to assist with your maintenance
schedule.
Each action is depicted in the daily inspection sheet using the following symbols.
• Never use a defective or a malfunctioning aerial work platform.
• If any item on the check list is marked "No" during the inspection; machine must be tagged and placed
out of service.
• Do not operate the machine until all identified items are corrected and it has been declared safe for
operation.
Visual inspection without
disassembly
Lubrication-Grease Functional adjustments
Drain Test and validate Tighten
Check levels Systematic replacement
Visual inspection with small
disassembly or movement
needed to reach the part.
Replacement is necessary.
Proof tests :  Need HAULOTTE Services® authorization.  For countries where
machines are not subject to controlled periodic maintenance.


58  4000415480  E 01.18   USA / GB
OPTIMUM 8 - OPTIMUM 1931 E
C
- Pre-operation inspection
Daily inspection
Visual inspection without disassembly Check level
To check by test
Yes No Corrected
Not
applicable
Manuals and displays.  Clean or replace if necessary.
Presence, cleanliness and legibility of the manufacturer's plate
Presence, cleanliness and legibility of operator's and maintenance
manuals
Presence and cleanliness of load chart of the machine
Control box (Ground and Platform)
Presence and cleanliness of the control box
No visible damage
All decals at the control boxes are clean and legible
Operation of start / stop device
Operation of E-stop button device
Operation of enable switch
Operation of horn from platform control box
Operation of movement from platform control box
Test warning alarm lights and buzzer
No abnormal noise and jerky movements from platform control box
Joysticks and movement switches return to neutral
Presence of the turret pin and its locking device
Presence of end stops and their locking system
Work Platform.  Floor, guardrails, access and extensions
Absence of cracks, broken parts, damaged paint
No deterioration and visible damage
Harness anchor points are not cracked or damaged, with the decal
attached and legible
No screws missing / loose parts


A
B
C
D
E
F
G
H
I

59 4000415480  E 01.18  USA / GB
C
- Pre-operation inspection
OPTIMUM 8 - OPTIMUM 1931 E
Entry bar/gate closes automatically and is not prevented from
closing.
Folding guard-rail (if fitted) is fixed securely in position
Extending structure (scissors)
Absence of cracks, broken parts, damaged paint
No deterioration and visible damage
No screws missing / loose parts
No foreign body in joints or slides
Presence of securely fitted maintenance devices (safety stand)
Frame, axle, steering system, scissors, pot hole mechanism
Check the system for damage and to ensure that it deploys when the
platform is raised
Absence of cracks, broken parts, damaged paint
No deterioration and visible damage
No screws missing / loose parts
No foreign body in joints or slides
No rust and abrasions on welds
Condition of tires/tyres (wear, cutting, damage ...)
Wheel reducer is undamaged and operates smoothly
Correct opening and locking of covers
Pin, pin stop, bearing ...
Presence of the turret pin and its locking device
Presence of end stops and their locking system
No bent, cracked or broken pins, pin stops, bushes or bearings
Cylinder and hydraulic component : pumps, filters, manifold
No leaks on the pump, tank or fittings
No deformation, visible damage, broken weld or leaks on hydraulic
cylinder
Presence and good condition of hydraulic hose
No screws missing / loose parts
Check hydraulic oil level is above the minimum level (Machine
folded)


60  4000415480  E 01.18   USA / GB
OPTIMUM 8 - OPTIMUM 1931 E
C
- Pre-operation inspection
Energy storage : Batteries
Battery electrolyte level
No screws missing / loose parts
Presence and good condition of the batteries: terminations and
clamps, electrolyte level ...
Electric cables
No torn or split wire sheaths
No evidence of chemical damage or corrosion on all cables
No oxidation or corrosion on terminals
Sensors and safety device
Slope limiting device operates properly
Test of load sensing system (visual warning at control box)
Serial number :
Hours of operation :
HAULOTTE Services® contract reference :
Intervention record number :
Date :
Name :
Model :
Signature :


A
B
C
D
E
F
G
H
I

61 4000415480  E 01.18  USA / GB
C
- Pre-operation inspection
OPTIMUM 8 - OPTIMUM 1931 E
4 -  Safety functional checks
To protect the user and the machine, safety systems prevent the movement of the machine beyond its
operating limits.  These safety systems when activated immobilize the machine and prevent further
movement.
The operator must be familiar with this technology and understand that is not a malfunction but an
indication that the machine has reached an operation limit.
Aerial Work platforms are equipped with two control boxes which allow operators to safely use the
machine. An auxiliary device (T-handle) is available on the chassis to assist with the emergency
lowering of the machine. Each control box is equipped with an E-Stop button, which cuts all movements
when pushed in.
The following checks describe the operation of the machine and the specific controls required.
The speed selector buttons at the ground control box and the platform control box act as the enable
switch.
For the location and description of these controls :   refer to section  B 3.3 and  D 2 Ground control
box and  B 3.4 and  D 3 Platform control box.
 4.1 -  E-STOP BUTTON CHECK
Ground control box E-stop button
Platform control box E-stop button
Step Action
1 Pull the E-stop button ( 15 ) at ground.
2
Turn the control box activation key switch ( 92 ) to the right to energize the ground control box. The
indicators light up.
3 Push the E-stop button ( 15 ). The indicator goes out.
Step Action
1 Pull the E-stop push-button ( 46 ).
2
Turn the control box activation key switch ( 92 ) to the left to energize the platform control box. The
indicators light up.
3 Push the E-stop button ( 46 ). The indicator goes out.


62  4000415480  E 01.18   USA / GB
OPTIMUM 8 - OPTIMUM 1931 E
C
- Pre-operation inspection
 4.2 -  ACTIVATION OF CONTROLS
The deadman foot pedal (enable switch) must be activated to allow any movement.
The "Enable Switch" system depends on the machine configuration and will consist of one of
the following :
•  Enable trigger on platform control joystick.
•  Foot pedal (enable switch) in the platform (Optional).
•  Enable switch on the  ACTIV'Screen on ground control box.
 4.3 -  FAULT DETECTOR
The machine is equipped with an on-board fault detection system, which indicates the type of
fault to the operator.
The fault is identified by a default code.
The default code is displayed at the ground control box.
According to the type of fault, the machine MAY switch into DOWNGRADEMODE mode and
certain movements are prevented to maintain Operator's safety.
Do not use the machine until the fault has been corrected.
 4.3.1 - Buzzers test
From the ground control box
 4.4 -  OVERLOAD SENSING SYSTEM (IF FITTED)
If the platform load exceeds the maximum allowed load, no movement is possible from the  2
control boxes.
At ground and platform control boxes a buzzer sounds and an indicator light warns the
operator.
To return the machine to normal operation remove weight from the platform until the load is
below the maximum allowed load.
Daily check that the LED's illuminate when the machine is switched on :
• Verify that the Overload system is active : Refer to Indicators ( 6 ) at ground and ( 30 ) at
platform.
•  Verify that the buzzers are functioning : Refer to  Buzzers test
A periodic inspection of this device must be performed according to the recommendation in
Maintenance Schedule.
Step Action
1 Pull the E-Stop buttons ( 15 ) at ground control box and ( 46 ) on the platform control box
2
Turn the control box activation selector key ( 92 ) to the left or right to activate a control box. An audible
signal (beep) sounds.


A
B
C
D
E
F
G
H
I

63 4000415480  E 01.18  USA / GB
C
- Pre-operation inspection
OPTIMUM 8 - OPTIMUM 1931 E
 4.5 -  SLOPE WARNING DEVICE
From each control box, a buzzer alerts the operator that the machine is not folded/stowed and
is positioned on a slope exceeding the slope allowed.
N.B.-:-T
HE SLOPE SENSOR IS ONLY ACTIVE WHEN THE PLATFORM IS NOT IN THE STOWED POSITION.
When the unfolded machine is on a slope greater than the rated slope, out of the stowed
position, DRIVE and LIFT functions are disabled(For CE, AS and CSA only).
All speeds are reduced
In this case, fully lower the platform and reposition the machine on level ground before raising
the platform again.
N.B.-:-D
EPENDING ON YOUR MACHINE CONFIGURATION, OUTSIDE ASSISTANCE MAY BE NECESSARY
IN
 ORDER TO CARRY OUT THIS OPERATION.
To check the tilt sensor at ground control box
 4.6 -  TRAVEL SPEED LIMITATION
Drive speed is proportional to control, without restriction, until the maximum speed is reached
(machine in fully stowed position).
The only speed allowed when not in stowed position is microspeed (This speed is a default
speed programed into the machine).
 4.7 -  ELECTRONIC VARIABLE SPEED DRIVE
The machines are equipped with  2 electronic variable speed regulators configured for each
function and manages the required power needed for each motor.
Step Action
1 Pull the E-stop push-buttons on the platform and ground control boxes (46, 15).
2 Switch on the machine from the ground control box (92).
3 Lower the platform completely.
3 Locate the tilt sensor next to the ground control box.
4
Manually tilt and maintain the tilt sensor towards the front for a few seconds ( Section B 3.1 - Layout) :
5 The audible beep sounds.
6
For machines fitted with : The slope sensor prevents lifting and driving movements (For CE, AS and CSA
only).
Do not interchange the speed controllers/regulators between machines even if they are the same model.


64  4000415480  E 01.18   USA / GB
OPTIMUM 8 - OPTIMUM 1931 E
C
- Pre-operation inspection
 4.8 -  OPERATING TEMPERATURE (FOR  EAC STANDARD ONLY)
Hydraulic energy to perform machine movements is provided by an electric motor driven
hydraulic pump.The operating speed of the pump is governed by a speed regulator.  If the
temperature limits are reached, an audible alarm alerts the operator.  All movements are cut
off except getting back to transport position.
Temperature limits :
•  from  0° C / 32° F to  + 40° C / 104° F
Location of operating temperature thermostat
 4.9 -  MACHINE BRAKING
When electric power is cut off, the machine stops automatically.
Performance levels may be reduced in the following situations :
•  Descending a bumpy ramp.
• Worn tires/tyres.
•  Damp or muddy ground conditions.
Check that the brakes are applied automatically when the Drive joystick is released to the
neutral position.
 4.10 -  WHEEL MOTOR BRAKE RELEASE
Each time a drive command is activated, electric power releases the brakes.
 4.11 -  POTHOLE PROTECTION SYSTEM
The machine is equipped with a pothole mechanism under the chassis that is deployed
automatically when the platform is out of the stowed position.
Check the system for damage and ensure that it deploys when the platform is raised.


A
B
C
D
E
F
G
H
I

65 4000415480  E 01.18  USA / GB
C
- Pre-operation inspection
OPTIMUM 8 - OPTIMUM 1931 E
 4.12 -  ON-BOARD CHARGER
Battery charging starts as soon as an external supply is connected to the battery charger.
 4.12.1 - Battery charge level
The indicator  (93) shows the charge status of the battery whilst charging :
 4.13 -  ANTI-CRUSH SYSTEM WHEN LOWERING
A device alerts people on the ground of a risk of crushing :
•  Between the lifting systems.
•  Under platform extension.
This device automatically operates between the transport height position limit and the lower
position (Refer to Driving speed)
All versions, lowering control from the platform and ground control boxes :
•  Slows the downward movement and emits an audible signal.
Standard CE, lowering movement from platform control box :
• At the end of the lowering operation, a  3 (second) automatic delay is initiated before
resuming lowering, to avoid the risk of crushing.
When the battery pack is being charged with an external power supply, the machine's electric system is
automatically deactivated.
•  Green indicator  : Battery charged 100 %.
•  Yellow LED  : Battery charged 80 %.
•  Red LED  : Battery in initial charging phase.


66  4000415480  E 01.18   USA / GB
OPTIMUM 8 - OPTIMUM 1931 E
C
- Pre-operation inspection

Notes


A
B
C
D
E
F
G
H
I

67 4000415480  E 01.18  USA / GB
D
- Operation instructions
OPTIMUM 8 - OPTIMUM 1931 E
Operation instructions
1 -  Operation
 1.1 -  INTRODUCTION
Only trained and authorized personnel shall be permitted to operate this aerial work platform.
Prior to operation :
• Read, understand and obey all instructions and safety precautions in this manual and
attached to the aerial work platform.
•  Read, understand and obey all Federal, State and local codes and regulations.
•  Become familiar with the proper use of all controls and emergency systems.


68  4000415480  E 01.18  USA / GB
D
- Operation instructions
OPTIMUM 8 - OPTIMUM 1931 E
 1.2 -  OPERATION FROM THE GROUND CONTROL BOX
•  Turning "ON" and "OFF" of the machine is performed with selector key switch (92).
•  Activation of a desired control box is achieved by turning the control box energizing selector
switch ( 92 ) to the desired position.
•  The ground control box is energized and is active ONLY when :
 • The E-stop buttons on both ground and platform control boxes are not pressed in.
 • The machine is switched on.
 • Ground control box is selected.
•  An E-stop button at each control box stops all movements when pressed in (deactivated).
N.B.-:-A
N E-STOP BUTTON PRESSED IN DOES NOT TURN OFF THE MAIN POWER SUPPLY TO THE
MACHINE
.
•  An enable switch ( 9 ) provided must be activated and maintained to authorize one or more
function movements.  If enable switch ( 9 ) is kept engaged without selecting a function
movement for more than  8 s; enable switch is automatically de-activated.
•  The release of "Enable switch" ( 9 ) while performing a movement stops all the movements.
The stop of movements is progressive.  If the "Enable switch" system is re-pressed, the
movement doesn't restart.  It could restart only when the selected function switch/joystick is
released to neutral position.
• All switches and joystick operating a movement, return automatically to neutral when
released.
•  At power up, a switch in it's neutral position will be taken into account to authorize movement.
•  The ground control box is designed for maintenance and emergency rescue operations only.
Refer to Section D 4.2 To rescue operator in platform.
• The status of the switches is tested automatically when the machine is switched on, and
checked at every starting.  A switch will be active only after it has been detected to be in
neutral position.  The following switches are not controlled :
 • Beacon light (if fitted)
A buzzer beeps in the following conditions :
•  Overload (if fitted).
•  Machine out of stowed position and on a slope greater than allowable slope.
• Movements option.
•  Indicators / Cluster  : All indicators are checked after powering on the machine


A
B
C
D
E
F
G
H
I

69 4000415480  E 01.18  USA / GB
D
- Operation instructions
OPTIMUM 8 - OPTIMUM 1931 E
 1.3 -  OPERATION FROM THE PLATFORM CONTROL BOX
•  The platform control box can only be used if :
 • The E-stop buttons on both ground and platform control boxes are not pressed in (Energized).
 • Machine switched on at ground control box.
 • Platform control box selected from ground control box.
•  A faulty joystick is not taken into account to control a movement.  If this fault disappears, the
movement is authorised again.
• An E-Stop button is present at each control box. When pushed in, it stops all functions
movements and will shut off the engine (if equipped).
•  An "Enable switch" ( 123 ) or Foot pedal switch in the basket ( 245 ) is present and should
be activated to authorize one or more function movements.  If the enable switch is kept active
for more than  8 seconds without selecting a function movement, then movement is
disallowed. The enable switch must be released (reset) before movement can occur.
• The release of "Enable switch" ( 123 ) or Foot pedal switch in the basket ( 245 ) while
performing a movement stops all the movements.  The stop of movements is progressive.  If
the "Enable switch" is pressed again quickly within   0,5 s the movement restarts.  If the
"Enable switch" is not pressed again quickly enough within  + 0,5 s the movement will not
restart.  It could restart only when the selected function switch/joystick is released to neutral
position.
• All switches and joystick operating a movement, return automatically to neutral when
released.
•  At power up, a switch in it's neutral position will be taken into account to authorize movement.
• The status of the switches is tested automatically when the machine is switched on, and
checked at every starting.  A switch or joystick will be active only after it has been detected
in neutral position.
A buzzer beeps in the following conditions :
•  Overload (if fitted).
•  Machine out of stowed position and on a slope greater than allowable slope.
•  Indicators - All the indicators are tested
 • When the machine is switched on.


70  4000415480  E 01.18  USA / GB
D
- Operation instructions
OPTIMUM 8 - OPTIMUM 1931 E
2 -  Ground control box
 2.1 -  TO START AND STOP THE MACHINE
•  Ensure that the E-Stop buttons ( 15 ) and ( 46 ) at the ground and platform control boxes are
pulled out.
• Turn the key of the control box activation switch ( 92 ) to the right to energize the ground
control box.
To shut-down the machine from the ground control box :
•  Turn the control box activation selector ( 92 ) key to the center.
•  Push in the E-stop button ( 15 ).
 2.2 -  MOVEMENT CONTROL
N.B.-:-RELEASING THE ENABLE SWITCH  WILL STOP ALL MOVEMENTS.
Ground box controls (emergency station)
Even at low movement speeds, use the controls with caution.
Control Action
Platform raising / lowering
Push the platform raising / lowering selector ( 106 ) upwards to
raise the platform.
Press the platform raising / lowering selector ( 106 )
downwards to lower the platform.
Emergency lowering /
Emergency platform
lowering halted
Pull the T-handle ( C107 ) to lower the platform.
Release the T-handle ( C107 ) to stop platform lowering.
Once rescue operations are complete, write an incident report.


A
B
C
D
E
F
G
H
I

71 4000415480  E 01.18  USA / GB
D
- Operation instructions
OPTIMUM 8 - OPTIMUM 1931 E
Pull T-handle for emergency lowering
N.B.-:-P
ULLING ON TO THE T-HANDLE, IMMEDIATELY ACTIVATES THE EMERGENCY LOWERING OF
THE
 PLATFORM.
 2.3 -  ADDITIONAL CONTROLS FROM THE GROUND CONTROL BOX
For the machines equipped with beacon light :
•  Push the beacon light selector switch ( 105 ) upwards to turn ON the beacon light.
•  Push the beacon light selector switch ( 105 ) downwards to turn OFF the beacon light.
ALWAYS keep personnel and obstructions clear of the aerial work platform that might block the lowering.


72  4000415480  E 01.18  USA / GB
D
- Operation instructions
OPTIMUM 8 - OPTIMUM 1931 E
3 -  Platform control box
 3.1 -  TO START AND STOP THE MACHINE
To start the machine :
At the ground control box :
•  The E-stop button on the ground control box must be in  ON position (pulled out / activated).
• Turn the key on the control box activation selector switch ( 92 ) to the left to energize the
platform control box.
At the platform control box :
•  Pull the E-stop button (46).
To stop the machine :
•  Push in the E-stop button  (46).


A
B
C
D
E
F
G
H
I

73 4000415480  E 01.18  USA / GB
D
- Operation instructions
OPTIMUM 8 - OPTIMUM 1931 E
 3.2 -  DRIVE AND STEER CONTROL
To control the direction and drive :
•  Move the  2-position selector ( 112 ) to the right.
•  The drive indicator ( 111 ) lights up.
• Simultaneously operate drive joystick ( 108 ) with joystick trigger (Enable switch ( 123 ))
pressed in and maintained.
N.B.-:-F
OR JAPAN ONLY - BOTH THE ENABLE SWITCH ( 123 ) AND FOOT PEDAL SWITCH ( 245 )
MUST BE PRESSED TO ACTIVATE A FUNCTION.
N.B.-:-F
OR JAPAN ONLY - DRIVE AND STEER RESTRICTION WHEN ELEVATED, DEPENDING ON THE
OPTION
 SELECTED AS SHOWN BELOW :
OFF-D
RIVE AND STEERING FUNCTIONS ARE ALLOWED AT FULL HEIGHT.
ON
IF > 0.5 M (1.6 FT) - DRIVE AND STEER FUNCTIONS ARE CUT OFF
ON IF > 1.5 M (5.0 FT) - DRIVE AND STEER FUNCTIONS ARE CUT OFF
N.B.-:-THE DRIVE AND LIFT SPEEDS ARE PROPORTIONAL TO THE POSITION OF THE JOYSTICK.
PUSHING THE JOYSTICK COMPLETELY FORWARD OR BACKWARD, WILL RESULT IN MAXIMUM SPEED.
Control Action
Driving
Move the drive joystick ( 108 ) forwards to drive the machine forwards.
Move the drive joystick ( 108 ) backwards to drive in reverse.
Front-axle steering
Push the front-axle steering selector thumb switch ( 108 ) to the right to steer to the
right.
Push the front-axle steering selector thumb switch ( 108 ) to the left to steer to the
left.


74  4000415480  E 01.18  USA / GB
D
- Operation instructions
OPTIMUM 8 - OPTIMUM 1931 E
 3.3 -  MOVEMENT CONTROL
To operate raising/lowering function, move  2 position selector switch ( 112 ) to the left.
Activate raising/lowering selector ( 110 ). Simultaneously operate joystick ( 108 ) with joystick
trigger (Enable switch ( 123 )) pressed in and maintained.
N.B.-:-F
OR JAPAN ONLY - BOTH THE ENABLE SWITCH ( 123 ) AND FOOT PEDAL SWITCH ( 245 )
MUST BE PRESSED TO ACTIVATE A FUNCTION.
Control Action
Platform raising / lowering
Push the movement joystick ( 108 ) forwards to raise the platform.
Push the movement joystick ( 108 ) backwards to lower the platform.
1
.
2
.
3
. .
1. When the platform is lowered to a height of 1,50 m(4 ft11 in) from the ground; a time delay is automatically activated for a few seconds, before any further
lowering of the platform can commence
2. This is to avoid any risk of crushing
3. The alarm sounds


A
B
C
D
E
F
G
H
I

75 4000415480  E 01.18  USA / GB
D
- Operation instructions
OPTIMUM 8 - OPTIMUM 1931 E
4 -  Emergency procedure
 4.1 -  IN CASE OF POWER LOSS
In case of loss of the main power source, the secondary (back-up) power unit, powered by the
starting battery, allows movements to be controlled from both the ground and platform control
boxes.
In an emergency, if the operator has to exit the platform while it is elevated, the transfer of the
operator must respect the following recommendations.  :
•  Exit onto a sturdy and safe structure.
• The occupant(s) must ensure that  2 lanyards are used for security/safety. One must be
attached to the designated anchorage point on platform the occupant(s) is in and the other
attached to the structure intended to get on.
•  Occupant(s) must exit the current platform through the normal access.
N.B.-:-D
O NOT DETACH THE LANYARD FROM THE CURRENT PLATFORM IF THE TRANSFER TO THE
NEW
 STRUCTURE POSES ANY DANGER OR UNTIL THE TRANSFER IS SAFELY COMPLETED.  DO NOT
ATTEMPT
 TO CLIMB DOWN FROM THE PLATFORM. WAIT FOR ASSISTANCE TO LEAVE THE CRADLE
SAFELY
.
 4.2 -  TO RESCUE OPERATOR IN PLATFORM
In a situation where an operator located in the platform needs to be rescued (for example in
case of illness, injury or trapped against a structure making the control box inaccessible), the
rescue personel at ground level needs to obtain rapid and direct access to operating functions.
HAULOTTE® provides a ground control emergency system that should be used to safely bring
the operator into such a position that appropriate medical attention could be provided.
Lower the platform using the T-handle on the chassis.
Or :
1. Turn the key of the control box activation switch ( 92 ) to the right to energize the ground control
box. The platform box controls are de-energized.
2. Lower the platform from the ground control box.
3. Lower the platform using the platform raising/lowering selector ( 1 ) while simultaneously press-
ing and maintaining the "Enable switch" ( 9 ).
4. Release it to halt lowering.
Once rescue operations are complete, write an incident report.


76  4000415480  E 01.18  USA / GB
D
- Operation instructions
OPTIMUM 8 - OPTIMUM 1931 E
5 -  Transportation
 5.1 -  PUTTING IN TRANSPORT POSITION
During loading, ensure that :
•  The loading ramp can support the machine weight.
•  The loading ramp is correctly attached to transport vehicle.
•  The loading ramp has sufficient grip surface.
• The transport vehicle must be parked on a level surface and must be secured to prevent
rolling away while machine is being loaded or unloaded.
To climb the slope, move progressively the drive joystick ( 108 ).
If the slope is too steep, use a winch in addition to traction.
Do not place yourself below or too close to the machine during loading.
The machine must be completely in the stowed configuration :
•  Check the platform is completely empty.
•  Platform extension must be retracted in the locked position.
•  Drive the machine onto the truck bed.
•  Secure the machine to the tie down points provided (See picture).
A wrong move can lead to machine tipping over and may cause serious injuries and material damage.
The manual extension (if fitted) must be retracted and locked during transport or towing.


A
B
C
D
E
F
G
H
I

77 4000415480  E 01.18  USA / GB
D
- Operation instructions
OPTIMUM 8 - OPTIMUM 1931 E
 5.2 -  MACHINE LAYOUT

 5.3 -  UNLOADING
Before unloading, check that the machine is in good condition.
•  Remove the tie downs.
•  At ground control box turn control box activation switch ( 92 ) to the left to energize platform
box.
• At the platform controls, with  2 position selector ( 112 ) turned to the right, carefully and
progressively move drive joystick ( 108 ) with Enable switch ( 123 ) pressed and maintained.
To reinstate the system, lift the platform a few centimetres (inches) from the ground control
box.
Warning : Upon starting a machine that has been secured and transported, the safety system may detect
a false overload preventing all movement from the platform control box.


78  4000415480  E 01.18  USA / GB
D
- Operation instructions
OPTIMUM 8 - OPTIMUM 1931 E
 5.4 -  TOWING
To tow a broken-down machine, release brake (Refer to Section D 5.4.1 Brake release).
Perform this operation on flat ground with wheels chocked.
In the towing configuration, the machine braking system is inactive. Use of a drawbar is
recommended :
• Do not exceed the maximum freewheel speed (Refer to Section B 4 Technical
specifications).
•  Do not exceed a grade of  25%.
In the event of a machine breakdown, the machine can be towed a short distance to load it onto a transport
vehicle :
• Ensure that no one is in the platform during towing.
• Before towing, ensure that the platform is fully lowered.
• The platform must be empty.
• ALWAYS keep personnel and obstructions clear of the aerial work platform when brakes are released.


A
B
C
D
E
F
G
H
I

79 4000415480  E 01.18  USA / GB
D
- Operation instructions
OPTIMUM 8 - OPTIMUM 1931 E
 5.4.1 - Free wheel mode
To tow a broken-down machine, release brake.
If the machine is towed, the brakes on the drive wheels can be released using the switch
located in the motor pump unit compartment.

To release the machine's brakes, the following conditions must be met :
•  The platform control box or the ground control box must be selected.
•  The machine must be completely stowed.
• No movement selected.
•  The machine must not be tilted.
Push the brake release button for at least 3 s. An audible signal (beep) sounds.
Releasing the button disengages the brakes.
The brake release procedure stops automatically if the brake release button is pushed again,
any actions are taken at the control boxes, the machine is turned off, or the control box in use
is changed.
Perform these operations on flat, horizontal ground. Failing that, block the wheels to immobilize the
machine.  During brake release operation, the machine is in free wheel mode and the brake system no
longer functions.
In the towing configuration, the machine is no longer slowed down. Use a drawbar to avoid any risk of
accident.
Do not exceed 4.5 km/h (2.79 mph)  .


80  4000415480  E 01.18  USA / GB
D
- Operation instructions
OPTIMUM 8 - OPTIMUM 1931 E
 5.5 -  STORAGE
When the machine is stored with platform raised, it is necessary to regularly switch "ON" the
power to ensure that the security systems are active..
It is recommended that the machine is not stored or immobilized unfolded.
Ensure all access panels, doors and side compartment covers are shut and secured.
Turn the energizing key selector switch ( 92 ) at the ground control box to the "center" position
to shut OFF the power.
Remove the energizing key to prevent unauthorized operation of the machine.
The machine can be stored in a designated area when not in use. If it has been stored for longer than  3
months without use then a periodic inspection must be conducted.
Storing of the machine with an obstacle under the extended platform is forbidden.
When machine is stored and not used for more than  1 week, check the battery's state of charge, recharge
if necessary.
To avoid any risk of corrosion on rods of cylinders during a storage period of for more than  1 month :
• In a normal atmospheric environment : perform a complete cycle for the cylinders every   2 months while
they are in storage.
• In harsh environments (high levels of salinity in the atmosphere: close to the sea, industrial environment
with chloride emissions and/or humidity  >70%), we recommend applying the following protection
process :
•  Wash and rinse the entire machine with plenty of clean water.
•  Dry all the cylinder rods using an air gun.
• Apply a solvent-based oil leaving an oily film after evaporation of the solvent
directly to all rods left exposed when the machine is in storage position.
•  Re-apply the product every month.
After washing the machine, make sure it is fully air-dry and does not contain moisture on corrosive parts
(cylinders rods for example).
Do not wash any electrical components, particularly with high pressure washer. Wipe away dirt from
around electrical components with a dry cloth.


A
B
C
D
E
F
G
H
I

81 4000415480  E 01.18  USA / GB
D
- Operation instructions
OPTIMUM 8 - OPTIMUM 1931 E
 5.6 -  LOADING BY RAMP
 5.7 -  UNLOADING BY RAMP
1. Remove the tie downs.
2. Start the machine.
3. The ramp is in good condition and of sufficient capacity. The lifting equipment ie. slings, shackles,
hooks, lifting beam etc. are in good condition and of sufficient capacity.
To avoid any risk of sliding during loading, ensure that :
• The loading ramp can bear the load.
• The loading ramp is correctly attached.
• The loading ramp has sufficient grip.
If the slope exceeds  25% grade, use a winch to assist in loading on to the ramp.
Never place yourself below or too close to the machine during loading.
A wrong move can lead to the tipping over of the machine and cause serious bodily and material accidents.
Before operating, check that the machine is in good condition.
If the machine has been damaged during transportation, contact the transporter in writing


82  4000415480  E 01.18  USA / GB
D
- Operation instructions
OPTIMUM 8 - OPTIMUM 1931 E
 5.8 -  LIFTING OPERATION
During loading / unloading operation, if it becomes necessary to lift the machine using an
overhead crane, it is important to respect the following :
•  Put the machine in stowed position (Extension retracted).
•  Ensure the platform is empty.
• Verify that lifting accessories are in good operation and match the technical specifications
listed below.  It is important that the lifting devices are attached only to the designated lifting
eyes.
•  Each of the slings used for lifting the machine must be adjusted to keep the machine level
and to minimize the risk of damage to the machine.
•  Anchorage point for lifting are identified / labeled by the following symbol .
•  ONLY trained and authorized personnel should attempt to lift the machine.
Procedure for the use of slings
Never lift the machine with slings attached to counterweight.
Number of shackles Number of slings Length Maximum load per sling and shackle
4 4 2 m / 6 ft 7 in 1000 kg/ 2,205 lbs


A
B
C
D
E
F
G
H
I

83 4000415480  E 01.18  USA / GB
D
- Operation instructions
OPTIMUM 8 - OPTIMUM 1931 E
 5.9 -  LOADING AND UNLOADING WITH FORKLIFT
Unloading
•  Carefully lift the machine and make sure that the machine weight is properly balanced.
•  Slowly lower the machine and place it on the ground.
• Lower the platform.
The machine must be in the fully stowed transport
position.
• Ensure that the machine controls are in the  OFF
position.
•  Forklift used to load and unload must have adequate
capacity  (Refer to Section B 4 Technical
specifications).
• Adjust the forklift forks spread to match with the
machine fork pockets.
• Carefully insert the forklift forks in the designated
machine fork pockets.
Never place yourself below or too close to the machine during loading.
A wrong move can lead to machine tipping over and may cause serious injuries and material damage.


84  4000415480  E 01.18  USA / GB
D
- Operation instructions
OPTIMUM 8 - OPTIMUM 1931 E
6 -  Hydraulic oil
External environmental conditions can reduce performance of the machine if the hydraulic oil
temperature does not reach its optimum range.
It is recommended to use the hydraulic oil according to weather condition.  Refer to the table below.
N.B.-:-I
T IS RECOMMENDED TO REPLACE LOW TEMPERATURE OIL AS THE AMBIENT TEMPERATURE
REACHES
 + 15°C (59°F).  IT IS NOT ADVISABLE TO MIX OILS OF DIFFERENT BRANDS OR TYPES.
Environmental conditions  SAE Viscosity grade
Ambient temperature between  - 15°C (5°F) and  + 40°C (+ 104°F) HV 46
Ambient temperature between  - 35°C (- 31°F) and  + 35°C (+ 95°F) HV 32
Ambient temperature between  0°C (+ 32°F) and  + 45°C (+ 113°F) HV 68


A
B
C
D
E
F
G
H
I

85 4000415480  E 01.18  USA / GB
D
- Operation instructions
OPTIMUM 8 - OPTIMUM 1931 E
7 -  Battery care and maintenance
 7.1 -  BATTERY CHARGING
Recharge aerial work platform batteries after each  8 hour work shift or as needed. When the
aerial work platform is not in use, batteries should be recharged at least once per week. Under
normal circumstances, battery recharge should take approximately  8-10 hours. However, a
full recharge may take up to  24 hours, if the battery charge is extremely low.
Battery charger status
Ground control box :
The indicator  (93) indicates charge status.
Platform control box :
The indicator  (91) indicates charge status.
•  Green indicator  : Battery charged 100 %.
•  Yellow LED  : Battery charged 80 %.
•  Red LED  : Battery in initial charging phase.
•  Battery charged :
•  Flashing : Batteries have  40% charge left :
•  Constantly on : Batteries have only  20% charge left :

100%

40%

20%


86  4000415480  E 01.18  USA / GB
D
- Operation instructions
OPTIMUM 8 - OPTIMUM 1931 E
When should the batteries be charged ? :
•  Do not let the battery discharge to below 20 %.
•  When the batteries are discharged to between 35 % and 80 % of their nominal capacity.
•  If installing new batteries, recharge them after   3 or  4 hours of use  3 to  5 times.
•  After a long period of non-use.
•  Never leave the batteries discharged.
•  Do not put off recharging the batteries in cold weather as the electrolyte may freeze.
How to charge the batteries ? :
• Use the machine's on-board charger. The charger has a charge rate compatible to the
battery capacity.
•  Ensure that the mains supply is compatible to the charger's consumption.
• Top up the batteries with distilled water to the minimum electrolyte level if any of the
elements are below this minimum level.
•  Work in a clean and well-ventilated area away from naked flames.
•  Move the aerial work platform to a well-ventilated area with direct access to a  AC electrical
outlet.
• Do not recharge the batteries if the temperature of the electrolyte exceeds 40 °C(104 °F) . Allow to cool
down.
• Keep the top of the batteries clean and dry. Incorrect connection or corrosion may cause a high loss of
power.
• The charger settings are adjusted in the factory using its own cable. If the cable needs changing,
the HAULOTTE® factory must be contacted to obtain authorisation.
Before charging the batteries, switch the machine off.
Charger type 24 V - 20 Ah
Electric power supply
220 V  single phase 50 Hz
120 V  single phase 60 Hz
80 V  single phase 50 - 60 Hz
System voltage 24 V
Charging time Approximately 10 h for batteries discharged to 80 %


A
B
C
D
E
F
G
H
I

87 4000415480  E 01.18  USA / GB
D
- Operation instructions
OPTIMUM 8 - OPTIMUM 1931 E
To recharge the aerial work platform batteries :
Attach a  12 AWG multi-strand, grounded extension cord with a maximum length of  15 m (50
ft) to the receptacle located on the charger.
Plug the extension cord into outlet.
Start-up is automatic as soon as the mains connection is established. The charger is fitted with
a LED indicator placed near the special holding frame :
•  Green indicator  : Battery charged 100 %
•  Yellow LED  : Battery charged 80 %
•  Red LED  : Charger in the intitial charge phase
The CHARGING indicator LED remains lit continuously during the first stage of the charge
cycle. The charge current will be displayed on the BATTERY CHARGER FACEPLATE.
To display the Battery Voltage, press (push) in and hold the BATTERY VOLTAGE button.
How to maintain battery autonomy ? :
•  Do not charge the batteries in cold temperatures.
•  The battery life is reduced when the machine is used in cold
temperatures (< 0 °C(32 °F) ).
• If the machine is not going to be used for a length of time,
shut-off the power with battery isolation switch(E-stop
button ( 15 )).
•  Do not let the battery discharge to below 20 %.
•  If batteries are deeply discharged  (<10%); standard battery
charger may not be enough to recharge battery.


88  4000415480  E 01.18  USA / GB
D
- Operation instructions
OPTIMUM 8 - OPTIMUM 1931 E
When the battery charge reaches  80% of capacity, the yellow  80% CHARGED indicator LED
will become lit and the green CHARGING indicator LED will begin to flash.
Unplug the extension cord from the outlet and the charger receptacle on the aerial work
platform. Store the extension cord for next use.
N.B.-:-A
LWAYS UNPLUG THE BATTERY CHARGER POWER CORD BEFORE MOVING THE AERIAL WORK
PLATFORM
. FAILURE TO DISCONNECT POWER CORD COULD CAUSE DAMAGE TO THE EQUIPMENT.
Do not disconnect any output leads or connectors between the batteries and the charger when the charger
is on. To stop a charge in progress, always unplug the extension cord from the AC power source.
Recharge batteries in a well-ventilated area only. Do not charge batteries near fire, spark or other potential
ignition sources. Batteries may emit highly explosive hydrogen gas while charging. Failure to properly
ventilate the charge gasses could result in death or serious injury. Always charge aerial work platform
batteries away from flammable materials.
ALWAYS avoid contact with battery acid. Battery acid causes serious burns and should be kept away from
skin or eyes. If contact occurs, flush with water and consult a physician immediately.


A
B
C
D
E
F
G
H
I

89 4000415480  E 01.18  USA / GB
D
- Operation instructions
OPTIMUM 8 - OPTIMUM 1931 E

Notes


90  4000415480  E 01.18  USA / GB
E
- General Specifications
OPTIMUM 8 - OPTIMUM 1931 E
General Specifications
1 -  Machine dimensions
Stowed / Transport position : Configuration that takes the minimum floor space
necessary for storage and / or delivery of the machine - Access position.


A
B
C
D
E
F
G
H
I

91 4000415480  E 01.18  USA / GB
E
- General Specifications
OPTIMUM 8 - OPTIMUM 1931 E
CE, AS and  EAC standards
ANSI and CSA standards
Machine OPTIMUM 8
Marking Specifications - Dimensions SI Imp.
A Overall length of machine 1,89 m 6 ft 2 in
B Overall width of machine 0,79 m 2 ft 7 in
C Overall height of machine 1,99 m 6 ft 6 in
D Wheel base 1,38 m 4 ft 6 in
E
Ground clearance - Pothole mechanism deployed with platform raised 2,2 cm 1 in
Ground clearance - Pothole mechanism retracted with platform fully
lowered
6 cm 3 in
F X G Platform dimensions 1,73 m x 0,74 m 5 ft 8 in x 2 ft 5 in
H Storage length 1,89 m 6 ft 2 in
J Storage height 1,99 m 6 ft 6 in
Machine OPTIMUM 1931 E
Marking Specifications - Dimensions SI Imp.
A Overall length of machine 1,89 m 6 ft 2 in
B Overall width of machine 0,79 m 2 ft 7 in
C Overall height of machine 1,99 m 6 ft 6 in
D Wheel base 1,38 m 4 ft 6 in
E
Ground clearance - Pothole mechanism deployed with platform raised 2,2 cm 1 in
Ground clearance - Pothole mechanism retracted with platform fully
lowered
6 cm 3 in
F X G Platform dimensions 1,73 m x 0,74 m 5 ft 8 in x 2 ft 5 in
H Storage length 1,89 m 6 ft 2 in
J Storage height 1,99 m 6 ft 6 in


92  4000415480  E 01.18  USA / GB
E
- General Specifications
OPTIMUM 8 - OPTIMUM 1931 E
2 -  Major component masses
3 -  Acoustics and vibrations
The acoustics and vibrations specifications are based upon the following conditions :
• The airborne noise emissions at workstation are determined per European Directive  2006/42/CE.
• The guaranteed sound power level  LWA (displayed on the product) is determined per European
Directive  2000/14/CE.
• The vibrations transmitted by the machinery to the hand/arm system and to the whole body are
determined per European Directive  2006/42/CE.
Specifications
OPTIMUM 8 OPTIMUM 1931 E
SI Imp.
Frame assembly mass 948 kg 2090 lbs
Scissors assembly mass 430 kg 950 lbs
Platform assembly mass 125 kg 275 lbs
Drive wheel mass 19 kg 40 lbs
Steer wheel mass 19 kg 40 lbs
Central counterweight mass 248 kg 550 lbs
Moulded (Steps) counterweight mass 244 kg 540 lbs
Specifications
Sound pressure level at workstation 63 dBA
Vibrations hand/arm
Vibration transmitted by this MEWP to the hand-arm does not
exceed 2,5 m/s²(98,4 in/s²)
Vibrations whole body
Vibration transmitted by this MEWP to the whole body does not
exceed 0,5 m/s²(19,6 in/s²)


A
B
C
D
E
F
G
H
I

93 4000415480  E 01.18  USA / GB
E
- General Specifications
OPTIMUM 8 - OPTIMUM 1931 E
4 -  Wheel/Tire assembly
 4.1 -  TECHNICAL SPECIFICATIONS
 4.2 -  INSPECTION AND MAINTENANCE
Component Standard wheel
Reference number Solideal
Typ e Solid tires/tyres
Size 316 mm / 108 mm (12,5 in/ 4,25 in)
Tor qu e 115 Nm (84.81 ft lbs)
Replace the wheels and the tires if any of the following
conditions exist :
• Presence of cracks, damage, deformation or other
faults on the hub
•  Damage to the tire :
•  Cut or hole >  3 cm (2 in) in the rubber side wall.
•  Blister or pronounced lump on the external and lateral
wall.
• Damaged wheel stud.
•  Damage or wear on the side wall to the extent that the
reinforcing wire is visible.
•  Consistent wear of the ground contact surface greater
than  25%
Tires and rims are critical components for the stability of the machine. For safety reasons :
• Use only HAULOTTE® spare parts according to the technical characteristics of the machine.  Refer to
the spare parts catalog.
• Do not replace factory-installed tires with tires of different specifications or ply rating.


94  4000415480  E 01.18  USA / GB
E
- General Specifications
OPTIMUM 8 - OPTIMUM 1931 E
 4.2.1 - Procedure of replacement
• Slightly lift the machine using the lifting
points of the frame.
• Place a wooden spacer under the frame to
support the machine after lifting off the
ground.
• Straighten the bent tooth of the washer
which restricts the nut rotation. Use a
screwdriver and a hammer.
•  Use the locknut socket  TMFS5 to loosen the
nut.
•  Remove the nut and the washer.
• Remove the wheel (use an extractor if
necessary).


A
B
C
D
E
F
G
H
I

95 4000415480  E 01.18  USA / GB
E
- General Specifications
OPTIMUM 8 - OPTIMUM 1931 E
Reassembly of the wheel
•  Use a new locking washer  MB5 (4000505880).
Marking Description
1 Wheel
2 Motor shaft
3 Washer
4 Nut


96  4000415480  E 01.18  USA / GB
E
- General Specifications
OPTIMUM 8 - OPTIMUM 1931 E
•  Use a new nut  KM5 (2454131050).
1. Check that the shaft key is well positioned in
the motor shaft.
2. Mount the wheel on the motor shaft.
3. Install the washer first then the nut.
4. Tighten the nut with a calibrated torque
wrench and locknut socket  FMFS5 to preset
torque of  8 kgf. m (58 lbsf. ft).
5. If no washer tooth lined up with any notch in
the nut, continue to tighten the nut until it is
aligned.
6. Bend the aligned washer tooth in the notch to
stop rotation.


A
B
C
D
E
F
G
H
I

97 4000415480  E 01.18  USA / GB
E
- General Specifications
OPTIMUM 8 - OPTIMUM 1931 E
5 -  Options
 5.1 -  PLUMBER'S KIT
 5.1.1 - Description
This attachment is an assembly designed to transport pipes and tubes. The assembly
comprises of   2 cradles securely attached to the platform. The load (material) should be
placed in both the cradles and secured with a strap (not supplied).
 5.1.2 - Characteristics
 5.1.3 - Safety precautions
Specifications
OPTIMUM 8 OPTIMUM 1931 E
SI Imp.
Weight of the carrier 9 kg 20 lbs
Weight of the equipment on the carrier 50 kg 110 lbs
Maximum load surface 0,3 m² (Ø 0,2 m x 1,5 m) 3.3 sq.ft (Ø 8 in x 4 ft 11 in)
Maximum wind speed allowed 0 m/s - 0 km/h 0 mph
• Please read and assimilate the instructions before using the attachment.
• This attachment is designed for transporting pipes and tubes.  Do not use this attachment for
transporting other types of load. .
• Do not suspend loads.
• Do not overload the attachment and ensure that the material is correctly attached by straps (not
supplied).
• Do not exceed the maximum allowable platform capacity. The combined weight of the attachment, load,
the occupants, the tools and any other equipment must not exceed the maximum allowable platform
capacity.
• Do not load tubes whose surface area exceeds the maximum authorized surface area. Exposing an
additional surface area to the wind reduces machine stability. Do not install any other attachments that
increase the surface area exposed to the wind.
• Do not use the machine if the wind speed exceeds the authorized limit of the attachment.
• The cradles should always be positioned such that they are within the platform. Position the bottom end
of the cradles such that they are resting on the platform floor.
• When maneuvring, ensure you maintain a safe distance between the load and the obstacles in the work
environment.


98  4000415480  E 01.18  USA / GB
E
- General Specifications
OPTIMUM 8 - OPTIMUM 1931 E
 5.1.4 - Pre-operation inspection
 5.1.5 - Operation
•  Position and centre the load to rest on the  2 cradles.
•  Securely attach the load to each cradle with supplied straps.
Strapping example(s)
• Check that the cradle has no cracks or other damage.
• Check that the cradle is correctly installed and secured to the platform(Ensure fastening screws are
tightened and pins correctly positioned).
• Check that the information decal is present on the cradle and is legible.
• Check that the strap(s) is(are)not twisted or torn.
• Check that the position of the load and attachment is not obstructing access to the platform or the
controls.
• Check that the position of the attachment and the load is not reducing visibility during maneuvers in the
work environment.


A
B
C
D
E
F
G
H
I

99 4000415480  E 01.18  USA / GB
E
- General Specifications
OPTIMUM 8 - OPTIMUM 1931 E
 5.1.6 - Disassembly - Assembly
OPTIMUM 8 / 1931E
•  Straddle the support pipes  (1, 1A, 1B) and  (1C) on the structure of the fixed or folding guard
rails (7).
•  Lock in place with the pin ( 5 ).
•  Tighten the  3 screws ( 3 ) and  3 washers ( 2 ) to the recommended torque
N.B.-:-T
ORQUE REQUIREMENTS : 22 NM (16 FT LBS)
•  Pre-operation test : Place and secure the load of  50 kg (110 lbs)  max. on the cradle.  Ensure
that the cradle can support the load and that there is no visual structural damage.
Marking Description
1 - 1A - 1B - 1C Carrier
2 Spring washer
3 Fastening screw
4 Strap
5 Dowel pin
6 Adjustment screw
7 Guardrail
8 Platform

4
17
5
6
1A
1B
8
2
3
1C


100  4000415480  E 01.18  USA / GB
E
- General Specifications
OPTIMUM 8 - OPTIMUM 1931 E
 5.1.7 - Specific decals
Location of the  decals
OPTIMUM 8 / 1931E
Marking Description Quantity Part number
1 Risk of overturning 1
In english - ANSI : 4000426070
In french - ANSI : 4000415300
In spanish - ANSI: 4000426060
1


A
B
C
D
E
F
G
H
I

101 4000415480  E 01.18  USA / GB
E
- General Specifications
OPTIMUM 8 - OPTIMUM 1931 E
 5.2 -  FOLDING GUARDRAILS
 5.2.1 - Description
Folding guardrails system is designed to allow guardrails to be lowered to reduce the overall
height of the machine.
This system facilitates moving the machine through low height doorways/passages.
 5.2.2 - Safety precautions
 5.2.3 - Fold down operation
•  Extension deck must be fully retracted and in locked position.
•  The intermediate sliding entrance bar must be at its lowest position.

• Fully lower the platform to the stowed position.
• Take care to avoid trapping the hands while folding the guardrails.
• User must wear gloves.
• Keep hands clear of pinch points.
• Perform the folding of the guardrails from outside of the platform.


102  4000415480  E 01.18  USA / GB
E
- General Specifications
OPTIMUM 8 - OPTIMUM 1931 E
Remove platform control box from its designated
position and place it on platform floor
Remove the  2 pins ( G2 ) from the platform front
guardrails.
Tip element ( 2 ) inwards onto the platform floor.
Remove pin ( G3 ) from the right hand extension
guardrail.
Lift the guardrail and slowly tip it inwards until it contacts
element ( 3 ).
Remove pin ( G4 ) from the left hand extension
guardrail.
Lift the guardrail and slowly tip it inwards until it contacts
element ( 4 ).


A
B
C
D
E
F
G
H
I

103 4000415480  E 01.18  USA / GB
E
- General Specifications
OPTIMUM 8 - OPTIMUM 1931 E
Remove the  2 pins ( G5 ).
Lift and tip inwards and down until it contacts the
element ( 6 ).
Remove the pin ( G6 ).
Lift and tip left hand main railing inwards until it contacts
the element ( 3 ).
Do not release the element ( 5 ).
Remove the pin ( G7 ).
Lift and tip right hand main railing inwards until it
contacts the element ( 6 ).


104  4000415480  E 01.18  USA / GB
E
- General Specifications
OPTIMUM 8 - OPTIMUM 1931 E
 5.2.4 - Specific decals

 5.2.5 - Raising guardrails to working position
To raise the folded guardrails to the vertical working position :
•  Follow the fold down operational sequence in the reverse order.
•  Ensure all pins are installed and secured.
Marking Description Quantity Part number
8
Explanation work and
transport positions
1 4000557230


A
B
C
D
E
F
G
H
I

105 4000415480  E 01.18  USA / GB
E
- General Specifications
OPTIMUM 8 - OPTIMUM 1931 E
 5.3 -  PANEL CARRIER
 5.3.1 - Description
This attachment is an assembly designed to transport panels. The assembly comprises of a
tray that extends along the length of the floor. The panel(s) should be placed in the tray and
secured to the guard rail with a strap (not supplied).
 5.3.2 - Characteristics
 5.3.3 - Safety precautions
Specifications
OPTIMUM 8 OPTIMUM 1931E
SI Imp.
Weight of the carrier 7 kg 15 lbs
Maximum allowable weight of the panels on the carrier 50 kg 110 lbs
Maximum load surface 3 m² (L 2,5 m x H 1,2 m) 32 sq.ft (L 8 ft x H 4 ft)
Maximum wind speed allowed 0 m/s - 0 km/h 0 mph
• Please read and assimilate the instructions before using the attachment.
• This attachment is designed for transporting panels.  Do not use this attachment for transporting other
types of load.
• Do not suspend loads.
• Position the panel(s) centrally on cradle with deck extended.
• Secure the panel in place with the use of strap.
• Do not overload the attachment and ensure that the panels are secured with straps.
• Do not exceed the maximum allowable platform capacity. The combined weight of the attachment, load,
the occupants, the tools and any other equipment must not exceed the maximum allowable platform
capacity.
• Do not load panels whose surface area exceeds the maximum authorized surface area. Exposing an
additional surface area to the wind reduces machine stability. Do not install any other attachments that
increase the surface area exposed to the wind.
• Do not use the machine if the wind speed exceeds the authorized limit of the attachment.
• When maneuvring, ensure you maintain a safe distance between the load and the obstacles in the work
environment.


106  4000415480  E 01.18  USA / GB
E
- General Specifications
OPTIMUM 8 - OPTIMUM 1931 E
 5.3.4 - Pre-operation inspection
 5.3.5 - Operation
•  Position and center the load to rest on the cradle.
•  Securely attach the load on the cradle with straps.
Strapping example(s)
• Check that the cradle has no cracks or other damage.
• Check that the cradle is correctly installed and secured to the platform (Ensure fastening screws are
tightened and pins correctly positioned).
• Check that the information decal is present on the cradle and is legible.
• Check that the strap(s) is(are)not twisted or torn.
• Check that the position of the load and attachment is not obstructing access to the platform or the
controls.
• Check that the position of the attachment and the load is not reducing visibility during maneuvers in the
work environment.


A
B
C
D
E
F
G
H
I

107 4000415480  E 01.18  USA / GB
E
- General Specifications
OPTIMUM 8 - OPTIMUM 1931 E
 5.3.6 - Disassembly - Assembly
OPTIMUM 8 - OPTIMUM 1931E


108  4000415480  E 01.18  USA / GB
E
- General Specifications
OPTIMUM 8 - OPTIMUM 1931 E


A
B
C
D
E
F
G
H
I

109 4000415480  E 01.18  USA / GB
E
- General Specifications
OPTIMUM 8 - OPTIMUM 1931 E
1. Position the sheet metal support ( 2 ) against the sheet metal support ( 1 ).  Tighten the
screws ( 4 ) and the nuts ( 5 ) to the recommended torque.
2. Place the protection pads ( 7 ), the rivets ( 6 ) and the stops ( 3 ).
3. After checking that the decal is on the cradle, position the sheet metal support ( 1 ) on
the outside of the guardrail on the side of the control box.
4. Tighten the screw ( 4 ) and the nut ( 5 ) to the recommended torque. Tighten the
screws ( 8 ) to the recommended torque.
5. Position the bumpers ( 9 ) and fasten with clamps ( 10 ).
N.B.-:-TORQUE REQUIREMENTS :  10 NM (7 LBS/FT) FOR  M6 AND  22 NM (16 LBS/FT) FOR  M8.
•  Pre-operation test : Place and secure the load of  50 kg (110 lbs)  max. on the cradle.  Ensure
that the cradle can support the load and that there is no visual structural damage.
Marking Description
1 Sheet metal support
2 Sheet metal support
3 Stop
4 Screw
5 Nut
6 Rivet
7 Protection pad
8 Screw
9 Bumper
10 Clamp


110  4000415480  E 01.18  USA / GB
E
- General Specifications
OPTIMUM 8 - OPTIMUM 1931 E
 5.3.7 - Specific decals
Location of the  decals
OPTIMUM 8 - OPTIMUM 1931E
Marking Description Quantity Part number
1Danger 1
In french : 4000676050
In english : 4000676060
In spanish : 4000676070


A
B
C
D
E
F
G
H
I

111 4000415480  E 01.18  USA / GB
E
- General Specifications
OPTIMUM 8 - OPTIMUM 1931 E
 5.4 -  SWING GATE
 5.4.1 - Description
"SWING GATE" consists of a laterally mounted pivoting ½ gate with closing latch, which
enables a better access to platform. Spring loaded hinges and a latching mechanism allows
the gate to swing inwards only.
Swing gate
 5.4.2 - Characteristics
Width of the gate :  600 mm / 24 in
 5.4.3 - Safety precautions
 5.4.4 - Pre-operation instructions
•  Inspect that the latching mechanism is securely fastened.
•  Check the hinges and latch operate correctly and are not deformed.
•  Ensure that the gate returns automatically to the closed and fastened position after entering
or exiting the platform.
• The gate is part of the guardrail system and must be securely fastened after entering the platform.
• Pay attention to the toe board when entering or exiting the platform.


112  4000415480  E 01.18  USA / GB
E
- General Specifications
OPTIMUM 8 - OPTIMUM 1931 E

Notes


A
B
C
D
E
F
G
H
I

113 4000415480  E 01.18  USA / GB
F
- Maintenance
OPTIMUM 8 - OPTIMUM 1931 E
Maintenance
1 -  General
As an owner and/or operator of Haulotte equipment, your Safety is of utmost importance
to HAULOTTE® , which is why HAULOTTE® places such a high priority on product safety.
INSPECTIONS are not only required by HAULOTTE®, but may also be required by industry standards
and/or governmental regulations.
To ensure that your equipment continues to perform to the factory set performance levels, it is
important that you regularly maintain your equipment and avoid making any modifications that are not
approved by HAULOTTE®.  Regular and timely inspections will reduce equipment down time as well
as prevent possible injury.
N.B.-:-DO NOT OPERATE
UNLESS YOU ARE FAMILIAR AND TRAINED IN THE PRINCIPLES OF SAFE
MACHINE
 OPERATION.
Overview :
• Walk-around inspections take only a few minutes at the beginning and end of each shift – one of the
best ways to prevent mechanical problems and safety hazards.
What to Do :
• Use your senses: sight, smell, hearing and touch.
Frequency :
• Check your machine periodically during your entire workday.
• Make sure to do your inspection the same way every time.
• Complete one of these inspections at the start and end of each shift.
N.B.-:-I
F DAMAGE OR UNAUTHORIZED MODIFICATIONS ARE DISCOVERED, THE MACHINE MUST BE
REMOVED
 FROM SERVICE UNTIL REPAIRS ARE MADE BY A QUALIFIED SERVICE TECHNICIAN.
It is the owner's responsibility to ensure the required maintenance as recommended by Haulotte is
completed prior to the operation of the machine.
If regular maintenance is not carried out, this may :
• Void the warranty.
• Cause machine malfunction.
• Reduce machine reliability and shorten its service life.
• Jeopardize operator safety.
HAULOTTE Services® technicians are specially trained to carry out extensive repairs, interventions or
adjustments on the safety systems or elements of HAULOTTE® machines. They carry genuine
HAULOTTE spare parts and tools as required, and also provide fully documented reports on all work
completed.
The inspection and maintenance table, identifies the role and the responsibilities of each party in
periodical machine maintenance.  Section C 3 - Inspection and Functional test.


114  4000415480  E 01.18  USA / GB
F
- Maintenance
OPTIMUM 8 - OPTIMUM 1931 E
2 -  Maintenance Schedule
This section provides the necessary information needed to place the machine in safe operation.
According to the current regulations, this machine has been designed for a minimum service life of  10
years. The life may be extended or reduced dependent on the severity of operating conditions, the
machine condition itself and by conducting effective inspections and maintenance in addition to other
external factors. There are a number of factors which can affect the design life including but not limited
to, severity of operating conditions/routine maintenance which should be carried out in accordance with
this manual.
Severity of operating conditions may require a reduction in time between maintenance periods.
Machines that have been out of service or have not been in use for more than 3 months must undergo
a periodic inspection before the machine is put back into service.
Maintenance must be carried out by a competent company or person familiar with
mechanicalprocedures.
Maintenance operations performed must be recorded in a register / log book of the machine.


A
B
C
D
E
F
G
H
I

115 4000415480  E 01.18  USA / GB
F
- Maintenance
OPTIMUM 8 - OPTIMUM 1931 E
3 -  Inspection program
 3.1 -  GENERAL PROGRAM
The machine must be inspected on a regular basis at intervals of no less than once  1 per year.
The purpose of the inspection is to detect any defect which could lead to an accident during
routine use of the machine. Local standards and regulations may require more frequent
inspections.
HAULOTTE® requires Reinforced and Major Inspections to be carried out on the product to
extend its service life.
Inspections must be carried out by a competent company or person.
The inspection results must be recorded in the safety register or machine log book controlled
and overseen by the company manager.  This register or machine log book and the list of
competent repair persons must be made available to the government work inspector
and HAULOTTE Services®.
 3.2 -  DAILY INSPECTION
The Daily inspection includes a visual inspection, operational checks and testing of the safety
systems. This must be conducted by the operator before using the machine.
This inspection is the responsibility of the user. Refer to  Section C 3.1 - Daily inspection.
When Responsible Stakeholder What
Before sale Owner (or renter)
Competent technician or
qualified
technician HAULOTTE
Services®
Periodic inspection
Before rent Owner (or renter)
Competent technician or
qualified
technician HAULOTTE
Services®
Daily inspection
Before use or every
change of user
User User
Annually (  1 year) Owner (or renter)
Competent technician or
qualified
technician HAULOTTE
Services®
Periodic inspection
 5 years Owner (or renter)
Qualified
technician HAULOTTE
Services®
Reinforced inspection
 10 years Owner (or renter)
Qualified
technician HAULOTTE
Services®
Major inspection


116  4000415480  E 01.18  USA / GB
F
- Maintenance
OPTIMUM 8 - OPTIMUM 1931 E
 3.3 -  PERIODIC INSPECTION
The Periodic inspection is a thorough evaluation of the operation and safety features of the
machine.
It must be conducted before the sale / resale of the machine and/or at least once every year.
Local regulations may have specific requirements on frequency, and content of inspections.
The severity of operating conditions may require frequent inspections.
This inspection is the responsibility of the owner, and inspections must be carried out by a
competent company or person.
This inspection is in addition to the daily inspection.
This inspection should also be conducted after :
•  Extensive dismantling and reassembly of major components.
•  Repairs involving the machine's essential components.
•  Any accident causing stress to the machine.
 3.4 -  REINFORCED INSPECTION
The Reinforced inspection is a thorough evaluation of the machine's structural components, to
ensure proper functionality of the machine.
This evaluation must occur at a frequency of  5000 hours or every  5 years.
This inspection is the responsibility of the owner, and it must be conducted by a HAULOTTE
Services® technician or by a competent company or person.
This inspection includes :
• Daily inspection
• Periodic inspection
N.B.-:-R
EFER TO THE MAINTENANCE MANUAL FOR DETAILS.
 3.5 -  MAJOR INSPECTION
The Major inspection is a thorough evaluation of the machine's integrity and proper
functioning; after a normal service life of  10 years.
This evaluation must take place after  10 years of operation and then repeated every  5 years
thereafter.
The severity of operating conditions may require frequent inspections.
This inspection is the responsibility of the owner, and it must be conducted by a HAULOTTE
Services® technician.
This inspection includes :
• Daily inspection
• Periodic inspection
• Reinforced inspection
N.B.-:-R
EFER TO THE MAINTENANCE MANUAL FOR DETAILS.


A
B
C
D
E
F
G
H
I

117 4000415480  E 01.18  USA / GB
F
- Maintenance
OPTIMUM 8 - OPTIMUM 1931 E
4 -  Repairs and adjustments
Extensive repairs, interventions or adjustments on the safety systems or components must be
performed by a HAULOTTE Services® technician.  Use original spare parts and components only.
N.B.-:-HAULOTTE S
ERVICES® TECHNICIANS ARE  TRAINED PROFESSIONALS TO  PERFORM
EXTENSIVE
  REPAIRS, INTERVENTIONS AND  ADJUSTMENTS  ON  THE  SAFETY  SYSTEMS  OR
COMPONENTS
 OF HAULOTTE® MACHINES. THE TECHNICIAN CARRIES GENUINE HAULOTTE®
SPARE PARTS AND TOOLS AS REQUIRED, AND ALSO PROVIDES FULLY DOCUMENTED REPORTS ON
ALL
 WORK COMPLETED.
HAULOTTE Services® will not take responsibility for any outcomes resulting from inferior services or
repairs performed by other unauthorised personnel.
HAULOTTE® reminds that NO modifications SHALL be carried out without the written permission
of HAULOTTE®.
Any unauthorised repairs/modifications will void HAULOTTE® warranty.
With the utmost care to ensure enhanced reliability and greater safety of the HAULOTTE® products, it
is pertinent that when a "Service or Safety Bulletin" is issued, action is taken immediately. Once the
bulletin has been addressed, make sure that the completed form is submitted to HAULOTTE®.
N.B.-:-W
HEN DISPOSING OR SCRAPPING THIS MACHINE, PLEASE CONSIDER APPROPRIATE METHODS
OF
 RECYCLING. ANY ITEMS THAT REQUIRE SPECIFIC DISPOSAL ARE LISTED WITH INSTRUCTIONS IN
THE
 MAINTENANCE MANUAL.


118  4000415480  E 01.18  USA / GB
F
- Maintenance
OPTIMUM 8 - OPTIMUM 1931 E

Notes


A
B
C
D
E
F
G
H
I

119 4000415480  E 01.18  USA / GB
G
- Other information
OPTIMUM 8 - OPTIMUM 1931 E
Other information
1 -  Warranty disclosure
 1.1 -  AFTER SALES SERVICE
Our HAULOTTE Services® After Sales Service is at your disposal throughout your machine's
service life to ensure the optimum use of your HAULOTTE product :
•  When contacting our After Sales Service, ensure that you provide the machine model and
serial number.
• When ordering any consumables or spare parts, please use this manual and
the HAULOTTE® Essential catalogue to receive your genuine HAULOTTE® spare parts,
your only guarantee of parts interchangeability and correct machine operation.
• If there is an equipment malfunction involving a HAULOTTE® product, then
contact HAULOTTE Services® immediately even if the malfunction does not involve material
and/or bodily damage.
 1.2 -  MANUFACTURER'S WARRANTY
 1.2.1 - Warranty acceptance
On reception of his machine, the owner or rental company must check the machine's condition
and fill out the machine reception slip provided.
 1.2.2 - Warranty period
The present warranty is valid for a period of  12 months or up to a maximum of  1000 operating
hours for lifting and handling equipment and  2000 operating hours for public works machinery,
starting from delivery and terminating when the first limit is reached.
Spare parts are covered by a   6 month warranty.
 1.2.3 - Procedure conditions
To benefit from the warranty, the owner or rental company must inform the
nearest HAULOTTE® subsidiary or the subsidiary that delivered the machine (the only dealer
authorised to carry out an intervention under the manufacturer's warranty agreement) of the
defect in writing as quickly as possible.
The subsidiary will decide whether to repair or replace the part that proves to be faulty.
The owner or rental company must present the duly completed maintenance book supplied
with the machine as proof that the maintenance operations recommended by the manufacturer
have been carried out.
The owner or rental company must ensure that the defect covered by the HAULOTTE®
warranty is reported to and acknowledged by the HAULOTTE® subsidiary as rapidly as
possible or must report the defect in writing.
Work carried out under the HAULOTTE® warranty will be performed by the subsidiary which
delivered the machine, wherever possible.


120  4000415480  E 01.18  USA / GB
G
- Other information
OPTIMUM 8 - OPTIMUM 1931 E
 1.2.4 - Conditions of warranty
HAULOTTE® guarantees its products against defects, faults or manufacturing defects when
the owner or rental company has informed HAULOTTE® of the defect.
The warranty does not cover the consequences of normal wear, nor any defects, failure or
damage resulting from poor maintenance or abnormal usage, in particular overloading, impact
by an external source, faulty installation or any modification made to products marketed
by HAULOTTE® and performed by the owner or rental company.
In the event of operation or use which does not comply with the instructions or
recommendations in the maintenance book, warranty claims will not be accepted.
The machine utilisation period must be recorded by reading the engine hour meter whenever
an intervention is made. The engine hour meter must be maintained in good working order to
guarantee maximum working life and to justify maintenance at the recommended time.
Warranty obligations for the time period stated above will cease immediately in situations
where the defect is due to the following reasons :
•  Use of spare parts that are not HAULOTTE® originals.
•  If elements or products other than those recommended by the manufacturer are used.
•  If the HAULOTTE® name, serial numbers or identification marks are removed or altered.
•  After an unreasonably long delay before reporting a manufacturing problem.
•  If the owner or rental company continues to use the machine despite problems.
•  If damage is caused by modifications that do not comply with HAULOTTE® specifications.
•  If lubricants, hydraulic oils or fuels that do not comply with HAULOTTE® recommendations
are used.
•  If the machine is incorrectly repaired or used by the customer.
•  In case of an accident caused by a third party.
If no particular agreement has been made, any claims made after the previously established
warranty period has expired will be refused.


A
B
C
D
E
F
G
H
I

121 4000415480  E 01.18  USA / GB
G
- Other information
OPTIMUM 8 - OPTIMUM 1931 E
The present warranty does not cover damage that may result directly or indirectly from any
flaws or defects covered by the latter :
• Consumables : No claims will be accepted for objects or parts replaced in the context of
normal machine usage.
• Settings : Adjustments of all sorts may become necessary at any time.  Therefore
adjustments are considered a part of normal machine usage conditions and are not covered
by the warranty.
•  Hydraulic and fuel circuit contamination : Every possible precaution is taken to ensure that
fuel and hydraulic liquid delivered is clean. HAULOTTE® will not accept any claims
concerning cleaning of the fuel circuit, filter, injection pump or any other equipment in direct
contact with fuel or lubricants.
•  Wearing parts (pads, bearings, tires/tyres, connections, etc.) : These parts are, by definition,
subject to deterioration during the period of operation.  Wearing parts will therefore not be
covered by the warranty agreement.


122  4000415480  E 01.18  USA / GB
G
- Other information
OPTIMUM 8 - OPTIMUM 1931 E
2 -  Subsidiary contact information


HAULOTTE FRANCE
PARC DES LUMIERES
601 RUE NICEPHORE NIEPCE
69800 SAINT-PRIEST


TECHNICAL Department:
+33 (0)820 200 089
SPARE PARTS : +33 (0)820 205 344

FAX : +33 (0)4 72 88 01 43
E
-mail : [email protected]

www.haulotte.fr


HAULOTTE ITALIA
VIA LOMBARDIA 15
20098 SAN GIULIANO MILANESE
(MI)
TEL: +39 02 98 97 01
FAX: +39 02 9897 01 25
E-mail : [email protected]


www.haulotte.it


HAULOTTE HUBARBEITSBÜHNEN GmbH

Ehrenkirchener Strasse 2
D-79427 ESCHBACH
TEL : +49 (0) 7634 50 67 - 0
FAX  : +49 (0) 7634 50 67 - 119
E.mail : [email protected]
www.haulotte.de


HAULOTTE VOSTOK

    61A, RYABINOVAYA STREET


   Bldg. 3

121471 MOSCOW


RUSSIA

TEL/FAX : +7


495


221 53 02 / 03


E.mail : [email protected]


www.haulotte-international.com


HAULOTTE DO BRASIL

AV. Tucunaré, 790


CEP: 06460

-

020 – TAMBORE


BARUERI

–

 SAO PAULO

–

 BRASIL


TEL


: +55 11 4196 4300


FAX


: +55 11 4196 4316


E.mail

 :

[email protected]


www.haulotte

.com.br

HAULOTTE IBERICA
C/ARGENTINA N° 13 - P.I. LA GARENA
28806 ALCALA DE HENARES
MADRID
TEL : +34 902 886 455
TEL SAT : +34 902 886 444
FAX : +34 911 341 844
E.mail : [email protected]
www.haulotte.es


HAULOTTE POLSKA Sp. Z.o.o.
UL. GRANICZNA 22
05-090 RASZYN - JANKI-
TEL : +48 22 720 08 80
FAX : +48 22 720 35 06
E-mail :
[email protected]
www.haulotte.pl


HAULOTTE MÉXICO, Sa de Cv
Calle 9 Este, Lote 18, Civac, Jiutepec,
Morelos
CP 62500 Cuernavaca
México
TEL : +52 77 7321 7923
FAX : +52 77 7516 8234
E-mail : [email protected]

www.haulotte-international.com


HAULOTTE PORTUGAL
ESTRADA NACIONAL NUM. 10
KM. 140 - LETRA K
2695 - 066 BOBADELA LRS
TEL : + 351 21 995 98 10
FAX : + 351 21 995 98 19
E.mail : [email protected]

www.haulotte.es


HAULOTTE SINGAPORE Pte Ltd.

No.26 CHANGI NORTH WAY,
SINGAPORE 498812
Parts and service Hotline:
            +65 6546 6150

FAX : +65 6536 3969
E-mail: [email protected]

www.haulotte.sg


HAULOTTE MIDDLE EAST FZE
PO BOX 293881
Dubaï Airport Free Zone
DUBAÏ
United Arab Emirates
TEL : +971 (0)4 299 77 35
FAX : +971 (0) 4 299 60 28
E-mail : haulottemiddle-
[email protected]
www.haulotte-international.com


HAULOTTE SCANDINAVIA AB
Taljegårdsgatan 12
431 53   Mölndal
SWEDEN
TEL : +46 31 744 32 90
FAX : +46 31 744 32 99
E-mail : [email protected]
[email protected]
www.haulotte.se


HAULOTTE TRADING (SHANGHAI)
Co. Ltd.
#7 WORKSHOP
No 191 HUA JIN ROAD
MIN HANG DISTRICT
SHANGHAI 201108 CHINA


TEL : +86 21 6442 6610
FAX : +86 21 6442 6619

E-mail :
[email protected]
www.haulotte.cn


HAULOTTE ARGENTINA
      Ruta Panamericana Km. 34,300
                (Ramal A Escobar)

               1615 Gran Bourg
        (Provincia de Buenos Aires)

Argentina
TEL.:  +54 33 27 445991
FAX. +54 33 27 452191
E-mail : [email protected]

www.haulotte-international.com


HAULOTTE UK Ltd
STAFFORD PARK 6
TELFORD - SHROPSHIRE TF3 3AT
TEL : +44 (0)1952 292753
FAX : + 44 (0)1952 292758
E.mail : [email protected]
www.haulotte.co.uk


HAULOTTE GROUP / BILJAX
125 TAYLOR PARKWAY
ARCHBOLD, OH 43502 – USA


TEL : +1


419


445 8915


FAX :+1


419 445 0367


Toll free : +1 800 537 0540


E.mail : [email protected]


www.haulotte-usa.com
HAULOTTE NORTH AMERICA
3409 Chandler Creek Rd.
VIRGINIA BEACH, VA 23453 – USA
TEL : +1 757 689 2146
FAX :+1 757 689 2175
Toll free : +1 800 537 0540
E.mail : [email protected]
www.haulotte
HAULOTTE CHILE
El Arroyo 840
Lampa (9380000)
Santiago (RM)
TEL : + 562 2 3727630
                                   E.mail : [email protected]
www.haulotte-chile.com
-usa.com


HAULOTTE NETHERLANDS BV
Koopvaardijweg 26
4906 CV OOSTERHOUT - Nederland
TEL : +31 (0) 162 670 707
FAX : +31 (0) 162 670 710
E.mail :
[email protected]

HAULOTTE AUSTRALIA PTY Ltd
46 GREENS ROAD
DANDENONG – VIC – 3175


     TEL : 1 300 207 683
FAX : +61 (0)3 9792 1011
E.mail :

l

[email protected]

hl


HAULOTTE INDIA
Unit No. 1205, 12th foor,Bhumiraj Costarica,
Plot No. 1&2, Sector 18,
Palm Beach Road,
Sanpada, Navi Mumbai- 400 705
Maharashtra, INDIA
Tel. :  +91 22 66739531 to 35
 E-mail :  [email protected]
www.haulotte.in


A
B
C
D
E
F
G
H
I

123 4000415480  E 01.18  USA / GB
G
- Other information
OPTIMUM 8 - OPTIMUM 1931 E
 2.1 -  CALIFORNIA WARNING
For electric (battery operated) machines

CALIFORNIA
PROPOSITION 65 BATTERY WARNING
Battery posts, terminals and related accessories
contain lead and lead compounds, chemicals known to
the State of California to cause cancer and reproductive
harm. Batteries also contain other chemicals known to
the State of California to cause cancer.
WASH HANDS AFTER HANDLING.


124  4000415480  E 01.18  USA / GB
G
- Other information
OPTIMUM 8 - OPTIMUM 1931 E

Notes
-
Категория: Ножничные подъемники Haulotte

Электрический подъемник
Максимальная грузоподъемность: 230
Рабочая высота: 7.77
- Грузоподъемность дл 450 кг, платформа может вмещать 3 рабочих
- Высокие показатели производительности
- Возможность передвижения на максимальной высоте подъема
- Можно использовать внутри и вне помещений (при этом грузоподъемность не изменяется
- Выдвижная секция на платформе
- Ширина подъемника — 1.2 м
- Надежность и простота обслуживания
- Прочная конструкция
- Длительный рабочий цикл от одного заряда
| Рабочая высота | 7.77 m |
| Высота до пола платформы | 5.77 m |
| Длина платформы | 1.72 m |
| Длина с выдвинутой секцией | 2.59 m |
| Длина выдвижной секции | 0.86 m |
| Ширина платформы | 0.74 m |
| Увеличенный размер платформы | 2.59 х 0.74 m |
| Транспортная высота, перила подняты | 1.98 m |
| Ширина | 0.79 m |
| Длина | 1.9 m |
| Грузоподъемность внутри помещения | 230 kg (2 pers.) |
| Грузоподъемность снаружи помещения | 230 kg (1 pers.) |
| Грузоподъемность при расширении платформы | 230 kg |
| Колесная база | 1.38 m |
| Дорожный просвет | 8.7 cm |
| Дорожный просвет, страховые упоры опущены | 2 cm |
| Скорость движения | 0.5 — 4.5 km/h |
| Максимальный угол наклона | 1.5° — 3° |
| Устойчивость | 25 % |
| Возможность движения на полной высоте до | 5.77 m |
| Радиус поворота — внешний | 1.5 m |
| Шины не пачкающие | 12.5 х 4.13 |
| Источник питания | 24 V — 225 Ah |
| Вес | 1590 kg |
| Емкость гидросистемы | 7 l |
- Бесщеточные приводные электродвигатели переменного тока 24 В
- Индикатор зарядки аккумуляторных батарей
- Индикатор уровня заряда аккумуляторных батарей на верхней и нижней панелях управления
- Haulotte Activ’Screen (зарядка аккумуляторных батарей, часомер, значки аварийных сигналов тревоги и неисправностей с кодом или текстом и т.д.)
- Страховые упоры
- Два откидных поддона
- Боковые проемы для вильчатых захватов
- 2 передних управляемых и 2 задних ведущих колеса
- Пропорциональное управление
- Электрическая или ручная система растормаживания
- Датчик наклона
- Точки подъема и погрузки
- Не пачкающие поверхность шины
- Складные перила
- Питание платформы от источника переменного тока
- Гидравлическое масло для стран с холодным климатом
- Телематическое подключение
- Импульсное освещение
- Рабочая подсветка
- Держатель сэндвич-панелей
- Захваты для труб
Заказать звонок
Вы знаете, чем отличаются самоходные ножничные подъемники от других типов подъемной техники? С помощью их гидравлического механизма, выглядящего как «нюрнбергские ножницы» (вид ромба, состоящий из двух звеньев, соединённых в середине шарниром), рабочие с инструментом могут подняться в вертикальной плоскости на рабочей платформе. Данный вид подъемников безопасен в использовании, функционально надежен, обладает относительно высокой грузоподъемностью, прост в обслуживании. Самоходные ножничные подъемники с питанием от АКБ благодаря своим компактным размерам удобны для проведения работ внутри, в условиях ограниченного пространства, поэтому они пользуются повышенным спросом у производственных компаний, в распоряжении которых имеются помещения и складские площади.
Новый клиент компании ВЕРТЕКС – птицефабрика, для обслуживания корпусов которой потребовалась подъемная техника. Мы предложили оптимальное решение под задачи клиента — самоходный ножничный подъемник Haulotte Optimum 8.
Haulotte Optimum 8 с рабочей высотой 7,77м и грузоподъемность 230 кг — универсальная машина, которая может эксплуатироваться как внутри помещения, так и снаружи. Ширина подъемника 0,79 м, позволяет ему проходить через стандартный дверной проем. Заряда аккумуляторов хватает на 8 часов непрерывной работы – этот факт говорит о высокой производительности данной машины. В стандартной комплектации модель Optimum 8 имеет удобную систему бортовой диагностики неисправностей Haulotte Activ’Screen, которая показывает степень зарядки аккумулятора, часомер, знаки аварийных сигналов тревоги и неисправностей с кодом или текстом ошибки.
Для своих клиентов мы всегда рады предложить не только продажу или аренду техники, но и профессиональное сервисное обслуживание. К вашим услугам постоянно обучающийся и повышающий свою квалификацию сервисный персонал, склад запчастей с наличием около 6000 тыс позиций и конечно индивидуальный подход к каждому!
С подробными техническими характеристиками Haulotte Optimum 8 вы можете ознакомиться в каталоге техники.
Фотографии
1/6
К списку новостей