-
Contents
-
Table of Contents
-
Troubleshooting
-
Bookmarks
Quick Links
Related Manuals for Carestream DRYVIEW 5700
Summary of Contents for Carestream DRYVIEW 5700
-
Page 1
User’s Guide… -
Page 2
Carestream Health, Inc. 150 Verona Street Rochester, New York 14608 © Carestream Health, Inc., 2011 Pub No. 9G3886_en Rev. A… -
Page 3: Table Of Contents
Table of Contents 1 Overview Major internal assemblies ……………………..1-2 How the laser imager works ……………………..1-3 Film sizes …………………………..1-4 Automatic image quality and processing ………………….1-4 Configuring and monitoring the system (using the Web Portal) ……………1-4 Enhancing serviceability with remote monitoring ………………..1-5 Agency compliance ……………………….
-
Page 4
5 Specifications Equipment Specifications ……………………..5-1 Operating Space Requirements ……………………5-1 Environmental Requirements …………………….. 5-1 Environmental Effects ……………………….. 5-2 Power Requirements ……………………….5-2 Network Requirements ……………………… 5-2… -
Page 5: Overview
Overview Overview The Laser Imaging System is a continuous-tone laser imager with an internal photothermographic film processor. Heat, rather than photo chemicals, is used to develop the film. This easy-to-use and reliable laser imager provides high quality prints. Use the prints from this system for: •…
-
Page 6: Major Internal Assemblies
Overview Major internal assemblies H210_1012HC Exposure transport. Moves the film past the scanning laser beam. Transport guides. Orient and center the film while moving the film from the supply to the imaging portion of the laser imager. DICOM Raster Engine (DRE). A computer board that receives, processes, and manages the images. Feed rollers.
-
Page 7: How The Laser Imager Works
Overview How the laser imager works The laser imager receives, processes, manages, and prints the images on film. The laser imager has limited storage to hold a small number of digital images. As images are received for printing, they are stored in memory, placed in a sequential print queue, and are printed in order.
-
Page 8: Film Sizes
Overview Film sizes The laser imager supports four sizes: • 35 x 43 cm (14 x 17 in.) • 28 x 35 cm (11 x 14 in.) • 25 x 30 cm (10 x 12 in.) • 20 x 25 cm (8 x 10 in.) For the specific films that are supported, see the Publications Cover Page.
-
Page 9: Enhancing Serviceability With Remote Monitoring
Overview Enhancing serviceability with remote monitoring Remote Management Services is set up through the Web Portal, and is designed to enhance efficient system serviceability and simplify analytical and service processes through the monitoring of your equipment. Additionally, this simplifies the service process by providing qualified service personnel with faster, easier, and more complete access to the operational history of each system.
-
Page 11: Basic Operating Tasks
Basic Operating Tasks Basic Operating Tasks During normal operation, the laser imager receives and automatically prints images sent by modalities over a network. Very little interaction is required. You may do the following: • Turn the power on (|) and off (0). •…
-
Page 12: Understanding The Display Screen
Basic Operating Tasks Understanding the display screen The display screen communicates the status of the laser imager. Symbol or code Description Top left of the Error or status code. The 3-digit code displays when the error or status condition is present. display screen: for a complete list of the codes and how “Chapter 3 Maintenance and Troubleshooting”…
-
Page 13: Turning The Power On And Off
Basic Operating Tasks Turning the power on and off To start the laser imager, press the power switch on the back of the laser imager to on (|). Wait as the laser imager warms up. The warm-up period might last up to 30 minutes. The display screen shows the progress as the laser imager becomes ready to print.
-
Page 14
Basic Operating Tasks Restarting the laser If the laser imager encounters an error that is usually corrected with a restart, the display screen shows the Restart symbol. imager The error code indicates Restart the error condition. You may want to check the “Troubleshooting”… -
Page 15: Working With Film Cartridges
Basic Operating Tasks Working with film cartridges Checking film count The film count displays on the laser imager display screen. Film count 125 indicates a full cartridge Checking the size of The film size displays in the same location as the film count. The display screen alternates between the film count and the size of the loaded film.
-
Page 16
Basic Operating Tasks Inserting a new film Before you insert a new film cartridge, make sure that the Pause symbol is off. During normal operation, the symbol is off. When the film cartridge cartridge cover is open, the symbol is on. To avoid exposing the film to light, do not open the film supply until the Pause symbol is off. -
Page 17
Basic Operating Tasks Loading a different If a print request requires a different film size, the requested film size flashes on the display screen. Change the installed film to match the print film size to match a request. print request Screen 1: «35»… -
Page 18: Deleting Pending Jobs
Basic Operating Tasks Deleting pending jobs To cancel all print requests, press and hold the Film Size symbol for five seconds. All print requests are deleted from the queue. Press this symbol for five seconds NOTE: • A print request that cannot be printed is automatically deleted from the laser imager.
-
Page 19: Calibrating The Laser Imager For The Installed Film
Basic Operating Tasks Calibrating the laser imager for the installed film In normal operating conditions, it is not necessary to calibrate the laser imager for the film. Run a calibration when: • Code 001 appears on the display screen. • A calibration error occurs, indicated by codes 624, 631, or 632 on the display screen.
-
Page 20: Using The Web Portal To Access Additional Functionality
Basic Operating Tasks Using the Web Portal to access additional functionality The Web Portal is your interface to additional features. In addition to the installation and setup of your system, you can view and manage the laser imager’s connections over the network, configure features, view error messages and access general status information at the Web Portal.
-
Page 21: Maintenance And Troubleshooting
Maintenance and Troubleshooting Maintenance and Troubleshooting Use the information in this chapter to keep the laser imager in the best condition and to correct minor problems. • “Overview: Status and error messages and codes” on page 3-1 • “Preventive maintenance” on page 3-2 — Learn how to respond to the Maintenance symbol when it appears •…
-
Page 22: Preventive Maintenance
Maintenance and Troubleshooting Preventive maintenance NOTE: These conditions are also reported at the Web Portal. CAUTION Replacing the filter In the U.S., exhausted filters are considered to be non-hazardous waste according to the US Environmental Protection Agency Resource Conservation Recovery Act (RCRA).
-
Page 23: Error Indicators On The Display Screen
Maintenance and Troubleshooting 3. Install a new charcoal filter. 4. Close the film supply. 5. To reset the laser imager for the new filter and to clear the Maintenance symbol, press and then release the Maintenance and Calibrate symbols at the same time. 550 code and If the laser imager needs a preventive maintenance service call, the 550 code and Maintenance symbol appear:…
-
Page 24
Maintenance and Troubleshooting Required restart When the Restart symbol appears, you must restart before the laser imager can continue to print. Restart the laser imager 1. Press the power switch on the back of the laser imager off (0). 2. Press the power switch on (|). 3. -
Page 25: Using The Web Portal To Gain More Information On Errors
Maintenance and Troubleshooting Using the Web Portal to gain more information on errors The Web Portal is your interface to additional functions on the laser imager. You can view and correct error messages and access general status information at the Web Portal. To access the Web Portal, see “Using the Web Portal to access additional functionality”…
-
Page 26
Maintenance and Troubleshooting Printer Printer Display Screen Web Portal DICOM Status Description Status Cover is open Code: 701 20701: Cover WARNING / COVER The top cover is open or one of Open OPEN the side panels may be off. The Power symbol is yellow laser imager is not ready to print. -
Page 27
Maintenance and Troubleshooting Film Cartridge Film Display Screen Web Portal Description Cartridge State Failed Power symbol is yellow Failed An error has occurred that affects normal operation. This film Pause and Calibrate symbols are off cartridge is currently not usable. Film count is replaced by dashes Reinsert the cartridge. -
Page 28
Maintenance and Troubleshooting Film Display Screen Web Portal Description Cartridge State Cartridge closure Power symbol is green Pause Requested You pressed the Pause button, but is pending the rollback has not started because Calibrate symbol is off films are still moving through the Pause symbol is on laser imager. -
Page 29: Condition Codes
Maintenance and Troubleshooting Condition codes Condition codes are shown on the display screen in the order in which they are generated. If there is more than one code associated with the current condition of the laser imager, the first code is shown on the display screen for six seconds, while other codes in the list display for three seconds as the list is cycled.
-
Page 30
Maintenance and Troubleshooting Display Web Portal Action Screen Portal Message 20154 MCS: Internal Restart the laser imager. See page 2-4. Communications Failure If the error persists, call for service. 20155 Incompatible MCS Printer Restart the laser imager. See page 2-4. Configuration for Hardware If the error persists, call for service. -
Page 31
Maintenance and Troubleshooting Display Web Portal Action Screen Portal Message 21118 Film Supply: Internal If the Pause symbol is on, press it to cover the film cartridge. Hardware Failure When the Pause symbol stops flashing, remove the film cartridge from the laser imager. Then reinsert the film cartridge into the laser imager. -
Page 32
Maintenance and Troubleshooting Display Web Portal Action Screen Portal Message 21178 Rollback Failed to Leave If the Pause symbol is on, press it to cover the film cartridge. Home When the Pause symbol stops flashing, remove the film cartridge from the laser imager. Insert a different film cartridge into the laser imager. -
Page 33
Maintenance and Troubleshooting Display Web Portal Action Screen Portal Message 27607 Optics: Calibration Failed Restart the laser imager. See page 2-4. If the error persists, call for service. 27611 Optics: Internal Hardware Restart the laser imager. See page 2-4. Failure If the error persists, call for service. -
Page 34: Correcting Film Jams
Maintenance and Troubleshooting Correcting film jams When film is jammed, the display screen indicates a jam and an error code that provides guidance on where to check for the jammed film. NOTE: These errors are also reported at the Web Portal. Check the code to know where to find the jammed film…
-
Page 35
Maintenance and Troubleshooting For some jams, you can remove the film by turning a knob to move the film out of the laser imager. See details in the film jam instructions. Knobs for manual film removal Manual rollback knob Exit Roller Knob Front of laser imager Exposure Transport Knob H210_1013HAB… -
Page 36
Maintenance and Troubleshooting Film jam code 323 / NOTE: This error displays as code 26323 at the Web Portal. Jam in Area 2 1. If the Pause symbol is on, press it and wait until it goes off. 2. Open the film supply. 3. -
Page 37
Maintenance and Troubleshooting Film jam code 326 / NOTE: This error displays as code 26326 at the Web Portal. Jam in Area 2 or 3 1. If the Pause symbol is on, press it and wait until it goes off. 2. -
Page 38: Display Screen Is Not Functional
Maintenance and Troubleshooting Film jam code 543 / This error displays as code 26543 at the Web Portal. Jam in Area 3 1. If the Pause symbol is on, press it and wait until it goes off. 2. Open the top cover. 3.
-
Page 39: Film Technical Information
Film Technical Information Film Technical Information General description This section describes the characteristics of Laser Imaging Film, not the operation of the laser imager. The Laser Imaging Film is a high-resolution, infrared-sensitive, photothermographic film designed specifically for the Laser Imager. Spectral sensitivity The Laser Imaging Film is infrared sensitive and has been sensitized to the infrared laser diode of the laser imagers.
-
Page 40
Film Technical Information Environmental impact Tests show that the Laser Imaging Film is not considered hazardous to the environment. As a result, you can develop, recycle, and dispose of film with less impact on the environment than if you were using wet-developed silver halide films. -
Page 41
Film Technical Information Take care when using spotlight viewing for more than 30 seconds because temperatures near the light source may exceed 82.2° C (180° F). Use in slide projectors is not recommended due to the high temperatures generally found in these devices. With dry technology, a small amount of final development occurs when the film exits the laser imager and is initially exposed to ambient or view-box lighting. -
Page 43
Specifications Equipment specifications Unpacked Packed Height 47 cm (19 in.) 74 cm (29 in.) Width 61 cm (24 in.) 79 cm (31 in.) Depth 66 cm (26 in.) 85 cm (34 in.) Weight 54 kg (120 lbs) 73 kg (160 lbs) Operating space requirements Allow 5 cm (2 in.) clearance around the top, sides, and back of the laser imager. -
Page 44
Specifications Power requirements A power cord is provided with this equipment. All countries must use an Agency-approved power cord with a plug type suitable for the country of use. Contact a qualified dealer for help. Connect the equipment to a power source that is suitable for the voltage and current ratings shown on the rating label.
-
Contents
-
Table of Contents
-
Troubleshooting
-
Bookmarks
Quick Links
Related Manuals for Carestream DRYVIEW 5700
Summary of Contents for Carestream DRYVIEW 5700
-
Page 1
User’s Guide… -
Page 2
Carestream Health, Inc. 150 Verona Street Rochester, New York 14608 © Carestream Health, Inc., 2011 Pub No. 9G3886_en Rev. A… -
Page 3: Table Of Contents
Table of Contents 1 Overview Major internal assemblies ……………………..1-2 How the laser imager works ……………………..1-3 Film sizes …………………………..1-4 Automatic image quality and processing ………………….1-4 Configuring and monitoring the system (using the Web Portal) ……………1-4 Enhancing serviceability with remote monitoring ………………..1-5 Agency compliance ……………………….
-
Page 4
5 Specifications Equipment Specifications ……………………..5-1 Operating Space Requirements ……………………5-1 Environmental Requirements …………………….. 5-1 Environmental Effects ……………………….. 5-2 Power Requirements ……………………….5-2 Network Requirements ……………………… 5-2… -
Page 5: Overview
Overview Overview The Laser Imaging System is a continuous-tone laser imager with an internal photothermographic film processor. Heat, rather than photo chemicals, is used to develop the film. This easy-to-use and reliable laser imager provides high quality prints. Use the prints from this system for: •…
-
Page 6: Major Internal Assemblies
Overview Major internal assemblies H210_1012HC Exposure transport. Moves the film past the scanning laser beam. Transport guides. Orient and center the film while moving the film from the supply to the imaging portion of the laser imager. DICOM Raster Engine (DRE). A computer board that receives, processes, and manages the images. Feed rollers.
-
Page 7: How The Laser Imager Works
Overview How the laser imager works The laser imager receives, processes, manages, and prints the images on film. The laser imager has limited storage to hold a small number of digital images. As images are received for printing, they are stored in memory, placed in a sequential print queue, and are printed in order.
-
Page 8: Film Sizes
Overview Film sizes The laser imager supports four sizes: • 35 x 43 cm (14 x 17 in.) • 28 x 35 cm (11 x 14 in.) • 25 x 30 cm (10 x 12 in.) • 20 x 25 cm (8 x 10 in.) For the specific films that are supported, see the Publications Cover Page.
-
Page 9: Enhancing Serviceability With Remote Monitoring
Overview Enhancing serviceability with remote monitoring Remote Management Services is set up through the Web Portal, and is designed to enhance efficient system serviceability and simplify analytical and service processes through the monitoring of your equipment. Additionally, this simplifies the service process by providing qualified service personnel with faster, easier, and more complete access to the operational history of each system.
-
Page 11: Basic Operating Tasks
Basic Operating Tasks Basic Operating Tasks During normal operation, the laser imager receives and automatically prints images sent by modalities over a network. Very little interaction is required. You may do the following: • Turn the power on (|) and off (0). •…
-
Page 12: Understanding The Display Screen
Basic Operating Tasks Understanding the display screen The display screen communicates the status of the laser imager. Symbol or code Description Top left of the Error or status code. The 3-digit code displays when the error or status condition is present. display screen: for a complete list of the codes and how “Chapter 3 Maintenance and Troubleshooting”…
-
Page 13: Turning The Power On And Off
Basic Operating Tasks Turning the power on and off To start the laser imager, press the power switch on the back of the laser imager to on (|). Wait as the laser imager warms up. The warm-up period might last up to 30 minutes. The display screen shows the progress as the laser imager becomes ready to print.
-
Page 14
Basic Operating Tasks Restarting the laser If the laser imager encounters an error that is usually corrected with a restart, the display screen shows the Restart symbol. imager The error code indicates Restart the error condition. You may want to check the “Troubleshooting”… -
Page 15: Working With Film Cartridges
Basic Operating Tasks Working with film cartridges Checking film count The film count displays on the laser imager display screen. Film count 125 indicates a full cartridge Checking the size of The film size displays in the same location as the film count. The display screen alternates between the film count and the size of the loaded film.
-
Page 16
Basic Operating Tasks Inserting a new film Before you insert a new film cartridge, make sure that the Pause symbol is off. During normal operation, the symbol is off. When the film cartridge cartridge cover is open, the symbol is on. To avoid exposing the film to light, do not open the film supply until the Pause symbol is off. -
Page 17
Basic Operating Tasks Loading a different If a print request requires a different film size, the requested film size flashes on the display screen. Change the installed film to match the print film size to match a request. print request Screen 1: «35»… -
Page 18: Deleting Pending Jobs
Basic Operating Tasks Deleting pending jobs To cancel all print requests, press and hold the Film Size symbol for five seconds. All print requests are deleted from the queue. Press this symbol for five seconds NOTE: • A print request that cannot be printed is automatically deleted from the laser imager.
-
Page 19: Calibrating The Laser Imager For The Installed Film
Basic Operating Tasks Calibrating the laser imager for the installed film In normal operating conditions, it is not necessary to calibrate the laser imager for the film. Run a calibration when: • Code 001 appears on the display screen. • A calibration error occurs, indicated by codes 624, 631, or 632 on the display screen.
-
Page 20: Using The Web Portal To Access Additional Functionality
Basic Operating Tasks Using the Web Portal to access additional functionality The Web Portal is your interface to additional features. In addition to the installation and setup of your system, you can view and manage the laser imager’s connections over the network, configure features, view error messages and access general status information at the Web Portal.
-
Page 21: Maintenance And Troubleshooting
Maintenance and Troubleshooting Maintenance and Troubleshooting Use the information in this chapter to keep the laser imager in the best condition and to correct minor problems. • “Overview: Status and error messages and codes” on page 3-1 • “Preventive maintenance” on page 3-2 — Learn how to respond to the Maintenance symbol when it appears •…
-
Page 22: Preventive Maintenance
Maintenance and Troubleshooting Preventive maintenance NOTE: These conditions are also reported at the Web Portal. CAUTION Replacing the filter In the U.S., exhausted filters are considered to be non-hazardous waste according to the US Environmental Protection Agency Resource Conservation Recovery Act (RCRA).
-
Page 23: Error Indicators On The Display Screen
Maintenance and Troubleshooting 3. Install a new charcoal filter. 4. Close the film supply. 5. To reset the laser imager for the new filter and to clear the Maintenance symbol, press and then release the Maintenance and Calibrate symbols at the same time. 550 code and If the laser imager needs a preventive maintenance service call, the 550 code and Maintenance symbol appear:…
-
Page 24
Maintenance and Troubleshooting Required restart When the Restart symbol appears, you must restart before the laser imager can continue to print. Restart the laser imager 1. Press the power switch on the back of the laser imager off (0). 2. Press the power switch on (|). 3. -
Page 25: Using The Web Portal To Gain More Information On Errors
Maintenance and Troubleshooting Using the Web Portal to gain more information on errors The Web Portal is your interface to additional functions on the laser imager. You can view and correct error messages and access general status information at the Web Portal. To access the Web Portal, see “Using the Web Portal to access additional functionality”…
-
Page 26
Maintenance and Troubleshooting Printer Printer Display Screen Web Portal DICOM Status Description Status Cover is open Code: 701 20701: Cover WARNING / COVER The top cover is open or one of Open OPEN the side panels may be off. The Power symbol is yellow laser imager is not ready to print. -
Page 27
Maintenance and Troubleshooting Film Cartridge Film Display Screen Web Portal Description Cartridge State Failed Power symbol is yellow Failed An error has occurred that affects normal operation. This film Pause and Calibrate symbols are off cartridge is currently not usable. Film count is replaced by dashes Reinsert the cartridge. -
Page 28
Maintenance and Troubleshooting Film Display Screen Web Portal Description Cartridge State Cartridge closure Power symbol is green Pause Requested You pressed the Pause button, but is pending the rollback has not started because Calibrate symbol is off films are still moving through the Pause symbol is on laser imager. -
Page 29: Condition Codes
Maintenance and Troubleshooting Condition codes Condition codes are shown on the display screen in the order in which they are generated. If there is more than one code associated with the current condition of the laser imager, the first code is shown on the display screen for six seconds, while other codes in the list display for three seconds as the list is cycled.
-
Page 30
Maintenance and Troubleshooting Display Web Portal Action Screen Portal Message 20154 MCS: Internal Restart the laser imager. See page 2-4. Communications Failure If the error persists, call for service. 20155 Incompatible MCS Printer Restart the laser imager. See page 2-4. Configuration for Hardware If the error persists, call for service. -
Page 31
Maintenance and Troubleshooting Display Web Portal Action Screen Portal Message 21118 Film Supply: Internal If the Pause symbol is on, press it to cover the film cartridge. Hardware Failure When the Pause symbol stops flashing, remove the film cartridge from the laser imager. Then reinsert the film cartridge into the laser imager. -
Page 32
Maintenance and Troubleshooting Display Web Portal Action Screen Portal Message 21178 Rollback Failed to Leave If the Pause symbol is on, press it to cover the film cartridge. Home When the Pause symbol stops flashing, remove the film cartridge from the laser imager. Insert a different film cartridge into the laser imager. -
Page 33
Maintenance and Troubleshooting Display Web Portal Action Screen Portal Message 27607 Optics: Calibration Failed Restart the laser imager. See page 2-4. If the error persists, call for service. 27611 Optics: Internal Hardware Restart the laser imager. See page 2-4. Failure If the error persists, call for service. -
Page 34: Correcting Film Jams
Maintenance and Troubleshooting Correcting film jams When film is jammed, the display screen indicates a jam and an error code that provides guidance on where to check for the jammed film. NOTE: These errors are also reported at the Web Portal. Check the code to know where to find the jammed film…
-
Page 35
Maintenance and Troubleshooting For some jams, you can remove the film by turning a knob to move the film out of the laser imager. See details in the film jam instructions. Knobs for manual film removal Manual rollback knob Exit Roller Knob Front of laser imager Exposure Transport Knob H210_1013HAB… -
Page 36
Maintenance and Troubleshooting Film jam code 323 / NOTE: This error displays as code 26323 at the Web Portal. Jam in Area 2 1. If the Pause symbol is on, press it and wait until it goes off. 2. Open the film supply. 3. -
Page 37
Maintenance and Troubleshooting Film jam code 326 / NOTE: This error displays as code 26326 at the Web Portal. Jam in Area 2 or 3 1. If the Pause symbol is on, press it and wait until it goes off. 2. -
Page 38: Display Screen Is Not Functional
Maintenance and Troubleshooting Film jam code 543 / This error displays as code 26543 at the Web Portal. Jam in Area 3 1. If the Pause symbol is on, press it and wait until it goes off. 2. Open the top cover. 3.
-
Page 39: Film Technical Information
Film Technical Information Film Technical Information General description This section describes the characteristics of Laser Imaging Film, not the operation of the laser imager. The Laser Imaging Film is a high-resolution, infrared-sensitive, photothermographic film designed specifically for the Laser Imager. Spectral sensitivity The Laser Imaging Film is infrared sensitive and has been sensitized to the infrared laser diode of the laser imagers.
-
Page 40
Film Technical Information Environmental impact Tests show that the Laser Imaging Film is not considered hazardous to the environment. As a result, you can develop, recycle, and dispose of film with less impact on the environment than if you were using wet-developed silver halide films. -
Page 41
Film Technical Information Take care when using spotlight viewing for more than 30 seconds because temperatures near the light source may exceed 82.2° C (180° F). Use in slide projectors is not recommended due to the high temperatures generally found in these devices. With dry technology, a small amount of final development occurs when the film exits the laser imager and is initially exposed to ambient or view-box lighting. -
Page 43
Specifications Equipment specifications Unpacked Packed Height 47 cm (19 in.) 74 cm (29 in.) Width 61 cm (24 in.) 79 cm (31 in.) Depth 66 cm (26 in.) 85 cm (34 in.) Weight 54 kg (120 lbs) 73 kg (160 lbs) Operating space requirements Allow 5 cm (2 in.) clearance around the top, sides, and back of the laser imager. -
Page 44
Specifications Power requirements A power cord is provided with this equipment. All countries must use an Agency-approved power cord with a plug type suitable for the country of use. Contact a qualified dealer for help. Connect the equipment to a power source that is suitable for the voltage and current ratings shown on the rating label.
550 code and
Maintenance symbol
Code 550 indicates that the laser
imager requires a service call
The system requires maintenance
Calibration error
2011-03-31
3. Install a new charcoal filter.
4. Close the film supply.
5. To reset the laser imager for the new filter and to clear the
Maintenance symbol, press and then release the Maintenance and
Calibrate symbols at the same time.
If the laser imager needs a preventive maintenance service call, the 550
code and Maintenance symbol appear:
When the 550 code displays, contact a qualified service provider.
The laser imager can detect errors and other conditions that require a
response. Some errors or abnormal conditions are reported on the display
screen in the form of condition codes and symbols.
NOTE: These errors are also reported at the Web Portal.
When the calibration has failed, the display screen shows a 624, 631, or
632 error and the Calibrate symbol is yellow:
The most common cause is a film-related problem. Depending on the
cause, you may be able to keep printing, but the laser imager may not be
optimally calibrated.
9G3886_en
Maintenance and Troubleshooting
Yellow symbol
indicates that the
calibration failed
3-3
Highlight all
Match case
Current View
Current View
Enter the password to open this PDF file:
File name:
—
File size:
—
Title:
—
Author:
—
Subject:
—
Keywords:
—
Creation Date:
—
Modification Date:
—
Creator:
—
PDF Producer:
—
PDF Version:
—
Page Count:
—
Preparing document for printing…
0%
Specifications:
|
Accompanying Data:
Carestream DryView 5700 Laboratory Equipment, Medical Equipment PDF Getting Started (Updated: Monday 1st of August 2022 01:10:07 AM)
Rating: 4.2 (rated by 82 users)
Compatible devices: Carestream Vita Flex CR System, Quantum Odyssey HF Series, DRX-1, Vue PACS MR Diffusion, CS 9300C, Dryview 6850, DRX-Revolution, INDUSTREX M43ic.
Recommended Documentation:
Transcription of Carestream DryView 5700 Getting Started:
2011-01-05 9G5124_en 1
Getting Started
Requirements to install the laser imager
IMPORTANT:  The laser imager weighs approximately 53.52 kg (118 lb).
Two people must use safe lifting techniques to move the
laser imager. One person can complete the remaining
steps.
Required tools • Scissors
• Straight blade screwdriver
• Phillips screwdriver
Required information You will need:
• IP Address and related network information for the laser imager
• Configuration information for each modality that will print to the laser
imager
This information should have been previously collected and recorded in
the Site Readiness manual that was provided to your site. In the Site
Readiness manual, see the sections, “Network Requirements” and
“Modality Configuration.”
If you do not have this Site Readiness manual, contact your dealer.
Task Recommended Skill or Knowledge
Unpack the laser imager. Ability to use common hand tools.
Use a personal computer to view the documentation on
the publications disc supplied with the laser imager.
Basic personal computer skills.
Connect a personal computer to the laser imager and
enter the network information.
Familiarity with TCP/IP network addressing
conventions.
Configure the laser imager to print from a modality. Familiarity with DICOM protocol.
Make a backup disk of the configuration. Understand personal computer file name
conventions.


 2 9G5124_en 2011-01-05
Unpacking the laser imager
Checking the
accessories
Check that the following items are included in the accessories box:
•Power cord
• Network cable
• Charcoal filter
• Publications disc
IMPORTANT:  Please read the Safety Manual before you proceed to
install or operate the laser imager.
1. Remove the two foam assemblies.
2. Open the bag that covers the laser imager.
IMPORTANT:  Use safe lifting techniques and two people to move the
laser imager.
3. Lift the laser imager from the carton and set it on a flat surface.
Position the laser imager temporarily so there is a space of at least
1 m (39 in.) at the back of the laser imager.
Moving the shipping
brackets
Shipping brackets are fastened inside the laser imager to keep the parts
safe during shipment. You must remove them, and then reinstall them in
a different location (as shown) inside the laser imager. This prevents the
shipping brackets from becoming lost.
NOTE: If it is necessary to ship the laser imager again, you must return
the shipping brackets to the shipping locations.
Foam
assemblies
Accessories
box


2011-01-05 9G5124_en 3
1. To move the back shipping brackets, remove:
a. Back cover.
b. 4 screws that fasten the shipping brackets.
Back view of laser imager
2. Reattach the shipping brackets:
3. Replace the back cover.
Shipping brackets
Shipping brackets reattached


 4 9G5124_en 2011-01-05
4. To move the front shipping bracket:
a. Open the front cover.
b. Remove 4 screws that fasten the shipping bracket.
Front view of laser imager
5. Reattach the shipping bracket:
FRONT SHIPPING
      BRACKET
(FILTER REMOVED)
Shipping
bracket
Front Shipping
Bracket in
Storage
Shipping
bracket
reattached


2011-01-05 9G5124_en 5
6. Install the charcoal filter.
7. Close the front cover.
Front
cover


 6 9G5124_en 2011-01-05
Connecting to electrical power
1. Locate the power cord. The power cord must match the AC power
outlets at your site.
If you cannot use the power cord that is provided, obtain a suitable
power cord locally. You must use an agency-approved power cord
rated for adequate amperage with a plug type suitable for your
location. Contact your dealer if you need assistance.
2. Check that the voltage on the label over the power cord inlet
matches the AC voltage at your site.
Power cord inlet labels and connectors
3. Remove the power cord inlet label.
RISK OF ELECTRIC SHOCK:
Dangerous voltage!
4. Connect the power cord to the:
• AC power connector on the laser imager.
• Building AC power outlet.
OR
Laser
imager
back
panel


2011-01-05 9G5124_en 7
Applying power
1. Check that the film supply is closed.
2. Remove the protective covering from the display screen.
3. To start the laser imager, press the power switch on the back of the
laser imager to on (|). Wait as the laser imager warms up. The
warm-up period might last up to 30 minutes. The display screen
shows the progress as the laser imager becomes ready to print.
Warming up
The warm-up period varies depending on how long the laser imager
has been off and the ambient temperature.
NOTE:  If the laser imager does not start, see “Troubleshooting” on page
12.
Inserting a film cartridge
1. Open the film supply.
2. Insert the film cartridge. Align the cartridge with the label facing up
and the perforations to the front. Set the leading edge on the
cartridge guides, then slide the film cartridge into the laser imager to
engage the detents in the bottom of the cartridge.
3. Close the film supply.
4. Check that the film count appears on the display screen.
NOTE: If a film count does not appear, see the User’s Guide for help.
The power symbol is
yellow and flashing
while the laser
imager warms up
A countdown to zero (0) indicates
how soon the laser imager will be
ready to print
Detents
Leading Edge
Perforations


 8 9G5124_en 2011-01-05
Configuring the laser imager
Setting up your
computer to
communicate with the
laser imager
Do this procedure at your computer.
1. Select Start>Settings>Network Connections.
NOTE: Depending on your operating system, this might be
Start>Settings>Network and Dial-up Connections.
2. Right-click Local Area Connection.
3. Select Properties.
4. Select Internet Protocol (TCP/IP).
5. Click Properties.
IMPORTANT:  Remember or write down your current settings, as you will
reset your computer to these settings near the end of the
installation.
6. Select the Radio button next to Obtain an IP address
automatically.
7. Click OK.
8. Click OK.
Connecting your
computer to the laser
imager
1. Remove the laser imager’s top cover.
2. Using a crossover cable, connect your computer to the service port
on the laser imager.
3. Reinstall the top cover.
018HC
018HCA
Service Port
Top Cover
Crossover Cable


2011-01-05 9G5124_en 9
Configuring
site-specific information
1. Start MICROSOFT INTERNET EXPLORER.
2. In the Address field, type: 192.168.0.1
3. Click Go. The main screen for the Web Portal appears.
4. Select your language:
5. Select Wizard > Installation Assistant.
6. Click   at the bottom of the screen. The Network Configuration
screen appears.
7. Enter:
•Host Name
• IP Address
• Subnet Mask
• Default Gateway
8. Click Save.
9. Click  . The Clock Configuration screen appears.
IMPORTANT:  The system clock is set before the laser imager is shipped
to you. If the time zone is not correct, change it. When you
change the time zone, the time and date display correctly.


 10 9G5124_en 2011-01-05
10. Are the time zone, date, and time correct?
11. Will you set the clock manually, or does the site use a time server for
sychronization?
12. Click  . The System Indentification screen appears.
NOTE: Completing this screen is optional.
13. Enter the following information:
• Country Code
• Postal Code
• Hospital Name
• Department Name
• Device Location
14. Click Save.
15. Click   to return to the main screen.
16. Select Utilities > Session, and then click Restart.
NOTE: Make sure to restart using these steps or the network
parameters will not be saved.
Wait for the laser imager to restart. The laser imager requires
approximately 30 minutes to warm up. After completing the
warm-up cycle, the laser imager may print a calibration film if the
film cartridge requires it. While the laser imager is warming up,
continue with the next step.
Yes No
Advance to step 12. Continue with the next step.
Manually Synchronization
a.
Select the time zone.
b. Edit the date and
time if needed.
c. Click Save.
a. Select the Enable Time
Synchronization check box.
b. In the IP Address field, type the
address of the time server to be
used for synchronization.
c. In the Period field, select the
synchronization period (how often
the clock is synchronized) from the
drop-down menu.
d. Select the time zone.
e. Click Save.


2011-01-05 9G5124_en 11
Completing the installation
1. Connect the network cable to the network connector on the laser imager.
2. Connect the other end of the network cable to the nearest building network
connector.
3. After the laser imager has completed the warm-up cycle, send an image from
each modality that will print to the laser imager.
4. If the image quality must be improved for a modality, optimize the images from
that modality:
a. From the main screen, select Wizard > Image Quality.
b. Cancel all pending print jobs OR wait until all print jobs are printed.
c. Under Optimization Steps, click  .
d. Send an image from the modality, and then click  .
e. View the test print and visually select the optimal image.
f. Under Image Number, click   to select the number of your optimal
image.
g. Click   under Optimization Steps again to continue.
h. Check the status and result data near the bottom of the screen.
i. Send another image from the modality and check the print.
NOTE:  If none of the images are optimal for your site, call a qualified service
provider.
5. Disconnect the crossover cable and restore the settings to your computer if
necessary.
Discarding excess material
When you are finished and the laser imager is operational, discard all excess
shipping materials in a manner suitable to local ordinances.
Laser imager
back panel


 12 9G5124_en 2011-01-05
Troubleshooting
Laser imager does not
start
CAUTION:
Never pull on the cord to disconnect the plug from the wall
outlet. Grasp the plug and pull to disconnect.
1. Press the power switch on the back of the laser imager off(0), and
then on (|), to restart the laser imager.
If this does not solve the problem, continue with step 2.
2. Disconnect the power cord from the wall outlet.
3. Check that the power cord is properly connected to the AC power
connector on the laser imager.
4. Plug the power cord into the wall outlet.
5. Check that the wall outlet is energized.
6. If the laser imager still does not start, contact your qualified service
provider.


2011-01-05 9G5124_en 13
Publication History
Revision Date Reason for Change
30 2011-01-05 Gate 2


Carestream Health, Inc.
150 Verona Street
Rochester, New York 14608
© Carestream Health, Inc., 2011
Pub No. 9G5124_en
Rev 30
For Carestream DryView 5700 Device Owners (Recommended Manuals, Instructions):


Laboratory Equipment, Medical Equipment Device Manuals:
-
CH-9101 Herisau/Switzerland E-Mail [email protected] Internet www.metrohm.ch Metrohm Sample Processors 838 Advanced Sample Processor Technical Reference Program versions 5.838.0013 8.838.1133 06.2006 / dm …
838 Advanced Sample Processor Laboratory Equipment 46
-
Document Number: MKT-70-1096 Revision 1 Page 1SYSMEX XE-5000TMQuick GuideStart-UpQC AnalysisSample Processing Sample Explorer/ Data BrowserBody Fluid ModeHPC ModeReagent ReplacementQC SetupMaintenanceIf you need further assistance, please contact the Sysmex Technical Assistance Center: Phone: 1-888-8SYSMEX (1-888-879-7639) Fax: 1-847-996-4499SYSMEX AMERICA, INC.One Nelson C. White Pkwy.M …
XE-5000 Laboratory Equipment 18
-
38000-L01-001_Rev_J_SugarCUBE_Manual 1 SugarCUBE™ LED Fiberoptic Illuminator Operating and Owner’s Manual This manual contains important information necessary for the safe and efficient operation of the LED Fiberoptic Illuminator. Please read the manual in its entirety and heed all safety warnings before operatin …
SugarCube 38000-M03-002 Laboratory Equipment 28
-
T15USER’S GUIDET15 | T15-CKIT CONTENTST15 Thermal Imager Quick Release Rail Mount Allen wrenches: .050” and 1/8”CR123 lithium battery (2) ¼-20” rail mount fastener (2) USB cableUNIT SPECIFICATIONS T15-C T15 Size 4.1”x 2.7”x 1.7” (105 x 70 x 44mm) 4.5”x 2.7”x 2.5” (114 x 79 x 70mm) Weight w/o battery 225g 310g w/ mount Zoom 3-8x Continuous optical zoom with auto f …
T15 Laboratory Equipment 4
Additional Information:
Popular Right Now:
Operating Impressions, Questions and Answers about Carestream DryView 5700:
I got an issue with optics calibration failed on dryview 5700 printer with code 607.
Does anyone have any idea about this, how to solve it, please suggest me.
RE: Carestream — DryView 5700
I got an Issue with Printer DV5700. The issue was image unsent. Does anyone have an idea, how to solve it???
RE: Carestream — DryView 5700
Bonjour madame monsieur
Jai la machine Dryview 5700.
Au début quand je lançais limpression . Le filme sortons propre et nickel.
Actuellement, cest toujours propre sauf que une partie du filme simprime avec une zone sombre.
Avez-vous déjà rencontré ce problème ?
RE: Carestream — DryView 5700
How do i configure a Digital Mobile x-ray Machine with Dry view 5700. I read the manual and followed the steps only for me to get a display on configuration page that i needed Microsoft Internet Internet explorer version 6 or higher version. And the one the system is version 11.
RE: Carestream — DryView 5700
I have an issue with printer that the error code 935 is displaying on printer screen ..if is there any solution available …pls reply me
RE: Carestream — DryView 5700
I try to change IP address but something going wrong, and now i can access to web portal, how i can make a factory reset.
RE: Carestream — DryView 5700
Hi I have a problema with muy dryview printer send error 935, reestart but they trouble persist.
HELP !!!
RE: Carestream — DryView 5700
Please, can anyone help me with how to get the IP address of carestream dryview 5700 laser imager and how to configure it to print image from a carestream
RE: Carestream — DryView 5700
Start a Thread
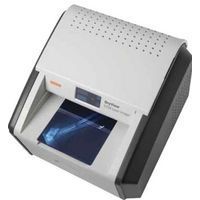
Основные преимущества термопринтера рентгеновских снимков Carestream Health DryView 5700
Термопринтер рентгеновских снимков Carestream Health DryView 5700 в равной степени подходит для печати изображений, полученных с помощью радиографии, магнитно-резонансной и компьютерной томографии. Удобная настольная конструкция обеспечит практичное размещение аппарата в любом кабинете вашей клиники. При этом, система обходится без ежедневного или еженедельного техобслуживания, не требует наличия затемненной комнаты или лабораторного оборудования, которое было необходимо при работе со старыми устройствами проявки жидкостным методом.
«Сухая» лазерная печать обладает рядом неоспоримых преимуществ, которые стали визитной карточкой термопринтера рентгеновских снимков Carestream Health DryView 5700. Разработчикам удалось свести к минимуму все возможные затраты на расходные материалы. Таким образом, система окупит себя в кратчайшие сроки, снимая нагрузку на бюджет больницы. В качестве основного носителя используется синяя пленка. Для загрузки применяются кассеты по 125 листов, которые можно менять в любой момент, при дневном освещении.
Технические характеристики:
- Тип принтера: фототермографический
- Метод печати: «сухой» лазерный
- Поддержка аппаратов: КТ, МРТ, CR/DR
- Параметры качества печати снимка: 325 пикселей на дюйм; лазерная точка 78 микрон
- Возможные размеры и форматы снимков: 8*10” (20*25 см), 10*12” (25*30 см); 11*14” (28*35 см), 14*17” (35*43 см)
- Возможные носители информации: синяя пленка 7 мм; кассеты на 125 листов с возможностью загрузки при дневном освещении
- Мультиформатный лоток для материалов
- Встроенный дисплей для отображения ключевой информации
- Поддержка протоколов связи DICOM
- Оптимальное соотношение цены системы и качества печати
- Компактный дизайн: настольное размещение; простая схема конструкции; не требует частого техобслуживания; обходится без темной комнаты и лаборатории для проявки снимков
- Высокое качество печати вне зависимости от выбранного формата пленки
- Размеры (Д*Ш*В): 66*61*47 см
- Вес системы: 54 кг